Table of Contents
Advertisement
Advertisement
Table of Contents

Summary of Contents for Orbitsound T12
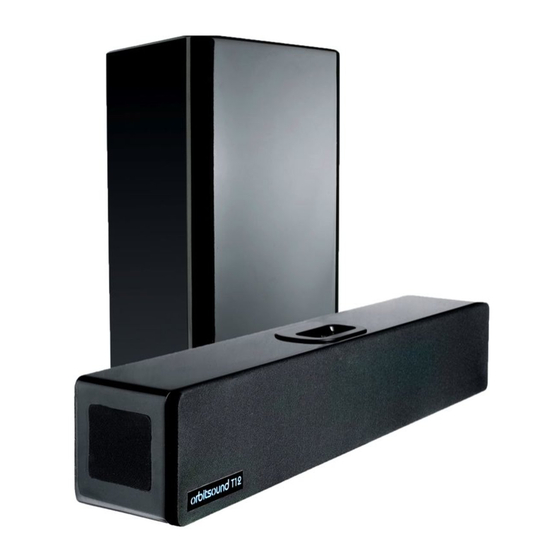
- Page 1 ® Soundbar and iPod dock with airSOUND® BELIEVE YOUR EARS User’s guide...
-
Page 3: Table Of Contents
Charge / Menu Maintenance Cleaning and care Battery replacement (remote) Troubleshooting No sound is heard Remote does not work Sound is distorted Sound is noisy / ‘hissy’ Orbitsound Warranty Warranty Terms Making a Warranty Claim Orbitsound Ltd Warranty Terms and Conditions Specifications... -
Page 4: Welcome
Welcome Thank you for purchasing the orbitsound T12 stereo soundbar with airSOUND®. With proper use the orbitsound T12 delivers superb sound fidelity and stereo sound field and will provide you with a high quality listening experience. This instruction booklet covers important safety and setup information as well as advice on how to get the most out of your orbitsound T12. -
Page 5: The Soundbar
LED State BLUE (FLASHING): Mute mode OFF: Power off The T12 soundbar produces most of the sound that you hear. It produces the main signal and stereo information. It also houses the amplifiers for itself and the subwoofer. Remote control... -
Page 6: The Subwoofer
The subwoofer The subwoofer is a passive loudspeaker designed to produce powerful sound at bass frequencies. IMPORTANT: When supplied, the subwoofer may be encased in plastic that covers the ports. This plastic must be removed to allow the subwoofer to operate properly. -
Page 7: Setting Up The T12
Subwoofer Output 8 ohm minimum (Only connect to T12 subwoofer) Note: The speaker wire is colour marked to make the job of identifying the correct wire for speaker terminal easy. Connect the black striped wire to the black terminal at both ends, and the red wire to the red terminals. -
Page 8: Connect Power
HINT: You can use the ‘headphones’ output from most televisions connected to the ‘line in’ in order to use the T12 to replace the sound from your TV. Then, the volume control on the TV will continue to function and control the level of sound from the T12. -
Page 9: Basic Operation
NOTE: The colour of the LED on the front of the T12 shows the current status of the unit. Red means the unit is in standby mode. Solid blue indicates that the unit is on. -
Page 10: Volume / Mute
Mute: Press the mute button on the remote to silence or resume play through the T12. NOTE: When the T12 is on and mute is enabled, you will see a blue flashing light on the front of the soundbar. A continuous blue light indicates that the T12 is on. -
Page 11: Advanced Setup
Advanced Setup The orbitsound T12 is easy to set up and enjoy, but even better sound can be achieved by following these guidelines. 1. Positioning: getting the most from airSOUND The stereo sound field is produced by the speakers mounted in the side of the soundbar. -
Page 12: Airsound Adjustment
Analogue audio connection cable HINT: When using the T12 in this way, it is normal that the sound output on the TV will need to be turned down or muted to stop sound coming from the TV’s own speakers. It will improve the overall listening experience if you do this. -
Page 13: Enhancement To Tv Sound (Replacing Tv Speakers)
HINT: When used in this way, the TV remote control should adjust the volume into the T12, but the iPod dock volume will be different to the TV listening level (some TVs have a menu option to mute internal speakers or alter the headphone out behaviour). -
Page 14: Maintenance
Maintenance Cleaning and care Use a soft, clean cloth moistened with plain, luke-warm water to clean the exterior of the unit. IMPORTANT: Never use solvents such as benzene or other strong chemical cleaners since these could damage the unit’s finish. It is important that no liquid reaches the inside of the unit. -
Page 15: Troubleshooting
Check that the iPod/TV or other sound source is playing and that it is connected properly to the T12. With iPod, check that the unit is docked fully. If unsure that your media device is playing, unplug, and test with headphones. -
Page 16: Orbitsound Warranty
Orbitsound Warranty This Orbitsound product is supplied with a 12 month limited manufacturer’s warranty dated from new purchase date. This warranty covers repairs or replacement that may be required in the event of unit failure during normal use, subject to the terms and conditions stated below and at the Agent’s discression. -
Page 17: Orbitsound Ltd Warranty Terms And Conditions
Orbitsound Ltd Warranty Terms and Conditions 1.RETURN TO BASE WARRANTY Faulty products will be repaired or replaced (as deemed appropriate by the relevant Agent) at the Agent’s premises. 2. LIMITATIONS The warranty covers the product and any agent installed accessories provided that the equipment has been installed and used in accordance with the supplied handbook instructions. - Page 18 GENERAL The Agent may assign or subcontract responsibilities and rights under this warranty. In all warranty cases, please refer to the support pages of www.orbitsound.com first. ORBITSOUND LTD. TQ1 1QB Tel UK office: +44 (0)8456 521 219 Web www.orbitsound.com...
-
Page 19: Specifications
Specifications Frequency range +/- 3 dB [Hz] 40 – 16KHz Control; response (remote control) +,-6dB at 60Hz and 8KHz Spatial level (slide switch) Off, normal, wide Maximum SPL [dB] 96dBA Amp. power [Watts at 0.1% dist.] 40 + 20 + 20 RMS Crossover frequencies [Hz] 160/5,000 Tweeter drivers...


Need help?
Do you have a question about the T12 and is the answer not in the manual?
Questions and answers