
Related Manuals for AUSTRALIAN MONITOR AMD2100P


Summary of Contents for AUSTRALIAN MONITOR AMD2100P
- Page 1 INSTALLATION AND OPERATION MANUAL AMD SERIES POWER AMPLIFIER AMD2100P AMD2200P AMD4100P AMD4200P...
-
Page 2: Important Safety Information
IMPORTANT SAFETY INFORMATION PRÉCAUTIONS DURANT UTILISATION Read these instructions. LISEZ ces instructions. Keep these instructions. Tenez ces instructions. Heed all warnings. Notez tous les avertissements. Follow all instructions. Suivez toutes les avertissements. Do not use this apparatus near water. N’utilisez pas ce produit près de l’eau (la piscine, la plage, le lac, etc.). Clean only with dry cloth. -
Page 3: Introduction And Contents
INTRODUCTION AND CONTENTS AMD SERIES INTRODUCTION FRONT PANEL The AMD P series of power amplifiers from Australian Monitor represent a quantum leap forward in connectivity, controllability & REAR PANEL flexibility in the constant voltage amplifier market. The AMD series allows contractors to integrate the power amplifier to third party INSTALLATION control systems for remote control and status reporting. -
Page 4: Front Panel
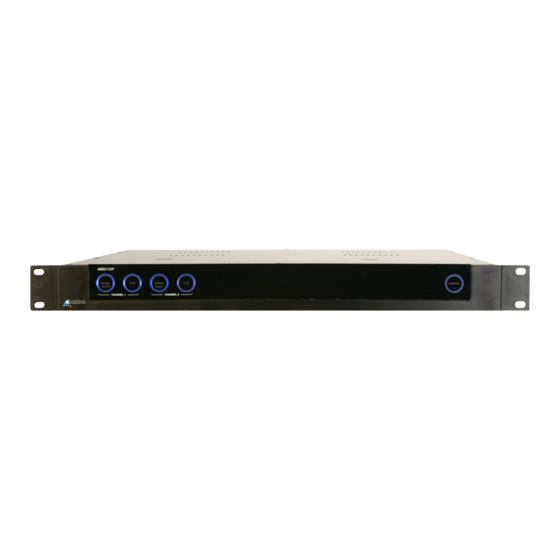
FRONT PANEL 4 channel model shown here AMD4100P SIGNAL CLIP SIGNAL CLIP SIGNAL CLIP SIGNAL CLIP CONTROL FAULT FAULT FAULT FAULT CHANNEL 1 CHANNEL 2 CHANNEL 3 CHANNEL 4 Signal Indicator The signal indicators (blue) illuminates when audio is present on the relevant amplifier channel. -
Page 5: Rear Panel
All models are internally fused. A pair of LED indicators provide link activity and link speed status feedback. The AMD2100P model operates from a wide range supply of 90 to 264VAC Modules for both Crestron and AMX control systems are available from the while all remaining models are internally configured for either 115V or 230VAC... -
Page 6: Installation
INSTALLATION Unpacking Every Australian Monitor product is tested and inspected before leaving our factory and should arrive in perfect condition. When opening the carton check for any noticeable damage to your Australian Monitor product. Please notify your Australian Monitor reseller immediately should any damage be discovered. -
Page 7: Software Application
SOFTWARE APPLICATION Main Screen The Main Screen provides an audio matrix for setting up the amplifier input and output relationship, signal level meters and various amplifier status indicators. The audio matrix provides amplifier inputs on each row and amplifier outputs on each column. A 2x2 matrix is presented when connected to 2 channel amplifiers and a 4x4 matrix is presented when connected to 4 channel amplifiers. - Page 8 SOFTWARE APPLICATION Crossover / EQ The Crossover / EQ block allows the user to enable and adjust crossover and EQ functions for each amplifier output channel. The crossover block provides High Pass, All Pass and Low Pass filters with adjustable frequency and filter types. The EQ section provides Low Shelf, High Shelf and 4 Bell (parametric) filters with adjustable Frequency, Gain and Quality Factor (Bell only).
- Page 9 SOFTWARE APPLICATION Output The output block allows the user to trim the output level of each amplifier channel. Mute and Phase Invert controls are also provided. A signal level meter provides real time indication of the audio output for the relevant output channel, displayed in dBFS. Choose Device Type The device chooser dialog is presented when the software application is first launched, or when defining a new configuration (File/New on the main...
- Page 10 SOFTWARE APPLICATION Go Online The Go Online dialog is presented when selecting Device/Go Online from the main menu, or when selecting the Go Online button at the bottom left of the main page. Once initiated, the auto discovery mechanism will search for AMD P Series amplifiers connected to the wired network.
- Page 11 THIRD PARTY CONTROL PROTOCOL Third party control is supported via two physical interfaces: 1. RS-232 serial port 2. Ethernet port The AMD P Series amplifiers provide third party communications when the amplifier is placed in the power saving mode. RS-232 PORT INFORMATION Baud Data Stop...
-
Page 12: Packet Header
THIRD PARTY CONTROL PROTOCOL Packet Header The header for each packet is 10 bytes in length and consists of the following: UInt16 ProtocolId = 0x5E03; UInt16 SubType = 0x0001; UInt16 SequenceNumber = 0x0001 to 0xFFFF; UInt16 Reserved = 0x0000; UInt16 ChunkLength = Length (in bytes) of data after this header The Protocol field differentiates this packet from others with a similar format for other products. - Page 13 THIRD PARTY CONTROL PROTOCOL Command: Channel Input Cross Mix Level (PCML) This command is used to get/set the level of an input to an amplifier channel. %PCML:xyzz<CR> Where x is output channel to select (between 1 and 4) and y is the input channel (between 1 and 4). For volume parameters, the zz section of the command can range between 0x00 (muted) and 0xE1 (225 = +12dB of gain).
- Page 14 THIRD PARTY CONTROL PROTOCOL Command: Channel Output Level (PLVL) This command is used to get/set the level of an amplifier output channel. %PLVL:xyy<CR> Where x is output channel to select (between 1 and 4). For volume parameters, the yy section of the command can range between 0x00 (muted) and 0xE1 (225 = +12dB of gain).
- Page 15 THIRD PARTY CONTROL PROTOCOL Command: Standby Mode (PGRN) This command is used to get/set whether or not the amplifier is in Standby (power-saving) mode. In this mode, the amplifier is shutdown. This parameter operates in a logic OR fashion with the rear panel Standby input.
-
Page 16: Parameter Description
THIRD PARTY CONTROL PROTOCOL Description Command Response Parameter Description Valid Range Value Detail Output Channel 1, 2, 3 or 4 1 or 2 for 2 channel amplifiers Input Channel 1, 2, 3 or 4 1 or 2 for 2 channel amplifiers Get Input Cross-Mix Level %PCML:xy??<CR>... - Page 17 THIRD PARTY CONTROL PROTOCOL Description Command Response Parameter Description Valid Range Value Detail Output Channel 1, 2, 3 or 4 1 or 2 for 2 channel amplifiers Output Level 00 to E1 hex 0.5dB steps where for Set Output Level %PLVL:xyy<CR>...
- Page 18 DIMENSIONS 482.00 mm (19.0”) 465.00 mm (18.3”) AMD4100P SIGNAL CLIP SIGNAL CLIP SIGNAL CLIP SIGNAL CLIP CONTROL FAULT FAULT FAULT FAULT CHANNEL 1 CHANNEL 2 CHANNEL 3 CHANNEL 4 433.00 mm (17.0”) Made in The Philippines +24VDC CLASS 2 WIRING CLASS 2 WIRING POWER 0VDC...
-
Page 19: Specifications
SPECIFICATIONS AMD2100P AMD2200P AMD4100P AMD4200P Power Output 4 ohm 100W (20 Vrms) 200W (28.3 Vrms) 100W (20 Vrms) 200W (28.3 Vrms) 70 V 100W (49 Ohms) 200W (25 Ohms) 100W (49 Ohms) 200W (25 Ohms) 100 V 100W (100 Ohms) - Page 20 AUSTRALIAN MONITOR Address: 1 Clyde Street, Silverwater, Sydney NSW 2128 Australia. Private Bag 149, Silverwater NSW 1811 ACN 007 573 417 Website: www.australianmonitor.com.au International enquiries email: international@australianmonitor.com.au DISTRIBUTED IN AUSTRALIA AND NEW ZEALAND BY HILLS SVL www.hillssvl.com.au P: 02 9647 1411...
Need help?
Do you have a question about the AMD2100P and is the answer not in the manual?
Questions and answers