
Related Manuals for PaceMaster Gold XRC


Summary of Contents for PaceMaster Gold XRC
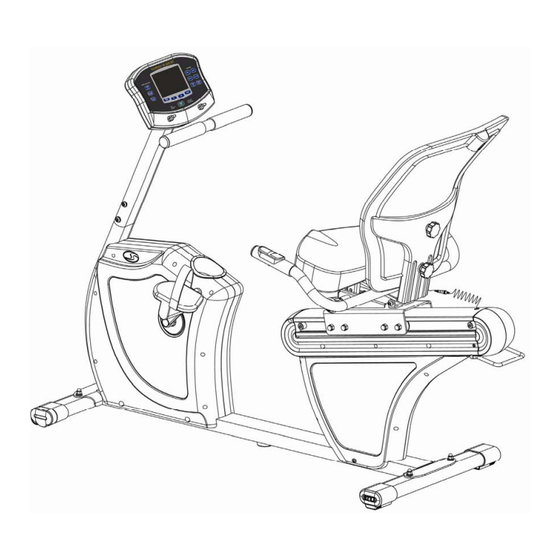
- Page 1 PaceMaster Gold XRC OWNER’S MANUAL Aerobics Inc., 34 Fairfield Place West Caldwell, NJ 07006, (973) 276-9700 www.pacemaster.com Part # GOLD XRC Rev. 11/13/07...
-
Page 2: Table Of Contents
Installation Requirements Unpacking Your Recumbent Tools Required for Assembly Box Contents Hardware Package Contents Assembling Your Recumbent 8-18 THE PACEMASTER GOLD XRC BIKE CONTROL PANEL OPERATING INSTRUCTIONS 19-33 Gold XRC Control Panel Button Functions Monitoring Heart Rate Quick Start Manual Operation... -
Page 3: Introduction
PaceMaster products have consistently received praise from a wide range of nationally recognized publications. To get the most from your PaceMaster, please read this owner’s manual carefully before starting to use this piece of exercise equipment. The manual contains important information about the assembly, operation and maintenance of the machine. -
Page 4: Important Safety Instructions
Aerobics, Inc. • Never operate your PaceMaster Recumbent if it has a damaged cord or plug, if it is not operating properly, if it has been dropped or damaged or if it has been immersed in water. Should any of these occur, contact your authorized PaceMaster retailer or service center for examination or repair. -
Page 5: Assembly Instructions
2 feet of clearance on all sides between the bike and any wall or obstruction. TIP: If you are installing your PaceMaster on a carpeted surface, use a equipment mat or a scrap piece of carpet underneath the Recumbent to avoid soiling of the carpet. Deep pile carpet is not recommended. -
Page 6: Box Contents
1. Box Contents... -
Page 7: Hardware Package Contents
Hardware Package Contents... -
Page 8: Assembling Your Recumbent
2. To assemble the Front Stabilizer Spring Washer M8х2.0t—2PCS(112) Washer 20х9х2.0t—2PCS(113) M8 Acorn Nut—2PCS(110) Bolt M8х56—2PCS(109) Step 2A: As shown to the Right, attach the Front Stabilizer (66) to the Frame (1) with Bolts (109), Washers (113) (112) and Acorn Nuts (110), then tighten the nut with the included wrench (117) or a 13mm wrench or socket. - Page 9 3. To assemble the Rear Stabilizer Spring Washer M8х2.0t—2PCS(112) Washer 20х9х2.0t—2PCS(113) M8 Acorn Nut—2PCS(110) Bolt M8х56—2PCS(109) Step 3A: As shown to the Right, attach the Rear Stabilizer (74) to the Frame (1) with Bolts (109), Washers (113) (112) and Acorn Nuts (110), then tighten with the included wrench (117) or a 13mm wrench or socket.
- Page 10 4. To assemble the Upright Washer 18х9 х 2.0t—6PCS(5) Allen Bolt M8х15—6PCS(108) Step 4A: 1. Connect the Contact Heart Rate Wires (17) & (83) then connect Wires (105)(122). 2. Slide the Upright (80) on to the main Frame (1), then secure the Upright to the Frame using 6 Bolts (108), 6 Washers (5) using a 6mm Allen wrench (151).
- Page 11 5. To assemble the Computer Step 5A: Remove the 4 mounting screws (100) from the back of the Computer (97) with a Phillips head Step 5B: Connect the 2 pairs of contact heart rate wires (98) to (83) and (99) to (122). Then connect the main power wires shown in the center of Fig B to the right.
- Page 12 6. To assemble the Seat, Handrails, and Seat Sliding Base Washer 18х9x2.0t—4PCS (5) Allen Bolt M8х15—4PCS (108) Spring Washer M10х3.0t—2PCS (153) Washer 20х10.2x3.0t—2PCS (150) Allen Bolt M10х15—2PCS (152) Step 6A: Attach handrail (59) to seat base (82) using screw (152), lock washer (153) and flat washer (150) using the 6mm Allen Wrench (151).
- Page 13 7. To Assemble the Seat Sliding Base and Rear Covers Bolt ST4.0х25—4PCS(41) Bolt M6х35—2PCS(91) Step 7A: Rotate the Handle (93) of the Seat Sliding Base (51) upwards in the direction shown in Fig A, then slide the Seat Sliding Base onto the Seat rail (84), and then release the Handle.
- Page 14 Step 7C: Install the seat rail covers (48) & (49) to the Seat rail (84), with Self Tapping Screw (41) using a Phillips head screw driver (117)
- Page 15 8. To assemble the Backrest Step 8A: Slide Backrest (103) on to Backrest bracket (82) and secure with adjusting knobs (101). Step 8B: To adjust seat angle, loosen adjustment knob (104), then pull and hold the adjustment knob out while tilting the seat to one of three positions.
- Page 16 9. Install the Transport handle Washer 18х9x2.0t—2PCS(5) Bolt M8х15—2PCS(108) Step 9A: Install the transport handle (96) to the Frame (1) with Bolts (108), Washers (5) tighten bolts (108) using the 6mm Allen wrench (118).
- Page 17 10. Assemble and Install the Pedals Step 10A: Install the toe straps on the pedals as shown in Fig A to the right. Step 10B: The pedals are stamped on the threaded end of the axle with the letter “R” and “L” for Right and Left respectively.
- Page 18 11. Connecting the AC Adapter Step 11A: Plug the AC-AC Adapter (127) into the Power Jack (1) in the front of the recumbent as shown in Figure A to the right. Step 11B: Plug the other end of the AC Adapter (127) into a 120 volt wall outlet then your Gold XRC is ready for use.
-
Page 19: The Pacemaster Gold Xrc Bike Control Panel
Gold XRC Control Panel Information Instructions of the Display: Range Setting Default value Time: 00:00~99:59 00:00~99:00(±1 min) 20:00 Level: 1-32 1-32 Speed: 0.0~99.9 RPM: 0~255 Distance: 0.00~99.99 0.0~99.00(±0.1) 0.00 Calories: 0~9999 0~9990(±5) Watt: 20~400 20~400(±5) Pulse: 30~250 30~250(±1) Sex: ♀♂... -
Page 20: Button Functions
1. Button Functions: Button Button Function Quick Start : Press this button and begin pedaling, the default resistance is level 1, the default time is 20 minutes. Manual : User can set level and weight, then set goal by time, distance, or calories. During workout user adjusts level of intensity by pressing Up or Down KEY. -
Page 21: Monitoring Heart Rate
Power On Plug in the AC Adapter to your Gold XRC, then plug the AC adapter into a wall outlet (See step 11, page 18). If your Gold XRC is already plugged in, press any button to turn on the display After 5 min. -
Page 22: Quick Start
Quick Start: No parameters need to be set, all values will count up from 0, the default program time is 20min, and the default resistance level is 1 (press key to adjust). After the program ends, all cumulative values will be displayed in the corresponding windows. POWER ON Begin Pedaling Manual Operation:... -
Page 23: Custom Program
ENTER ”ENTER DISTANCE” Set DISTANCE goal or Press Enter to Skip ENTER ”ENTER CALORIES” Set CALORIES goal or Press Enter to Skip ENTER ”MAX HR” Adjust Maximum Heart Rate value. ENTER Workout will begin after 3 second count down. Custom Program The Custom program allows user to set the individual level of intensity for 10 workout segments (columns). - Page 24 Set the resistance level for the first segment (column). ENTER SELECT LEVEL”, the second segment (column) will blink ” Set resistance for the 2nd segment (column). REPEAT THIS PROCEDURE FOR ALL 10 SEGMENTS. ”ENTER WEIGHT”, Set WEIGHT. ENTER ”ENTER TIME” Set workout TIME.
- Page 25 ENTER Workout will begin after 3 second count down.
-
Page 26: Interval Program
Interval Program: The interval program switches between work and recovery phases. POWER ON Start Display Workout will begin after 3 second count down. (default workout time is 20 min.) ENTER ”SELECT LEVEL”. Set resistance LEVEL. ENTER Set WEIGHT. ENTER ”ENTER TIME” Set workout TIME. -
Page 27: Hill Climb Program
ENTER ”MAX HR” Adjust Maximum Heart Rate value. ENTER Workout will begin after 3 second count down. Hill Climb Program: This program starts with a slight, stepwise increase in pedaling resistance then drops back to the starting resistance. This cycle is repeated, each time adding an extra level of resistance to the work phase. POWER ON Start Display Workout will begin after 3 second count down. -
Page 28: Target Heart Rate Program
Set DISTANCE goal or Press Enter to Skip ENTER ”ENTER CALORIES” Set CALORIES goal or Press Enter to Skip ENTER ”MAX HR” Adjust Maximum Heart Rate value. ENTER Workout will begin after 3 second count down. Target HRC Program: The Target Heart Rate workout allows user to maintain a specified desired heart pulse rate throughout workout. -
Page 29: Constant Effort Program
ENTER Display ”ENTER TIME” Increase or decrease TIME value ENTER Display ”ENTER DISTANCE” Increase or decrease DISTANCE value ENTER Display ” KILOCALORIES” Increase or decrease CALORIES value ENTER Display ”MAX HR” Increase or decrease PULSE value, the parameter setting is finished ENTER Begins to count down for 3 seconds and the program starts Constant Effort Program:... - Page 30 Increase or decrease WATT value ENTER Set WEIGHT. ENTER ”ENTER TIME” Set workout TIME. ENTER ”ENTER DISTANCE” Set DISTANCE goal or Press Enter to Skip ENTER ”ENTER CALORIES” Set CALORIES goal or Press Enter to Skip ENTER ”MAX HR” Adjust Maximum Heart Rate value. ENTER Workout will begin after 3 second count down.
-
Page 31: Fitness Test Program
Fitness Test Program: This is a 12 minute fitness test; the user enters sex, age, and weight and the computer will vary work load. At the completion of this test a value from F1 to F6 will be displayed (F1= most fit, F6= least fit). POWER ON Start Display Workout will begin after 3 second count down. -
Page 32: Hear Rate Recovery Program
Heart Rate Recovery: This feature is designed to be used immediately following your workout to evaluate your fitness condition based on change in heart rate over a period of one minute. At the completion of this test a value from F1 to F6 will be displayed (F1=least fit, F6=most fit). - Page 33 ENTER ”ENTER WEIGHT” Set WEIGHT. ENTER ”ENTER HEIGHT” Set HEIGHT. ENTER Begins to count down for 3 seconds and the program starts...
-
Page 34: Gold Xrc Exploded Parts Diagram
Gold XRC 11/13/07... -
Page 35: Pacemaster Technical Specifications
Warranty: Lifetime Frame, 2 Years Parts, 1 Year Labor Operating Temperature Range: 50º F to 100º F Manufacturer reserves the right to change the products specifications without notice. © Aerobics, Inc. 2007 PaceMaster is a registered trademark of Aerobics Inc.
Need help?
Do you have a question about the Gold XRC and is the answer not in the manual?
Questions and answers