
Subscribe to Our Youtube Channel
Related Manuals for Ortopedia ALLROUND 970


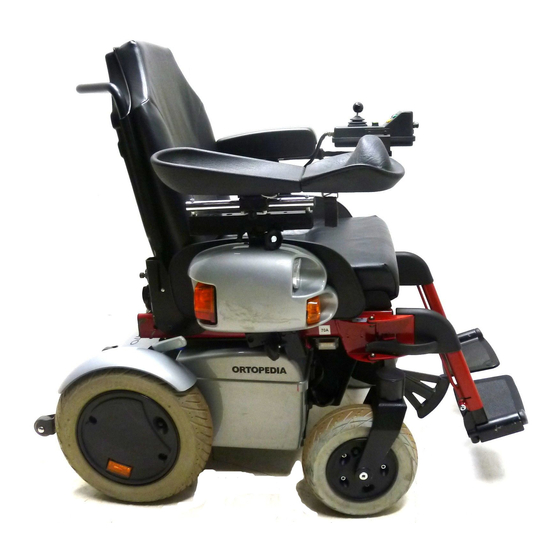
Summary of Contents for Ortopedia ALLROUND 970
- Page 1 Operating Manual Electric Wheelchair ALLROUND 970 S T A Y M O B I L E...
-
Page 2: Table Of Contents
Electric wheelchairs with a top speed of 10 km/h ..........7 5.1.3 Swivelling up the seat ..................27 3. Overview ........................8 5.1.4 Swivelling down the seat ..................28 Model ALLROUND 970 ...................... 8 Backrest ..........................29 5.2.1 Attaching/detaching the ERGOpor backrest element ......... 29 3.1.1 Overview ........................ 8 5.2.1.1... - Page 3 Hill-climbing ability ..................... 70 7. Maintenance ......................... 52 Fuses ..........................71 Cleaning ........................... 52 Model Allround 970 ......................72 Repairs ..........................54 Meaning of the labels on the wheelchair ................. 74 Customer service ......................54 9. Service record ......................75 Spare parts ........................
-
Page 4: Foreword
1. Foreword 2. Legal require- A valid liability insurance. The registration of the vehicle at the ments local vehicle registration centre. We thank you for the confidence you hicles' brochure must be read before the have placed in our company by choos- first use of the wheelchair, they are in- The type approval report required for Please comply with the legal require-... -
Page 5: Overview
Comply with the contents of the control of the vehicle. 'Safety Information for Electric Vehicles' brochure! The ALLROUND 970 wheelchair is in- tended for use indoors and outdoors. The model has been assigned the 'Use Class B' as per the EN12184 standard. -
Page 6: Driving On Public Highways
4.2.2 Driving on public high- High-frequency radiation exists in the 4.2.5 Safety information ways proximity of, for example, radar and Do not pull out the security plug whilst An exposure to high temperatures broadcasting stations, all types of radio The Highway Code must be complied still in motion. -
Page 7: Drive/Push Mode
4.3 Drive/push mode 4.4 Preparing for driv- The lever (Fig. 3/ ) for switching the drive motors between the drive mode Attention: and push mode is located on the right The functions and safety of the elec- side of the wheelchair (optional: lever tric wheelchair must be checked be- on the left side. -
Page 8: Charging The Battery
Every battery has a normal 'self-dis- plied and recommended by ORTOPEDIA to 95% of nominal capacity. charge'. The batteries should be re- are used. Your authorised dealer will be charged once a month when the elec- 1. -
Page 9: Driving Behaviour
4.5 Driving behaviour 4.6 Brakes You determine the speed and the travel Attention: direction through the movement of the Have the brakes repaired immediate- joystick (Fig. 10/ ). You can preset the ly by an authorised dealer if they work maximum speed of your wheelchair. -
Page 10: Decelerating/Stopping The Wheelchair
4.7 Handling the con- 4.6.3 Decelerating/stopping the wheelchair trol unit The wheelchair stops when you let go The position of the control unit can be of the joystick (Fig. 11/ ). adapted to the lower arm length of the Move the joystick slowly back to the cen- user. -
Page 11: Detaching The Control Unit
4.7.3 Detaching the control 4.7.5 Swivelling the control unit unit to the side Open the cable clip and slacken the The control unit can be swivelled to the clamping screw (Fig. 15/ ). Push the side into a position where it is parallel to control unit to the rear. -
Page 12: Transport In Vehicles
4.8.2 Transport in vehicles 4.8.3 Securing devices The following items may be necessary Use the front transverse tube (Fig. 21) for the transport in vehicles (Fig. 17). and the rear U-shaped securing tube for 1. Taking off the legrests. securing the wheelchair. 2. -
Page 13: Ramps And Lifting Platforms
4.9 Ramps and lifting 4.9.1 Special safety informa- Use only a dry, clean and undam- platforms tion: aged ramp or lifting platform. Position the ramps so that there is For safety reasons, the wheelchair The wheelchair can be loaded with the sufficient space for steering correc- must be unloaded (without baggage aid of ramps or lifting platforms. -
Page 14: Components
5. Components 5.1.3 Swivelling up the seat 1. The seat must be swivelled up to the rear for maintenance work and for 5.1 Seat access to the batteries and the fuses. Attention: 5.1.1 Seat cushion – Park the wheelchair on a level sur- The standard seat cushion (Fig. -
Page 15: Swivelling Down The Seat
5.2 Backrest 5.1.4 Swivelling down the seat Attention: 5.2.1 Attaching/detaching the Carefully swivel down the seat. ERGOpor backrest element – Danger of squashing between the 5.2.1.1 Detaching the ERGOpor seat and the chassis/covers. backrest element Open the locking device (Fig. 26/ Slacken the securing screws (Fig. -
Page 16: Standard Backrest
5.2.2 Standard backrest 5.2.3 30° backrest Tool: The angle of the 30° backrest (Fig. 59) 1 x 13 mm open-end or ring spanner can be infinitely-adjusted between ap- 1x hexagonal stud wrench WW 6 prox. -5° and 30°. The angle of the standard backrest (Fig. The adjustable backrest is combined with ) can be infinitely adjusted be- the sloped armrest (Fig. -
Page 17: Backrest
5.2.3.2 Detaching the 30° back- 5.2.4.2 Attaching the backrest rest element The 30° backrest can be detached for Place the lateral guides onto the pins transport or storage. Screw out the se- (Fig. 38/ ) and then press the upper curing screw (Fig. -
Page 18: Armrests
5.3 Armrests 5.3.2 Height adjustment Tool: The armrests can be adjusted in height 1 x 13 mm open-end or ring spanner and depth to suit the needs of the user. Slacken the securing screw (Fig. 42/ Attention: bring the backrest into the desired Do not use the armrests to lift or car- vertical position and then retighten the ry the wheelchair. -
Page 19: Clothing Protector
5.4 Clothing protector 5.5.1 Calf strap The calf strap is hooked into the holders The clothing protector can be horizon- of the legrests on the left and right side tally displaced. You do this by slacken- (Fig. 45/ ing the securing screws (Fig 44/ Bringing the clothing protector to the 5.5.2 Detaching the legrests desired position and then retightening... -
Page 20: Height-Adjustable Legrests
5.5.8 Height-adjustable legrests 5.5.8.4 Adjusting the height of 774 and 774-2 AL-E the legrests You raise the legrest to the desired height 5.5.8.1 Detaching the legrests by simply pulling it up. To lower the Pull the locking device (Fig. 49/ ) out- legrest, hold the legrest and then press wards. -
Page 21: Electrically Height-Adjustable Legrests
6. Options 5.5.9 Electrically height-adjust- able legrests Options are not a part of the standard See the 'Operating Manual for Control scope of supply. Units' for information on how to adjust the electrically height-adjustable legrests. Note: Options from other companies can 5.5.9.1 Detaching the legrests cause malfunctions. -
Page 22: Putting On The Seatbelt With Catch
6.2 Headrest 6.1.2 Putting on the seatbelt with catch The headrest in combination with the Pull both seat straps to the front and push Ergorpor backrest element (Fig. 58) is the latch tongue deep into the catch non-twisting, height-adjustable and de- (Fig. -
Page 23: Step Climber
6.3 Step climber 6.3.1.1 Safety information Attention: The step climber (Fig. 61/ ) serves An increased danger of tipping over exclusively for the crossing of obstacles. exists in the following situations when The step climber can be detached when crossing an obstacle with the step its use is not required. -
Page 24: Seat Lifter
6.4 Seat lifter 6.4.1 Safety information The user must be instructed on the The seat height can be increased infi- use of the seat lifter by the specialist nitely by up to 50 cm with the seat lifter dealer before the first use! (Fig. -
Page 25: User Information Applicable Before The Lifting Movement
6.4.3 User information applica- 6.4.4 User information applica- ble before the lifting ble after the lifting move- movement ment The seat lifter may only be used when Special care is necessary when driv- the user is wearing the seat belt! ing the wheelchair because of the restricted view (Fig. -
Page 26: Adjusting The Spring Tension
6.5 Suspension, adjust- 6.6 Anti-tip castors 6.6.2 Disassembly able To detach the anti-tip castor holders, 6.6.1 Assembly The suspension is adjusted to the weight press the spring-loaded pins on the un- of the driver. This requires the adjusting Insert both anti-tip castor holders, with derside of the tubes in to an extent that lever supplied with the wheelchair and the tube ends pointing to the front and... -
Page 27: Maintenance
7. Maintenance Do not clean the electric wheelchair Upholstery and covers: Tyres: with a high-pressure cleaner! Clean the upholstery and covers with A difference in tyre pressure between 7.1 Cleaning Keep water and moisture away from warm water. In the case of stubborn soil- the wheels on one axle causes the vehi- electrical components and cables! ing, the fabric can be washed with a... -
Page 28: Repairs
7.2 Repairs 7.4 Spare parts 7.5 Batteries 7.4.1 Disposal Electric vehicles require special drive You can trustingly use an authorised Can only be ordered from authorised The vehicle packing material can be batteries. workshop for any necessary repair work. dealers. Use only original spare parts for disposed of as recyclable material. -
Page 29: Battery Replacement
7.5.4 Battery replacement Switch off the control unit and then 7.5.6.1 Exposing the batteries pull out the main fuse before starting The daily use of the electric wheelchair 1. Park the wheelchair on a level sur- work on the electrical system. places a high demand on the drive bat- face and engage the parking brake. -
Page 30: Checking The Acid Level
7.5.6.2 Checking the acid level: 7.5.6.3 Measuring the acid densi- The battery acid level falls due to evapo- ration of water, especially during high The acid density measurement with the ambient temperature. acid checker gives an indication of the actual charge condition of the battery Note: cells. -
Page 31: Fuses/Connections
7.6 Fuses/connections 7.7 Lighting 7.6.1 Replacing fuses 7.7.1 Headlight Before replacing fuses, park the wheel- Filament bulb: chair on a level surface and move the 24V/3W E10 selection lever to the drive mode posi- Tool: Phillips screwdriver tion to prevent the wheelchair from moving. -
Page 32: Front Indicator
7.7.2 Front indicator 7.7.3 Rear indicator Spherical bulb: Spherical bulb: 24V/10W BA 15s 24V/21W BA 15s Tool: Phillips screwdriver Tool: Phillips screwdriver Note: Note: Use a dry cloth to hold the glass body Use a dry cloth to hold the glass body of the new filament bulb. -
Page 33: Rear Light
7.8 Wheel change 7.7.4 Rear light Festoon bulb: A wheel/tyre change requires technical 24V/C5W S8.5 knowledge. You should therefore have Tool: Phillips screwdriver this work carried out by an authorised workshop. Sitting in the wheelchair dur- Note: ing a wheel change is not permitted. Use a dry cloth to hold the glass body The wheelchair must stand on a level of the new filament bulb. -
Page 34: Disassembling The Swivel Wheels
7.9 Preventive mainte- – The wheel securing screws (Fig. 87/ Have this work carried out by an author- nance (annual serv- ) ust be tightened after the drive ised workshop in order to ensure that ice) wheels have been mounted. the electric wheelchair offers the high- est level of safety and reliability. -
Page 35: List Of Annual Maintenance Work
7.9.1 List of annual maintenance work 7.9.2 Fault correction Preparation for visual check Fault Cause Clearance Remove the seat and backrest elements, legrests, armrest units. If necessary, clean The display of the control The drive-electronics fuse Replace defective fuse or the vehicle or the modules before the visual check. -
Page 36: Technical Data
8.2 Fuses 8. Technical data The kilometric performance is greatly reduced by: Under the seat 8.1 Kilometric per- – frequent uphill travel, formance – low battery charging status Drive-electronics (Fig. 78/ ): ..........1 x 70 A – low ambient temperature, Battery bridge on the battery cover (Fig. -
Page 37: Model Allround 970
Max. battery dimensions (LxWXH): ........278 x 175 x 190 mm Dimensional tolerance is ± 1.5 cm. Permissible battery tilting angle: ..............55° Model: ........Electric wheelchair Allround 970/Code 9.970 Range (see 'Kilometric performance'): Type plate location: ....Under the seat, at the front left on the central frame Class of use as per DIN EN 12184: ............... -
Page 38: Meaning Of The Labels On The Wheelchair
8.4 Meaning of the la- Service record bels on the wheel- Vehicle data: chair Model : Attention: Read the operating manuals and oth- er provided documentation. Delivery note no.: Do not lift the wheelchair at the arm- rests or legrests. Serial no. -
Page 39: Guarantee
Recommended safety inspection Recommended safety inspection (at least every 12 months) (at least every 12 months) by an authorised dealer and only original–ORTOPEDIA–spare parts may be used for such repair/maintenance. Retailer stamp: Retailer stamp: The products are subject to technical improvement and design modification. -
Page 40: Notes
Notes Please send me free-of-charge and without commitment your latest ca- talogues and product information on the following products: Wheelchairs Active and universal wheelchairs, toilet and shower wheelchairs, elec- tric wheelchairs, electric wheelchairs, Scooter, accessories Equipment for home care, everyday life and the rehabilitation Bathroom and toilet equipment, walking aids, home care... - Page 41 Sender Please prepay if stamp available Name Street Response Postcode Town ORTOPEDIA GmbH – Öffentlichkeitsarbeit – Tel. Postfach 64 09 D-24125 Kiel Fax. Active and universal wheelchairs Toilet and shower wheelchairs Electric wheelchairs Scooter Equipment for home care, everyday life and the rehabilitation...
Need help?
Do you have a question about the ALLROUND 970 and is the answer not in the manual?
Questions and answers