Table of Contents
Advertisement
Quick Links
Do not use this equipment before reading this manual!
NOTE: This manual contains
important warnings
and instructions.
Please read and retain
for reference.
Model Numbers:
Skid Basic
High Rider Basic
Printed in the U. S. A.
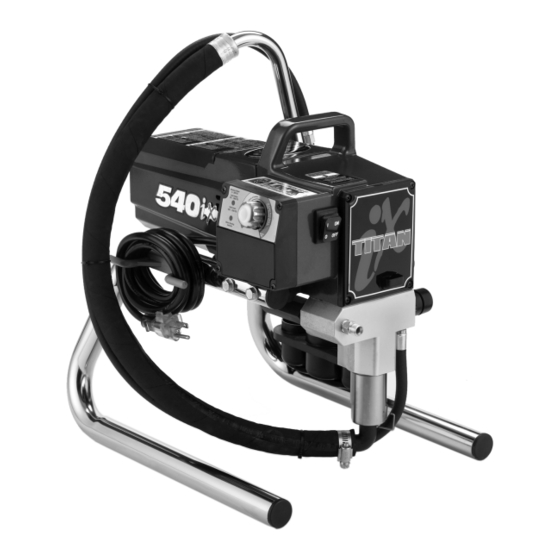
540
Airless Sprayer
700- 129
700- 134
Owner's Manual
For professional use only
ix
X-Lock Theft Deterrent System
Security Code
— — — —
_ _ _ _ _ _ _ _ _ _
Serial #
1206 © 2006 Titan Tool Inc. All rights reserved. Form No. 313-2704A
Advertisement
Table of Contents

Subscribe to Our Youtube Channel
Related Manuals for Titan 540ix


Summary of Contents for Titan 540ix
- Page 1 700- 129 High Rider Basic 700- 134 — — — — _ _ _ _ _ _ _ _ _ _ Serial # 1206 © 2006 Titan Tool Inc. All rights reserved. Form No. 313-2704A Printed in the U. S. A.
-
Page 2: Table Of Contents
3. Always use the nozzle tip guard. Do not spray without and electrical appliances. Avoid creating sparks from the nozzle tip guard in place. connecting and disconnecting power cords. 4. Only use a nozzle tip specified by the manufacturer. © Titan Tool Inc. All rights reserved. -
Page 3: Specifications
When the sprayer is used with a generator or uncontrolled 7. Do not expose the hose to temperatures or pressures in line voltage, the use of Titan’s “Line Surge Protector” (P/N excess of those specified by manufacturer. 800-935) is recommended. -
Page 4: General Description
8. Plug the power cord into a properly grounded outlet at NOTE: Hold the return hose in the waste least 25’ from the spray area. container when moving the PRIME/SPRAY valve to PRIME in case the sprayer is pressurized. © Titan Tool Inc. All rights reserved. -
Page 5: Painting
11. Unlock the gun by turning the gun trigger higher pressure and the PRIME/SPRAY valve is lock to the unlocked position. in the SPRAY position, either the spray tip is worn or the sprayer is in need of service/repair. © Titan Tool Inc. All rights reserved. -
Page 6: Pressure Relief Procedure
Once the desired setting has been reached, press the #4 key to set and the Main Screen will appear. To select or change the remaining three pre-sets, scroll to the User Pre-Sets screen and repeat the above procedure. © Titan Tool Inc. All rights reserved. - Page 7 SET PSI 3000 To select the Pressure screen, ACTUAL PSI 2950 press the #4 key. This screen is also the Main Screen. © Titan Tool Inc. All rights reserved.
-
Page 8: Spraying
Begin movement of the gun Shrubs next to houses should be tied back and covered with a before the trigger is pulled. canvas cloth. The cloth should be removed as soon as possible. Titan gun extensions are extremely helpful in these start pull release situations. -
Page 9: Cleanup
9. Turn off the sprayer by moving the ON/OFF switch to the for recommendations. OFF position. 4. If you have any further questions concerning your TITAN 10. Move the PRIME/SPRAY valve up to its Airless Sprayer, call TITAN: SPRAY position. -
Page 10: Replacing The Motor
Panel Screw Control Panel Motor Armature Gear Motor Mounting Gear and Crank Screw Assembly Thrust Washer Pump Housing 2nd Stage Gear Front Cover Pump Housing Front Cover Screw Front Cover Front Cover Screw © Titan Tool Inc. All rights reserved. -
Page 11: Replacing The Transducer
(refer to the electrical schematic in the Parts List section of this manual). 12. Reassemble the pump by reversing steps 1–7. Pump Front Housing Cover T-Slot Front Cover Screw Pump Transducer Block Assembly Pump Block Mounting Screw © Titan Tool Inc. All rights reserved. -
Page 12: Servicing The Fluid Section
P/N 704-642. through the bottom of the pump block. Using a rubber mallet, tap the bottom of the piston rod lightly until the piston rod is in position in the pump block. © Titan Tool Inc. All rights reserved. -
Page 13: Replacing The Filters
4. Turning counterclockwise, thread the new or cleaned filter into the pump block. 5. Slide the filter housing over the filter and thread it into the pump block until secure. Filter Housing Filter Seal Pump Block © Titan Tool Inc. All rights reserved. -
Page 14: Troubleshooting
4. Faulty or loose wiring. 4. Inspect or take to a Titan authorized service center. 5. Excessive motor temperature. 5. Allow motor to cool. -
Page 15: Xact Digital Control System Error Messages
Xact Digital Xact Digital Control System detects a problem with the Control System has risen too high. Take the sprayer to a Titan sprayer. Once a problem occurs and the error message authorized service center for repair. - Page 16 être placée sur PRIME pour libérer la pression. Consultez utilisez des rallonges électriques reliées à la terre. la PROCÉDURE DE LIBÉRATION DE PRESSION N’utilisez pas d’adaptateur 3 à 2. décrite dans le manuel de la pompe. © Titan Tool Inc. Tous droits réservés. Français...
- Page 17 Unis ont été adoptées dans la loi Occupational safety and Health Act (OSHA). Ces normes, en particulier la partie 1910 des Normes générales et la partie 1926 des Normes de construction, doivent être consultées. © Titan Tool Inc. Tous droits réservés. Français...
- Page 18 Póngase en contacto Inspeccione la manguera antes de cada uso. Sustituya con el proveedor del material para conocer su las mangueras o las piezas dañadas. compatibilidad con el aluminio. © Titan Tool Inc. Todos los derechos reservados. Español...
- Page 19 Sustitúyala por una manguera conductora a alta presión. 13. No pulverice al aire libre si hace viento. 14. Desenchufe siempre el cable antes de trabajar en el equipo. © Titan Tool Inc. Todos los derechos reservados. Español...
-
Page 20: Parts Listings
Parts List Main Assembly High Rider Model © Titan Tool Inc. All rights reserved. -
Page 21: Skid Assembly
704-109 O-ring (for hot solvents, optional) 700-1024 Elbow ............1 704-179 Leg, left, complete 704-127 Retaining clip ..........1 (includes items 1–4) 704-391 Return hose clip (not shown)......1 704-178 Leg, right, complete (includes items 5–10) © Titan Tool Inc. All rights reserved. -
Page 22: Fluid Section Assembly
NOTE: When using “hot” solvents, replace Viton valve stem o-ring (item 27) with optional Teflon valve stem o-ring (P/N 700-897). Install using o-ring replacement tool (P/N 700-890). © Titan Tool Inc. All rights reserved. -
Page 23: Drive Assembly
704-588 Electronic pressure control (EPC) ....1 704-126 Electronic pressure control 704-589 Motor (without EPC) ........1 lock washer (not shown)......4 704-173 Crankshaft/gear assembly ......1 704-594 Surge suppressor (not shown) ....1 704-174 Thrust washer ..........1 © Titan Tool Inc. All rights reserved. -
Page 24: High Rider Cart Assembly
WHITE Motor GREEN AC-Motor AC-Motor BLACK BLACK Ground Surge AC-Line AC-Neut Suppressor Control Panel Electronic Pressure Board Control (EPC) WHITE WHITE NOTE: All electrical work should be performed by an authorized service center. © Titan Tool Inc. All rights reserved. -
Page 25: Accessories
S-3 Stainless Steel Airless Gun • 3900 PSI • Stainless Steel fluid passages • High Pressure Swivel • In-handle filter • 4-finger trigger pull Part No. Description 550-250 ...S-3 — 4 Finger Gun © Titan Tool Inc. All rights reserved. - Page 26 Notes © Titan Tool Inc. All rights reserved.
- Page 27 Notes © Titan Tool Inc. All rights reserved.
-
Page 28: Warranty
Warranty Titan Tool, Inc., (“Titan”) warrants that at the time of delivery to the original purchaser for use (“End User”), the equipment covered by this warranty is free from defects in material and workmanship. With the exception of any special, limited, or extended warranty published by Titan, Titan’s obligation under this warranty is limited to replacing or repairing without charge...
Need help?
Do you have a question about the 540ix and is the answer not in the manual?
Questions and answers