England's Stove Works 13-NCMH Installation & Operation Manual
Hide thumbs
Also See for 13-NCMH:
- Installation & operation manual (65 pages) ,
- Installation & operation manual (34 pages)
Advertisement
INSTALLATION & OPERATION MANUAL
MODEL NUMBERS:
Thank you for purchasing this product from a fine line of heating equipment.
We wish you many years of safe heating pleasure with your new heating appliance.
IMPORTANT: IF YOU HAVE A PROBLEM WITH THIS UNIT DO NOT RETURN IT TO
THE DEALER. CONTACT CUSTOMER SERVICE @ 1-800-245-6489.
Please Note the Following Precautionary Statements:
England's Stove Works highly recommends the use of smoke detectors and Carbon
Monoxide detectors with any hearth product, including this unit. Follow all manufacturer's
CAUTION: This unit must be installed in accordance with these instructions and
must comply with local building and fire codes. Failure to do so could
result in a chimney or house fire.
Keep children, furniture, fixtures, and all combustible materials away from
any heating appliance. Refer to this owner's manual for all clearances to
combustible materials.
This stove must be installed in accordance with the Manufactured Home and Safety Standard (HUD),
CFR 3280, Part 24 and must comply with local building and fire codes. Failure to follow these
instructions could result in property damage, bodily injury or even death. Keep children, furniture,
fixtures and combustibles away from any heating appliance.
NOTE: THIS STOVE IS MOBILE HOME AND DOUBLE WIDE APPROVED (WITH OUTSIDE AIR
HOOK-UP) FOR THE PEDESTAL MODEL ONLY – NOT FOR LEG MODELS. DO NOT
INSTALL IN A SLEEPING ROOM.
HOME FLOOR, WALL AND CEILING/ROOF MUST BE MAINTAINED.
Read this entire manual before you install and use your new room heater. If this room
heater is not properly installed, a house fire may result. To reduce the risk of fire,
follow the installation instructions.
property damage, bodily injury, or even death.
13-NCMH
13-NCC
13-NCL
13-NCP
13-NCG
Save These Instructions.
Questions? Need Parts or Options?
instructions when using smoke or Carbon Monoxide detectors.
Rev. 1/07
50-SNCMH13
50-SNC13C
50-SNC13L
50-SNC13P
50-SNC13G
www.englanderstoves.com
THE STRUCTURAL INTEGRITY OF THE MOBILE
Failure to follow instructions may result in
50-TNCMH13
50-TNC13C
50-TNC13L
50-TNC13P
50-TNC13G
Advertisement
Table of Contents

Related Manuals for England's Stove Works 13-NCMH


Summary of Contents for England's Stove Works 13-NCMH
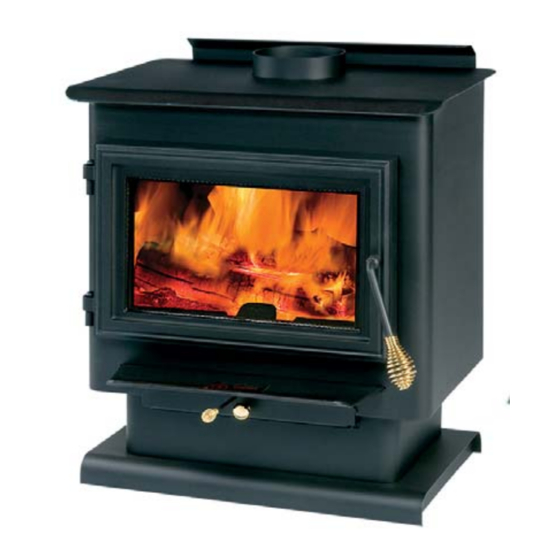
- Page 1 INSTALLATION & OPERATION MANUAL MODEL NUMBERS: 13-NCMH 50-SNCMH13 50-TNCMH13 13-NCC 50-SNC13C 50-TNC13C 13-NCL 50-SNC13L 50-TNC13L 13-NCP 50-SNC13P 50-TNC13P 13-NCG 50-SNC13G 50-TNC13G Thank you for purchasing this product from a fine line of heating equipment. We wish you many years of safe heating pleasure with your new heating appliance.
- Page 2 A letter from our Technical Support department: Thank you for purchasing this fine product from England’s Stove Works! England's Stove Works was started, and is still owned by, a family that believes strongly in a "Do It Yourself" spirit – that’s one reason you found this product at your favorite “Do It Yourself”...
-
Page 3: Before Installation Of Your Appliance
CAUTION If you have any doubt concerning your ability to complete your installation in a professional-like manner after reading these instructions, you should obtain the services of an installer who is versed in all aspects as to the correct and safe installation. Do not use temporary, makeshift compromises during installation. - Page 4 WHY THE CORRECT FLUE SIZE IS IMPORTANT: 6” “Draft” is the force that moves air from the appliance up through the chimney. The amount of draft in your chimney depends on the length of the chimney, local geography, nearby obstructions, and other factors.
-
Page 5: Flue System
FLUE SYSTEM 1. Existing Flue System If you have chosen a freestanding unit, this stove is designed to connect to an existing flue system, such as masonry or a pre-manufactured Class A flue system. If you have a masonry flue system, the inner liner should be inspected carefully for cracks;... - Page 7 INSTALLATION APPLICATIONS, Cont’d. Illustration 1b...
-
Page 8: Floor And Wall Protection
Pre-Manufactured Flue System: In the past few years pre-manufactured flue systems have become very popular, because this type system is easily installed and, when done correctly, is very safe. There are many pre-manufactured flue systems on the market, and when making your choice it should be U.L., B.O.C.A. - Page 9 Installation on a Combustible Floor If the appliance is to be installed on a combustible floor or a combustible floor covering, it must be installed on a 1” thick non-combustible millboard floor protector or a durable equivalent, with a “R” factor of no less than “2.”...
- Page 10 3. Side Heat Shields Side This accessory item Heat comes with the hardware Shield (six (6) mounting screws) necessary to install it on Rear Heat Shield the rear of the stove. This is a two-piece heat shield, but is installed one piece at a time.
-
Page 11: Installation
FREESTANDING PLACEMENT AND INSTALLATION The first problem you may encounter is getting your stove into your home -- all of our stove products are well constructed, which makes them rather heavy. Three to four adults can normally handle a unit, but we still recommend using a handcart. Never attempt to handle a heating product alone!!! The door and brick can be temporarily removed to lighten the unit (refer to Brick Layout). - Page 12 Mobile Home Installation Secure the heater to the floor using the two holes in the pedestal. If the unit is on a combustible surface, you will need to drill matching holes in the floor protection that you choose (see Floor Protection section).
-
Page 13: Operation
CHIMNEY REFER TO CHIMNEY AND CHIMNEY CONNECTOR MANUFACTURER’S INSTRUCTIONS CONTACT YOUR LOCAL BUILDING AUTHORITY FOR APPROVED METHODS OF INSTALLATION 1. This appliance requires a masonry or pre- manufactured chimney listed to UL103HT sized correctly. 2. If a masonry chimney is used, it is advisable to have your chimney inspected for cracks, and check the general condition before installing your unit. -
Page 14: First Fire
FIRST FIRE – Remember to ventilate well. Allow the stove to cure before burning for long periods of time at high temperatures. Flat spots on the painted surface are normal. Shiny spots on the painted surface (before burning) are normal. Call Customer Service at (800) 245-6489 if you have any questions. -
Page 15: Glass Care
GLASS CARE REPLACE GLASS ONLY WITH HIGH-TEMPERATURE ROBAX PYROCERAM OF THE PROPER SIZE AND THICKNESS. The following use and safety tips should be observed: Inspect the glass regularly for cracks or breaks. Surface scratches are acceptable and normal, but if this glass becomes cracked in any area, the unit should be shut down and the window replaced with this high-temperature ceramic glass. - Page 16 The following steps should be followed for replacement of the door gasket: Ensure the appliance is not in operation and is thoroughly cooled. Remove the old door gasket and clean the gasket channel. Using an approved high-temperature gasket cement, apply a thin coat in the bottom of the channel.
-
Page 18: Ash Disposal
CREOSOTE When wood is burned slowly, it produces tar and other organic vapors. These combine with moisture to form creosote. Creosote vapors condense in the relatively cool chimney flue of a slow-burning fire – as a result, creosote residue accumulates on the lining of the flue. If ignited, this creosote makes an extremely hot fire. - Page 19 IMPORTANT: HELPFUL HINTS AND TIPS WORTH REVIEWING What is the correct way to start a fire? You will need small pieces of dry wood (kindling) and paper. Use only newspaper or paper that has not been coated or that has had materials glued or applied to it. Never use coated or colored paper (such as advertising flyers).
- Page 20 Is it normal for soot to cover the glass at the beginning of a fire? This stove has been built with an air wash system that will help keep the glass clear when the firebox has reached a good operating temperature, and also has a good draft. Cold firebox temperature and poor draft cause soot to form on the glass.
- Page 21 PARTS, ACCESSORIES AND OPTIONS LIST (Options and trim (i.e. brass and nickel) interchange for variety. Gold door and legs may also be ordered to replace existing door and pedestal or regular cast legs.) REPLACEMENT PARTS AC-G17 DOOR GLASS KIT WITH GASKET (16 ½ “ x 9 ¼ “ x .197”) AC-GGK DOOR GLASS GASKET KIT (gasket only, no glass) AC-DGKNC...
- Page 22 DIRECTIONS FOR INSTALLATION OF LEGS OR PEDESTAL: (Stove must be cooled and all ashes cleaned out) Remove bricks, disconnect flue, and turn stove on its back. If you are replacing existing legs or pedestal, disconnect the existing legs or pedestal. To install legs: 1.
- Page 23 Have this information on hand if you phone the factory or your dealer regarding this product. Retain for your files: Model Number __________________________ Date of Purchase ________________________ Date of Manufacture _________________ Serial #_____________________ LIMITED 5 YEAR WARRANTY FROM THE DATE OF PURCHASE TO THE ORIGINAL OWNER The manufacturer extends the following warranties: Five Year Period: 1.
-
Page 25: Dealer Information
WARRANTY REGISTRATION for England’s Stove Works Purchased by (Name) ______________________________________________ Address _________________________________________________________ City ________________________ State __________ Zip _________________ Telephone _______________________________________________________ Email Address ____________________________________________________ DEALER INFORMATION Purchased From (Dealer) ___________________________________________ Address _________________________________________________________ City ________________________ State __________ Zip _________________ UNIT INFORMATION (Please be sure to refer to sticker on back of manual or box to complete this section) Model Number _____________________ Purchase Date _________________ Purchase Price ____________________ Serial Number _____________________ Mfg.
Need help?
Do you have a question about the 13-NCMH and is the answer not in the manual?
Questions and answers