
Related Manuals for SignaMax FO-065-7732A


Summary of Contents for SignaMax FO-065-7732A
- Page 1 Manageable Gigabit Switch ™ Signamax Connectivity Systems Manageable Gigabit Switch Model FO-065-7732A ’ S E R U I D E User’s Manual...
- Page 2 ™ Signamax Connectivity Systems Manageable Gigabit Switch Model FO-065-7732A User’s Guide...
- Page 3 Signamax™ FO-065-7732A Manageable Gigabit Switch P r e f a c e This manual describes how to install and use the Signamax ™ Connectivity Systems FO-065-7732A Manageable Gigabit Switch. This switch introduced here is designed to deliver full scalability with...
-
Page 4: Onsole M Anagement
Signamax™ FO-065-7732A Manageable Gigabit Switch T a b l e o f C o n t e n t s REFACE ABLE OF ONTENTS RODUCT VERVIEW ™ FO-065-7732A M IGNAMAX ANAGEABLE IGABIT WITCH ACKAGE ONTENTS RODUCT IGHLIGHTS Basic Features Management Support... -
Page 5: Table Of Contents
Signamax™ FO-065-7732A Manageable Gigabit Switch Console Port Configurations ERFORMING DVANCED ANAGEMENT CTIVITIES Start with Selection Menu L2 Switching DataBase IP Networking Bridging Static Filtering MAC Address In-Filters Spanning Tree Functions SNMP Functions Other Protocols Port Trunking Port Mirroring QoS Setup... -
Page 6: Signamax™ Fo-065-7732A Manageable Gigabit Switch
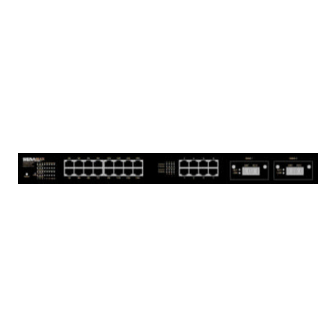
Signamax™ FO-065-7732A Manageable Gigabit Switch P r o d u c t O v e r v i e w Signamax™ FO-065-7732A Manageable Gigabit Switch Front View Package Contents When you unpack the product package, you shall find the items listed below. -
Page 7: Basic Features
Signamax™ FO-065-7732A Manageable Gigabit Switch Product Highlights Basic Features 24 x 10/100BaseTX ports with RJ-45 connectors, plus options of 2 x 1000BaseT/SX/LX ports, auto-MDIX on port 17 ~ port 24 Auto-negotiation for speed and duplexity on all 10/100BaseTX ports Full wire-speed forwarding rate Store-and-forward mechanism Back-pressure and IEEE 802.3x compliant flow control... - Page 8 Signamax™ FO-065-7732A Manageable Gigabit Switch IP Multicast: IGMP Snooping Maximum of 128 VLANs and IP multicast sessions Rate Control NETWORK MANAGEMENT METHODS Console port access via RS-232 cable Telnet remote access SNMP agent: MIB-2 (RFC1213) Bridge MIB (RFC1493) RMON MIB (RFC1757) – statistics, history, alarm and events VLAN MIB (802.1Q/RFC2674)
- Page 9 Signamax™ FO-065-7732A Manageable Gigabit Switch Front Panel Display • POWER This LED comes on when the switch is properly connected to power and turned on. ‚ Port Status LEDs The LEDs are located at the left side of each section, displaying status for each respective port.
- Page 10 Signamax™ FO-065-7732A Manageable Gigabit Switch State Indication Transmitting or receiving data. Flashing ACT stands for ACTIVITY. No activity. A valid network connection established. LNK stands for LINK. No connection. Physical Ports Signamax ™ Connectivity Systems FO-065-7732A Manageable Gigabit Switch provides: 24 x 10/100T X fixed ports and options of 2 x 1000T/SX/LX ports.
- Page 11 Signamax™ FO-065-7732A Manageable Gigabit Switch Switch Management Administration console via RS-232 serial port The switch provides an onboard serial port, which allows the switch to be configured via a directly connected terminal or a Telnet session. Web-based browser interface The switch also boasts a point-and-click browser-based interface that lets users access full switch configuration and functionality from a Netscape or Internet Explorer browser.
- Page 12 Signamax™ FO-065-7732A Manageable Gigabit Switch I n s t a l l a t i o n This chapter gives step-by-step instructions about how to install the switch: Selecting a Site for the Switch As with any electric device, you should place the switch where it will not be subjected to extreme temperatures, humidity, or electromagnetic interference.
- Page 13 Signamax™ FO-065-7732A Manageable Gigabit Switch Connecting to Your Network Cable Type & Length It is necessary to follow the cable specifications below when connecting the switch to your network. Use appropriate cables that meet your speed and cabling requirements. Cable Specifications...
- Page 14 Signamax™ FO-065-7732A Manageable Gigabit Switch Cabling Step 1: First, ensure the power of the switch and end devices is turned off. <Note> Always ensure that the power is off before any installation. Step 2: Prepare cable with corresponding connectors for each type of port in use.
- Page 15 Signamax™ FO-065-7732A Manageable Gigabit Switch S w i t c h M a n a g e m e n t This chapter explains the methods that you can use to configure management access to the switch. It describes the types of...
-
Page 16: Direct Access
Signamax™ FO-065-7732A Manageable Gigabit Switch Administration Console The administration console is an internal, character-oriented, menu- driven user interface for performing system administration such as displaying statistics or changing option settings. Using this method, you can view the administration console from a terminal, personal computer, Apple Macintosh, or workstation connected to the switch’s console port. - Page 17 Signamax™ FO-065-7732A Manageable Gigabit Switch switch management program provides Console Port screen, accessible from the Basic Management screen, that lets you configure parameters for modem access. When you have configured the external modem from the administration console, the switch transmits characters that you have entered as output on the modem port.
- Page 18 Signamax™ FO-065-7732A Manageable Gigabit Switch Protocols The switch supports the following protocols: VIRTUAL TERMINAL PROTOCOLS, SUCH AS TELNET A virtual terminal protocol is a software program, such as Telnet, that allows you to establish a management session from a Macintosh, a PC, or a UNIX workstation.
- Page 19 Signamax™ FO-065-7732A Manageable Gigabit Switch M e n u -Driven Console Management The switch provides a menu-driven console interface for configuration purposes. The switch can be configured either locally through its RS-232 port or remotely via a Telnet session. For the later, you must specify an IP address for the switch first.
-
Page 20: At The Screen Prompt
Signamax™ FO-065-7732A Manageable Gigabit Switch Logging on to the switch At the screen prompt Login: Password: LOGIN NAME Enter the console interface factory default console name admin. PASSWORD Enter the factory default password (no password, press <Enter> directly). Or enter a user-defined password if you followed the instructions later and changed the factory default password. -
Page 21: Basic Management
Signamax™ FO-065-7732A Manageable Gigabit Switch Switch Management Screen BASIC MANAGEMENT Basic management activities. ADVANCED MANAGEMENT Advanced management activities. LOGOUT Highlight this option and press Enter to log out. SAVE SETTINGS Highlight this option and press Enter to save the current settings and remain in the configuration program. - Page 22 Signamax™ FO-065-7732A Manageable Gigabit Switch Performing Basic Management Activities Basic management activities consist of General, LAN Port, and Console Port tasks. Start with Selection Menu Step 1: Highlight [Basic Management] from [Switch Management] screen and press <Enter>. The [Basic Management] screen appears: Step 2: Highlight a desired option and press <Enter>.
-
Page 23: General Management Configurations
Signamax™ FO-065-7732A Manageable Gigabit Switch General Management Configurations Step 1: Highlight [General] from [Basic Management] screen and press <Enter>. System Name Step 2: System Name is highlighted. Press <Enter> if you want to change Location Step 3: Move to highlight Location and press <Enter> if you want to change it. -
Page 24: Lan Port Configurations
Signamax™ FO-065-7732A Manageable Gigabit Switch Reboot-On-Error Step 7: Move to highlight Reboot-On-Error and press <Enter> if you want to change it, Disabled or Enabled. Remote Telnet Login Step 8: Move to highlight Remote Telnet Login and press <Enter> if you want to change it, Disabled or Enabled. - Page 25 Signamax™ FO-065-7732A Manageable Gigabit Switch SPEED & FLOW CONTROL Step 2: Speed & Flow Control is highlighted. Press <Enter> if you want to set speed or flow control on port. Step 3: Highlight All (10/100M or 1000M) Ports and press <Enter> to configure at one time.
- Page 26 Signamax™ FO-065-7732A Manageable Gigabit Switch Step 8: Press <Esc> to a previous screen as shown in Step 3. PHYSICAL PORT ADDRESS Step 9: Press <Esc> to a previous screen as shown in Step 1. Step 10: Move to highlight Physical Address to view physical port address.
-
Page 27: Console Port Configurations
Signamax™ FO-065-7732A Manageable Gigabit Switch Console Port Configurations Step 1: Move to highlight [Console Port] from [Basic Management] screen. Baud Rate Step 2: Baud Rate is highlighted. Press <Enter> if you want to change the current console baud rate. Flow Control Step 3: Move to highlight Flow Control and press <Enter>... - Page 28 Signamax™ FO-065-7732A Manageable Gigabit Switch SLIP Step 6: Move to highlight SLIP and press <Enter> if you want to change it, Disabled or Enabled. <Note> If you enable SLIP, a message tells you that the console port becomes accessible only through the SLIP protocol after you logout from the current console screen.
-
Page 29: Performing Advanced Management Activities
Signamax™ FO-065-7732A Manageable Gigabit Switch Performing Advanced Management Activities Advanced management activities consist of L2 Switching DataBase / IP Networking / Bridging / Static Filtering / Spanning Tree / SNMP / Other Protocols / Port Trunking / Port Mirroring / QoS Setup / File Transfer. -
Page 30: L2 Switching Database
Signamax™ FO-065-7732A Manageable Gigabit Switch PORT MIRRORING Mirror one port to another. QOS SETUP Specify Quality of Service parameter. FILE TRANSFER Send files using the TFTP or Kermit protocol. L2 Switching DataBase Highlight [L2 Switching DataBase] from [Advanced Management] screen and press <Enter>. - Page 31 Signamax™ FO-065-7732A Manageable Gigabit Switch User’s Manual...
- Page 32 Signamax™ FO-065-7732A Manageable Gigabit Switch VLAN & PVID PERSPECTIVE There are three types of private VLAN ports: promiscuous, isolated, and community. 1. A promiscuous port communicate with all other private VLAN ports and is the port you use to communicate with routers, servers, and administrative workstations.
- Page 33 Signamax™ FO-065-7732A Manageable Gigabit Switch Step 1: Highlight the VLAN & PVID Perspective and press <Enter>. Step 2: Highlight the VLAN Settings and press <Enter> to view VLAN info of the default VLAN or if you want to obtain a VLAN perspective instead of the default VLAN.
- Page 34 Signamax™ FO-065-7732A Manageable Gigabit Switch Step 12: Return to Step 9. Move to highlight VLAN Settings and press <Enter>. The screen appears as shown in Step 3 for adding or deleting switch ports. Step 13: Highlight the VLAN & PVID Perspective and press <Enter>.
-
Page 35: Ip Multicast Group Perspective
Signamax™ FO-065-7732A Manageable Gigabit Switch IP MULTICAST GROUP PERSPECTIVE Step 1: Move to highlight [Other Protocols] from [Advanced Management] screen and press <Enter>. Step 2: Move to highlight IGMP and press <Enter> to change the Disable to Passive or Active. -
Page 36: Mac Address Perspective
Signamax™ FO-065-7732A Manageable Gigabit Switch MAC ADDRESS PERSPECTIVE Step 1: Move to highlight [MAC Address Perspective] from [L2 Switching DataBase] screen and press <Enter>. Step 2: Enter a MAC address to view characteristics information, corresponding VLANs, and corresponding ports in the switching database. -
Page 37: Port Perspective
Signamax™ FO-065-7732A Manageable Gigabit Switch PORT PERSPECTIVE Step 1: Move to highlight [Port Perspective] from [L2 Switching DataBase] screen and press <Enter>. You can view VLAN activities and RMON statistics here. Per Port VLAN Activities Step 2: Per Port VLAN Activities is highlighted. Press <Enter>. -
Page 38: Ip Networking
Signamax™ FO-065-7732A Manageable Gigabit Switch IP Networking Move to highlight [IP Networking] from [Advanced Management] screen and press <Enter>. IP & RIP SETTINGS Step 1: Highlight [IP & RIP Settings] from [IP Networking] and press <Enter>. User’s Manual... - Page 39 Signamax™ FO-065-7732A Manageable Gigabit Switch Initial IP Settings Step 2: Move to highlight IP Address and press <Enter>. Step 3: Type an IP address and press <Enter> Step 4: Press <Esc> until you return to [Switch Management] screen. Make sure you save the settings before you log out...
-
Page 40: Bridging
Signamax™ FO-065-7732A Manageable Gigabit Switch Bridging Move to highlight [Bridging] from [Advanced Management] screen, and press <Enter>. AGING TIME Step 1: Move to highlight Aging Time and press <Enter>. Aging Options Step 2: Set Aging Time is highlighted. Press <Enter>. -
Page 41: Static Filtering
Signamax™ FO-065-7732A Manageable Gigabit Switch BROADCAST LIMIT Step 1: Move to highlight [Broadcast Limit] and press <Enter>. Broadcasting Options Step 2: Set Broadcast Limit is highlighted. Press <Enter>. Enter a decimal number as broadcast limit in packets per second. Step 3: Otherwise, you may move to highlight Unlimited, and press <Enter>. - Page 42 Signamax™ FO-065-7732A Manageable Gigabit Switch SOURCE/DESTINATION MAC ADDRESS OUT-FILTERS Step 1: Move to highlight source MAC addresses or destination MAC addresses for static filtering, and press <Enter>. User’s Manual...
-
Page 43: Mac Address In-Filters
Signamax™ FO-065-7732A Manageable Gigabit Switch Add/Delete/Search Step 2: Press <Shift> and [+] on keypad to add a specific MAC address to be filtered. Press [-] to delete a specific MAC address from being filtered. Press <S> to search through current list of MAC addresses in the static filtering database. -
Page 44: Spanning Tree Functions
Signamax™ FO-065-7732A Manageable Gigabit Switch Press [-] to delete a specific MAC address from being filtered. Press <S> to search through current list of MAC addresses in the static filtering database. The static filtering database maximum capacity is 128. * No precautionary message appears before you delete a specific MAC address from being filtered. -
Page 45: Spanning Tree Configurations
Signamax™ FO-065-7732A Manageable Gigabit Switch SPANNING TREE CONFIGURATIONS Step 1: Move to highlight [Spanning Tree Configurations] if you want to change Spanning Tree Protocol Configurations. Spanning Tree Protocol Step 2: Press <Enter> to enter Spanning Tree Options . Decide to have it Disabled or Enabled. -
Page 46: Spanning Tree Port States
Signamax™ FO-065-7732A Manageable Gigabit Switch SPANNING TREE PORT STATES Step 1: Move to highlight [Spanning Tree Port States] if you want to change per port administration status, and press <Enter>. Step 2: Move to highlight a port if you want to change its administration status, and press <Enter>. -
Page 47: Spanning Tree Path Costs
Signamax™ FO-065-7732A Manageable Gigabit Switch SPANNING TREE PATH COSTS Step 1: To change the path cost, move to highlight [Spanning Tree Path Costs] and press <Enter>. Step 2: Move to highlight All Ports or each port individually, and press <Enter>. For new path cost, type a decimal number and press <Enter>. -
Page 48: Spanning Tree Port Priorities
Signamax™ FO-065-7732A Manageable Gigabit Switch SPANNING TREE PORT PRIORITIES Step 1: To change the priority level per port, move to highlight [Spanning Tree Port Priorities] and press <Enter>. Step 2: Move to highlight All Ports or each port individually, and press <Enter>. -
Page 49: Snmp Functions
Signamax™ FO-065-7732A Manageable Gigabit Switch SNMP Functions Move to highlight [SNMP] from [Advanced Management] screen, and press <Enter>. SNMP Options Step 1: Move to highlight SNMP and press <Enter>. Decide to have it Disabled or Enabled. Get Community Name Step 2: Move to highlight Get Community Name and press <Enter>. - Page 50 Signamax™ FO-065-7732A Manageable Gigabit Switch Cold Start Trap Step 6: Move to highlight Cold Start Trap and press <Enter>. Decide to have it Disabled or Enabled. Warm Start Trap Step 7: Move to highlight Warm Start Trap and press <Enter>.
-
Page 51: Other Protocols
Signamax™ FO-065-7732A Manageable Gigabit Switch Other Protocols Move to highlight [Other Protocols] from [Advanced Management] screen, and press <Enter>. GVRP Step 1: Move to highlight GVRP and press <Enter>. Step 2: Decide to have it Disabled or Enabled. IGMP Step 1: Move to highlight IGMP and press <Enter>. -
Page 52: Port Trunking
Signamax™ FO-065-7732A Manageable Gigabit Switch Port Trunking Move to highlight [Port Trunking] from [Advanced Management] screen, and press <Enter>. Select Range Step 1: Move to highlight a trunk group to which you want to assign ports, and press <Enter> to enter Select Range. -
Page 53: Port Mirroring
Signamax™ FO-065-7732A Manageable Gigabit Switch Port Mirroring Move to highlight [Port Mirroring] from [Advanced Management] screen, and press <Enter>. Mirror To Step 1: Press <Enter> to enter Mirror To Options , listing the ports that can be mirrored to. Step 2: Move to highlight the port you want to mirror to and press <Enter>. -
Page 54: Qos Setup
Signamax™ FO-065-7732A Manageable Gigabit Switch QoS Setup Move to highlight [QoS Setup] from [Advanced Management] screen, and press <Enter>. User’s Manual... - Page 55 Signamax™ FO-065-7732A Manageable Gigabit Switch Global Setting Step 1: Move to highlight Global Setting and press <Enter>. Step 2: Move to highlight QoS Status and press <Enter>. Move to highlight to enable or disable QoS Status and press <Enter>. Step 3: Move to highlight Diffserv Expedite Forwarding and press <Enter>.
- Page 56 Signamax™ FO-065-7732A Manageable Gigabit Switch Logical Port Step 7: Move to highlight Logical Port and press <Enter>. Step 8: Move to highlight User Define Port, Well-Known Port, or Range Port and press <Enter>. Step 9: Move to highlight the appropriate port and press <Enter>.
- Page 57 Signamax™ FO-065-7732A Manageable Gigabit Switch VLAN Step 11: Move to highlight VLAN and press <Enter> to specify the QoS VLAN priority. Step 12: Move to highlight Drop Priority or Transmit Priority and press <Enter>. Step 13: Press <Esc> when completed...
- Page 58 Signamax™ FO-065-7732A Manageable Gigabit Switch Step 14: Move to highlight TOS and press <Enter> to specify the ToS priority. Step 15: Move to highlight Drop Priority or Transmit Priority and press <Enter>. Step 16: Press <Esc> when completed User’s Manual...
- Page 59 Signamax™ FO-065-7732A Manageable Gigabit Switch Profile Step 17: Move to highlight Profile and press <Enter> to select a QoS profile. Step 18: Move to highlight Megabit Profile or Gigabit Profile and press <Enter>. Step 19: Press <Esc> when completed User’s Manual...
- Page 60 Signamax™ FO-065-7732A Manageable Gigabit Switch Port Configuration Step 20: Move to highlight Port Configuration and press <Enter> to specify the port configuration parameters. Step 21: Move to highlight Active Profile, Fixed Drop Priority, or Fixed Transmit Priority and press <Enter>.
- Page 61 Signamax™ FO-065-7732A Manageable Gigabit Switch Rate Control Step 23: Move to highlight Rate Control and press <Enter> to specify rate control parameters. Step 24: Move to highlight Rate Control, or Port Number and press <Enter>. Step 25: Press <Esc> when completed.
-
Page 62: Sending And Receiving Files
Signamax™ FO-065-7732A Manageable Gigabit Switch Sending and Receiving Files Move to highlight [File Transfer] from [Advanced Management] screen, and press <Enter>. If you access the administration console by connecting an RS232 cable directly to the console port at the back of the switch, you will see a [File Transfer] screen. -
Page 63: Logout
Signamax™ FO-065-7732A Manageable Gigabit Switch SEND FILE VIA TFTP Step 1: In [File Transfer] screen, move to highlight Send File Via TFTP and press <Enter>. Step 2: If the default File Type is not the one you intend to send, press <Enter>. -
Page 64: Restore Default Settings
Signamax™ FO-065-7732A Manageable Gigabit Switch Restore Default Settings To restore the factory default settings, highlight [Restore Default Settings] from [Switch Management] and press <Enter>. The switch will be rebooted after confirming Yes as to restore the default settings. Reboot To reboot the switch, highlight [Reboot] from [Switch Management] and press <Enter>. -
Page 65: Web -Based Browser Management
Signamax™ FO-065-7732A Manageable Gigabit Switch W e b -B a s e d B r o w s e r M a n a g e m e n t The switch provides a web-based browser interface for configuring and managing the switch. This interface allows you to access the switch using a preferred web browser. -
Page 66: Understanding The Browser Interface
Signamax™ FO-065-7732A Manageable Gigabit Switch PASSWORD Enter the factory default password (no password, press Enter directly). Otherwise, enter a user-defined password if you followed the instructions later and changed the factory default password. Understanding the Browser Interface The web browser interface provides three point-and-click buttons at the upper field of the screen for configuring and managing the switch. -
Page 67: Basic Setup
Signamax™ FO-065-7732A Manageable Gigabit Switch FILE Save settings configured in the browser interface / download upgraded software via TFTP / reboot the switch / logout of the browser interface. BASIC SETUP Perform general, LAN port, and console port activities. ADVANCED SETUP... -
Page 68: Performing File Activities
Signamax™ FO-065-7732A Manageable Gigabit Switch Performing File Activities Start with Selection Menu Click the [File] button at the upper field of the main display, the menu options appear. SAVING SETTING Step 1: Click Saving Setting to save your configuration settings. -
Page 69: Performing Basic Setup Activities
Signamax™ FO-065-7732A Manageable Gigabit Switch Performing Basic Setup Activities Start with Selection Menu Click the [Basic Setup] button at the upper field of the main display, the menu options appear. User’s Manual... -
Page 70: General Management Configuration
Signamax™ FO-065-7732A Manageable Gigabit Switch GENERAL MANAGEMENT CONFIGURATION Step 1: Click General and the screen shows the Basic Setup/General parameters. System Name Step 2: Click in System Name text box on the field of Basic Setup/General. Step 3: Type a system name if it is blank, or replace the current system name with a new one. -
Page 71: Lan Port Configuration
Signamax™ FO-065-7732A Manageable Gigabit Switch Remote Telnet Login Step 8: To enable or disable access to the switch management program via Telnet, click the appropriate option from Remote Telnet Login drop-down menu. Step 9: Click Update Setting. A confirmation window appears. -
Page 72: Port Status
Signamax™ FO-065-7732A Manageable Gigabit Switch PORT STATUS Click Basic Setup _ LAN Port _ Port Status to access a read- Step 1: only table show s the current settings for all ports. User’s Manual... -
Page 73: Port Setting
Signamax™ FO-065-7732A Manageable Gigabit Switch PORT SETTING Click Basic Setup _ LAN Port _ Port Setting to show the Step 1: configuration for all ports. Step 2: In the Port column, click the port you want to configure. Admin Setting... -
Page 74: Console Port Configuration
Signamax™ FO-065-7732A Manageable Gigabit Switch Console Port Configuration To access the console port configuration parameters, click Basic Setup button first and then click Console Port. Baud Rate Step 1: Click an appropriate speed from Baud Rate drop-down menu on the field of Basic Setup/Console Port Configuration. - Page 75 Signamax™ FO-065-7732A Manageable Gigabit Switch Modem Setup String Step 5: If you select Custom_Setup_String, enter the string in the Modem setup String text box. <Note> The default modem setup string configures the modem to auto answer. It works for all Hayes-compatible modems.
-
Page 76: Performing Advanced Setup Activities
Signamax™ FO-065-7732A Manageable Gigabit Switch Performing Advanced Setup Activities Start with Selection Menu Click the [Advanced Setup] button at the upper field of the main display, the menu options appear. MAC Address Management From the Advanced Setup menu, point to MAC Address Management to view VLANs and their associated MAC addresses. -
Page 77: Per Vlan View
Signamax™ FO-065-7732A Manageable Gigabit Switch PER VLAN VIEW Step 1: Click Per VLAN View first, and click on the VLAN ID that you want to view. User’s Manual... - Page 78 Signamax™ FO-065-7732A Manageable Gigabit Switch Step 2: Click to close the VLAN Activities window when finished viewing. User’s Manual...
-
Page 79: Individual Mac View
Signamax™ FO-065-7732A Manageable Gigabit Switch PER PORT VIEW Click Advanced Setup _ MAC Address Management _ Per Step 1: Port View first, and click on the port that you want to view. Step 2: Click to close the Per Port VLAN Activities window when finished viewing. -
Page 80: Per Port Statistics
Signamax™ FO-065-7732A Manageable Gigabit Switch Per Port Statistics Step 1: To access per port statistics, click the Advanced Setup button, and then click Per Port Statistics from the selection menu. Step 2: Click a port to view statistic data. Step 3: Click Update Setting when completed. -
Page 81: Bridging
Signamax™ FO-065-7732A Manageable Gigabit Switch Bridging To access bridging parameters, click the Advanced Setup button, and then click Bridging from the selection menu. Aging Options Step 1: Click the drop-down list for Disabled (No Aging) or Set Aging Time. Aging Time... -
Page 82: Static Mac Filter
Signamax™ FO-065-7732A Manageable Gigabit Switch Static MAC Filter To access the static MAC filter parameters, click the Advanced Setup button, and point to Static MAC Filter in the selection menu. User’s Manual... - Page 83 Signamax™ FO-065-7732A Manageable Gigabit Switch SOURCE MAC ADDRESS Step 1: Click Source MAC Address. Add Source MAC Address Step 2: Click Add MAC Addr button to add a source MAC address for static filtering. Step 3: The Static Source MAC Filter window appears.
- Page 84 Signamax™ FO-065-7732A Manageable Gigabit Switch DESTINATION MAC ADDRESS Step 1: Click the Advanced Setup button, and point to Static MAC Filter in the selection menu. Click Destination MAC Address. Step 2: Click Add MAC Addr button to add a destination MAC address for static filtering.
-
Page 85: Ip Multicast Group
Signamax™ FO-065-7732A Manageable Gigabit Switch IP Multicast Group To view the IP multicast group addresses, click the Advanced Setup button, and click IP Multicast Group in the selection menu. The information is read-only. User’s Manual... -
Page 86: Spanning Tree Perspective
Signamax™ FO-065-7732A Manageable Gigabit Switch Spanning Tree Perspective To view the spanning tree perspective parameters, click the Advanced Setup button, and point to Spanning Tree Perspective in the selection menu. User’s Manual... - Page 87 Signamax™ FO-065-7732A Manageable Gigabit Switch CONFIGURATIONS Step 1: To view and/or change the Spanning Tree configurations, click Configurations from the above screen. Spanning Tree Protocol Step 2: Specify whether you want to have it Disabled or Enabled by clicking the drop-down list.
- Page 88 Signamax™ FO-065-7732A Manageable Gigabit Switch PORT SETTING Step 1: To view and/or change the Spanning Tree configurations by port, click the Advanced Setup button, point to Spanning Tree Perspective in the selection menu, and click Port Setting. Step 2: In the Port column, click the port whose Spanning Tree information you want to view.
-
Page 89: Snmp
Signamax™ FO-065-7732A Manageable Gigabit Switch SNMP To view and/or change all SNMP-related information, click the Advanced Setup button, and click SNMP in the selection menu. The SNMP Configurations window appears. As shown below, the factory-default SNMP value is Enabled and the factory-default Community Name value is public. -
Page 90: Other Protocols
Signamax™ FO-065-7732A Manageable Gigabit Switch Falling Alarm Trap Step 12: Specify whether it is Disabled or Enabled by clicking the drop- down list. Topology Alarm Trap Step 13: Specify whether it is Disabled or Enabled by clicking the drop- down list. - Page 91 Signamax™ FO-065-7732A Manageable Gigabit Switch Step 3: Click Update Setting when c ompleted. A confirmation window appears. Click to close the confirmation window. User’s Manual...
- Page 92 Signamax™ FO-065-7732A Manageable Gigabit Switch User’s Manual...
-
Page 93: Port Trunking
Signamax™ FO-065-7732A Manageable Gigabit Switch Port Trunking To use the switch’s trunking capability to gain more bandwidth, click the Advanced Setup button, and click Port Trunking in the selection menu. Step 1: The Port Trunking Overview window appears. E.g. Click Trunk Group 1 in the Trunk Group column. -
Page 94: Port Mirroring
Signamax™ FO-065-7732A Manageable Gigabit Switch Port Mirroring To use the switch’s mirroring capability to mirror one port to another, click the Advanced Setup button, and click Port Mirroring in the selection menu. Mirror To Step 1: Click the Index and the Port Mirroring Setting window appears. -
Page 95: Qos
Signamax™ FO-065-7732A Manageable Gigabit Switch To use the switch’s mirroring capability to mirror one port to another, click the Advanced Setup button, and click QoS in the selection menu. Global Setting Step 1: Point to Advanced Setup, point to QoS, and Click Global Setting. - Page 96 Signamax™ FO-065-7732A Manageable Gigabit Switch Logic Port Step 7: Point to Advanced Setup, point to QoS, and Click Logic Port. Step 8: Point to Advanced Setup, point to QoS, point to Logic Port, and click User Define Port, Well-Known Port, or Range Logic Port.
- Page 97 Signamax™ FO-065-7732A Manageable Gigabit Switch VLAN Step 10: Point to Advanced Setup, point to QoS, and Click VLAN. Step 11: For each VLAN priority, use the right drop-down list to select a Transmit Priority for that VLAN and use the right drop-down list to select a High or Low Drop Priority for that VLAN.
- Page 98 Signamax™ FO-065-7732A Manageable Gigabit Switch Type of Service Step 13: Point to Advanced Setup, point to QoS, and Click Type of Service. Step 14: For each Type of Service priority, use the right drop-down list to select a Transmit Priority for that Type of Service and use the right drop-down list to select a High or Low Drop Priority for that Type of Service.
- Page 99 Signamax™ FO-065-7732A Manageable Gigabit Switch Profile Step 16: Point to Advanced Setup, point to QoS, and Click Profile . Step 17: You can specify 10/100M Profile Settings or Gigabit Profile Settings . Step 18: Click Update Setting when completed. A confirmation window appears.
- Page 100 Signamax™ FO-065-7732A Manageable Gigabit Switch Port Configuration Step 19: Point to Advanced Setup, point to QoS, and Click Port Configuration. Step 20: Click a port number under Port. Use the Active Profile drop-down list to select a different active profile.
-
Page 101: Snmp & Rmon Management
Signamax™ FO-065-7732A Manageable Gigabit Switch S N M P & R M O N M a n a g e m e n t This chapter describes the switch’s Simple Network Management Protocol (SNMP) and Remote Monitoring (RMON) capabilities. Overview RMON is an abbreviation for the Remote Monitoring MIB (Management Information Base). -
Page 102: Rmon Mib (Rfc 1757) And Bridge Mib (Rfc 1493)
Signamax™ FO-065-7732A Manageable Gigabit Switch - Retrieving MIB counters from various layers of software modules according to the SNMP GET/GET NEXT frame messages. - Setting MIB variables according to the SNMP SET frame message. - Generating an SNMP TRAP frame message to the Network Management... -
Page 103: Bridge Groups Supported
Signamax™ FO-065-7732A Manageable Gigabit Switch Threshold, High Threshold, or both. A trigger can trigger an alarm when the value of a specific MIB variable exceeds a threshold, falls below a threshold, or exceeds or falls below a threshold. - RMON Event Group – allows a network administrator to define actions based on alarms. -
Page 104: Specifications
Signamax™ FO-065-7732A Manageable Gigabit Switch S p e c i f i c a t i o n s 1) Two slots for optional 1000BaseT ports Signamax™ FO-065-7732A Manageable Gigabit Switch with RJ-45 connectors, or 1000BaseSX/LX ports with SC connectors... - Page 105 Signamax™ FO-065-7732A Manageable Gigabit Switch Power Input Two 100~240VAC, 50~60Hz internal universal or –48 VDC redundant power supplies Input Fuse 3.8VDC, 10.0A (VAC) 1.1A (VDC) Power Consumption 2 X 45W max. Operating Temperature 0°C to 40° C (32°F to 104°F) Storage Temperature -25°C to 70°C (-13°F to 158°F)
-
Page 106: Contact Information
Signamax™ FO-065-7732A Manageable Gigabit Switch C o n t a c t I n f o r m a t i o n SIGNAMAX™ CONNECTIVITY SYSTEMS An AESP Company 1810 N.E. 144th Street. North Miami, Florida 33181, U.S.A. Phone: 305-944-7710 Fax: 305-652-8489 Sales: 800-446-2377 Tech.
Need help?
Do you have a question about the FO-065-7732A and is the answer not in the manual?
Questions and answers