Table of Contents
Advertisement
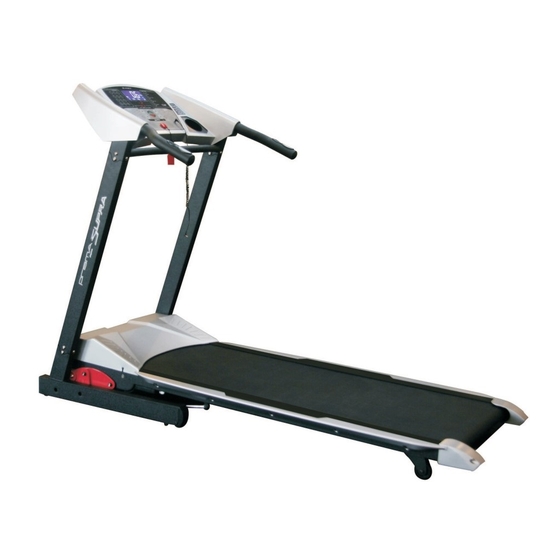
Prisma Supra folding treadmill
OWNER'S MANUAL
ASSEMBLY OPERATION
MAINTENANCE
WARRANTY
PARTS ORDERING
CAUTION:
Exercise of a strenuous nature, as is customarily done on this equipment, should not be
undertaken without first consulting a physician. No specific health claims are made or implied as they
relate to the equipment.
I MPORTANT:
Read all instructions carefully before using this product. Retain this owner's
manual for future reference.
BH North America Corporation • www.bhnorthamerica.com
20155 Ellipse • Foothill Ranch • CA • 92610
Advertisement
Table of Contents

Related Manuals for BLADEZ prisma Supra


Summary of Contents for BLADEZ prisma Supra
- Page 1 Prisma Supra folding treadmill OWNER’S MANUAL ASSEMBLY OPERATION MAINTENANCE WARRANTY PARTS ORDERING CAUTION: Exercise of a strenuous nature, as is customarily done on this equipment, should not be undertaken without first consulting a physician. No specific health claims are made or implied as they relate to the equipment.
-
Page 2: Table Of Contents
TABLE OF CONTENTS Safety……………......….…..1 Treadmill Lubrication......…… 3 Target Heart Rate…........4 Training….............5 Assembly Instructions…………………..9 Storage……………………......14 Installation…………………….......15 Treadmill Operations……………....18 Additional Maintenance……………....22 Troubleshooting……..…………………….…..23 Exploded View ………........24 Parts List …………………......25 Warranty……..………………………....28... -
Page 3: Safety
IMPORTANT SAFETY ADVICE PRECAUTIONS This treadmill has been designed and constructed to provide maximum safety. Nevertheless, certain precautions should be taken when using exercise equipment. Read the whole manual before assembling and using the treadmill. The following safety precautions should also be observed: 1. - Page 4 IMPORTANT SAFETY ADVICE (Cont’d) 13. A perimeter distance of 3 feet / 1meter is required before operating the unit. 14. The treadmill should only be used for the home. Not meant for commercial use. 15. This treadmill is not suitable for therapeutic use. Consult a physician prior to starting an exercise program.
-
Page 5: Treadmill Lubrication
TREADMILL LUBRICATION TREADMILL LUBRICATION Use the bottle of lubricant to lubricate the inside of the belt in order to keep your unit in top condition and to ensure that friction between the belt and the board is kept to a minimum (due to different running styles, always apply more lubrication to the area where you place your feet during the exercise). -
Page 6: Target Heart Rate
TARGET HEART RATE The old motto, “no pain, no gain”, is a myth that has been overpowered by the benefits of exercising comfortably. A great deal of this success has been promoted by the use of heart rate monitors. With the proper use of a heart rate monitor, many people find that their choice of exercise intensity is either too high or too low and exercise is much more enjoyable by maintaining their heart rate in the desired benefit range. -
Page 7: Training
TRAINING GUIDELINES Exercise is one of the most important factors in the overall health of an individual. Listed among its benefits are: Increased capacity for physical work (strength endurance) Increased cardiovascular (heart and arteries/veins) and respiratory efficiency Decreased risk of coronary heart disease Changes in body metabolism, e.g. - Page 8 TRAINING GUIDELINES (cont’d) Specifics Different forms of exercise produce different results. The type of exercise that is carried out is specific both to the muscle groups being used and to the energy source involved. There is little transfer of the effects of exercise, i.e. from strength training to cardiovascular fitness. That is why it is important to have an exercise program tailored to your specific needs.
- Page 9 TRAINING GUIDELINES (cont’d) The target is not a magic number, but a general guide. If you’re above average fitness, you may work quite comfortably a little above that suggested for your age group. The following table is a guide to those who are keeping fit. Here we are working at about 80% of maximum.
- Page 10 TRAINING GUIDELINES (cont’d) SUGGESTED STRETCHES The correct form for several basic stretches is shown at the right. Move slowly as you stretch—never bounce. 1. Toe Touch Stretch Stand with your knees bent slightly and slowly bend forward from your hips. Allow your back and shoulders to relax as you reach down toward your toes as far as possible.
- Page 11 ASSEMBLY If you are missing parts or require information on how to operate this product please call (949) 206-0330...
-
Page 12: Assembly Instructions
ASSEMBLY INSTRUCTIONS Note: Assembly of this unit should take one person about 20 minutes to properly assemble. WARNINGS Never place the treadmill on its side during assembly or transport. Doing so will impair the safety release mechanism and could result in personal injury. Assembly Instruction Take the unit out of the box and place it on the floor as shown Fig.0. - Page 13 ASSEMBLY INSTRUCTIONS (cont’d) First, loosen the two top holding knobs (29) by two turns, counter-clockwise, Fig.1. Next take hold of the handrails (9 and 10) and lift them in the direction of the arrow, until you hear the top holding knobs (29) click into position, as shown in Fig.2. Fig.1 Fig.2...
- Page 14 ASSEMBLY INSTRUCTIONS (cont’d) Loosen the bottom holding knobs by two turns (29), holding the handrails (9 and 10), lift the upright bars in the direction of the arrow, until you hear the bottom holding knobs (29) click into position. Fig.3 Fig.4...
- Page 15 ASSEMBLY INSTRUCTIONS (cont’d) Once you have completed the above, tighten the top knobs (29) securely, by turning them clockwise and the bottom knobs (29), by turning it clockwise, Fig.5. Assemble the side supports Bring the side support (35) up to the main structure, position it on the holding pins. Next, use the Allen wrench (26) to tighten the screws (74) and washers (101) To the foot rest.
-
Page 16: Storage
STORAGE Caution: You must be able to safely lift 20 kg (45lbs) in order to raise\lower and move the treadmill. To protect the floor or carpet from damage, place a mat under the treadmill. Keep the treadmill out of direct sunlight. -
Page 17: Installation
INSTALLATION IMPORTANT SAFETY INFORMATION THIS UNIT IS INTENDED FOR HOUSEHOLD USE ONLY READ ALL INSTRUCTIONS BEFORE USING THIS TREADMILL CAUTION: Before starting any exercise program, it is recommended that you consult your physician. WARNING: Connect this unit to a properly grounded outlet only. DANGER: To reduce the risk of electric shock, always unplug the treadmill from the electrical outlet immediately after using and before cleaning. - Page 18 INSTALLATION (cont’d) 1.- Set switch (L), located on the body also needs oxygen. Regular casing, to the “0” (OFF) position Fig.B. exercise improves the body’s ability to 2.- Press the circuit button (C) to reset supply oxygen to all of the muscles the unit.
- Page 19 INSTALLATION (cont’d) your weight or for physiotherapy, always side bars and the electronic console. remember that your exercise should be Do not use solvents. gradual, planned, varied and not too Use a vacuum cleaner to carefully demanding. We recommend that you vacuum around the visible components should exercise 3 to 5 times per week.
-
Page 20: Treadmill Operations
Treadmill Operations CHANGING FROM KILOMETERS TO MILES This machine has the option to display speed in km/h or mph. The factory setting for the machine is mph. To change from mph to km/h follow these steps: Unplug the machine from the mains supply, remove the safety key. - Page 21 Treadmill Operations (cont’d) stage (between 0 to 12), press the PROGRAM MODE SPEED ▼ keys to select the speed This monitor programs that you want for the first stage between (MANUAL, P01; P02; P03; P04; P05; 0.6 and 11 km/h). P06;...
-
Page 22: Emergency Stop
Treadmill Operations (cont’d) stage 20 to complete the User ▼) to specify the duration of the Program Graph. exercise (between By pressing the MODE key you can minutes). The monitor’s default setting program a time limit for the exercise is 30 minutes. Press the START key (between 10 to 99 minutes). - Page 23 Treadmill Operations (cont’d) PULSE MEASUREMENT Your pulse rate is measured by exercising, the machine will zero itself placing both hands on pulse sensors while it is starting. with which electronic unitis You can adjust the elevation level by equipped. The pulse rate readout will pressing the INCLINE or INCLINE▼...
-
Page 24: Additional Maintenance
ADDITIONAL MAINTENANCE INSTRUCTIONS ADJUSTING THE BELT. If your unit is not seated evenly on the four contact points, this may cause the belt (38) to shift sideways. Rigorous quality control adjusts and checks the running belt. However, due to weight differences and individual styles of running, the belt may be prone to shift sideways. -
Page 25: Troubleshooting
TROUBLE SHOOTING FAULT FINDING CHART PROBLEM CHECKS SOLUTIONS 1.The monitor does not 1) Make sure that the 1) Plug the machine into the switch on. machine is plugged in, the mains supply. Set the switch to ON/OFF switch in position 1 position 1 and insert the safety and that the safety key is key. -
Page 26: Exploded View
EXPLODED VIEW... -
Page 27: Parts List
PARTS LIST Item No. Description spec. SLEEVE MAIN FRAME SAFETY KEY PLATE BASE FRAME BOLT M10*20 11 LEFT UPRIGHT MOTOR COVER RIGHT UPRIGHT SIDE RAIL COMPUTER FRAME A-WING MOVING TUBE LEFT REAR END CAP PLATING TUBE RIGHT REAR END CAP INCLINE FRAME PLASTIC STOP COLLAR LEFT HANDLEBAR... - Page 28 PARTS LIST Item No. Description spec. Item No. Description spec. MAIN FRAME BOLT M6*32 BASE FRAME BOLT M8*25 15 MONITOR CENTRAL COVER LEFT UPRIGHT BOLT M8*35 20 MONITOR TOP COVER RIGHT UPRIGHT BOLT M8*40 20 MONITOR REAR COVER COMPUTER FRAME BOLT M8*50 20 FAN COVER...
- Page 29 PARTS LIST FLAT WASHER SAFETY KEY COMPONENT FLAT WASHER MONITOR CENTRAL COVER SWITCH BOARD FLAT WASHER MONITOR TOP COVER SPEED SENSOR FLAT WASHER MONITOR REAR COVER POWER SWICH SCREW M6*10 FAN COVER BREAKER RIGHT BOTTLE HOLDER POWER CABLE WASHER φ φ 8* 22*2.0 GRIPFOAM SILICON...
-
Page 30: Warranty
COMMERCIAL OR RENTAL USE If a Bladez product is used for commercial or rental purposes the warranty is void. THIS WARRANTY DOES NOT COVER •...
Need help?
Do you have a question about the prisma Supra and is the answer not in the manual?
Questions and answers