Table of Contents

Related Manuals for InFocus INF7011


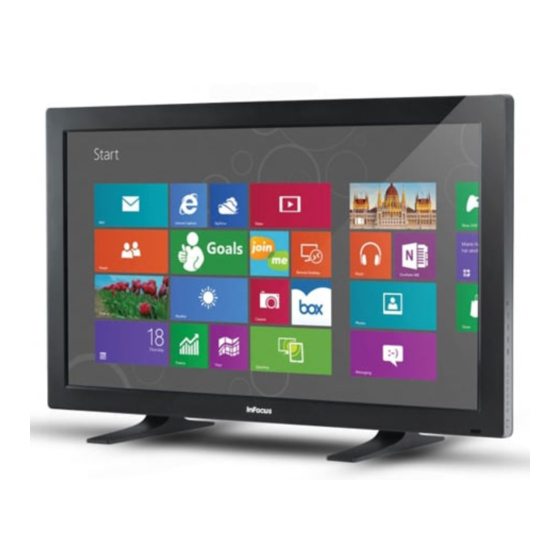
Summary of Contents for InFocus INF7011
- Page 1 INF7011 Hardware Guide 009-1465-02...
-
Page 3: Table Of Contents
Contents Declaration of Conformity ..................................2 Safety Considerations ..................................... 5 What’s Included...................................... 7 Setup ........................................8 Connecting to Other Devices ................................8 Connecting AC Power ..................................9 Turning the Monitor On/Off ................................... 9 Setting up the Wireless Mouse and Keyboard ............................. 10 Wireless Mouse ..................................... -
Page 4: Declaration Of Conformity
Adobe Systems Incorporated. HDMI logo and “High Definition Multimedia Interface” are registered trademarks of HDMI Licensing LLC. Vidtel is a trademark of Vidtel, Inc. InFocus, In Focus, and INFOCUS (stylized) are either registered trademarks or trademarks of InFocus Corporation in the United States and other countries. All other trademarks are the property of their respective owners. Any other trademarks, service marks, personal names or product names are assumed to be the property of their respective owners and are used only for reference. - Page 5 IC : 8150A-RG0918 CMIIT ID:2009DJ2362 FCC ID: E8HRG-0918 This document applies to regulatory model: INF7021 Input ratings: AC 100-240V, 7.5A, 50-60Hz InFocus reserves the right to alter product offerings and specifications at any time without notice. INF7011 Hardware Guide Page 3...
- Page 6 Page 4...
-
Page 7: Safety Considerations
When disconnecting the power cord, hold the plug, not the cord. • Protect the power cord from being walked on or pinched particularly at plugs, convenience receptacles and the point where they exit from the monitor. INF7011 Hardware Guide Page 5... - Page 8 Refer all service to qualified service personnel. Do not remove the cover or back. Servicing your own monitor can be dangerous to you and will void the warranty. • Only use replacement parts specified by InFocus. Unauthorized substitutions may result in fire, electrical shock or injury and may void the warranty. •...
-
Page 9: What's Included
(batteries not included) *Not included for all countries. For setup purposes, a keyboard and mouse are recommended. For additional accessory options, such as stands, feet, carts and wall mounts, see the InFocus website (www.infocus.com/store) or your local dealer. INF7011 Hardware Guide... -
Page 10: Setup
Setup Connecting to Other Devices A full range of digital and analog video inputs and audio source devices can be connected to the connection panels on the back and side of the monitor. Available jacks include: HDMI® In (2), VGA In (1), PC Control (1), Microphone In (1), Audio Out 3.5mm (1), Audio In 3.5mm (1), Audio Out RCA (2 –... -
Page 11: Connecting Ac Power
By default, the monitor will time out at 10 minutes and go into system standby after 20 minutes of inactivity. Power settings for the monitor can be changed in Windows Control Panel> Hardware and Sound > Power Options. INF7011 Hardware Guide Page 9... -
Page 12: Setting Up The Wireless Mouse And Keyboard
Setting up the Wireless Mouse and Keyboard NOTE: The wireless mouse and keyboard is not included as a standard accessory for some countries. For initial setup and/or configu- ration, it may be easier to use a mouse and keyboard. Any standard wired or wireless mouse or keyboard can be connected through the monitor's USB ports. -
Page 13: Using The Remote
Do not mix new and old batteries or different types of batteries together. • Replace the batteries as soon as they run out. • Remove batteries from the remote control when storing or not in use for a prolonged period. INF7011 Hardware Guide Page 11... - Page 14 The remote has the following buttons: Power: Switches the power on or puts the monitor into Standby. POWER POWER Home: Changes the active source back to the embedded PC. HOME HOME INPUT MENU Input: Toggles the Input Source menu on and off, which allows the INPUT RESIZE user to change sources.
-
Page 15: Using The Keypad
OSD items when the OSD menu is on. Left/Volume Decrease button: Decreases the audio volume when the OSD menu is off. Decreases the value of selected OSD items when the OSD menu is on. INF7011 Hardware Guide Page 13... -
Page 16: Osd (On-Screen Display) Menu System
OSD (On-Screen Display) Menu System The OSD provides the user the ability to control the monitor display. To access the OSD, press the Menu button on the remote or the keypad located on the left-hand side of the monitor. A B C Input Wide Picture... -
Page 17: Input Menu
External devices can be connected to the monitor. To use an external device, you must change the input source in the Input Source Selection menu. Use the up and down arrow buttons to highlight the desired source and press OK. Input Source Selection HDMI-1 HDMI-2 INF7011 Hardware Guide Page 15... -
Page 18: Wide Menu
Wide Menu The monitor can display images in five different modes: Wide, Zoom, Panoramic, Normal, and Stretch. Each mode displays the picture differently. Use the left and right arrows to highlight the desired display mode and press OK. Screen Mode Wide Zoom Normal... -
Page 19: Cc (Closed Captioning) Menu
Digital Closed Caption Digital CC Style As Broadcast Analog Closed Caption: turns closed captioning on and off for analog (NTSC) video sources. Digital Closed Caption: turns closed captioning on and off for digital (ATSC) video sources. INF7011 Hardware Guide Page 17... - Page 20 Digital CC Style: opens the Digital CC Style submenu which allows you to adjust the style, size, color, and opacity of the closed cap- tioning and the background window. Digital CC Style Caption Style Custom Text Size As Broadcast Color As Broadcast Opacity As Broadcast...
-
Page 21: Picture Menu
Color: adjusts the image from black and white to fully saturated color. Tint: adjusts the red-green color balance in the image of NTSC video images. Sharpness: changes the clarity of the edges of a video image. INF7011 Hardware Guide Page 19... - Page 22 More: opens the Picture Settings submenu and allows you to adjust the size and position, color temperature (warmth), and other advanced picture settings. Picture Settings Size & Position Color Temperature Advanced Picture Reset Picture Mode Page 20...
- Page 23 Horiz. Position: adjusts the horizontal (left/right) position of the display image. Vertical Position: adjusts the vertical (up/down) position of the display image. Horizontal Size: adjusts the width of the display image. Vertical Size: adjusts the height of the display image. INF7011 Hardware Guide Page 21...
- Page 24 Color Temperature: opens the Color Temperature submenu which allows you to adjust the relative warmth (reddish tones) and coolness (bluish tones) of the image. Color Temperature Color Temperature Normal Red Gain Green Gain Blue Gain Red O set Green O set Blue O set Reset Color Temperature Color Temperature: provides different predefined color temperature modes to choose from.
- Page 25 Backlight Control: Options include: Off, DCR (Dynamic Contrast Ratio), or OPC. Ambient Light Sensor: The ambient light sensor detects the light levels in the room and automatically adjusts the back- light for the best picture. Options include: Off, Low, Medium, and High. INF7011 Hardware Guide Page 23...
-
Page 26: Audio Settings Menu
Audio Settings Menu The Audio Settings menu allows you to adjust audio settings of the monitor. Use the up and down arrows to highlight the option you wish to change, press OK, then use the left and right arrow buttons to make your selections, and press OK. Audio Settings Audio Mode Flat... - Page 27 Analog Audio Out: sets the volume control properties for the analog RCA connectors when connected to a home theater audio system. Select Variable to control the external speakers' volume from the monitor's volume controls, or select Fixed to control the external speakers' volume from your home theater system controls. INF7011 Hardware Guide Page 25...
- Page 28 Equalizer Settings: opens the Equalizer submenu and allows you to adjust the boost or attenuation of the different frequencies. Equalizer Audio Mode Flat Basic EQ Mode Bass Treble Audio Mode: adjusts the preset audio modes. This setting is only available when SRS StudioSound HD is set to Standard. Op- tions include: Flat, Jazz, Classical, Pop and Rock.
-
Page 29: Settings Menu
CEC Settings Power Indicator Input Source: allows you to select the desired source input. Use the left and right arrow buttons to make your selection and press OK. Options include: HDMI-1, HDMI-2, PC, and VGA. INF7011 Hardware Guide Page 27... - Page 30 Name Input: opens the Name Input submenu and allows you to customize the source input names. Name Input Input Source Input Labels Show Keyboard Input Source: allows you to select the input source you wish to rename. Note: You must select the desired input source before changing the Input Label or using Show Keyboard to enter a custom name.
- Page 31 Postal Code: allows you to enter your ZIP code using the keypad on the remote. The ZIP code information is often used by VIA Apps to give you the most accurate location-based information, such as weather or news. INF7011 Hardware Guide Page 29...
- Page 32 CEC Settings: opens the CEC Settings submenu and allows you to control the HDMI-connected devices with the included remote without any additional programming. CEC Settings CEC Function Enable System Audio Control Device Discovery CEC Function: allows you to adjust the System Audio Control and Device Discovery options. Options include: Enable and Dis- able.
-
Page 33: Troubleshooting
Press the Connect button on the bottom of the keypad. • Verify the USB adapter is installed into the monitor's USB port. • Verify that the Keyboard Control setting in the Advanced Option OSD menu is set to Unlock. INF7011 Hardware Guide Page 31... - Page 34 The monitor is in standby mode. Press the Power button on the remote or keypad. White Green • The monitor is powered on. Orange • Contact InFocus Support at www.infocus.com/support, For Additional Troubleshooting Support, please contact: InFocus Corporation Technical Support 6am-5pm PST 877-388-8385 www.infocus.com/support Page 32...
-
Page 35: Specifications
Specifications To read the latest product specifications, be sure to visit our support website at www.infocus.com/support, as specifications are subject to change. Size (viewable) 69.51” (cm diagonal) Dimensions (without stand) 62.60 x 36.50 x 2.40" Weight (without stand) 72.20 lbs. -
Page 36: Limited Warranty
If a hardware defect arises and a valid claim is received within the Warranty Period, at its op- tion and to the extent permitted by law, InFocus will either (1) repair the hardware defect at no charge, using new parts or refurbished... - Page 37 16 hours continuously per day with a minimum 8 hour period of continuous rest in the powered off state; or (m) if any InFocus serial number has been removed or defaced. In addition, LCD burn-in as a result of excessive display of static images on the product is not covered under the terms of this Limited Warranty.
- Page 38 InFocus will provide warranty service either (i) at an ASP location, where service is performed at the loca- tion, or the ASP may send the product to an InFocus repair service location for service, (ii) by sending you prepaid way bills (and if you...
- Page 39 InFocus may utilize a doorstep swap process, which involves an InFocus delivery person delivering the replacement product or CSR part to the Customer and picking up the defective product or part at the time of delivery for return to InFocus. Upon receipt of the replacement product or part, the original product or part becomes the property of InFocus and you agree to follow instructions, including arranging the return of original product or part to InFocus in a timely manner.
- Page 40 Page 38...
- Page 41 INF7011 Hardware Guide Page 39...
- Page 42 Page 40...
- Page 43 INF7011 Hardware Guide Page 41...
- Page 44 Page 42...
Need help?
Do you have a question about the INF7011 and is the answer not in the manual?
Questions and answers