Table of Contents
Advertisement
Quick Links
Download this manual
See also:
User Manual
Advertisement
Table of Contents

Related Manuals for InFocus INF7020


Summary of Contents for InFocus INF7020
-
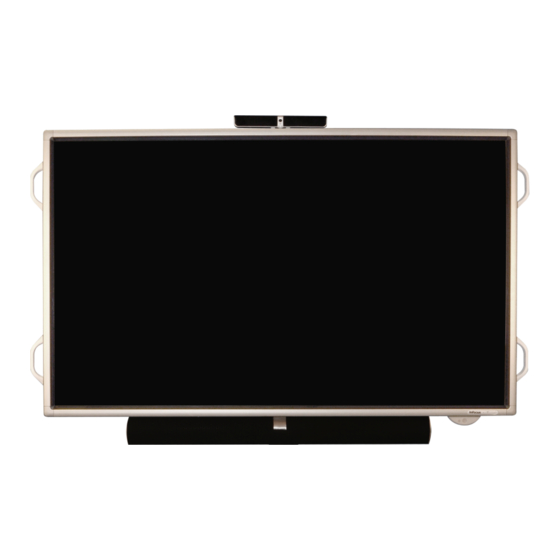
Page 1: Hardware Guide
INF7020 Hardware Guide Regulatory model: PN-L702B p/n: 009-1429-00... -
Page 3: Table Of Contents
Wireless Mouse and Keyboard ................................16 Setting up the Wireless Mouse ..............................16 Setting up the Wireless Keyboard ..............................16 Turning the INF7020 On/Off ................................. 17 Operating the Mondopad Software ..............................18 INF7020 Menu System ..................................18 Screen Menu ....................................18 Picture Menu .................................... - Page 4 Page 2...
-
Page 5: Declaration Of Conformity
Sharp is a registered trademark of Sharp Corporation. HDMI logo and “High Definition Multimedia Interface” are registered trade- marks of HDMI Licensing LLC. InFocus, In Focus, and INFOCUS (stylized) are either registered trademarks or trademarks of InFocus Corporation in the United States and other countries. All other trademarks are the property of their respective owners. Any other trademarks, service marks, personal names or product names are assumed to be the property of their respective owners and are used only for reference. -
Page 6: Safety Precautions
Servicing — Do not attempt to service the product yourself. Removing covers can expose you to high voltage and other danger- ous conditions. Request a qualified service person to perform servicing. Repair — If any of the following conditions occurs, unplug the power cord from the AC outlet, and contact InFocus Technical Support to arrange for a repair. - Page 7 Care should be taken to place or install the monitor where it cannot be pushed, pulled over, or knocked down. • Care should be taken to route all cords and cables connected to the monitor so that they cannot be pulled or grabbed by curious children. Page 5 INF7020 Hardware Guide...
-
Page 8: Safety Instructions
• Please understand that InFocus Corporation bears no responsibility for errors made during use by the customer or a third party, nor for any other malfunctions or damage to this product arising during use, except where indemnity liability is recognized under law. - Page 9 41°F (5°C) to 95°F (35°C), install a fan or take other measures to keep the ambient temperature within the required range. • Temperature conditions may change when using the monitor together with the optional equipments recommended by InFocus. In such cases, please check the temperature condition specified by the optional equipment. •...
- Page 10 Page 8...
-
Page 11: What's Included
*Keyboard and mouse not included in all countries. For setup purposes, a keyboard and mouse are recommended. Any standard wired or wireless mouse or keyboard, connected through the computer module USB ports is supported. IMPORTANT: A stand or cart is recommended for use with this monitor. Page 9 INF7020 Hardware Guide... -
Page 12: Connector Panel Identification
Connector Panel Identification Monitor Panel Computer Module Connector Type Description USB A input Available. For use with USB thumb drives and other USB A inputs. USB A input Available. For use with USB thumb drives and other USB A inputs. USB A input Available. -
Page 13: Computer Module Front Panel
Use the tip of a pen and press the recessed reset button (do not exceed 3 seconds). Reset button Multi Card CF slot Available. For use with CF source inputs. Power button Press to turn the computer module power on and off. Not supported. Page 11 INF7020 Hardware Guide... -
Page 14: Computer Module Rear Panel
Computer Module Rear Panel HDMI Connector Type Description Wi-Fi External Wi-Fi External Antenna connectors. Attach both antennas to these connectors. Antennas Connected to the computer module. RS232C Connected to the computer module. DVI-I input RJ45 input (2) Available. Connect your network to one of these connectors. Not supported. -
Page 15: Setup
Removing Orange Tape After mounting the INF7020 monitor, carefully remove all orange tape. Attaching the HD Video Conferencing Camera Center the camera along the top edge of the monitor, aligning the camera bracket with the screw hole on the back of the moni- tor. -
Page 16: Cable Connection
Cable Connection POWER SWITCH Cut the zip tie holding the power cord to the back of the monitor. Connect the power cord to an AC outlet. Press the monitor power switch to the ON position. WARNINGS: • The main power must be turned on and off with the monitor power switch. Do not connect or disconnect the power cord or turn the breaker on and off while the monitor power switch is on. -
Page 17: Operating The Remote
Use the arrow buttons to navigate, and the Enter button to select functions and adjust values in the menus. • See "INF7020 Menu System" on page 18 for more information. The remote also has the following functions: MUTE: Turns the sound on/off. -
Page 18: Wireless Mouse And Keyboard
Wireless Mouse and Keyboard NOTE: The wireless mouse and keyboard is not included as a standard accessory for some countries. For initial setup and/or con- figuration, it may be easier to use a mouse and keyboard. Any standard wired or wireless mouse or keyboard, connected through the Mondopad USB ports, is supported by Mondopad. -
Page 19: Turning The Inf7020 On/Off
TO PUT THE INF7020 MONITOR INTO STANDBY Press the POWER button on the front of the INF7020 (or use the monitor's remote). If you want to put the computer module into standby mode, press the POWER button located on the back of the monitor. -
Page 20: Operating The Mondopad Software
Operating the Mondopad Software For information about the Mondopad Software, refer to the Mondopad Software Guide on the web at www.infocus.com/ Mondodocs. INF7020 Menu System To operate the menu, press the MENU button. Use the arrow buttons to select a menu option, enter submenus and make adjust- ments. -
Page 21: Picture Menu
THRU - Displays the input signal level as is (for PC HDMI only). PRESET - Selects the color temperature using PRESET. USER - Used for adjusting R-/G-/B-CONTRAST and R-/G-/B-OFFSET respectively. PRESET: Selects the color temperature when the WHITE BALANCE is set to PRESET. Page 19 INF7020 Hardware Guide... -
Page 22: Audio Menu
The setting values are shown for reference. The color temperature of the screen varies over time. This function is not intended to keep the color temperature constant. USER: Adjusts each item when the WHITE BALANCE is set to USER. R-CONTRAST - Adjusts bright-toned red component. G-CONTRAST - Adjusts bright-toned green component. -
Page 23: Setup Menu
HDMI AUTO VIEW: When ON is selected, the screen size is adjusted automatically according to the screen size control signal in- cluded in the video signal input from the HDMI input. COPY SETTING VALUE: Not applicable. LOGO SCREEN: Displays and turns off the logo screen. Page 21 INF7020 Hardware Guide... -
Page 24: Option Menu
Option Menu SCREEN OPTION PC D-SUB PICTURE DATE/TIME SETTING DATE/TIME FORMAT AUDIO SCHEDULE INPUT SELECT SETUP AUDIO SELECT INPUT SIGNAL OPTION SCAN MODE POWER MANAGEMENT PIP/PbyP MOVE OSD···[DISPLAY] OK···[MENU] 1 9 2 0 x 1 0 8 0 V: 60 Hz H: 67.5 kHz DATE/TIME SETTING: Set the date and time. - Page 25 TOUCH PANEL MODE: When the resolution is 1920 x 1080, setting this to ON improves touch panel tracking. When two screens are displayed, or when V-POS or V-SIZE is adjusted on the SCREEN menu, the screen may become distorted. In this case, set to OFF. Page 23 INF7020 Hardware Guide...
-
Page 26: Pip/Pbyp Menu
PIP/PbyP Menu PIP MODES: Sets the display method of the PC and AV input signals. A secondary image is displayed inside the main image. PBYP The main image and the secondary im- age are displayed side by side. PBYP2 The main image uses 1280 pixels across the screen and the secondary image is displayed next to the main image. -
Page 27: Function Menu
OSD & LED - When a hardware error is detected, the power LED flashes red and the screen displays a message: STATUS [xxxx]. LED - When a hardware error is detected, the power LED flashes red. Page 25 INF7020 Hardware Guide... -
Page 28: Maintenance
Wipe dry with a soft, dry cloth. WARNING: Do not allow liquids to enter the INF7020. Spilled liquid may damage your INF7020. WARNING: Do not attempt to service this product yourself as opening and removing covers may expose you to dangerous voltage and other hazards. - Page 29 If you touch the touch panel, this may be detected as an element failure in the infrared transmitter/receiver and incorrect operation will result. Power LED flashes RED • There is a problem with the monitor. Turn off the monitor and contact InFocus Technical “STATUS [xxxx]” appears in the Support. corner of the screen.
-
Page 30: Led Status
The internal clock is not working. • The clock is maintained by the internal battery. The battery may be exhausted. Contact InFocus Technical Support for assistance. Note: The estimated service life of the internal battery is 5 years. LED Status... -
Page 31: Appendix
Intel® Huron River Platform, 2nd Generation Intel® Core™ i3/i5/i7 Processors, Intel QM67 BIOS AMI UEFI BIOS/iAMT 7.0 supported WLAN IEEE 802.11b/n/g Power Supply Input: 100-240 VAC 1.5A, 50/60Hz Output: +19VDC, 3.95A, 75W Cooling System Fan with smart fan function OS Support Windows 7 Page 29 INF7020 Hardware Guide... - Page 32 Temperature/Humidity Operating: 32˚ to 104˚F (0˚C to 40˚C), 0%-90%, non-condensing Storage: -4˚ to 176˚F (-20˚C to 80˚C), 0%-90%, non-condensing Dimensions (WxHxD) 7.87" x 1.38" x 6.0" (200 x 35 x 153.3 mm) Weight 2.64 lbs (1.2kg) Mounting VESA Mount 100mm x 100mm CAMERA Resolution 1280 x 720 pixels...
-
Page 33: Dimensional Drawings
235 W Standby No Display 1.0W* Suspend Off State DMPM: DIGITAL MONITOR POWER MANAGEMENT DMPM Screen Power Consumption Monitor On Display 235W Active Off No display 1.0W* *When Auto Input Change is set to Off. Page 31 INF7020 Hardware Guide... -
Page 34: Ddc (Plug And Play)
DDC (Plug and Play) The monitor supports the VESA DDC (Display Data Channel) standard. DDC is a signal standard for plug and play between monitors and computers. Information about resolution and other parameters is exchanged between the two. This function can be used if the computer supports DDC and it has been configured to detect plug-and-play monitors. -
Page 35: Rs232C Command And Control
If the Command DIRECTION is “R” in the RS232C Command Table, the current value can be returned by using “?” as the parameter. Example: VOLM ? ? ? ? ← From PC to monitor (How much is current volume setting?). ← From monitor to PC (Current volume setting: 30). Page 33 INF7020 Hardware Guide... - Page 36 RESPONSE CODE FORMAT When a command has been executed correctly Return code (0Dh, 0Ah) A response is returned after a command is executed. When a command has not been executed Return code (0Dh, 0Ah) NOTES: • ERR is returned when there is no relevant command or when the command cannot be used in the current state of the monitor. •...
-
Page 37: Gamma User Data
• The user data is not initialized by RESET of the PICTURE menu. To initialize the user data, use ALL RESET of the FUNCTION menu. The GAMMA user data initialize command (UGRS) allows the initialization of the user data only. Page 35 INF7020 Hardware Guide... -
Page 38: Rs232C Command Table
RS232C Command Table COMMAND: Command field. DIRECTION: • "W" is used when the “Parameter” is set in the parameter field. The command functions are described under “Control/Response Contents”. • "R" is the returned value indicated under “Reply” which can be obtained by setting “????”, “˽ ˽ ˽ ?” or “???+” (repeater control) in the parameter field. - Page 39 “ERR” when PC HDMI is selected for HDMI of INPUT SELECT. PC HDMI “ERR” when AV HDMI is selected for HDMI of INPUT SELECT. PC DVI-D PC D-SUB AV Component AV Video PC RGB AV DVI-D AV S-Video AV HDMI PC HDMI Page 37 INF7020 Hardware Guide...
- Page 40 SCREEN MENU Function Command Direction Parameter Reply Control/Response contents Auto ASNC When the input mode is PC D-SUB, PC RGB. Clock CLCK 0-1200 0-1200 When the input mode is PC D-SUB, PC RGB. Varies depending on the signal. Phase PHSE 0-63 0-63 When the input mode is PC D-SUB, PC RGB.
- Page 41 0-256 ERR when CTMP is not set to 99. G-Contrast CRTG 0-256 0-256 B-Contrast CRTB 0-256 0-256 R-Offset OFSR -127-127 -127-127 G-Offset OFSG -127-127 -127-127 B-Offset OFSB -127-127 -127-127 Copy to User CPTU Copies a preset value to the user setting. Page 39 INF7020 Hardware Guide...
- Page 42 Gamma GAMM 0-2 0: 1.8, 1: 2.2, 2: 2.4 (during PC input) ○ 0: LIGHT 2, 2: DARK (during AV input) 4-6 4: User , 5: 2.0, 6: STD (during PC input) 4: USER, 5: LIGHT 1, 6: STD (during AV input) Display Color Pattern PTDF 0 No pattern display.
- Page 43 0-1 0: PC DVI-D, 1: AV DVI-D ○ BNSL 0-1 0: PC RGB, 1: AV COMPONENT ○ D-SUB SLDS 0-2 0: PC D-SUB, 1: AV COMPONENT, 2: AV VIDEO HDMI HDSL 0-1 0: PC HDMI, 1: AV HDMI ○ Page 41 INF7020 Hardware Guide...
- Page 44 ○ Audio Select PC DVI-D ASDP 1-3 1: AUDIO(STEREO MINI), 2: AUDIO1(RCA), 3: AUDIO2(RCA) PC HDMI ASHP 0-1 0: HDMI, 1: AUDIO(STEREO MINI) 2-3 2: AUDIO1(RCA), 3: AUDIO2(RCA) PC D-SUB ASAP 1-3 1: AUDIO(STEREO MINI) 2: AUDIO1(RCA), 3: AUDIO2(RCA) PC RGB ASCP 1-3 1: AUDIO(STEREO MINI), 2: AUDIO1(RCA), 3: AUDIO2(RCA)
- Page 45 Power Button PBTN 0: MONITOR, 1: CONTROLLER ○ Controller Input PCIP 0: D-SUB, 1: HDMI (“ERR” when MONITOR is selected for POWER ○ BUTTON.) 2: DVI-D (“ERR” when MONITOR is selected for POWER BUTTON.) ○ Page 43 INF7020 Hardware Guide...
- Page 46 OTHER MENU Function Command Direction Parameter Reply Control/Response contents Screen Size (PC) WIDE 1: WIDE, 2: NORMAL, 3: Dot by Dot, 4: ZOOM1, 5: ZOOM2 ○ Screen Size (AV) WIDE 1: WIDE, 2: ZOOM1, 3: ZOOM2, 4: NORMAL, 5: Dot by Dot ○...
Need help?
Do you have a question about the INF7020 and is the answer not in the manual?
Questions and answers