Cisco RV180 Administration Manual
Vpn router/wireless-n multifunction router
Hide thumbs
Also See for RV180:
- Administrator's manual (183 pages) ,
- Manual (14 pages) ,
- Datasheet (5 pages)

Related Manuals for Cisco RV180


Summary of Contents for Cisco RV180
- Page 1 ADMINISTRATION GUIDE Cisco Small Business RV180 VPN Router RV180W Wireless-N Multifunction Router...
- Page 2 June 2012 Cisco and the Cisco Logo are trademarks of Cisco Systems, Inc. and/or its affiliates in the U.S. and other countries. A listing of Cisco's trademarks can be found at www.cisco.com/go/trademarks. Third party trademarks mentioned are the property of their respective owners. The use of the word partner does not imply a partnership relationship between Cisco and any other company.
-
Page 3: Table Of Contents
Back Panel Mounting the Cisco RV180/RV180W Placement Tips Wall Mounting Connecting the Equipment Setting Up the Cisco RV180/RV180W Using the Setup Wizard Choosing the Device Mode (Cisco RV180W) Using the Getting Started Page Navigating through the Pages Saving Your Changes... - Page 4 Viewing the Routing Table Configuring Static Routes Configuring Dynamic Routing Configuring Port Management Configuring Dynamic DNS (DDNS) Configuring IPv6 Configuring the IP Mode Configuring IPv6 WAN Settings Configuring IPv6 LAN Properties Configuring IPv6 Static Routing Configuring Tunneling Cisco RV180/RV180W Administration Guide...
- Page 5 Chapter 3: Configuring the Wireless Network (Cisco RV180W) A Note About Wireless Security Wireless Security Tips General Network Security Guidelines Understanding the Cisco RV180W’s Wireless Networks Configuring Basic Wireless Settings Configuring Security Configuring MAC Filtering Configuring Wi-Fi Multimedia Configuring Wireless Network (SSID) Scheduling...
- Page 6 Firewall Configuration Examples Chapter 5: Configuring VPN and Security Configuring a Basic VPN Viewing Basic VPN Default Values Configuring Advanced VPN Parameters Configuring IKE Policies Configuring VPN Policies Monitoring VPN Tunnel Status Configuring VPN Users Configuring VPN Passthrough Cisco RV180/RV180W Administration Guide...
- Page 7 Viewing a Self Certificate Request Exporting a Self Certificate Request Uploading a Self Certificate Exporting the Router’s Current Certificate Using the Cisco RV180/RV180W With a RADIUS Server Adding a RADIUS Server Configuration Configuring Captive Portal Configuring Captive Portal Settings Configuring Captive Portal Users Configuring 802.1x Port-Based Authentication...
- Page 8 Backing Up and Restoring the System Importing CSV Files Upgrading Firmware Rebooting the Cisco RV180/RV180W Restoring the Factory Defaults Chapter 8: Viewing the Cisco RV180/RV180W Status Viewing the Dashboard Viewing the System Summary Viewing the Wireless Statistics (Cisco RV180W) IPsec Connection Status...
- Page 9 Contents Viewing Port Triggering Status Viewing Port Statistics Viewing Open Ports Appendix A: Using Cisco QuickVPN for Windows 7, 2000, XP, or Vista Overview Before You Begin Installing the Cisco QuickVPN Software Installing from the CD-ROM Downloading and Installing from the Internet...
-
Page 10: Chapter 1: Introduction
Introduction This chapter describes the features of the Cisco RV180/RV180W, guides you through the installation process, and gets you started using the Device Manager, a browser-based utility for configuring the Cisco RV180/RV180W. • Product Overview, page 2 • Getting to Know the Cisco RV180, page 4 •... -
Page 11: Product Overview
Product Overview Thank you for choosing the Cisco Small Business RV180/RV180W router. The Cisco RV180 & RV180W Wireless-N VPN Router provides simple, affordable, highly secure, business-class connectivity to the Internet for small offices and remote workers. The RV180W features multi-function operation allowing the device to function as a wireless router, bridge, or access point. -
Page 12: Wireless Distribution System (Cisco Rv180W)
Device Manager. The Cisco RV180/ RV180W supports Internet Explorer, Firefox, and Safari web browsers. The Cisco RV180/RV180W also provides a setup wizard. The setup wizard allows you to easily configure the Cisco RV180/RV180W’s basic settings. -
Page 13: Getting To Know The Cisco Rv180
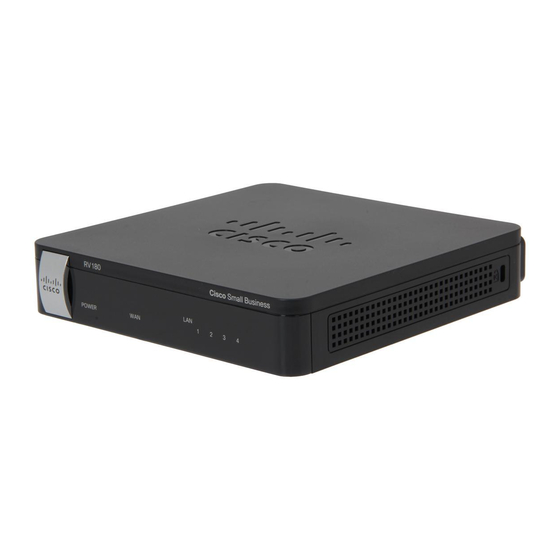
LAN—These four LEDs correspond to the four LAN (Ethernet) ports of the Cisco RV180. If the LED is continuously lit green, the Cisco RV180 is connected to a device through the corresponding port (1, 2, 3, or 4). The LED for a port flashes green when the Cisco RV180 is actively sending or receiving data over that port. -
Page 14: Getting To Know The Cisco Rv180W
WAN Port—The WAN port is connected to your Internet device, such as a cable or DSL modem. ON/OFF Power Switch—Press this button to turn the Cisco RV180 on and off. When the button is pushed in, power is on. Power Port—The power port is where you connect the AC power cable. -
Page 15: Cisco Rv180/Rv180W Administration Guide
The LED flashes green when the device is transmitting or receiving data on the wireless module. AP—The AP LED lights up solid green when the Cisco RV180W is in access point mode. See Choosing the Device Mode (Cisco RV180W), page BRIDGE—The BRIDGE LED lights up solid green when the Cisco RV180W is in... -
Page 16: Back Panel
WAN Port—The WAN port is connected to your Internet device, such as a cable or DSL modem. ON/OFF Power Switch—Press this button to turn the Cisco RV180W on and off. When the button is pushed in, power is on. Power Port—The power port is where you connect the AC power cable. -
Page 17: Mounting The Cisco Rv180/Rv180W
Introduction Mounting the Cisco RV180/RV180W Mounting the Cisco RV180/RV180W You can place your Cisco RV180/RV180W on a desktop or mount it on a wall. Placement Tips • Ambient Temperature—To prevent the device from overheating, do not operate it in an area that exceeds an ambient temperature of 104°F (40°C). - Page 18 Introduction Mounting the Cisco RV180/RV180W To mount the firewall to the wall: Determine where you want to mount the firewall. Verify that the surface is smooth, STEP 1 flat, dry, and sturdy. Drill two pilot holes into the surface 2-7/16 inches (61 mm) apart, and with a STEP 2 minimum of 5.
- Page 19 Introduction Mounting the Cisco RV180/RV180W Place the firewall wall-mount slots over the screws and slide the firewall down until STEP 4 the screws fit snugly into the wall-mount slots. Cisco RV180/RV180W Administration Guide...
-
Page 20: Connecting The Equipment
STEP 2 device such as a router or PC, disconnect the cable from the device and plug it into the port marked “WAN” on the RV180/RV180W. The cable or DSL modem is now connected to the router. Cisco RV180/RV180W Administration Guide... - Page 21 Introduction Connecting the Equipment Using the Ethernet cable included in the Cisco RV180/180W box, connect one end STEP 3 of the cable to one of the LAN ports of the router. (In this example, the LAN 1 port is used.) Connect the other end of the cable to an Ethernet port on the PC that will be used to connect to the Cisco RV180/180W Device Manager.
- Page 22 Introduction Connecting the Equipment Connect the power adapter to the Cisco RV180/RV180W power port (12VDC). STEP 5 Use only the power adapter that is supplied with the device. Using a different CAUTION power adapter could damage the device. Plug the other end of the adapter into an electrical outlet. You may need to use a STEP 6 specific plug (supplied) for your country.
-
Page 23: Setting Up The Cisco Rv180/Rv180W Using The Setup Wizard
Start the PC connected to the RV180/RV180W. Your computer becomes a DHCP STEP 1 client of the RV180/RV180W and receives an IP address in the 192. 1 68. 1 .xxx range. Launch a web browser and enter 192.168.1.1 in the Address field. This is the STEP 2 default IP address of the RV180/RV180W. -
Page 24: Choosing The Device Mode (Cisco Rv180W)
Connect the PC on which you will be using the Device Manager to the primary STEP 1 wireless host (in this example, called “Router A”). Connect one of the LAN ports on Router A with one of the LAN ports on the Cisco STEP 2 RV180W. - Page 25 On the RV180W, enter the Router A’s MAC address of the wireless network STEP 5 (access point). For example, if Router A is a Cisco RV220W, you would find the MAC address of its wireless network under Status > System Summary, in the Available Access Points table.
-
Page 26: Using The Getting Started Page
Introduction Using the Getting Started Page Using the Getting Started Page The Getting Started page displays the most common Cisco RV180/RV180W configuration tasks. Use the links on this page to jump to the relevant configuration page. By default, this page appears when you start the Device Manager. However, you can change this behavior by checking Don’t show this on start up at the bottom... -
Page 27: Navigating Through The Pages
Other Resources Support Click this link to open Cisco’s support page. Forums Click this link to visit Cisco’s online support forums. Navigating through the Pages Use the navigation tree (numbered 1 in Figure 1) located in the in the left pane to open the configuration pages. -
Page 28: Saving Your Changes
Figure 1 RV180W Device Manager Saving Your Changes When you finish making changes on a configuration page, click Save (numbered 4 Figure 1) to save the changes, or click Cancel (numbered 5 in Figure 1) to undo your changes. Cisco RV180/RV180W Administration Guide... -
Page 29: Viewing The Help Files
• (Optional) If you already have a DHCP server on your network, and you do not want the Cisco RV180/RV180W to act as a DHCP server, see “Configuring the LAN (Local Network) Settings” section on page Cisco RV180/RV180W Administration Guide... - Page 30 Introduction Configuration Next Steps • (Cisco RV180W) Configure your wireless network, especially wireless security. See Chapter 3, “Configuring the Wireless Network (Cisco RV180W).” • Configure your Virtual Private Network (VPN) using QuickVPN. The QuickVPN software is found on the documentation and software CD that shipped with your router.
- Page 31 Introduction Configuration Next Steps Cisco RV180/RV180W Administration Guide...
- Page 32 Introduction Configuration Next Steps Cisco RV180/RV180W Administration Guide...
-
Page 33: Chapter 2: Configuring Networking
Configuring Dynamic DNS (DDNS), page 47 • Configuring IPv6, page 49 Cisco recommends you use the Setup Wizard to configure basic networking on the NOTE Cisco RV180/RV180W. You can then make changes and provision advanced features using the Device Manager. -
Page 34: Configuring Automatic Configuration (Dhcp)
Primary DNS Server Enter the IP address of the primary DNS server used by your ISP. Secondary DNS Server (Optional) Enter the IP address of the secondary DNS server. This is used if the primary DNS server fails. Cisco RV180/RV180W Administration Guide... -
Page 35: Configuring Pppoe
From the Internet Connection Type drop-down menu, choose PPTP. STEP 2 Enter this information: STEP 3 User Name Enter your username assigned to you by the ISP. Password Enter your password assigned to you by the ISP. Cisco RV180/RV180W Administration Guide... -
Page 36: Configuring L2Tp
From the Internet Connection Type drop-down menu, choose L2TP. STEP 2 Enter this information: STEP 3 User Name Enter your username assigned to you by the ISP. Password Enter your password assigned to you by the ISP. Cisco RV180/RV180W Administration Guide... -
Page 37: Configuring Mtu Settings
STEP 1 (Internet). Choose the MTU type: STEP 2 • Default—Unless a change is required by your ISP, we recommend that you choose Default in the MTU Type field. The default MTU size is 1500 bytes. Cisco RV180/RV180W Administration Guide... -
Page 38: Configuring The Mac Address
The Cisco RV180/RV180W has a unique 48-bit local Ethernet hardware address. In most cases, the default MAC address is used to identify your Cisco RV180/ RV180W to your ISP. However, you can change this setting if required by your ISP. - Page 39 Choose the authentication type from the drop-down menu: • Auto-negotiate—The server sends a configuration request specifying the security algorithm set on it. Then, the Cisco RV180/ RV180W sends back authentication credentials with the security type sent earlier by the server. •...
-
Page 40: Configuring The Lan (Local Network) Settings
Click Save. The profile is added to the Profile Table. STEP 4 Configuring the LAN (Local Network) Settings If you have an IPv4 network, use these sections to configure your LAN settings. If you have an IPv6 network, see Configuring IPv6 LAN Properties, page Cisco RV180/RV180W Administration Guide... -
Page 41: Configuring Ipv4 Lan (Local Network) Settings
To configure the host name of the Cisco RV180/RV180W: Choose Networking > LAN (Local Network) > IPv4 LAN (Local Network). STEP 1 In the Host Name field, enter the host name of the Cisco RV180/RV180W. You can STEP 2 use only alpha-numeric characters and the hyphen. - Page 42 • If DHCP is not configured on the Cisco RV180/RV180W, manually assign an IP address to your PC. The address must be on the same subnet as the Cisco RV180/RV180W. For example, if you change the Cisco RV180/RV180W’s IP address to 10.0.0. 1 , assign your PC an IP address in the range of 10.0.0.2 to 10.0.0.254.
-
Page 43: Configuring Virtual Lan (Vlan) Membership
Choose Networking > LAN (Local Network) > IPv4 LAN (Local Network). STEP 1 In the DNS Proxy field, check to enable the Cisco RV180/RV180W to act as a STEP 2 proxy for all DNS requests and communicate with the ISP's DNS servers. - Page 44 VLANs, including the VLAN ID, description, ports, and whether inter- VLAN routing is enabled or not for each configured VLAN. Creating a VLAN You can create up to four VLANs on the Cisco RV180/RV180W. Choose Networking > LAN (Local Network) > VLAN Membership. STEP 1 In the VLAN Membership Table, click Add Row.
-
Page 45: Configuring Multiple Vlan Subnets
Enter the Subnet Mask for the new IP address. c. Click Save. If you are connected to the Cisco RV180/RV180W by the LAN port that is a member of this VLAN, you might have to release and renew the IP address on the PC connected to the LAN port, or manually assign an IP address to your PC that is in the same subnet as the VLAN. -
Page 46: Configuring Static Dhcp
The DHCP pool is treated as generic pool and all reserved IPs should be outside this pool. The DHCP server will then serve the reserved IP address when the device using the corresponding MAC address requests an IP address. Click Save. STEP 5 Cisco RV180/RV180W Administration Guide... -
Page 47: Configuring Advanced Dhcp Settings
Configuring the LAN (Local Network) Settings Configuring Advanced DHCP Settings Configuring Automatic Configuration Download You can configure devices that are connected to the Cisco RV180/RV180W to download configuration files from a TFTP server. This can be useful in scenarios like the following: •... -
Page 48: Viewing Dhcp Leased Clients
RSTP is not aware of virtual LANs (VLANs) in a network, so it is not recommended NOTE for use in a network with VLANs. To configure RTSP: Choose Networking > LAN > RSTP. STEP 1 Check Enable to enable RSTP. STEP 2 Cisco RV180/RV180W Administration Guide... - Page 49 40960, 45056, 49152, 53248, 57344, and 61440. This value is the priority component of the bridge identifier of the network node. The lower the system priority, the more likely the Cisco RV180W is to become the root in the Spanning Tree. The default is 327688.
-
Page 50: Configuring Jumbo Frames
Frames feature allows the switch to send jumbo frames within the LAN containing up to 9,000 bytes of data per frame. You can configure the Cisco RV180/RV180W to support jumbo frames. After support is enabled, devices on the LAN side of the network can exchange traffic that contains jumbo frames. -
Page 51: Viewing The Routing Table
• Use—Count of lookups for the route. Depending on the use of -F and -C, this is either route cache misses (-F) or hits (-C). • Interface—Interface to which packets for this route will be sent. Cisco RV180/RV180W Administration Guide... - Page 52 Gateway—Use gateway. R—Reinstate route for dynamic routing. D—Dynamically installed by daemon or redirect. M—Modified from routing daemon or redirect. addrconf A—Installed by C—Cache entry. !—Reject route. • Metric—The distance to the target (usually counted in hops). Cisco RV180/RV180W Administration Guide...
-
Page 53: Configuring Static Routes
In the Destination IP Address field, enter the IP address of the destination host or STEP 6 network to which the route leads. For a standard Class C IP domain, the network address is the first three fields of the Destination LAN IP; the last field should be zero. Cisco RV180/RV180W Administration Guide... -
Page 54: Configuring Dynamic Routing
Configuring Dynamic Routing RIP (Routing Information Protocol, RFC 2453) is an Interior Gateway Protocol (IGP) that is commonly used in internal networks. It allows the Cisco RV180/RV180W to exchange its routing information automatically with other routers, and allows it to dynamically adjust its routing tables and adapt to changes in the network. -
Page 55: Configuring Port Management
Click Save. STEP 6 Configuring Port Management The Cisco RV180/RV180W has four LAN ports and one WAN port. You can enable or disable ports, configure if the port is half- or full-duplex, and set the port speed. Cisco RV180/RV180W Administration Guide... -
Page 56: Configuring Dynamic Dns (Ddns)
To configure DDNS: Choose Networking > Dynamic DNS. STEP 1 Select the Dynamic DNS Service you are using. Selecting None disables this STEP 2 service. Cisco RV180/RV180W Administration Guide... - Page 57 Enter the user e-mail address for the TZO account. c. Enter the user key for the TZO account. d. In the Update Period field, enter the number of hours before the Cisco RV180/ RV180W updates the host information on TZO.com.
-
Page 58: Configuring Ipv6
Internet connection you have. See the sections below for detailed instructions. The Cisco RV180/RV180W can be configured to be a DHCPv6 client of the ISP for this WAN or a static IPv6 address provided by the ISP can be assigned. -
Page 59: Configuring Ipv6 Lan Properties
Under LAN TCP/IP Setup, in the IPv6 Address field, enter the IP address of the STEP 2 Cisco RV180/RV180W. The default IPv6 address for the gateway is fec0::1. You can change this 128 bit IPv6 address based on your network requirements. - Page 60 Choose the DHCP mode. If stateless is selected, an external IPv6 DHCP server is STEP 5 not required as the IPv6 LAN hosts are auto-configured by the Cisco RV180/ RV180W. In this case, the router advertisement daemon (RADVD) must be configured on this device and ICMPv6 router discovery messages are used by the host for auto-configuration.
-
Page 61: Configuring Ipv6 Static Routing
Configuring IPv6 Address Pools This feature allows you to define the IPv6 delegation prefix for a range of IP addresses to be served by the Cisco RV180/RV180W’s DHCPv6 server. Using a delegation prefix, you can automate the process of informing other networking equipment on the LAN of DHCP information specific for the assigned prefix. -
Page 62: Configuring Tunneling
STEP 10 Configuring Tunneling The Cisco RV180/RV180W provides several IPv6 tunneling methods. 6to4 tunneling allows IPv6 packets to be transmitted over an IPv4 network. 6to4 tunneling is typically used when a site or end user wants to connect to the IPv6 Internet using the existing IPv4 network. - Page 63 Choose the local endpoint address, or the endpoint address for the tunnel that STEP 4 starts with the Cisco RV180/RV180W. The endpoint can be the LAN interface (if the LAN is configured as an IPv4 network), or another LAN IPv4 address.
-
Page 64: Configuring Router Advertisement
The Router Advertisement Daemon (RADVD) on the Cisco RV180/RV180W listens for router solicitations in the IPv6 LAN and responds with router advertisements as required. This is stateless IPv6 auto configuration, and the Cisco RV180/RV180W distributes IPv6 prefixes to all nodes on the network. -
Page 65: Configuring Router Advertisement Prefixes
SLA ID in the 6to4 address prefix is set to the interface ID of the interface on which the advertisements are sent. If you chose Global/Local/ISATAP in Step 3, enter the IPv6 prefix and prefix length. STEP 5 The IPv6 prefix specifies the IPv6 network address. The prefix length variable is a Cisco RV180/RV180W Administration Guide... - Page 66 Enter the prefix lifetime, or the length of time during which the requesting router is STEP 6 allowed to use the prefix. Click Save. STEP 7 Cisco RV180/RV180W Administration Guide...
- Page 67 Configuring Networking Configuring IPv6 Cisco RV180/RV180W Administration Guide...
- Page 68 Configuring Networking Configuring IPv6 Cisco RV180/RV180W Administration Guide...
-
Page 69: (Cisco Rv180W)
Configuring a Wireless Distribution System (WDS), page 73 • Configuring Load Balancing, page 74 This chapter only applies to the Cisco RV180W model. NOTE A Note About Wireless Security Wireless networks are convenient and easy to install, so small businesses with high-speed Internet access are adopting them at a rapid pace. -
Page 70: Wireless Security Tips
• Enable MAC address filtering Cisco routers and gateways give you the ability to enable Media Access Control (MAC) address filtering. The MAC address is a unique series of numbers and letters assigned to every networking device. With MAC address filtering enabled, wireless network access is provided solely for wireless devices with specific MAC addresses. -
Page 71: General Network Security Guidelines
Combine letters and numbers to avoid using standard words that can be found in the dictionary. General Network Security Guidelines Wireless network security is useless if the underlying network is not secure. Cisco recommends that you take the following precautions: •... -
Page 72: Understanding The Cisco Rv180W's Wireless Networks
Configuring Basic Wireless Settings The following sections contain information on how to configure basic wireless settings on the Cisco RV180W. These settings apply to all of the wireless networks. Configuring Radio, Mode, and Channel Settings Choose Wireless >... - Page 73 STEP 6 wireless frames. Select a channel from the list of channels or choose auto to let the Cisco RV180W determine the best channel to use based on the environment noise levels for the available channels. In the U-APSD field, choose Enable to enable the Unscheduled Automatic Power...
-
Page 74: Configuring Security
SSID. When this feature is enabled, the wireless client can communicate with the Cisco RV180W, but not with other clients connected wirelessly to that SSID. For example, if the Cisco RV180W has many wireless users, you can prevent users from accessing other parts of the network. - Page 75 Configuring the Wireless Network (Cisco RV180W) Configuring Basic Wireless Settings 802. 1 1i standard was being prepared. It supports TKIP/AES encryption. The personal authentication is the preshared key (PSK) that is an alphanumeric passphrase shared with the wireless peer. •...
-
Page 76: Configuring Mac Filtering
If you want to see the password as you are entering it, check the Unmask Password box. c. In the Key Renewal field, enter the number of seconds after which the Cisco RV180W will generate a new key. These keys are internal keys exchanged between the Cisco RV180W and connected devices. -
Page 77: Configuring Wi-Fi Multimedia
Configuring the Wireless Network (Cisco RV180W) Configuring Basic Wireless Settings Under Connection Control, choose one of the following: STEP 5 • Block following MAC addresses from connecting to wireless network— Blocks MAC addresses specified below from connecting to the wireless network. -
Page 78: Configuring Wireless Network (Ssid) Scheduling
Click Save. STEP 7 Configuring Wireless Network (SSID) Scheduling You can configure each of the four available wireless networks on the Cisco RV180W to be active during certain times of the day. To configure the schedule for a wireless network: Choose Wireless >... -
Page 79: Configuring Advanced Wireless Settings
STEP 3 message should be sent. A DTIM field is a countdown field informing clients of the next window for listening to broadcast and multicast messages. When the Cisco RV180W has buffered broadcast or multicast messages for associated clients, it sends the next DTIM with a DTIM Interval value. -
Page 80: Configuring Rogue Access Point Detection
The Short Retry Limit and Long Retry Limit fields determine the number of times STEP 8 the Cisco RV180W will reattempt a frame transmission that fails. The limit applies to both long and short frames of a size less than or equal to the RTS threshold. -
Page 81: Adding And Editing Authorized Aps
Click Save. STEP 4 Configuring Wi-Fi Protected Setup You can configure Wi-Fi Protected Setup (WPS) on the Cisco RV180W to allow WPS-enabled devices to more easily connect to the wireless network. You must configure one AP with WPA/WPA2 to use WPS. -
Page 82: Configuring A Wireless Distribution System (Wds)
You must log in to that device to obtain its WPS PIN. Then click Configure via PIN. After clicking this button on the Cisco RV180W, on the WPS-enabled device, select the necessary option to begin WPS. The device should begin communication with the Cisco RV180W. -
Page 83: Configuring Load Balancing
Configuring the Wireless Network (Cisco RV180W) Configuring Load Balancing You need to configure WDS if you are using the Cisco RV180W in WDS Bridge or WDS Repeater mode. Choosing the Device Mode (Cisco RV180W), page To configure WDS: Choose Wireless > WDS. - Page 84 Configuring the Wireless Network (Cisco RV180W) Configuring Load Balancing Cisco RV180/RV180W Administration Guide...
- Page 85 Configuring the Wireless Network (Cisco RV180W) Configuring Load Balancing Cisco RV180/RV180W Administration Guide...
-
Page 86: Chapter 4: Configuring The Firewall
Cisco RV180/RV180W Firewall Features You can secure your network by creating and applying access rules that the Cisco RV180/RV180W uses to selectively block and allow inbound and outbound Internet traffic. You then specify how and to what devices the rules apply. You can configure the following: •... -
Page 87: Configuring Access Rules
WAN ports are configured; for the Cisco RV180/RV180W, you may use the IP address if a static address is assigned to the WAN port, or if your WAN address is dynamic, a DDNS (Dynamic DNS) name can be used. -
Page 88: Configuring The Default Outbound Policy
STEP 1 In the Access Rule Table, check the rule that you want to move, and click the Up or STEP 2 Down arrow to move it up or down the list. Click Save. STEP 3 Cisco RV180/RV180W Administration Guide... -
Page 89: Creating An Access Rule
• BOOTP_CLIENT (Bootstrap Protocol client) • BOOTP_SERVER (Bootstrap Protocol server) • CU-SEEME (videoconferencing) UDP or TCP • DNS (Domain Name System), UDP or TCP • FINGER • FTP (File Transfer Protocol) • HTTP (Hyptertext Transfer Protocol) Cisco RV180/RV180W Administration Guide... - Page 90 SNMP (Simple Network Management Protocol) TCP or UDP • SNMP-TRAPS (TCP or UDP) • SQL-NET (Structured Query Language) • SSH (TCP or UDP) • STRMWORKS • TACACS (Terminal Access Controller Access-Control System) • TELNET (command) • TFTP (Trivial File Transfer Protocol) Cisco RV180/RV180W Administration Guide...
- Page 91 Enable box and enter the IP address you want to use. c. Under Rule Status, choose Enabled or Disabled. You may want to configure a rule and choose Disabled if you want to enable it at a later time. Cisco RV180/RV180W Administration Guide...
-
Page 92: Configuring Attack Prevention
Configuring Attack Prevention Attacks are malicious security breaches or unintentional network issues that render the Cisco RV180/RV180W unusable. Attack prevention allows you to manage WAN security threats such as continual ping requests and discovery via ARP scans. TCP and UDP flood attack prevention can be enabled to manage extreme usage of WAN resources. -
Page 93: Configuring Content Filtering
STEP 2 • WAN (Internet) Security Checks Respond to Ping on WAN (Internet)—To configure the Cisco RV180/ RV180W to allow a response to an Internet Control Message Protocol (ICMP) Echo (ping) request on the WAN interface, check this box. This setting is used as a diagnostic tool for connectivity problems. - Page 94 Block ActiveX—Similar to Java applets, ActiveX controls are installed on a Windows computer while running Internet Explorer. A malicious ActiveX control can be used to compromise or infect computers. Enabling this setting blocks ActiveX applets from being downloaded. Cisco RV180/RV180W Administration Guide...
-
Page 95: Configuring Url Blocking
URL or newsgroup name), the site is blocked. To configure URL blocking: Choose Firewall > URL Blocking. The table displays currently blocked keywords. STEP 1 Click Add Row. STEP 2 Under Status, check the box to enable blocking for the new keyword. STEP 3 Cisco RV180/RV180W Administration Guide... -
Page 96: Configuring Port Triggering
You can also specify a port triggering rule by defining the type of traffic (TCP or UDP) and the range of incoming and outgoing ports to open when enabled. Cisco RV180/RV180W Administration Guide... -
Page 97: Adding A Port Triggering Rule
The table contains the following information: • Action—Whether to block or allow traffic (always or by schedule) that meets these filter rules, and when the rule is applicable. • Service—Service for which this port forwarding rule is applicable. Cisco RV180/RV180W Administration Guide... -
Page 98: Adding A Port Forwarding Configuration
STEP 4 device: • AIM (AOL Instant Messenger) • BGP (Border Gateway Control) • BOOTP_CLIENT (Bootstrap Protocol client) • BOOTP_SERVER (Bootstrap Protocol server) • CU-SEEME (videoconferencing) UDP or TCP • DNS (Domain Name System), UDP or TCP Cisco RV180/RV180W Administration Guide... - Page 99 SFTP (Secure Shell File Transfer Protocol) • SMTP (Simple Mail Transfer Protocol) • SNMP (Simple Network Management Protocol) TCP or UDP • SNMP-TRAPS (TCP or UDP) • SQL-NET (Structured Query Language) • SSH (TCP or UDP) • STRMWORKS Cisco RV180/RV180W Administration Guide...
- Page 100 Enter the Destination IP address, or the address where traffic meeting the rule should be sent. b. In the Internal Port field, enter the port to which traffic should be forwarded. Click Save. STEP 9 Cisco RV180/RV180W Administration Guide...
-
Page 101: Configuring A Dmz Host
Configuring a DMZ Host Configuring a DMZ Host The Cisco RV180/RV180W supports DMZ options. A DMZ is a sub-network that is open to the public but behind the firewall. DMZ allows you to redirect packets going to your WAN port IP address to a particular IP address in your LAN. It is recommended that hosts that must be exposed to the WAN (such as web or e-mail servers) be placed in the DMZ network. -
Page 102: Adding A One-To-One Nat Rule
Public Range Begin—The starting IP address in the public (WAN) IP address. • Range Length—Range length maps one to one private address to public address up to the given range. • Service—Choose the service for which the rule applies. Click Save. STEP 4 Cisco RV180/RV180W Administration Guide... -
Page 103: Configuring Mac Address Filtering
In the MAC Addresses table, click Add. STEP 3 Enter the MAC address and description to add to the table and click Save. Repeat STEP 4 for each address to allow or block. Click Save. STEP 5 Cisco RV180/RV180W Administration Guide... -
Page 104: Configuring Ip/Mac Address Binding
IP/MAC Binding allows you to bind IP addresses to MAC address. Some machines are configured with static addresses. To prevent users from changing static IP addresses, IP/MAC Binding should be enabled. If the Cisco RV180/RV180W sees packets with matching IP address but inconsistent MAC addresses, it drops those packets. -
Page 105: Creating Schedules
Under Repeat, check Everyday to apply the schedule to all the days of the week. STEP 5 Leave the box unchecked if you want it to only apply to certain days, and check the boxes next to the days you want to include in the schedule. Click Save. STEP 6 Cisco RV180/RV180W Administration Guide... -
Page 106: Configuring Session Settings
Configuring Session Settings You can limit the maximum number of unidentified sessions and half-open sessions on the Cisco RV180/RV180W. You can also introduce timeouts for TCP and UDP sessions to ensure Internet traffic is not deviating from expectations in your private network. -
Page 107: Configuring Internet Group Management Protocol (Igmp)
WAN network. Adding Allowed Networks To configure IGMP: Choose Firewall > Advanced Settings > IGMP Configuration. STEP 1 Check the Enable box to allow IGMP communication between the router and other STEP 2 nodes in the network. Cisco RV180/RV180W Administration Guide... -
Page 108: Configuring Lan (Local Network) Groups
Enabling Session Initiation Protocol Application-Level Gateway (SIP ALG) SIP ALG can rewrite information within SIP messages (SIP headers and SDP body) making signaling and audio traffic possible between a client behind Network Address Translation (NAT) and the SIP endpoint. Cisco RV180/RV180W Administration Guide... -
Page 109: Firewall Configuration Examples
Choose Firewall > Advanced Settings > SIP ALG. STEP 1 Check the Enable box to enable SIP ALG support. If disabled, the router will not STEP 2 allow incoming calls to the UAC (User Agent Client) behind the Cisco RV180/ RV180W. Click Save. STEP 3... - Page 110 DMZ servers. The following addressing scheme is used to illustrate this procedure: • WAN IP address: 10. 1 .0. 1 18 • LAN IP address: 192. 1 68. 1 . 1 ; subnet 255.255.255.0 Cisco RV180/RV180W Administration Guide...
- Page 111 Click Add. STEP 2 Enter the schedule name (for example, “Weekend”). STEP 3 Under Time, check All Day. STEP 4 Under Repeat, leave Everyday unchecked. STEP 5 Check Saturday and Sunday. STEP 6 Click Save. STEP 7 Cisco RV180/RV180W Administration Guide...
- Page 112 IP address Destination IP Rule Status Enabled Create an inbound access rule with the following parameters: Parameter Value Connection Type Inbound Action Block by Schedule Schedule Weekend Service All Traffic Source IP Rule Status Enabled Cisco RV180/RV180W Administration Guide...
- Page 113 Configuring the Firewall Firewall Configuration Examples Cisco RV180/RV180W Administration Guide...
- Page 114 Configuring the Firewall Firewall Configuration Examples Cisco RV180/RV180W Administration Guide...
-
Page 115: Chapter 5: Configuring Vpn And Security
• new connection name • pre-shared key • remote gateway type and remote WAN IP address or fully-qualified domain name (FQDN) • local gateway type and local WAN IP address or FQDN Cisco RV180/RV180W Administration Guide... - Page 116 VPN > IPsec > VPN Users page. Choose XAUTH as the user protocol. Configuring VPN Users, page 121. • If you configured the VPN policy to authenticate from an external database, configure the connection to the RADIUS server. Cisco RV180/RV180W Administration Guide...
- Page 117 For more information, see Appendix A, “Using Cisco QuickVPN for Windows 7, 2000, XP, or Vista.” Note: To enable access via Cisco QuickVPN this router, you must enable remote management to open port 443 for SSL. Using the Management Interface, page 137.
-
Page 118: Configuring A Basic Vpn
Choose the type of peer that the VPN tunnel will connect: STEP 1 • Gateway—Connects the Cisco RV180W to a gateway, such as another Cisco RV180W at another site. • VPN Client—Connects the Cisco RV180W to remote clients. The remote clients must run VPN client software. - Page 119 IP address range used on the local LAN. Click Save to save your settings, or click Cancel to reload the page with the STEP 5 page current settings. After you save your settings, the Advanced VPN Setup appears. Cisco RV180/RV180W Administration Guide...
-
Page 120: Viewing Basic Vpn Default Values
The Advanced VPN Setup page allows you to configure advanced VPN parameters, such as IKE and other VPN policies. These policies control how the Cisco RV180/RV180W initiates and receives VPN connections with other endpoints. Use the VPN > IPsec > Advanced VPN Setup page to view, add, edit, and delete IKE and VPN policies. -
Page 121: Configuring Ike Policies
Be sure to use compatible encryption, authentication, and key-group parameters for the VPN policy. To open this page: From the VPN > IPsec > Advanced VPN Setup page, in the IKE Policy table, click Add or select an existing policy and click Edit. Cisco RV180/RV180W Administration Guide... - Page 122 In the Remote section, enter the Identifier Type to specify the Internet Security STEP 3 Association and Key Management Protocol (ISAKMP) identifier for the remote router: • Remote WAN (Internet) IP • FQDN • User FQDN Cisco RV180/RV180W Administration Guide...
- Page 123 RSA-Signature—Choose this option to disable the pre-shared key text field and use the Active Self Certificate that was uploaded on the Security > SSL Certificate page. A certificate must be configured in order for RSA-Signature to work. Cisco RV180/RV180W Administration Guide...
- Page 124 RADIUS server and either password authentication protocol (PAP) or challenge handshake authentication protocol (CHAP). After completing this procedure, set up the RADIUS server on the Security > RADIUS Server page. Using the Cisco RV180/RV180W With a RADIUS Server, page 127. Cisco RV180/RV180W Administration Guide...
-
Page 125: Configuring Vpn Policies
NETBIOS—Check the Enable box to allow NetBIOS broadcasts to travel over the VPN tunnel, or uncheck this box to disable NetBIOS broadcasts over the VPN tunnel. For client policies, the NetBIOS feature is available by default. Cisco RV180/RV180W Administration Guide... - Page 126 Local Traffic Selector: 192. 1 68. 1 .0/24 Remote Traffic Selector: 192. 1 68.0.0/16 In the Split DNS section, check the Enable box to allow the Cisco RV180/RV180W STEP 3 to find the DNS server of the remote router without going through the ISP (Internet).
- Page 127 • Key-In—Enter the integrity key (for ESP with Integrity-mode) for the inbound policy. The length of the key depends on the algorithm chosen: MD5—16 characters SHA-1— 20 characters SHA2-256—32 characters SHA2-384— 48 characters SHA2-512—64 characters Cisco RV180/RV180W Administration Guide...
- Page 128 Select IKE Policy—Choose the IKE policy that will define the characteristics of phase 1 of the negotiation. To add an IKE policy to the list, click the IKE Policies link. Configuring Advanced VPN Parameters, page 111. Cisco RV180/RV180W Administration Guide...
-
Page 129: Monitoring Vpn Tunnel Status
You can view and change the status of (connect or drop) the router’s IPsec security associations by performing one of the following actions: • Choose VPN > IPsec > Advanced VPN Setup and click IPsec VPN Connection Status. • Choose Status > IPsec Connection Status. Cisco RV180/RV180W Administration Guide... -
Page 130: Configuring Vpn Users
Configuring VPN Users Use the VPN > IPsec > VPN Users page to configure PPTP Server settings (if applicable) and to add VPN clients for PPTP, XAUTH, and Cisco QuickVPN. You can also created comma-separated value (CSV) files containing user NOTE information and import them to easily add multiple users. - Page 131 To add a client, click Add. Enter these settings: Enabled—For PPTP, check the box to activate the user account. Uncheck the box to de-activate the user account. This setting is not applicable to QuickVPN or XAUTH. Cisco RV180/RV180W Administration Guide...
-
Page 132: Configuring Vpn Passthrough
VPN passthrough allows VPN traffic that originates from VPN clients to pass through the router. For example, if you are not using a VPN that is configured on the Cisco RV180/RV180W, but are using a laptop to access a VPN at another site, configuring VPN passthrough allows that connection. -
Page 133: Configuring Security
Using SSL Certificates for Authentication The Cisco RV180/RV180W uses digital certificates for IPsec VPN authentication and SSL validation (for HTTPS and SSL VPN authentication). You can obtain a digital certificate from a well-known Certificate Authority (CA) such as VeriSign, or generate and sign your own certificate using functionality available on this gateway. -
Page 134: Uploading A Trusted Certificate
Certificate. Uploading a Trusted Certificate If you have a certificate from a trusted authority to upload, the file must be located on the computer connected to the Cisco RV180/RV180W. Perform the following steps: Choose Security > SSL Certificate. STEP 1 In the Trusted Certificates (CA Certificate) Table, click Upload. -
Page 135: Viewing A Self Certificate Request
Choose Security > SSL Certificate. STEP 1 Under Self Certificate Requests, click View. STEP 2 The contents of the request are displayed. This information is necessary to give to STEP 3 the CA if you are getting the certificate signed. Cisco RV180/RV180W Administration Guide... -
Page 136: Exporting A Self Certificate Request
STEP 1 Under Export Certificate, click Export for Client to export the certificate. It will be STEP 2 uploaded to an endpoint that will connect to the Cisco RV180/RV180W as a VPN client. Using the Cisco RV180/RV180W With a RADIUS Server A RADIUS server can be configured to maintain a database of user accounts and can be used for authenticating this device's users. -
Page 137: Adding A Radius Server Configuration
In the Timeout field, enter the timeout interval after which the Cisco RV180/ STEP 5 RV180W re-authenticates with the RADIUS server. In the Retries field, enter the number of retries for the Cisco RV180/RV180W to re- STEP 6 authenticate with the RADIUS server. -
Page 138: Configuring Captive Portal Settings
It also prevents access to that port in cases where the authentication fails. It provides an authentication mechanism to devices trying to connect to a LAN. The Cisco RV180/RV180W acts as a supplicant in the 802. 1 x authentication system. - Page 139 Configuring VPN and Security Configuring Security Enter the username and password sent by the Cisco RV180/RV180W to the STEP 4 authenticator for authentication. The username and password are the credentials sent to the authenticating server (the device running 802. 1 X in an authenticator role;...
-
Page 140: Chapter 6: Configuring Quality Of Service (Qos)
WAN QoS profiles let you manage the bandwidth of the traffic flowing from the secure network (LAN) to the insecure network (WAN). You can configure WAN QoS profiles to control the rate at which the RV180/ RV180W transmits data. For example, limiting the outbound traffic helps you prevent the LAN users from consuming all of the bandwidth of the Internet link. - Page 141 Enter the total WAN bandwidth (1–100 Mbps). Bandwidth Click Save. STEP 3 Adding WAN QoS Profiles To add a WAN QoS profile: Choose QoS > WAN QoS Profiles. STEP 1 In the WAN QoS Profile Table, click Add. STEP 2 Cisco RV180/RV180W Administration Guide...
-
Page 142: Configuring Profile Binding
In the Available Profiles field, choose a WAN QoS profile. STEP 2 To create a profile, click Configure Profile. See Configuring WAN QoS Profiles, page 131 for more information. From the Service drop-down menu, choose the service to which the profile STEP 3 applies. Cisco RV180/RV180W Administration Guide... -
Page 143: Configuring Cos Settings
Click Save. STEP 6 Configuring CoS Settings You can map CoS priority settings to the traffic forwarding queue on the RV180/ RV180W. To map CoS priority settings to the traffic forwarding queue: Choose QoS > CoS Settings > Cos Settings. -
Page 144: Mapping Cos Settings To Dscp Values
For each CoS priority level, enter the corresponding DSCP value (0–63). The STEP 3 default value is 63. Click Save. STEP 4 To restore the default CoS to DSCP mappings, click Restore Default and, when prompted, click OK. Then, click Save. Cisco RV180/RV180W Administration Guide... -
Page 145: Chapter 7: Administering Your Cisco Rv180/Rv180W
Administering Your Cisco RV180/RV180W This chapter describes the administration features of the Cisco RV180/RV180W, including creating users, configuring network management, diagnostics and logging, date and time, and other settings. It contains the following sections: • Configuring Language, page 137 •... -
Page 146: Configuring Language
STEP 2 In the Individual Rule Settings field, in the Minimal Password Length field, enter the STEP 3 minimum password length. NOTE: Passwords cannot be the same as the username, which is “cisco” by default. Click Save. STEP 4 Using the Management Interface The Cisco RV180/RV180W provides a management interface to configure accounts for user and administrative access to the system. -
Page 147: Configuring Web Access
Configuring Web Access You can enable HTTPS and remote management on the LAN interface of the Cisco RV180/RV180W. If a user connects a PC to the LAN port, web access is then allowed using secure HTTP (HTTPS). To enable HTTPS access on the LAN port: Choose Administration >... -
Page 148: Configuring User Accounts
Configuring User Accounts The Cisco RV180/RV180W supports two user accounts for administering and viewing settings: an administrative user (default user name: “cisco”) and a “guest” user (default user name: “guest”). The guest account has read-only access. You can set and change the username and password for both the administrator and guest accounts. -
Page 149: Setting The Session Timeout Value
STEP 4 Configuring Network Management The Cisco RV180/RV180W supports Simple Network Management (SNMP) to allow you to monitor and manage your router from an SNMP manager. SNMP provides a remote means to monitor and control network devices, and to manage configurations, statistics collection, performance, and security. -
Page 150: Editing Snmpv3 Users
Configuring Network Management Editing SNMPv3 Users SNMPv3 parameters can be configured for the two default Cisco RV180/RV180W user accounts (Admin and Guest). To configure: In the SNMPv3 User Table, check the box for the user to edit and click Edit. -
Page 151: Configuring Access Control Rules
Administering Your Cisco RV180/RV180W Configuring Network Management Configuring Access Control Rules The SNMP v1/v2c Access Control Table is a table of access rules that enables read-only or read-write access for select IP addresses in a defined SNMP agent's community. To configure access control rules: In the SNMP v1/v2c Access Control Table, click Add. -
Page 152: Configuring The Wan Traffic Meter
Configuring the WAN Traffic Meter Configuring the WAN Traffic Meter The WAN traffic meter displays statistics for traffic coming from the WAN (Internet) to the Cisco RV180/RV180W, and traffic going from the Cisco RV180/RV180W to the WAN. To configure the WAN Traffic Meter: Choose Administration >... -
Page 153: Using Network Diagnostic Tools
Administering Your Cisco RV180/RV180W Using Network Diagnostic Tools To configure what the Cisco RV180/RV180W does when the traffic limit is reached: Choose Administration > WAN Traffic Meter. STEP 1 Under When Limit Is Reached, select one of the following: STEP 2 •... -
Page 154: Capturing And Tracing Packets
Administering Your Cisco RV180/RV180W Capturing and Tracing Packets Using Traceroute Traceroute displays all the routers present between the destination IP address and this router. Up to 30 “hops” (intermediate routers) between this router and the destination will be displayed. To use traceroute: Choose Diagnostics >... -
Page 155: Configuring Logging
Administering Your Cisco RV180/RV180W Configuring Logging Configuring Logging Enabling logging options may generate a significant volume of log messages and NOTE is recommended for debugging purposes only. Configuring Logging Policies To configure general logging policies: Choose Administration > Logging > Logging Policies. -
Page 156: Configuring Remote Logging
Administering Your Cisco RV180/RV180W Configuring Logging • Dropped Packets—Check this box to log packets that were blocked from being transferred through the segment. This option is useful when the Default Outbound Policy is “Allow” (see Configuring the Default Outbound Policy, page 79). - Page 157 Administering Your Cisco RV180/RV180W Configuring Logging Configuring Email Logging Choose Administration > Logging > Remote Logging Configuration. STEP 1 Select the check box to enable e-mail logs. Then enter the following: STEP 2 • E-mail Server Address—Enter the IP address or Internet Name of an SMTP server.
-
Page 158: Configuring The Discovery Settings
Cisco RV180/RV180W advertises itself to all devices connected to it on VLAN 1, and devices joining the network can connect to the Cisco RV180/ RV180W. If you have other VLANs created on your network, you can enable Bonjour on those VLANs too. -
Page 159: Configuring Upnp
Cisco RV180/RV180W advertises itself to plug and play devices connected to it on VLAN 1, and plug and play devices joining the network can connect to the Cisco RV180/RV180W. If you have other VLANs created on your network, you can enable UPnP on those VLANs too. (See... -
Page 160: Configuring Time Settings
Administering Your Cisco RV180/RV180W Configuring Time Settings Configuring Time Settings You can configure your time zone, whether or not to adjust for Daylight Savings Time, and with which Network Time Protocol (NTP) server to synchronize the date and time. The router then gets its date and time information from the NTP server. To configure NTP and time settings: Choose Administration >... - Page 161 Administering Your Cisco RV180/RV180W Backing Up and Restoring the System During a restore operation, do not try to go online, turn off the router, shut down the CAUTION PC, or do anything else to the router until the operation is complete. This should take about a minute.
-
Page 162: Importing Csv Files
Administering Your Cisco RV180/RV180W Importing CSV Files Importing CSV Files You can import VPN client setting files that contain the username and passwords of clients in a Comma Separated Value (CSV) text file. You can use Excel to create a CSV file containing the VPN client settings. The file should contain one row for the headings and one or more rows for the VPN clients. - Page 163 IPSECUSER Code: 1 • Username - String • Password - String • UserType - boolean (0 - Standard Ipsec / 1 - Cisco Quick VPN) • AllowChangePassword - boolean "<SSLVPNUSER Code>", "<UserName>", "<FirstName>", "<LastName>", "<GroupName>", "<UserType>", "<UserTimeOut>", "<DenyLogin>", "<DenyLoginFromWan>", "<LoginFromIP>", "<LoginFromBrowser>", "<Password>"...
- Page 164 Administering Your Cisco RV180/RV180W Importing CSV Files Possible Values: • SSLVPNUSER Code: 0 • UserName - String • FirstName - String • LastName - String • GroupName - String • UserType - integer • UserTimeOut - integer • DenyLogin - boolean •...
-
Page 165: Upgrading Firmware
Administering Your Cisco RV180/RV180W Upgrading Firmware Upgrading Firmware During a firmware upgrade, do not try to go online, turn off the device, shut down CAUTION the PC, or interrupt the process in any way until the operation is complete. This process takes about a minute, including the reboot process. - Page 166 Administering Your Cisco RV180/RV180W Restoring the Factory Defaults To restore factory defaults to the router, choose Administration > Restore Factory Defaults. Click Default. Do not perform this procedure unless you want to erase all configuration you have CAUTION performed on the router.
- Page 167 Administering Your Cisco RV180/RV180W Restoring the Factory Defaults Cisco RV180/RV180W Administration Guide...
-
Page 168: Chapter 8: Viewing The Cisco Rv180/Rv180W Status
Cisco RV180/RV180W. • Viewing the Dashboard, page 159 • Viewing the System Summary, page 162 • Viewing the Wireless Statistics (Cisco RV180W), page 166 • IPsec Connection Status, page 167 • Viewing VPN Client Connection Status, page 168 •... - Page 169 Viewing the Cisco RV180/RV180W Status Viewing the Dashboard The view of the back panel shows you which ports are used (colored in green) and allows you to click the port to obtain information about the connection. • To view a port’s connection information, click the port.
- Page 170 Viewing the Cisco RV180/RV180W Status Viewing the Dashboard Syslog Summary Displays the number of events logged for these categories: • Emergency • Alert • Critical • Error • Warning To view the logs, click details. For more information see Viewing Logs, page 169.
-
Page 171: Viewing The System Summary
Wireless Networks Lists the status of the four wireless network SSIDs. To view the router’s wireless settings, click details. For more information see Viewing the Wireless Statistics (Cisco RV180W), page 166. Site-to-Site Tunnels Displays the connected IPSec VPN tunnels. Click to view the IPsec Connection Status page. - Page 172 Viewing the Cisco RV180/RV180W Status Viewing the System Summary If applicable, to change a system setting, click its corresponding Edit link. STEP 3 The System Summary page displays this information: System Information Host Name The name of the device. Firmware Version Current software version the device is running.
- Page 173 Viewing the Cisco RV180/RV180W Status Viewing the System Summary WAN (Internet) Information (IPv4) MAC Address The MAC address of the WAN port. Connection Time The time duration for which the connection is up. Connection Type Indicates if the WAN IPv4 address is obtained...
- Page 174 Viewing the Cisco RV180/RV180W Status Viewing the System Summary WAN (Internet) Information (IPv6) Connection Time The time duration for which the connection is up. Connection Type Indicates if the WAN IPv6 address is obtained dynamically through a DHCP server, assigned statically by the user, or obtained through a PPPoE/ PPTP/L2TP ISP connection.
-
Page 175: Viewing The Wireless Statistics (Cisco Rv180W)
Viewing the Cisco RV180/RV180W Status Viewing the Wireless Statistics (Cisco RV180W) Available Access Points Table This table displays the list of access points currently enabled on the router. It contains the following information: SSID The SSID (name) of the access point. -
Page 176: Ipsec Connection Status
Viewing the Cisco RV180/RV180W Status IPsec Connection Status Errors The number of received/sent packet errors reported to the radio, over all configured APs. Dropped The number of received/sent packets dropped by the radio, over all configured APs. Multicast The number of multicast packets sent over this radio. -
Page 177: Viewing Vpn Client Connection Status
Viewing the Cisco RV180/RV180W Status Viewing VPN Client Connection Status State The current status of the SA for IKE policies. The status can be IPsec SA Established or IPsec SA Not Established. Action Click Connect to establish an inactive SA connection. -
Page 178: Viewing Logs
The protocol the user uses, QuickVPN or PPTP. Disconnect Click to disconnect this user. Viewing Logs The View Logs page allows you to view the Cisco RV180/RV180W logs. To view the logs: Choose Status > View Logs. STEP 1 Click Refresh Logs to display the latest log entries. -
Page 179: Viewing Port Triggering Status
Viewing the Cisco RV180/RV180W Status Viewing Port Triggering Status From the Filter drop-down menu, choose the interface type. You can choose one STEP 2 of the following options: Displays a list of all devices connected to the router. Wireless Displays a list of all devices connected through the wireless interface. -
Page 180: Viewing Port Statistics
Viewing the Cisco RV180/RV180W Status Viewing Port Statistics The Port Triggering Status window provides information on the ports that have been opened per the port triggering configuration rules. The ports are opened dynamically whenever traffic that matches the port triggering rules flows through them. -
Page 181: Viewing Open Ports
Viewing the Cisco RV180/RV180W Status Viewing Open Ports The Port Statistics page displays this information: Port The name of the port. Status The status of the port (enabled or disabled). Operational Mode The bandwidth the port is operating at. Packets The number of received/sent packets per second. - Page 182 Viewing the Cisco RV180/RV180W Status Viewing Open Ports Cisco RV180/RV180W Administration Guide...
-
Page 183: Appendix A: Using Cisco Quickvpn For Windows 7, 2000, Xp, Or Vista
Using Cisco QuickVPN for Windows 7, 2000, XP, or Vista Overview This appendix explains how to install and use the Cisco QuickVPN software that can be downloaded from www.cisco.com. QuickVPN works with computers running Windows 7, 2000, XP, or Vista. (Computers using other operating systems will have to use third-party VPN software.) -
Page 184: Installing The Cisco Quickvpn Software
Installing the Cisco QuickVPN Software Installing the Cisco QuickVPN Software Installing from the CD-ROM Insert the Cisco RV180/RV180W CD-ROM into your CD-ROM drive. After the STEP 1 Setup Wizard begins, click the Install QuickVPN link. The License Agreement window appears. -
Page 185: Using The Cisco Quickvpn Software
Configuring VPN Users, page 121. In the Server Address field, enter the IP address or domain name of the Cisco RV180/RV180W. In the Port For QuickVPN field, enter the port number that the QuickVPN client will use to communicate with the remote VPN router, or keep the default setting, Auto. - Page 186 Using Cisco QuickVPN for Windows 7, 2000, XP, or Vista Using the Cisco QuickVPN Software If you clicked Change Password and have permission to change your own STEP 6 password, you will see the Connect Virtual Private Connection window. Enter your password in the Old Password field.
-
Page 187: Appendix B: Where To Go From Here
Where to Go From Here Cisco provides a wide range of resources to help you obtain the full benefits of the Cisco RV180/RV180W. Product Resources Support Cisco Small Business www.cisco.com/go/smallbizsupport Support Community Cisco Small Business www.cisco.com/go/smallbizhelp Support and Resources Phone Support Contacts www.cisco.com/en/US/support/...
Need help?
Do you have a question about the RV180 and is the answer not in the manual?
Questions and answers