Cisco RV180 Quick Start Manual
Vpn router; wireless-n multifunction router
Hide thumbs
Also See for RV180:
- Administration manual (187 pages) ,
- Administrator's manual (183 pages) ,
- Manual (14 pages)
Table of Contents
Advertisement
Quick Links
Quick Start Guide
Cisco Small Business
RV180 VPN Router
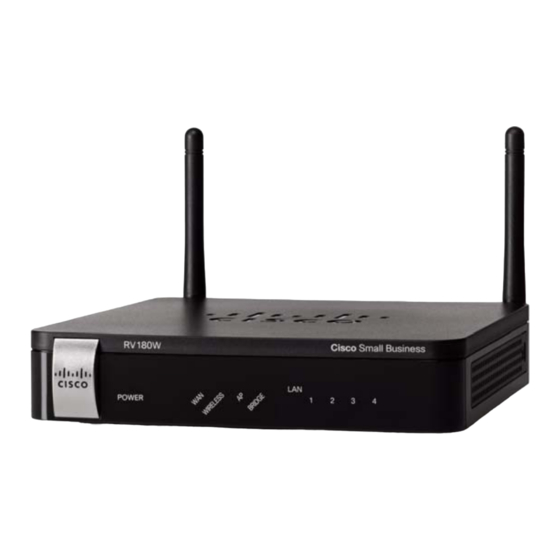
RV180W Wireless-N Multifunction Router
Package Contents
• Router
• Ethernet Cable
• Power Adapter
• Quick Start Guide
• Documentation and Software on CD-ROM
Version en français sur CD
Welcome
Thank you for choosing the Cisco Small Business RV180/RV180W router. The
Cisco RV180 & RV180W Wireless-N VPN Router provides simple, affordable,
highly secure, business-class connectivity to the Internet for small offices and
remote workers. The RV180W features multi-function operation allowing the
device to function as a wireless router, bridge, or access point. Both products
include 4-port Gigabit Ethernet LAN ports, a Gigabit Ethernet WAN port, and
an intuitive browser-based device manager.
Before You Begin
1
Before you begin the installation, make sure that you have the following
equipment and services:
• An active Internet account
• Ethernet cable for WAN (Internet) connection (provided).
• PC with functional network adapter (Ethernet connection) to run the Device
Manager. The Setup Wizard is supported on Microsoft Windows 2000,
Windows XP, Windows Vista, and Windows 7. The Device Manager is
Supported on Microsoft Internet Explorer 6.0 and later, Mozilla Firefox 3.0
and later, and Apple Safari 3.0 or later.
• (Optional) Ethernet cables for LAN interfaces to connect additional devices
to the Cisco RV180/RV180W.
You may need to contact your Internet Service Provider (ISP) to get more
information about your account if any of the following situations apply:
• You have a static IP address assigned to you by your ISP and you do not
know your IP address.
• You have a PPPoE, PPTP, or LT2P connection to the Internet and you do not
know your username or password for your account.
Mounting the RV180/RV180W
2
You can place your Cisco RV180/RV180W on a desktop or mount it on a wall.
Placement Tips
• Ambient Temperature—To prevent the router from overheating, do not
operate it in an area that exceeds an ambient temperature of 104°F (40°C).
• Air Flow—Be sure that there is adequate air flow around the router.
• Mechanical Loading—Be sure that the router is level and stable to avoid
any hazardous conditions.
For desktop placement, place the Cisco RV180/RV180W horizontally on a flat
surface so that it sits on its four rubber feet.
Wall Mounting
The Cisco RV180/RV180W can be wall-mounted. You will need two mounting
screws (not supplied) and drywall anchors (not supplied), if you are installing
the screws into wallboard. The dimensions for the screws are as follows:
1
3
2
4
1 0.30 to 0.32 in/
2 0.86 to 0.88 in/
3 0.26 to 0.28 in/
4 0.61 to 0.63 in/
7.7 to 8.2 mm
21.8 to 22.3 mm
6.5 to 7. 1 mm
15.5 to 16 mm
W
Insecure mounting might damage the device or cause injury. Cisco
ARNING
is not responsible for damages incurred by insecure wall-mounting.
To mount the router to the wall:
S
1
Determine where you want to mount the router. Verify that the surface
TEP
is smooth, flat, dry, and sturdy.
S
2
Drill two pilot holes into the surface 2-7/16 inches (61 mm) apart, and
TEP
with a minimum of 5. 1 2 inches (130 mm) of clearance.
Insert a screw into each hole, leaving a gap between the surface and
the base of the screw head of at least 0. 1 inches (3 mm).
2-7/16" (61 mm)
Place the router wall-mount slots over the screws and slide the router
S
TEP
3
down until the screws fit snugly into the wall-mount slots.
Connecting the Equipment
3
S
1
Power off your cable or DSL modem.
TEP
S
2
If your Ethernet cable from your DSL or cable modem is currently
TEP
connected to a device such as a router or PC, disconnect the cable
from the device and plug it into the port marked "WAN" on the RV180/
RV180W. The cable or DSL modem is now connected to the router.
S
3
Using the Ethernet cable included in the Cisco RV180/180W box,
TEP
connect one end of the cable to one of the LAN ports of the router. (In
this example, the LAN 1 port is used.) Connect the other end of the
cable to an Ethernet port on the PC that will be used to connect to the
Cisco RV180/180W Device Manager.
S
4
Power on the cable or DSL modem and wait until the connection is
TEP
active.
Advertisement
Table of Contents

Subscribe to Our Youtube Channel
Related Manuals for Cisco RV180


Summary of Contents for Cisco RV180
- Page 1 • Router Mounting the RV180/RV180W • Ethernet Cable • Power Adapter You can place your Cisco RV180/RV180W on a desktop or mount it on a wall. • Quick Start Guide • Documentation and Software on CD-ROM Placement Tips • Ambient Temperature—To prevent the router from overheating, do not operate it in an area that exceeds an ambient temperature of 104°F (40°C).
- Page 2 Device Manager. The LED is off when the wireless Cisco and the Cisco Logo are trademarks of Cisco Systems, Inc. and/or its affiliates in the U.S. and WAN Port—The WAN port is connected to your Internet device, such as a The Setup Wizard appears.
- Page 3 Small Business Support, Global: www.cisco.com/go/sbsc 78-19755-01 Cisco and the Cisco Logo are trademarks of Cisco Systems, Inc. and/or its affiliates in the U.S. and other countries. A listing of Cisco's trademarks can be found at www.cisco.com/go/trademarks. Third party trademarks mentioned are the property of their respective owners. The use of the word partner does not imply a partnership relationship between Cisco and any other company.
Need help?
Do you have a question about the RV180 and is the answer not in the manual?
Questions and answers