Table of Contents
Advertisement
Advertisement
Table of Contents

Related Manuals for Shark SE200 series


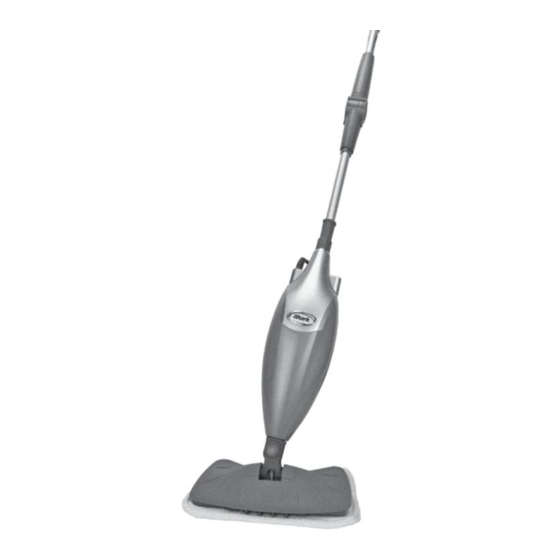
Summary of Contents for Shark SE200 series
- Page 1 SE200 series OWNER’S GUIDE WWW.SHARKCLEAN.COM...
-
Page 2: Important Safety Instructions
IMPORTANT SAFETY INSTRUCTIONS For Household Use Only WHEN USING YOUR SHARK STEAM 1. U se the system only for its ® intended use. MOP, BASIC SAFETY PRECAUTIONS SHOULD ALWAYS BE FOLLOWED, 2. DO NOT use outdoors. INCLUDING THE FOLLOWING: 3. D O NOT leave the appliance WARNING: unattended when plugged in. - Page 3 11. D O NOT unplug by pulling on 23. Keep your work area well lit. power cord. To unplug, grasp the 24 S tore steam mop indoors in a cool, plug not the power cord. Do not dry place. use extension cords or outlets 25. T o avoid circuit overload, do not with inadequate current carrying operate another appliance on the capacity. same socket (circuit) as the steam 12. D O NOT put any objects into cleaner. openings. Do not use with any 26. I f an extension cord is absolutely opening blocked. necessary, an extension cord rated 13. D O NOT put hands or feet under a minimum of 15 ampere, 14 gage the steam mop. Unit gets very hot. cord should be used. Cords rated 14. U se ONLY on flat, stable horizontal for less amperage may overheat.
-
Page 4: Quick Start
Quick Start fig. 2 fig. 1 fig. 3 ASSEMBLE FILL 1 Fit together the backsaver 3 Before plugging in the mop, handle (a) and lower pole (b). remove the cap to fill the water Insert the assembled pole into tank. Use the filling flask and the top of the mop as shown. funnel to fill the tank with water (fig. 1) to the “MAX” line. Replace the water tank cap. (fig. 3) 2 Place the micro-fiber cleaning pad underneath the mop head, with quick fastener strips facing up. Simply press the mop to the pad to attach it. (fig. 2) TOLL FREE: 1-800-798-7398... -
Page 5: Steam Cleaning
5 fig. 4 STEAM CLEANING BACKSAVER 4 Plug in the steam mop and the 5 Use the Shark ® Steam Mop STEAM light will blink blue in the with backsaver handle to standby mode. Press the STEAM access tight areas. Press button to activate the steam. The the release button on the LED indicator light will turn solid handle to bend and lock the blue. (fig. 4) steam mop in the backsaver position. Press the release button on the handle and pull up to straighten the handle. (fig. 5) www.sharkclean.com... -
Page 6: Specifications
This manual covers models: SE200 11 SE200Z 11 TECHNICAL SPECIFICATIONS Voltage: 120V., 60Hz. Power: 1550 Watts Water Capacity: 310 ml (10.5 fl. oz.) TOLL FREE: 1-800-798-7398... -
Page 7: Table Of Contents
Contents Thank you Getting started ................2 for purchasing Using your steam mop ............4 the Shark ® Care and storage of your steam mop ......7 Steam Mop. Troubleshooting ................9 Warranty and registration ............12 www.sharkclean.com... -
Page 8: Getting Started
Getting Started When assembling your steam mop there may be a little water in or around the water tank. This is because we test all our steam mops 100% before you buy them, so you get a quality Shark Steam ® Mop. fig. 3 fig. 1 fig. 2 ASSEMBLY Backsaver handle Lower Pole 1 R emove all the parts from the package. Verify all the listed parts Steam Mop are included. 2 All-Purpose Cleaning Pads 2 I nsert the lower pole into the Filling Flask Backsaver handle as shown. (fig. 1) Funnel 3 I nsert the assembled pole into the Steam Button base of the steam mop. Gently push... -
Page 9: Attaching The Micro-Fiber Pad
Your micro-fiber cleaning pads Calcium and mineral deposits can should be replaced every 2-3 build up and impact the performance months to maximize cleaning of your steam mop over time. To performance. extend the life of your product we recommend that you use distilled water or Shark ’s Water Filtration ® Bottle. Visit www.sharkclean.com to order. fig. 4 fig. 5 fig. 6 fig. 3 ATTACHING THE MICRO-FIBER PAD FILLING THE WATER TANK 1 P lace the micro-fiber cleaning pad I MPORTANT: Unplug the Steam Mop before filling the water tank. (fig. 4) on the floor with the quick fastener strips facing up. Place the Steam 1 R emove the water tank cap by Mop on the top of the pad to attach. -
Page 10: Using Your Steam Mop
I MPORTANT: Your steam mop needs 1 P ull and twist the quick release cord water to make steam! Never use your holder to unwrap the power cord completely. (fig. 1) Plug into a 120-volt steam mop without water in the tank. electrical outlet. (fig. 2) The LED light S weep or vacuum your floors prior to will blink blue to show that you are in cleaning with your Steam Mop. standby mode. If the light does not V isit www.sharkclean.com for other turn on, reference the troubleshooting great quick cleaning products to section on page 9. (fig. 3) complement your Steam Mop, such as 2 P ress the STEAM button to activate the Shark ® Navigator (model NV350). the steam. The LED light will turn solid blue. When the STEAM button is pressed, the electronic pump will automatically generate steam and moisten the micro-fiber pad. (fig. 4) TOLL FREE: 1-800-798-7398... - Page 11 If your Steam Mop stops steaming, it could be out of water. Press the STEAM button so that the LED light blinks BLUE, unplug the power cord from the electrical outlet and refill the water tank at anytime. fig. 4 fig. 5 N OTE: It may take a few seconds for the mop to warm up and and start steaming after you plug it in. If you press the STEAM button and the unit does not begin to steam immediately, just wait a few seconds for the mop to heat up to a deep cleaning and sanitizing temperature. 3 C lean your floors with a forward and backward motion. (fig. 5) 4 P ress the STEAM button at any time to stop the steam. www.sharkclean.com...
-
Page 12: Backsaver Feature
Using Your Steam Mop - cont’d fig. 7 fig. 6 BACKSAVER FEATURE 1 C lean under furniture and tight areas Backsaver™ locking using the Shark ® handle. Press the handle release button and apply slight pressure to bend the handle. The Shark ® Backsaver™ joint will lock at a perfect, access maximizing angle. (fig. 6) 2 P ress the release button on the handle again and pull up to straighten. (fig. 7) TOLL FREE: 1-800-798-7398... -
Page 13: Steam Mop
Care of Your Steam Mop fig. 1 fig. 3 fig. 2 AFTER USE AND STORAGE 4 T o store the cooled Shark Steam ® Mop, hang on a large hook. (fig. 3) 1 W hen you have finished using the Steam Mop, press the STEAM button N OTE: If you want to store the Steam to stop the unit from steaming. The Mop standing upright, make sure it LED light will blink BLUE. Unplug the is leaning against a wall for added cord from the outlet and place the support and safety. Always store your mop into the upright position. (fig. 1) Shark Steam Mop with the micro- ®... - Page 14 Care of Your Steam Mop - cont’d. fig. 4 fig. 5 ORDERING REPLACEMENT PARTS CARE OF YOUR MICRO-FIBER CLEANING PAD T o order additional parts and accessories, feel free to contact 1 W ash pads in warm water. Wash us at www.sharkclean.com or separately from other laundry. Only call 1-800-798-7398. use liquid detergent (not powder detergent). Do not use fabric softeners. Line dry or dry on a low dryer setting. (fig. 4) 2 I f there are loose threads on the pad carefully cut the threads with scissors. Do not pull on them or cut at the base. (fig.
-
Page 15: Troubleshooting
Trouble Shooting PROBLEM POSSIBLE REASONS & SOLUTIONS Your steam mop should be securely plugged into a 120V AC electrical outlet only. The Steam Mop will Is the LED light on? If not, check your fuse or breaker. not turn-on. If your unit still does not work, call 1-800-798-7398. Is there water in the water tank? If not, add water to your The Steam Mop will Steam Mop following instructions on page 3. not make steam. Is the LED light blinking BLUE? If so, press the STEAM button to activate the steam. If you have already plugged in your unit, unplug and try a different outlet. This may reset the mop. Cannot select steam Add water to the tank and press the STEAM button to setting/flashing blue begin cleaning. light remains on. If your unit still does not work, call Customer care at 1-800-798-7398. The Steam Mop leaves Is your micro-fiber cleaning pad too wet? Unplug your Steam Mop and change the micro-fiber cleaning pad. water on the floor. Do not leave your steam mop on the floor with a damp or wet cleaning pad. The Steam Mop left a white spot on Do you have hard water? If you do, you might want to switch to distilled water. - Page 16 Notes TOLL FREE: 1-800-798-7398...
- Page 17 Notes www.sharkclean.com...
-
Page 18: Warranty And Registration
ONE (1) YEAR LIMITED WARRANTY EURO-PRO Operating LLC warrants this product to be free from defects in material and workmanship for a period of one (1) year from the date of the original purchase, when utilized for normal household use, subject to the following conditions, exclusions and exceptions. If your appliance fails to operate properly while in use under normal household conditions within the warranty period, return the complete appliance and accessories, freight prepaid. For Customer Service support, call 1 (800) 798-7398 or visit our website www.sharkclean.com. If the appliance is found to be defective in material or workmanship, EURO-PRO Operating LLC will repair or replace it free of charge. Proof of purchase date and $ 9.95 to cover the cost of return shipping and handling must be included. * The liability of EURO-PRO Operating LLC is limited solely to the cost of the repair or replacement of the unit at our option. This warranty does not cover normal wear of parts and does not apply to any unit that has been tampered with or used for commercial purposes. This limited warranty does not cover damage caused by misuse, abuse, negligent handling or damage due to faulty packaging or mishandling in transit. This warranty does not cover damage or defects caused by or resulting from damages from shipping or repairs, service or alterations to the product or any of its parts, which have been performed by a repair person not authorized by EURO-PRO Operating LLC. This warranty is extended to the original purchaser of the unit and excludes all other legal and/ or conventional warranties. The responsibility of EURO-PRO Operating LLC warranty if any, is limited to the specific obligations expressly assumed by it under the terms of the limited warranty. In no event is EURO-PRO Operating LLC liable for incidental or consequential damages of any nature whatsoever. Some states/provinces do not permit the exclusion or limitation of incidental or consequential damages, so the above may not apply to you. - Page 19 Notes www.sharkclean.com...
- Page 20 U.S.: EURO-PRO Operating LLC Newton, MA 02459 Canada: EURO-PRO Operating LLC 4400 Bois Franc Ville St. Laurent, Québec H4S 1A7 1-800-798-7398 www.sharkclean.com COPYRIGHT© EURO-PRO OPERATING LLC 2011 PRINTED IN CHINA SE200.E.110415 Illustrations may differ from actual product. US Patent No. D575918...
Need help?
Do you have a question about the SE200 series and is the answer not in the manual?
Questions and answers