NETGEAR PS121 Start Here
Usb mini print server
Hide thumbs
Also See for PS121:
- User manual (52 pages) ,
- Installation manual (7 pages) ,
- Specification sheet (2 pages)
Advertisement
Quick Links
Start Here
Follow these instructions to set up your PS121 USB Mini Print Server.
Verify Printer and Network Readiness
Assure that the following are available:
•
You have a working Ethernet network running TCP/IP with at least one
Windows 98SE, Me, 2000, or XP PC.
•
You have a printer with a USB port.
•
You may also need to have your printer driver software handy. For most popular
printers, Windows already has the printer driver software available.
First, Connect the PS121
1. C
PS121
.
ONNECT THE
TO YOUR PRINTER
a. Connect the supplied USB cable (A) from the PS121 to your printer.
A
b. Turn on your printer.
2. C
PS121
.
ONNECT THE
TO YOUR NETWORK
a. Insert one end of an Ethernet cable (B) into an open Ethernet port in the
network device like a hub, switch, or router.
B
C
b. Insert the other end (C) into the Ethernet port on the PS121.
c. Connect the 9v power cord to the PS121, and plug it into a power source.
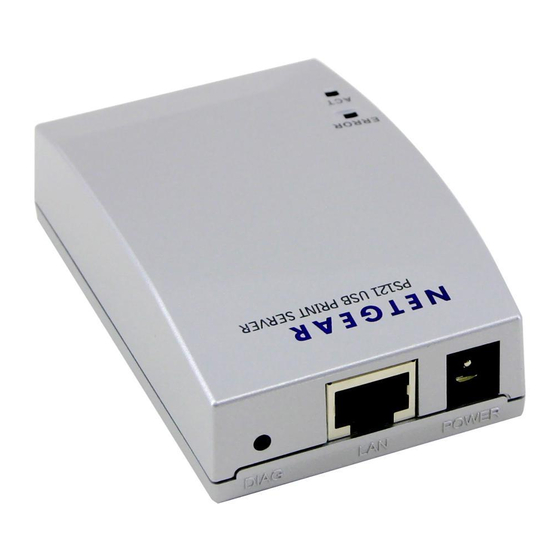
d. Check the PS121 status lights and verify the following:
•
ACT light: When the print server is powered on, the ACT light will blink
then turn solid green.
•
ERROR light: The ERROR light should be off.
Your PS121 and printer are now connected to your network!
Now, Install and Configure the PS121 Software
1. I
PS121
.
NSTALL THE
SOFTWARE
a. Power on your PC, let the operating system boot up completely, and log in as
needed.
b. Insert the Resource CD for the PS121 into your CD-ROM drive. The CD
main page shown below will load. Click Install Software.
c. Follow the InstallShield Wizard steps, and click Finish when done.
2. R
P
S
UN THE NETWORK
RINT
ERVER
Note: The factory default network setting for initial setup of the PS121 is to
automatically get its TCP/IP network configuration via DHCP. If your network
does not use DHCP, you can refer to Reference Manual on the PS121 Resource
CD for help with manually the configuring the PS121.
a. When your computer restarts, you will be prompted to run the Print Server
Setup Wizard. Click Finish to finish the software installation. The Print
Server Setup Wizard screen will display.
b. Click Next to proceed. The Print Server Wizard will now search your
network for the PS121.
If the Print Server Setup Wizard cannot find your PS121, check the USB
cable connections, the network cable connections, and the status lights on
the PS121. Then, click the Refresh button.
c. Click Next to proceed to the device name screen. Change the print server
name to a more descriptive name if you like. Click Next to proceed.
d. The Print Server Setup Wizard displays the TCP/IP address information
automatically assigned to it by your network PS121. Click Next to proceed.
Note: Failure to set a valid fixed IP address for the PS121 will prevent it
from functioning reliably. The Print Server Setup Wizard suggested IP
address will usually work fine. The Reference Manual explains this fully.
e. Click Finish to end the Print Server Setup Wizard.
3. R
A
P
P
W
UN THE
DD
RINTER
ORT
IZARD FOR EACH
Warning: Print manager software from Epson and from some HP printers can
block communications between your PC and the PS121. Uninstall such print
manager software before proceeding with the Add Printer Port Wizard.
S
W
ETUP
IZARD
PC
Advertisement

Related Manuals for NETGEAR PS121


Summary of Contents for NETGEAR PS121
- Page 1 Insert the other end (C) into the Ethernet port on the PS121. network for the PS121. c. Connect the 9v power cord to the PS121, and plug it into a power source. d. Check the PS121 status lights and verify the following: •...
- Page 2 DHCP server. Typically IP addresses between 200 to 250 are outside the Use the PS121 Resource CD to run the Add Printer Port Wizard to set up each c. Click Next to proceed to the Port/Printer name screen. Take note of the range of DHCP servers found on home networks.
Need help?
Do you have a question about the PS121 and is the answer not in the manual?
Questions and answers