
Related Manuals for Allied Telesis AT-RPS3000


Summary of Contents for Allied Telesis AT-RPS3000
-
Page 1: Installation Guide
AT-RPS3000 Redundant Power Supply AT-RPS3000 AT-PWR250 AT-PWR800 AT-PWR1200 2179 Installation Guide 613-001498 Rev. B... - Page 2 Allied Telesis, Inc. has been advised of, known, or should have known, the...
- Page 3 Electrical Safety and Emissions Standards This product meets the following standards. U.S. Federal Communications Commission Radiated Energy Note: This equipment has been tested and found to comply with the limits for a Class A digital device pursuant to Part 15 of FCC Rules.
- Page 4 Translated Safety Statements Important: The indicates that translations of the safety statement are available in the PDF document “Translated Safety Statements” posted on the Allied Telesis website at www.alliedtelesis.com.
-
Page 5: Table Of Contents
Power Module LED ............................ 46 On/Off Power Switches ............................ 47 Guidelines................................. 48 Chapter 2: Installing the AT-RPS3000 Chassis and Power Supply Modules ........... 49 Reviewing Safety Precautions.......................... 50 Planning the Installation ........................... 52 Unpacking the AT-RPS3000 Chassis and Power Supply Modules..............54 AT-RPS3000 Chassis .......................... - Page 6 Installing the AT-RPS3000 Chassis in an Equipment Rack................58 Installing a Power Supply Module ........................61 Connecting the AT-RPS3000 Chassis to the x610 Series Switch ..............65 Powering On the Power Supply Modules ......................69 Chapter 3: Removing Power Supply Modules ..................... 75 Removing the AT-RPS-CBL1.0 Cable ......................
- Page 7 Figure 23: Two AT-PWR1200 Modules Providing Up to 780 Watts, with Full Redundancy..........38 Figure 24: Two AT-PWR1200 Modules for 780 to 1560 Watts, with Limited Redundancy ..........39 Figure 25: Example of x610 Series Switches and AT-RPS3000 Chassis with Different Power Supply Modules ....40 Figure 26: LED Panel ................................42 Figure 27: Module A Ports LEDs ............................42...
- Page 8 Figure 54: Checking the FAN and DC OUT LEDs in the LED Panel ..................72 Figure 55: Checking the LOAD and CABLE LEDs in the LED Panel ...................73 Figure 56: Loosening the Thumbscrews that Secure the AT-RPS-CBL1.0 Cable to the AT-RPS3000 Chassis....76 Figure 57: Removing the AT-RPS-CBL1.0 Cable from the AT-RPS3000 Chassis...............77 Figure 58: Raising the Power Cord Retaining Clip .......................78...
- Page 9 Tables Table 1: Power Supply Modules ............................19 Table 2: Valid and Invalid Power Supply Combinations in the AT-RPS3000 Chassis ............20 Table 3: Low-power and High-power Switches ........................24 Table 4: Valid and Invalid Configurations of Low- and High-power Switches for a Power Supply Module ......24 Table 5: Power Supply Module Combinations for PoE+ Switches ..................40...
- Page 10 Tables...
-
Page 11: Preface
Preface This guide contains the installation instructions for the AT-RPS3000 Chassis. The chassis is a modular power supply system for the x610 Series of Layer 3 Gigabit Ethernet switches. This preface contains the following sections: “Document Conventions” on page 12 ... -
Page 12: Document Conventions
Preface Document Conventions This document uses the following conventions: Note Notes provide additional information. Caution Cautions inform you that performing or omitting a specific action may result in equipment damage or loss of data. Warning Warnings inform you that performing or omitting a specific action may result in bodily injury. -
Page 13: Where To Find Web-Based Guides
AT-RPS3000 Redundant Power Supply Installation Guide Where to Find Web-based Guides The installation and user guides for all of the Allied Telesis products are available for viewing in portable document format (PDF) from our web site at www.alliedtelesis.com/support/documentation. -
Page 14: Contacting Allied Telesis
Select your country from the list displayed on the website and Support then select the appropriate menu tab. Warranty For hardware warranty information, refer to the Allied Telesis web site at www.alliedtelesis.com/support. Returning Products for return or repair must first be assigned a return materials authorization (RMA) number. -
Page 15: Chapter 1: Overview
Chapter 1 Overview This chapter contains the following sections: “Features” on page 16 “Power Supply Modules” on page 19 “System Power and Power for PoE+” on page 21 “Low-power and High-power Switches” on page 24 “Configuration Examples” on page 25 ... -
Page 16: Features
Chapter 1: Overview Features The AT-RPS3000 Chassis is a modular power supply system for the x610 Series of Layer 3 Gigabit Ethernet switches. It protects the switches from power supply failures and provides additional PoE+ power. The chassis can support two or four x610 Series switches, depending on the switch model. -
Page 17: Power Supply Slots
AT-RPS3000 Redundant Power Supply Installation Guide Power Supply The slots on the back panel of the chassis are for two power supply modules. The slots are labeled A and B. Slots SYSTEM SYSTEM PoE+ / SYSTEM PoE+ / SYSTEM MODULE A... -
Page 18: Figure 4: Slot B And Rps 3 And 4 Ports
Chapter 1: Overview RPS 3 and 4 ports obtain power from the power supply module in slot B. SYSTEM SYSTEM PoE+ / SYSTEM PoE+ / SYSTEM MODULE A MODULE B 2166 RPS 3 and 4 ports Slot B Figure 4. Slot B and RPS 3 and 4 Ports The ports are labeled System and PoE+/System ports. -
Page 19: Power Supply Modules
Power Supply Modules This table lists the power supply modules that are currently available for the AT-RPS3000 Chassis and PoE+ x610 Series switches. One module supplies only system power to the x610 Series switches and two modules provide system power and PoE+ power. -
Page 20: Table 2: Valid And Invalid Power Supply Combinations In The At-Rps3000 Chassis
Chapter 1: Overview The power supply modules for the AT-RPS3000 Chassis and PoE+ x610 Series switches must be purchased separately. Non-PoE+ x610 Series switches come with non-removable power supply modules. Note The AT-PWR800 and AT-PWR1200 Modules are compatible with non-PoE+ x610 Series switches. They may be used in the AT-RPS3000 Chassis to provide active system power to non-PoE+ switches. -
Page 21: System Power And Power For Poe
PoE+. The switch may obtain its system power either from its own internal power supply module or from a module in the AT-RPS3000 Chassis. There is no load-sharing of system power. Consequently, one of the sources is going to be actively providing system power to the switch while the other source is held in a redundant state. -
Page 22: Poe+ Power
AT-RPS3000 Chassis. System power for PoE+ and non-PoE+ x610 Series switches is provided by all four RPS ports on the AT-RPS3000 Chassis. RPS 1 and 3 System ports provide only system power, and RPS 2 and 4 PoE+/System ports provide PoE+ power in addition to system power. - Page 23 This assumes, of course, that both supplies have PoE+ power. So, in essence, the AT-RPS3000 Chassis performs two roles for PoE+ switches. It acts as a redundant source of system power for the switches and, assuming the chassis has PoE+ power supplies, actively provides them with additional power for PoE+ so that they can support more powered devices.
-
Page 24: Low-Power And High-Power Switches
A power supply module that is connected to an invalid configuration may overload and fail. The responsibility for adhering to the rule belongs to the installer because the AT-RPS3000 Chassis cannot determine the low- or high-power status of the switches connected... -
Page 25: Configuration Examples
Switch places its non-removable, internal power supply module in a redundant state, and receives all of its system power from the AT-RPS3000 Chassis and the power module in slot A. If there is an interruption of system power from the chassis, the switch automatically activates its internal power supply to maintain network operations. -
Page 26: Figure 8: Example Of A Non-Poe+, Low-Power Switch Connected To An Rps Poe+/System Port
Chapter 1: Overview AT-RPS3000 Chassis DC OUT AT-PNL800/1200 FAULT 100-240 VAC~12A MAX SYSTEM SYSTEM with One Power Supply PoE+ / SYSTEM PoE+ / SYSTEM MODULE A MODULE B Slot A Slot B RPS 2 PoE+/System Port AT-x610-24Ts Switch (Low-power) WARNING This unit may have more than one power input. -
Page 27: Figure 10: Example Of Four Low-Power Switches
AT-RPS3000 Redundant Power Supply Installation Guide The chassis must have a second power supply to support three or four low-power switches, as illustrated in the following example. The power module in slot A supports switches 1 and 2, and the module in slot B powers switches 3 and 4. -
Page 28: High-Power Switches
2136 Figure 11. Example of Low-power and High-power Switches When a high-power, non-PoE+ switch is connected to the AT-RPS3000 Chassis, it responds just like a low-power switch. It places its internal power supply in the redundant state and draws its system power from the chassis. -
Page 29: Figure 12: Example Of Two High-Power Switches On The System Ports
AT-RPS3000 Redundant Power Supply Installation Guide AT-RPS3000 Chassis DC OUT DC POWER FAULT FAULT with Two Power Supplies 100-240 VAC~12A MAX 100-240 VAC~12A MAX SYSTEM SYSTEM PoE+ / SYSTEM PoE+ / SYSTEM MODULE A MODULE B Slot A Slot B... -
Page 30: Poe+ Switches
Chapter 1: Overview PoE+ Switches Here is an example of the AT-RPS3000 Chassis supporting a single PoE+ switch, the AT-x610-24Ts/X-POE+ Switch. Notice that the switch is connected to RPS 2 PoE+/System port on the chassis so that it receives both system and PoE+ power from the power module in slot A. It would receive only system power if it was connected to RPS 1 System port. -
Page 31: Figure 15: Example Of Two Poe+ Switches
AT-RPS3000 Redundant Power Supply Installation Guide RPS 2 PoE+/System Port AT-RPS3000 Chassis DC OUT DC POWER FAULT FAULT with Two Power Supplies 100-240 VAC~12A MAX 100-240 VAC~12A MAX SYSTEM SYSTEM PoE+ / SYSTEM PoE+ / SYSTEM MODULE A MODULE B... -
Page 32: Figure 16: Example Of Low-Power Poe+ And Non-Poe+ Switches
Chapter 1: Overview AT-RPS3000 Chassis DC OUT AT-PNL800/1200 FAULT with One Power Supply 100-240 VAC~12A MAX SYSTEM SYSTEM PoE+ / SYSTEM PoE+ / SYSTEM MODULE A MODULE B Slot A Slot B AT-x610-24Ts Switch (Low-power) WARNING This unit may have more than one power input. To reduce the risk of... -
Page 33: Invalid Configurations
AT-RPS3000 Redundant Power Supply Installation Guide AT-RPS3000 Chassis DC OUT DC OUT with Two Power Supplies FAULT FAULT 100-240 VAC~12A MAX 100-240 VAC~12A MAX SYSTEM SYSTEM PoE+ / SYSTEM PoE+ / SYSTEM MODULE A MODULE B Switches supported by the Power... -
Page 34: Figure 18: Example Of An Invalid Configuration - A
Chapter 1: Overview AT-RPS3000 Chassis DC OUT AT-PNL800/1200 with One Power Supply FAULT 100-240 VAC~12A MAX SYSTEM SYSTEM PoE+ / SYSTEM PoE+ / SYSTEM MODULE A MODULE B Slot A Slot B AT-x610-24Ts Switch (Low-power) WARNING This unit may have more than one power input. To reduce the risk of... -
Page 35: Figure 19: Example Of An Invalid Configuration - B
AT-RPS3000 Redundant Power Supply Installation Guide AT-RPS3000 Chassis DC OUT AT-PNL800/1200 with One Power Supply FAULT 100-240 VAC~12A MAX SYSTEM SYSTEM PoE+ / SYSTEM PoE+ / SYSTEM MODULE A MODULE B Slot A Slot B AT-x610-24Ts Switch (Low-power) WARNING This unit may have more than one power input. To reduce the risk of... -
Page 36: Choosing A Power Supply Module
Series switches and AT-RPS3000 Chassis. Non-PoE+ You may use any of the three available power supply modules listed in Table 1 on page 19, even the two PoE+ modules, in the AT-RPS3000 Switches Chassis to provide active system power to non-PoE+ switches. The switches may be connected to any of the four RPS connectors on the chassis. -
Page 37: Poe+ Switches
AT-RPS3000 Redundant Power Supply Installation Guide PoE+ Switches The PoE+ switches do not come with power supplies. You must purchase them separately and install them as part of the switch’s installation procedure. The only way to determine which power module is appropriate for a PoE+ switch is to determine the amount of power the powered devices connected to the switch will require. -
Page 38: Figure 22: Two At-Pwr800 Modules For 480 To 960 Watts, With Limited Redundancy
Chapter 1: Overview DC OUT AT-PNL800/1200 AT-RPS3000 Chassis FAULT 100-240 VAC~12A MAX SYSTEM SYSTEM PoE+ / SYSTEM PoE+ / SYSTEM MODULE A MODULE B AT-PWR800 Module AT-x610-24Ts/X-POE+ DC OUT WARNING FAULT This unit may have more than one power input. To reduce the risk of... -
Page 39: Figure 24: Two At-Pwr1200 Modules For 780 To 1560 Watts, With Limited Redundancy
AT-RPS3000 Redundant Power Supply Installation Guide Two AT-PWR1200 Modules may be used for amounts above 780 watts, up to 1560 watts, but there is no redundancy for power requirements above 780 watts. AT-RPS3000 Chassis AT-PNL800/1200 DC OUT FAULT 100-240 VAC~16A MAX... -
Page 40: Power Module Combinations For Poe+ Switches
PoE+ switches. It lists the various combinations of power Combinations for modules for the switch and AT-RPS3000 Chassis, and the available PoE+ PoE+ Switches power. It should be noted that it does not matter which module is in the switch and which is in the chassis. - Page 41 AT-RPS3000 Redundant Power Supply Installation Guide Table 5. Power Supply Module Combinations for PoE+ Switches Range of PoE+ Range of PoE+ Power Supply Power Supply System Power Power with Power without Module 1 Module 2 Redundancy Redundancy Redundancy AT-PWR800 None...
-
Page 42: Leds
Chapter 1: Overview LEDs On the front panel of the AT-RPS3000 Chassis is an LED panel that displays status information about the power supply modules and RPS ports. 2148 LED Panel Figure 26. LED Panel Module A/B Ports The LEDs in the Module A Ports section of the LED panel provide... -
Page 43: Figure 28: Module B Ports Leds
AT-RPS3000 Redundant Power Supply Installation Guide The LEDs in the Module B Ports section provide information you may use to monitor RPS ports 3 and 4, whose power is provided by the power supply module in slot B. DC OUT... -
Page 44: Power Module Status Leds
Chapter 1: Overview Table 6. Module A and B Ports LEDs (Continued) State Description CABLE Green The RPS port is enabled and connected to an x610 Series switch, and the power supply module is powered on. Amber The RPS port is not connected to an x610 Series switch. -
Page 45: Table 7: Power Module Status Leds
AT-RPS3000 Redundant Power Supply Installation Guide Table 7 describes the Power Module Status LEDs. Table 7. Power Module Status LEDs State Description Green The power module’s fans are operating normally. Amber One or both fans in the module have stopped or are operating below their normal operating speed. -
Page 46: Power Module Led
Chapter 1: Overview Power Module The power modules have a DC OUT/FAULT LED, shown in Figure 30 on page 46, that displays the same information as the DC OUT LEDs on the front panel. DC OUT FAULT 100-240 VAC~12A MAX DC OUT DC OUT FAULT... -
Page 47: On/Off Power Switches
Turning off an RPS port stops the transmission of system power. The switch that is connected to the RPS port will stop functioning if it is completely dependent on the AT-RPS3000 Chassis for its system power, either because its internal power supply has failed or been removed. -
Page 48: Guidelines
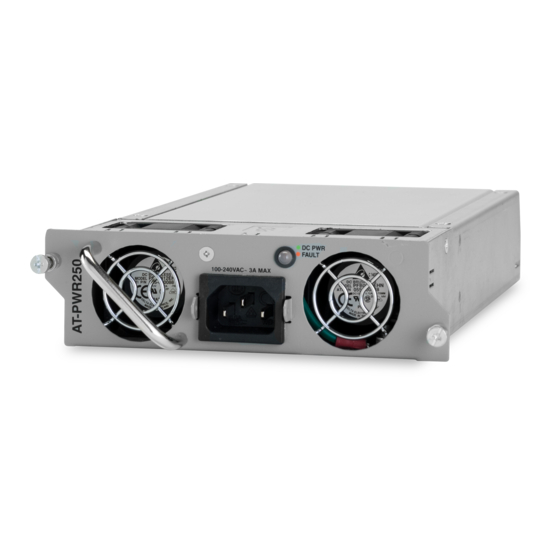
The power supply in the switch does not have to be the same type as the power supply in the AT-RPS3000 Chassis. For example, a switch that contains the AT-PWR250 Module may be connected to an AT-PWR1200 Module in the AT-RPS3000 Chassis. -
Page 49: Chapter 2: Installing The At-Rps3000 Chassis And Power Supply Modules
“Planning the Installation” on page 52 “Unpacking the AT-RPS3000 Chassis and Power Supply Modules” on page 54 “Selecting a Location for the AT-RPS3000 Chassis in the Equipment Rack” on page 57 “Installing the AT-RPS3000 Chassis in an Equipment Rack” on ... -
Page 50: Reviewing Safety Precautions
Chapter 2: Installing the AT-RPS3000 Chassis and Power Supply Modules Reviewing Safety Precautions Please review the following safety precautions before installing the unit. Note The indicates that a translation of the safety statement is available in a PDF document titled “Translated Safety Statements” (613- 000405) posted on the Allied Telesis website at www.alliedtelesis.com. - Page 51 AT-RPS3000 Redundant Power Supply Installation Guide Circuit Overloading: Consideration should be given to the connection of the equipment to the supply circuit and the effect that overloading of circuits might have on overcurrent protection and supply wiring. Appropriate consideration of equipment nameplate ratings should be used when addressing this ...
-
Page 52: Planning The Installation
adequate space for the AT-RPS3000 Chassis. For further information, refer to “Selecting a Location for the AT-RPS3000 Chassis in the Equipment Rack” on page 57. Check that the rack is safely secured and will not tip over. Devices in a ... - Page 53 AT-RPS3000 Redundant Power Supply Installation Guide Do not expose the chassis to moisture or water. Make sure the site is a dust-free environment. Use dedicated power circuits or power conditioners to supply reliable electrical power to the network devices.
-
Page 54: Unpacking The At-Rps3000 Chassis And Power Supply Modules
Chapter 2: Installing the AT-RPS3000 Chassis and Power Supply Modules Unpacking the AT-RPS3000 Chassis and Power Supply Modules Refer to the tables in this section to verify the contents of the shipping containers of the AT-RPS3000 Chassis and power supply modules. -
Page 55: Power Supply Modules
2189 Note The AT-RPS3000 Chassis is connected to an x610 Series switch with the AT-RPS-CBL1.0 cable. The cable must be purchased separately. You will need one cable for each x610 Series switch. Power Supply Refer to this table to verify the items in the shipping containers of the power supply modules. - Page 56 Chapter 2: Installing the AT-RPS3000 Chassis and Power Supply Modules Table 10. Power Supply Module Components (Continued) Power Supply Power Cord Regional Power Module Module Retaining Clip Cord AT-PWR1200 None. DC OUT FAULT 100-240VAC~ 16A MAX 2187 Note The power cord that comes with the AT-PWR1200 Power Supply...
-
Page 57: Selecting A Location For The At-Rps3000 Chassis In The Equipment Rack
Selecting a Location for the AT-RPS3000 Chassis in the Equipment Rack The AT-RPS3000 Chassis has to be installed in the same equipment rack as the x610 Series switches. You may install it above, below, or between the switches. This may require relocating networking equipment to other equipment racks if there is currently no available space for the chassis in the rack. -
Page 58: Installing The At-Rps3000 Chassis In An Equipment Rack
Chapter 2: Installing the AT-RPS3000 Chassis and Power Supply Modules Installing the AT-RPS3000 Chassis in an Equipment Rack Perform this procedure to install the chassis in a 19-inch equipment rack. The procedure requires the following items: Twelve bracket screws (included with chassis) ... -
Page 59: Figure 37: Attaching The Equipment Rack Brackets
Figure 37. Attaching the Equipment Rack Brackets 5. Have another person hold the unit in the equipment rack while you secure it using standard screws (not provided). 2151 Figure 38. Mounting the AT-RPS3000 Redundant Power Supply in an Equipment Rack... - Page 60 Chapter 2: Installing the AT-RPS3000 Chassis and Power Supply Modules Note The chassis and x610 Series switches must be within one meter of each other in the equipment rack to accommodate the AT-RPS-CBL1.0 cables. 6. Go to “Installing a Power Supply Module” on page 61.
-
Page 61: Installing A Power Supply Module
AT-RPS3000 Redundant Power Supply Installation Guide Installing a Power Supply Module To install a power supply unit module in the chassis, perform this procedure: 1. Using a cross-head screwdriver, remove the three screws that secure the blank shipping panel, from the back panel of the chassis. -
Page 62: Figure 40: Installing A Power Supply Module
Chapter 2: Installing the AT-RPS3000 Chassis and Power Supply Modules 100 -24 100 -24 0 VAC DC OU 0 VAC DC OU ~12 A MA X MA X AT-PWR250 Module AT-PWR800 Module 100 -24 DC OU 0 VAC ~16 A... -
Page 63: Figure 41: Securing A Power Supply Module
AT-RPS3000 Redundant Power Supply Installation Guide 3. Secure the module to the chassis by tightening the two captive screws. 100 -24 DC OU 0 VAC ~12 A FA UL MA X SY ST Po E+ / SY SY ST ST EM... -
Page 64: Figure 43: Installing The Slot Cover
Chapter 2: Installing the AT-RPS3000 Chassis and Power Supply Modules 6. If the unit is to have only one power supply module, cover the empty slot with one of the slot covers, labelled AT-PNL250 and AT-PNL800/ 1200, provided with the unit, as shown in Figure 43 on page 64. -
Page 65: Connecting The At-Rps3000 Chassis To The X610 Series Switch
AT-RPS3000 Redundant Power Supply Installation Guide Connecting the AT-RPS3000 Chassis to the x610 Series Switch Perform this procedure to connect the AT-RPS3000 Chassis to the x610 Series switch, with the AT-RPS-CBL1.0 cable: Note The AT-RPS-CBL1.0 cables must be purchased separately. -
Page 66: Figure 46: Securing The At-Rps-Cbl1.0 Cable To The Switch
Off button to turn off the port. The LED should turn off. For example, if you intend to connect the DC RPS cable to port 3 on the AT-RPS3000 Chassis, check the CABLE LED for port 3. If the LED is on, press the port’s On/Off button to disable the port. -
Page 67: Figure 48: Connecting The At-Rps-Cbl1.0 Cable To The At-Rps3000 Chassis
/ SY / SY / SY ST EM ST EM ST EM M O D M O D M O D U L E U L E U L E Figure 48. Connecting the AT-RPS-CBL1.0 Cable to the AT-RPS3000 Chassis... -
Page 68: Figure 49: Securing The At-Rps-Cbl1.0 Cable To The At-Rps3000 Chassis
Chapter 2: Installing the AT-RPS3000 Chassis and Power Supply Modules 5. Secure the cable to the port by tightening the two thumbscrews. 100 -24 DC OU 0 VAC ~12 A MA X FA UL 100 -24 DC OU 0 VAC... -
Page 69: Powering On The Power Supply Modules
AT-RPS3000 Redundant Power Supply Installation Guide Powering On the Power Supply Modules Perform this procedure to power on the power supply modules in the AT-RPS3000 Chassis: 1. For the AT-PWR250 or AT-PWR800 Module, raise the power cord retaining clip on the power supply module. -
Page 70: Figure 51: Connecting The Ac Power Cord
Chapter 2: Installing the AT-RPS3000 Chassis and Power Supply Modules 10 0-2 40 VA DC OU C~ 12 FA UL A MA 10 0-2 DC OU 40 VA C~ 12 A MA FA UL SY ST Po E+ / SY... -
Page 71: Figure 53: Lowering The Power Cord Retaining Clip
AT-RPS3000 Redundant Power Supply Installation Guide 5. Examine the DC OUT/FAULT LED on the power supply module. The module is operating normally if the LED is green. If the LED is amber or off, refer to Chapter 4, “Troubleshooting” on page 83 for troubleshooting suggestions. -
Page 72: Figure 54: Checking The Fan And Dc Out Leds In The Led Panel
Chapter 2: Installing the AT-RPS3000 Chassis and Power Supply Modules DC OUT DC OUT FAULT FAULT 100-240 VAC~12A MAX 100-240 VAC~12A MAX SYSTEM SYSTEM PoE+ / SYSTEM PoE+ / SYSTEM MODULE A MODULE B Figure 54. Checking the FAN and DC OUT LEDs in the LED Panel 7. -
Page 73: Figure 55: Checking The Load And Cable Leds In The Led Panel
AT-RPS3000 Redundant Power Supply Installation Guide DC OUT DC OUT FAULT FAULT 100-240 VAC~12A MAX 100-240 VAC~12A MAX SYSTEM SYSTEM PoE+ / SYSTEM PoE+ / SYSTEM MODULE A MODULE B 2156 DC OUT DC OUT FAULT FAULT 100-240 VAC~12A MAX... - Page 74 Chapter 2: Installing the AT-RPS3000 Chassis and Power Supply Modules 8. If the chassis has two power supply modules, repeat this procedure to power on the second module. Warning This unit might have more than one power source. To reduce the risk of electric shock, disconnect all power cords before servicing the unit.
-
Page 75: Chapter 3: Removing Power Supply Modules
Chapter 3 Removing Power Supply Modules Here are the procedures for removing power supply modules from the AT-RPS3000 Chassis: “Removing the AT-RPS-CBL1.0 Cable” on page 76 “Removing an AC Power Supply Module” on page 78 ... -
Page 76: Removing The At-Rps-Cbl1.0 Cable
Off button to turn off the port. The LED should turn off. For example, if you want to disconnect the cable from RPS port 3 on the AT-RPS3000 Chassis, check the CABLE LED for port 3. If the LED is on, press the port’s On/Off button to disable the port. -
Page 77: Figure 57: Removing The At-Rps-Cbl1.0 Cable From The At-Rps3000 Chassis
M O D U LE U LE U LE Figure 57. Removing the AT-RPS-CBL1.0 Cable from the AT-RPS3000 Chassis 4. Loosen the two thumbscrews that secure the cable to the RPS port on the x610 Series switch. 5. Remove the cable from the RPS port on the switch. -
Page 78: Removing An Ac Power Supply Module
Chapter 3: Removing Power Supply Modules Removing an AC Power Supply Module To remove an AC power supply module from the chassis, perform this procedure: 1. For the AT-PWR250 or AT-PWR800 Module, raise the power cord retaining clip on the power supply module. 100 -24 DC OU 0 VA... -
Page 79: Figure 59: Removing The Power Cord
AT-RPS3000 Redundant Power Supply Installation Guide 2. Disconnect the power cord from the power supply module. DC OU 100 -24 0 VAC ~12 A FA UL MA X 100 -24 DC OU 0 VAC ~12 A FA UL MA X... -
Page 80: Figure 60: Loosening The Two Captive Screws
Chapter 3: Removing Power Supply Modules 3. Loosen the two captive screws securing the power module to the chassis. DC OU 100 -24 0 VAC ~12 A FA UL MA X 100 -24 DC OU 0 VAC ~12 A FA UL MA X SY ST Po E+... -
Page 81: Figure 62: Installing The Slot Cover
AT-RPS3000 Redundant Power Supply Installation Guide 6. If you are not replacing the module, cover the empty slot with one of the slot covers, labeled AT-PNL250 and AT-PNL800/1200, provided with the unit. The faceplates of the power supply modules and the slot covers are keyed so that the slot cover has to correspond to the power supply module you installed in the unit. - Page 82 Chapter 3: Removing Power Supply Modules...
-
Page 83: Chapter 4: Troubleshooting
Chapter 4 Troubleshooting If you encounter a problem with the product, you may be able to resolve it with the information in this chapter: Problem 1: A power supply module does not seem to be receiving power because its DC OUT/FAULT LED on its faceplate is off, as well as its FAN and DC OUT LEDs in the LED panel. - Page 84 Chapter 4: Troubleshooting Verify that the power from the power source is within the operating ❒ specifications of the power supply module, listed in “Power Specifications” on page 88. Replace the power supply module. ❒ Problem 4: The FAN LED in the LED panel is amber. Solution: A fan in the power supply module has failed.
- Page 85 AT-RPS3000 Redundant Power Supply Installation Guide Verify that the power supply module that is suppose to be delivering ❒ the PoE+ power from the chassis is either the AT-PWR800 or AT-PWR1200 Module. The AT-PWR250 Module do not support PoE+ power.
- Page 86 Chapter 4: Troubleshooting...
-
Page 87: Appendix A: Technical Specifications
Appendix A Technical Specifications Physical Specifications Dimensions (H x W x D): AT-RPS3000 Chassis 4.4 cm x 44.1 cm x 36.3 cm (1.7 in. x 17.4 in. x 14.3 in.) AT-PWR250 and 4.2 cm x 14.8 cm x 25,2 cm AT-PWR800 Power Supply (1.7 in. -
Page 88: Power Specifications
Class A, CISPR Class A, C-TICK, CE EMC (Immunity): EN55024 Electrical and Laser Safety: EN60950-1 (TUV), UL 60950-1 ( EN60825 Quality and Reliability (MTBF): AT-RPS3000 Chassis 440,000 hrs. AT-PWR250 Module (AC) 100,000 hrs. AT-PWR800 Module (AC) 100,000 hrs. AT-PWR1200 Module (AC) 80,000 hrs. -
Page 89: Port Pin-Outs
AT-RPS3000 Redundant Power Supply Installation Guide Port Pin-outs Figure 64 identifies the pins on the RPS ports. Figure 64. Port Pin-outs for the RSP System and PoE+/System Ports Table 11 lists the pin signals for the RPS 1 and 3 System ports. -
Page 90: Table 12: Rps 2 And 4 Poe+/System Ports
Appendix A: Technical Specifications Table 11. RPS 1 and 3 System Ports Description Reserved Reserved Switch present Reserved Reserved Table 12 lists the pin signals for the RPS 2 and 4 PoE+/System ports. Table 12. RPS 2 and 4 PoE+/System Ports Description -12V return +12V... -
Page 91: Pin Description
AT-RPS3000 Redundant Power Supply Installation Guide Table 12. RPS 2 and 4 PoE+/System Ports Description PoE+ negative remote sense... - Page 92 Appendix A: Technical Specifications...
Need help?
Do you have a question about the AT-RPS3000 and is the answer not in the manual?
Questions and answers