G-Technology G-RAID Studio User Manual
High-performance thunderbolt 2 storage system with hardware raid
Hide thumbs
Also See for G-RAID Studio:
- Product manual (50 pages) ,
- Instructions manual (32 pages) ,
- User manual (24 pages)

Related Manuals for G-Technology G-RAID Studio


Summary of Contents for G-Technology G-RAID Studio
- Page 1 USER MANUAL High-performance Thunderbolt™ 2 storage system with hardware RAID g-technology.com...
-
Page 2: Table Of Contents
Initialize Drive for Mac ..........31 Backup Your Data .............5 Restore the Drive Icon ..........34 Reformat with Partitions ..........36 About Your G-RAID Studio Replace a Failed Drive Module ......... 40 Introduction ...............7 Helpful Tips ..............41 What’s in the Box .............8 Using Your Drive on Windows The following items are included in the box: ..8... -
Page 3: Safety & General Use
Safety & General Use Safety Precautions ......... p.4 • Backup Your Data ........... p.5 •... -
Page 4: Safety Precautions
Safety & General Use Safety Precautions Your G-RAID Studio’s warranty may be voided as a result of failing to respect the precautions listed Technical Support department below. If you detect a problem with your drive, please contact our If the product is returned with damage caused by improper handling, the warranty will be void and Limited Warranty liability will rest with the user. -
Page 5: Backup Your Data
Under no circumstances will G-Technology be held liable for the recovery or restoration of lost data. Any loss, corruption, or destruction of data while using a G-Technology drive is the sole responsibility of the user. Make Two Backups To help prevent possible data loss, we highly recommend keeping TWO copies of your data in separate storage locations. -
Page 6: About Your G-Raid Studio
About Your G-RAID Studio Introduction ............p.7 • What’s in the Box ........... p.8 • System Requirements ........p.8 • Overview of the Drive ........p.9 • Activity & Failure LED ........p.10 • Daisy Chaining with TB Technology ..p.11 •... -
Page 7: Introduction
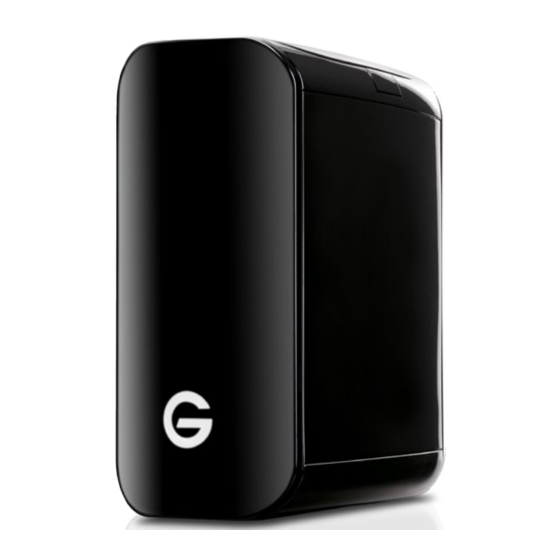
Since 2011, G-RAID with Thunderbolt has been the go-to storage solution for content creation professionals needing higher interface speeds and storage capacity. With the introduction of G-RAID Studio, which comes in a high-quality sleek, black enclosure, con- tent creators worldwide now have a solution where durability, style, and performance reach new heights. -
Page 8: What's In The Box
About Your G-RAID What’s in the Box The following items are included in the box: • G-RAID Studio storage solution with two removable disk modules • (1) Thunderbolt cable • External DC power supply and cable • Quick Start Guide If any items are missing, please contact G-Technology at www.g-technology.com/support... -
Page 9: Overview Of The Drive
Overview of the Drive The following diagrams show the helpful features of your G-RAID Studio. The compact and quiet G-RAID Studio features two removable HGST 7200 RPM SATA III hard drives. G-RAID Studio showcases a sleek, high-quality, black enclosure with integrated cooling and smart fan technology, two Thunderbolt 2 ports, a DC power input, and a soft-touch on/off switch on the rear panel. -
Page 10: Activity & Failure Leds
LED located near the faulty drive will turn from BLUE to RED. To replace the faulty drive, please refer to the section Replace a Failed Drive Module. • If configured in fail-safe RAID 1 (Protected) mode, data stored on the G-RAID Studio will still be intact. -
Page 11: Daisy Chaining With Thunderbolt Technology
Thunderbolt 2 technology requires you to connect with a computer equipped with at least one enabled Thunderbolt 2 port. You may attach up to six Thunderbolt devices in the chain including your G-RAID Studio. With 20 Gb/s performance, your computer can take advantage of Thunderbolt 2’s tremen- dous throughput potential for your G-Technology storage solutions. -
Page 12: Using Your Drive On Mac
Using Your Drive on Mac Easy Installation for Mac ......p.13 • Use with Time Machine ....... p.14 • Disconnect the Drive ........p.16 •... -
Page 13: Easy Installation For Mac
Mac OS 10.9 or above. Important Note: If you connect your G-RAID Studio to a computer that only supports previous-generation, 10 Gb/s Thunderbolt technology, then your G-RAID Studio will be restricted to a maximum data transfer speed of 10 Gb/s. To understand how you can use G-RAID Studio for daisy chaining more than one peripheral device, please refer to the previous section Daisy Chaining with Thunderbolt Technology. -
Page 14: Use With Time Machine
Using Your Drive on Mac Use with Time Machine Your G-RAID Studio can be easily used as a backup drive via Time Machine when con- nected to a Mac. Time Machine is an application that ships with your Mac and provides automatic file backup. - Page 15 Using Your Drive on Mac In the subsequent dialog box, select the G-RAID Studio. Click the Use Disk button. Make sure the Time Machine switch is set to ON. You can set its options by clicking the Options button. Do this to choose volumes, folders, or files you do NOT want to backup.
-
Page 16: Disconnect The Drive
Using Your Drive on Mac Disconnect the Drive A great feature of G-RAID Studio is the ability to connect and disconnect while your com- puter is running. To prevent failures and/or data loss, it is important to follow the steps below when disconnecting or “unmounting”... -
Page 17: Using Raid Modes
Supported RAID Modes ........p.18 • G-Technology Assistant Utility ..... p.19 • G-Technology Assistant Menu ...... p.20 • G-RAID Studio Configuration Utility ..p.21 • Configure the RAID Mode for Mac ..... p.22 • RAID 1 Degraded Mode and Rebuild Mac.. p.24 •... -
Page 18: Supported Raid Modes
To change the RAID mode of the G-RAID Studio, follow the steps in Configure the RAID Mode. RAID 0 (Performance) This default RAID mode features 100 percent storage capacity (for example, two 4TB drives would provide 8TB of unformatted capacity) and is ideal for video editing. -
Page 19: G-Technology Assistant Utility
Recommended Installation When you first set up G-RAID Studio, you will want to install the GTA on your computer. The utility provides useful notifications and shortcuts to enhance your experience with G-RAID Studio. -
Page 20: G-Technology Assistant Menu
There are helpful menu items in the G-Technology Assistant utility. Once G-Technology Assistant has been successfully installed, the utility’s “G” icon will appear in your menu bar. By selecting this icon, the G-Technology Assistant menu will appear. Unmount All Volumes: Unmounts supported G-Technology drives attached to the system. -
Page 21: The Raid Configuration Utility
The G-Technology RAID Configurator is used to change the RAID level of your G-RAID Studio. You can use any of the two Thunderbolt 2 ports in your G-RAID Studio with the RAID Configurator application. To configure G-RAID Studio, it will need to be the only device connected to your computer. -
Page 22: Configure The Raid Mode For Mac
1. In the G-RAID Studio Configuration Utility, click on the Configure button. A dialog window will pop up with three options for configuring your disk set, as shown below. - Page 23 Disk Utility button using which you can open the Disk Utility window to initialize your disk. 5. Changing the RAID mode of G-RAID Studio will require you to re-initialize the disk with the Disk Utility application. The Disk Insertion dialog below should appear.
-
Page 24: Raid 1 Degraded Mode And Rebuild For Mac
RAID 1 Degraded Mode and Rebuild for Mac If your G-RAID Studio is in RAID 1 configuration and either a single drive failure occurs or if a member of the RAID 1 set is removed, then the active drive will operate in degraded mode. - Page 25 3. To rebuild the RAID 1 set, please insert a new drive in place of the failed or removed drive. Note: While replacing the failed drive make sure the G-RAID Studio is powered off. If this new drive is not formatted then the Disk Utility function will automatically launch, allowing you to format the drive.
-
Page 26: Raid Configuration Utility For Windows
The G-Technology RAID Configurator is used to change the RAID level of your G-RAID Studio. You can use any of the two Thunderbolt 2 ports in your G-RAID Studio with the RAID Configurator application. To configure G-RAID Studio, it will need to be the only device connected to your computer. - Page 27 Using RAID Modes 2. Select your desired configuration with the RAID 0 (Performance), RAID 1 (Protected), or JBOD radio buttons. Then click the Configure button to continue. 3. Two warning windows will appear, both letting you know that the following step will erase all of your data.
- Page 28 Using RAID Modes 4. A new window will appear to inform you that configuration is in progress. The next window will confirm that your G-RAID Studio is configured in RAID 0, RAID 1, or JBOD mode. 5. Changing the RAID mode of G-RAID will require you to re-initialize the disk. For helpful information on initialization of your drive with Windows using the Disk Management, please visit g-technology.com/windows.
-
Page 29: Raid 1 Rebuild For Windows
RAID 1 Rebuild for Windows If your G-RAID Studio is in RAID 1 configuration and either a single drive failure occurs or if a member of the RAID 1 set is removed, then the active drive will operate in degraded mode. -
Page 30: Maintenance For Your Drive
Maintenance for Your Drive Initialize Drive for Mac ....... p.31 • Restore the Drive Icon ....... p.34 • Reformat with Partitions ......p.36 • Replace a Failed Drive Module ....p.40 •... -
Page 31: Initialize Drive For Mac
Maintenance for Your Drive Initialize Drive for Mac G-RAID Studio is factory-formatted for use, or “initialized, ” for the Mac OS. You can reini- tialize if you would like to quickly erase the contents of the drive. Here are the neces- sary steps. - Page 32 5. In the Name field, you can input a volume name of your choice. At the factory, the configured name is G-RAID Studio 6. Click the Erase button in the lower-right corner of the window. A dialog box will ap- pear asking if you want to erase the G-RAID Studio partition. p.32...
- Page 33 • Click the Don’t Use or Decide Later buttons if you do not want to use Time Machine at this point. 9. Quit the Disk Utility program. After reinitializing the drive, the icon for G-RAID Studio will be erased. You can optionally restore this icon with the steps on the next page.
-
Page 34: Restore The Drive Icon
If the G-RAID Studio drive icon was erased during the reinitializing process (see the previous section), you can restore the icon with the following steps. NOTE: This process is not required for the operation of G-RAID Studio. However, it will make your drive’s appearance on the computer desktop look more accurate and intui- tive. - Page 35 6. Press Command+V to paste the custom G-RAID Studio icon into the Get Info window. (below right) The icon for your G-RAID Studio has been restored and you can close the Get Info window. Your drive is now fully ready for use!
-
Page 36: Reformat With Partitions
Cut Pro, Avid Media Composer, or Adobe Premiere. The following steps will guide you through the simple process of partitioning your drive. In this example, we will partition an 8TB G-RAID Studio. The steps will be identi- cal for your drive, only the name may be different. - Page 37 Maintenance for Your Drive 2. Select the top icon — not the bottom icon — by clicking it in the left column. 3. Click on the Partition button in the main window. 4. Select the number of partitions you would like from the Volume Scheme menu.
- Page 38 Maintenance for Your Drive 5. Click on the first partition in the Volume Scheme area. A blue bounding box will high- light your partition. • In the Name field, type a name for the partition. • From the Format menu, choose your desired disk format. If you will use your drive primarily on Mac OS, it is recommended to use Mac OS Extended or Mac OS Ex- tended (Journaled).
- Page 39 Restore the Drive Icon section. 11. The G-RAID Studio’s multiple partitions will be displayed on the desktop. Your drive is now set up with two or more partitions and is ready for use.
-
Page 40: Replace A Failed Drive Module
Failure LEDs. Follow the steps below to identify and replace a failed drive. 1. With G-RAID Studio powered up, the RED LED under the top lid will indicate which drive module failed. For more information, see Activity and Failure LEDs. -
Page 41: Helpful Tips
“G” to show that all is well. 6. If your G-RAID Studio was setup in RAID 0 mode, then you have to build a new RAID 0 set using the newly introduced drive. -
Page 42: Using Your Drive On Windows
Using Your Drive on Windows Windows Use ..........p.43 • Cross Platform Use ........p.44 •... -
Page 43: Windows Use
Using Your Drive on Windows Windows Use G-RAID Studio is set up at the factory for use with Mac OS systems. A simple initialization will prepare your drive for use with Windows 7, 8, and 8.1 systems. For helpful information on configuring and using your drive with Windows, please visit g-technology.com/windows. -
Page 44: Cross Platform Use
Using Your Drive on Windows Cross Platform Use You can set up G-RAID Studio for use on both Windows and Mac systems by format- ting the drive as exFAT. To do this, use the Disk Utility application and format the drive to exFAT. - Page 45 WARNING: THIS NEXT STEP WILL ERASE ALL DATA ON YOUR DRIVE. 5. Click the Erase button in the lower right corner of the window. A dialog box will ap- pear asking if you want to erase the G-RAID Studio partition. p.45...
- Page 46 7. Quit the Disk Utility program. You are finished! 8. After reinitializing, the custom icon for the G-RAID Studio will be erased. No icons are available for exFAT. With this format, you will be able to read and write on Mac OS systems as well as PCs running Windows 7 and later.
-
Page 47: Support & Warranty
Support & Warranty Technical Support ........p.48 • Limited Warranty ......... p.49 • Copyright ............p.51 •... -
Page 48: Technical Support
Thank you for purchasing G-RAID. If you have any comments or questions about this manual or the product, please let us know! G-Technology appreciates and values its customers, striving to give you the finest service and support. If you encounter any difficulties while installing or using G-RAID, g-technology.com/support... -
Page 49: Limited Warranty
To determine the war- ranty specifically for your product, visit www.g-technology.com. A valid proof of purchase may be required to prove eligibility. If you do not have a valid proof of purchase, the limited warranty period will be measured from the date of sale from HGST to the authorized distributor. - Page 50 To obtain limited warranty service, you must first obtain a Return Materials Authorization (RMA) and ship-to address by contacting G-Technology at http://www.g-technology.com/support. Please follow the instructions found on the website. You must return the covered hard disk drive using approved packaging to our logistics center.
-
Page 51: Copyright
Support & Warranty CAPACITY DEFINITION AND DISCLAIMER For G-Technology products 1TB or greater: “One gigabyte (GB) is equal to one billion bytes and one terabyte (TB) equals 1,000 GB (one trillion bytes). Accessible capacity will vary from the stated capacity due to formatting and partitioning of the hard drive, the computer’s operating system, and other factors”...
Need help?
Do you have a question about the G-RAID Studio and is the answer not in the manual?
Questions and answers