
Related Manuals for G-Technology G-RAID with Thunderbolt


Summary of Contents for G-Technology G-RAID with Thunderbolt
- Page 1 Product Manual G-RAID® with Thunderbolt™ is a high-performance, removable dual-drive RAID solution with Thunderbolt, USB and Enterprise-class hard drives.
-
Page 2: Table Of Contents
Supported RAID Modes ......... 17 G-Technology Assistant Utility ......18 G-Technology Assistant Menu ......19 G-RAID with Thunderbolt Config. Utility ..20 Configure the RAID Mode for Mac ....21 RAID 1 Degraded Mode for Mac ......25 Configure the RAID Mode for Windows ..25... -
Page 3: Safety & General Use
Safety & General Use • Safety Precautions ........p. 4 • Backup Your Data ........p. 5... -
Page 4: Safety Precautions
Safety & General Use Safety Precautions G-RAID with Thunderbolt’s warranty may be void as a result of the failure to respect the precautions listed here. If you detect a problem with your drive, please contact our Technical Support department If the product is returned with damage caused by improper handling, the warranty will be void and liability Limited Warranty will rest with the user. -
Page 5: Backup Your Data
Under no circumstances will G-Technology be held liable for the recovery or restoration of lost data. Any loss, corruption or destruction of data while using a G-Technology drive is the sole responsibility of the user. -
Page 6: About Your G-Raid With Thunderbolt
About Your G-RAID with Thunderbolt Introduction ............p. 7 • What’s in the Box ...........p. 8 • System Requirements .........p. 8 • Overview of the Drive .........p. 9 • Activity & Failure LED ........p. 10 •... -
Page 7: Introduction
Final Cut Pro®, Avid® Media Composer and Adobe Premiere®. With its built-in RAID controller, the G-RAID with Thunderbolt is not tied to a single workstation and can be easily transported for use in the edit bay or on the road. The unit contains an internal RAID controller and can be configured in RAID 0 (Performance), RAID 1 (Protected) or JBOD (Just a Bunch of Disks) mode. -
Page 8: What's In The Box
Thunderbolt™ What’s in the Box The following items are included in the box: • G-RAID with Thunderbolt storage solution with two removable disk drives • Thunderbolt cable (compatible with Thunderbolt 2 & 1 ports) • USB cable (3.0; backward compatible with USB 2.0 ports) •... -
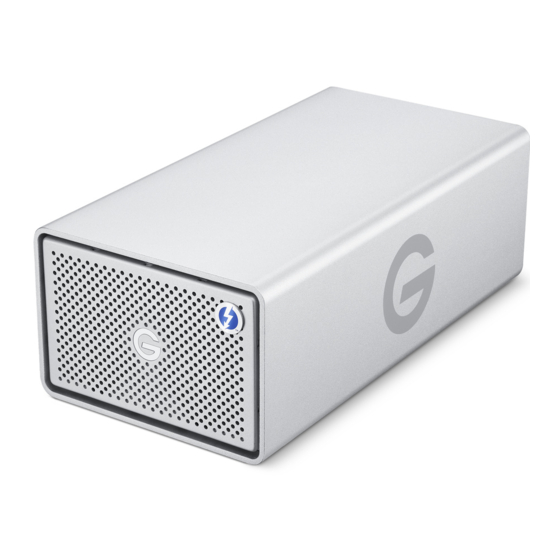
Page 9: Overview Of The Drive
Thunderbolt™ Overview of the Drive The following diagram shows the helpful features of your G-RAID with Thunderbolt. The compact and quiet G-RAID with Thunderbolt features two removable HGST Enterprise- class 7200 RPM SATA III hard drives. It has a uniquely designed all-aluminum enclosure with an activity/failure LED in the front panel. -
Page 10: Activity & Failure Led
Thunderbolt™ Power, Activity and Failure LEDs G-RAID with Thunderbolt contains LEDs for power, drive activity and drive failure. The “G” LED on the front panel of the enclosure indicates Power (White) or RAID Failure (Red). There are also Drive Activity LEDs and Drive Failure LEDs located on the drive modules. - Page 11 Using Your Drive on Mac • Easy Installation for Mac ......p. 12 • Optimize Performance ......p. 12 • Use With Time Machine......p. 13 • Disconnect the Drive .......p. 15...
-
Page 12: Easy Installation For Mac
USB 3.0 Port Optimize Performance G-RAID with Thunderbolt can be connected to any Mac or Windows machine equipped with a Thunderbolt port or a USB 3.0 or USB 2.0 port. If you are going to use the drive on a Windows machine, read Using Your Drive on Windows. -
Page 13: Use With Time Machine
Using Your Drive on Mac Use with Time Machine® Your G-RAID with Thunderbolt can be easily used as a backup drive via Time Machine when connected to a Mac. Time Machine is an application that ships with your Mac and provides automatic file backup. - Page 14 ® Using Your Drive on Mac In the subsequent dialog box, select the G-RAID with Thunderbolt. Click the Use Disk button. Make sure the Time Machine switch is set to ON. You can set its options by clicking the Options button.
-
Page 15: Disconnect The Drive
2. It is safe to remove the drive from your system when the drive icon is no longer present on your desktop. 3. To power off G-RAID with Thunderbolt, press and hold the On/Off power button until the unit shuts down. -
Page 16: Using Raid Modes
• G-Technology Assistant Utility ..........p. 18 • G-Technology Assistant Menu ..........p. 19 • G-RAID with Thunderbolt Configuration Utility .... p. 20 • Configure the RAID Mode for Mac ........p. 21 • RAID 1 Degraded Mode and Rebuild for Mac ....p. 25 •... -
Page 17: Supported Raid Modes
Mode. RAID 0 (Performance) G-RAID with Thunderbolt ships in RAID 0 (Performance) mode. This RAID mode is ideal for maximizing your throughput when video editing. In RAID 0 mode, the drives are combined and data is split between the two drives for increased performance. -
Page 18: G-Technology Assistant Utility
Recommended Installation When you first set up G-RAID with Thunderbolt, you will want to install the GTA on your computer. The utility provides useful notifications and shortcuts to enhance your experience with G-RAID with Thunderbolt. -
Page 19: G-Technology Assistant Menu
Using RAID Modes G-Technology Assistant Menu There are helpful menu items in the G-Technology Assistant (GTA) utility. Once G-Technology Assistant has been successfully installed, the utility’s “G” icon will appear in your menu bar. By selecting this icon, the G-Technology Assistant menu will appear. -
Page 20: G-Raid With Thunderbolt Config. Utility
The G-RAID with Thunderbolt RAID Configurator is used to change the RAID level of your G-RAID with Thunderbolt. You can use any of the two Thunderbolt 2 ports or USB 3.0 port in your G-RAID with Thunderbolt with the RAID Configurator application. To configure G- RAID with Thunderbolt, it will need to be the only device connected to your computer. -
Page 21: Configure The Raid Mode For Mac
Using RAID Modes Configure the RAID Mode for Mac You can easily configure G-RAID with Thunderbolt’s RAID mode with the following steps. Important Note: Changing the RAID level will erase all data on the drive. Be sure all of the data and files you want to save are backed up to separate media. - Page 22 Click the Initialize button to launch Disk Utility, if you did not open the Disk Utility from the previous window. Follow the simple steps described in the section Initialize Drive for Mac to initialize G-RAID with Thunderbolt for use with the Mac OS. p.22...
-
Page 23: Raid 1 Degraded Mode And Rebuild For Mac
RAID 1 Degraded Mode and Rebuild for Mac If your G-RAID with Thunderbolt is in RAID 1 configuration and either a single drive failure occurs or if a member of the RAID 1 set is removed, then the active drive will operate in degraded mode. - Page 24 Click the YES button in both the windows to continue. Note: While the rebuild is in process please keep the G-RAID with Thunderbolt connected to the host.
-
Page 25: Raid 1 Degraded Mode For Mac
Configure the RAID Mode for Windows You can easily configure G-RAID with Thunderbolt’s RAID mode with the following steps. Important Note: Changing the RAID level will erase all data on the drive. Be sure all of the data and files you want to save are backed up to separate media. - Page 26 Using RAID Modes 2. Select your desired configuration with the RAID 0 (Performance), RAID 1 (Protected), or JBOD radio buttons. Then click the Configure button to continue. 3. Two warning windows will appear, both letting you know that the following step will erase all of your data.
- Page 27 Using RAID Modes 4. A new window will appear to inform you that the configuration is in progress. The next window will confirm that your G-RAID with Thunderbolt is configured in RAID 0, RAID 1, or JBOD mode. 5. Changing the RAID mode of G-RAID will require you to re-initialize the disk. For helpful information on initialization of your drive with Windows using the Disk Management, please visit www.g-technology.com/windows.
-
Page 28: Raid 1 Rebuild For Windows
Using RAID Modes RAID 1 Rebuild for Windows If your G-RAID with Thunderbolt is in RAID 1 configuration and either a single drive failure occurs or if a member of the RAID 1 set is removed, then the active drive will operate in degraded mode. -
Page 29: Maintenance For Your Drive
Maintenance for Your Drive • Initialize the Drive for Mac .....p. 30 • Restore the Drive Icon ......p. 34 • Reformat with Partitions ......p. 36 • Replace a Failed Drive Module .....p. 41... -
Page 30: Initialize The Drive For Mac
Maintenance for Your Drive Initialize the Drive for Mac G-RAID with Thunderbolt is factory formatted or “initialized” for use with Mac OS. You can follow these steps to reinitialize your drive if you would like to quickly erase the contents of the drive. - Page 31 Maintenance for Your Drive 4. Choose the Format option you prefer. • Mac OS Extended (Journaled): This basic File System format is intended for generally formatted drives including Time Machine backup and creating separate bootable Disk Images. • Mac OS Extended Case-sensitive and Encryption options: The Case-sensitive option treats file names that are the same but with different cases as different while the Encryption option adds an additional layer of security for your personal files.
- Page 32 Maintenance for Your Drive 5. Click the Erase button in the lower-right corner of the window. A dialog box will appear asking if you want to erase the G-RAID with Thunderbolt partition. WARNING: THIS NEXT STEP WILL ERASE ALL DATA ON YOUR DRIVE.
- Page 33 Click the Don’t Use or Decide Later buttons if you do not want to use Time Machine at this point. 8. Quit the Disk Utility program. After you reinitialize the drive, the custom icon for G-RAID with Thunderbolt will be erased. You can optionally restore this icon with the steps on the next page. p.33...
-
Page 34: Restore The Drive Icon
NOTE: This process is not required for the operation of the G-RAID with Thunderbolt. However, it will make your drive’s appearance on the computer desktop look cleaner and more accurate. - Page 35 Command+I. This opens the Get Info window (below left). 5. Select the default icon in the Get Info window (below left). 6. Press Command+V to paste the custom G-RAID with Thunderbolt icon into the Get Info window (below right). The icon for your G-RAID with Thunderbolt has been restored and you can close the Get Info window.
-
Page 36: Reformat With Partitions
The following steps will guide you through the simple process of partitioning your drive. In this example, we will partition a 6TB G-RAID with Thunderbolt connected via Thunderbolt. The steps will be identical for your drive, although the name may be different. - Page 37 Maintenance for Your Drive 2. Select your drive icon — not the indented drive icon, by clicking it in the left column. 3. Click on the Partition button in the main window. p.37...
- Page 38 Maintenance for Your Drive 4. Select the number of partitions you would like from the Partition Layout menu. Below, we have selected “2 Partitions” to create two partitions. p.38...
- Page 39 7. Click the Apply button in the lower-right corner of the window. A dialog box will appear asking if you are sure you want to partition the G-Technology disk. WARNING: THE NEXT STEP WILL ERASE ALL DATA ON YOUR DRIVE.
- Page 40 Disk Utility. 10. Quit the Disk Utility program. After re-initializing the drive, the custom icon for the G-Technology drive has been erased. To restore the G-RAID with Thunderbolt icon for each partition follow the steps from the Restore the Drive Icon section.
-
Page 41: Replace A Failed Drive Module
RAID 1: If G-RAID with Thunderbolt is configured as RAID 1, a single drive failure will not result in data loss. However, the array is now in a degraded or unprotected state, and the failed drive should be replaced as soon as possible to avoid data loss. - Page 42 Maintenance for Your Drive 4. If G-RAID with Thunderbolt was set up in RAID 1 mode, the unit will begin rebuilding data on the drive. During this process, the activity LED will indicate data access. The rebuild time is approximately two hours per terabyte.
-
Page 43: Using Your Drive On Windows
Using Your Drive on Windows • Windows Use ..........p. 44 • Cross Platform Use ........p. 44... -
Page 44: Windows Use
Using Your Drive on Windows Windows Use G-RAID with Thunderbolt is set up at the factory for use with Mac OS systems. A simple initialization will prepare your drive for use with Windows 10, Windows 8.1 and Windows 7 systems. - Page 45 WARNING: THIS NEXT STEP WILL ERASE ALL DATA ON YOUR DRIVE. 5. Click the Erase button in the lower right corner of the window. A dialog box will appear asking if you want to erase the G-RAID with Thunderbolt partition. p.45...
- Page 46 ExFAT. 7. Quit the Disk Utility program. You are finished! 8. After reinitializing, the custom icon for the G-RAID with Thunderbolt will be erased. With this format, you will be able to read/write on Windows and on Mac OS machines.
-
Page 47: Support & Warranty
Support & Warranty • Technical Support ........p. 48 • Limited Warranty ........p. 49 • Copyright .............p. 51... -
Page 48: Technical Support
As a valued customer, G-Technology strives to provide you with the finest products and support. If you encounter any difficulties while installing or using your G-RAID with Thunderbolt, our Tech Support team members will gladly assist your at: www.g-technology.com/support. -
Page 49: Limited Warranty
Support & Warranty Limited Warranty Limited Warranty HGST, a Western Digital Company including G-Technology for External Hard Disk Drives. What does this limited warranty cover? This Limited Warranty applies to new HGST products purchased from an authorized HGST dealer by the original purchaser for normal use and not for resale. HGST warrants that a covered product is free from defects in materials and workmanship, with the exceptions stated below. - Page 50 HGST or your reseller provides. To obtain limited warranty service, you must first obtain a Return Materials Authorization (RMA) and ship-to address by contacting G-Technology at http://www.g-technology.com/support. Please follow the instructions found on the website. You must return the covered hard disk drive using approved packaging to our logistics center.
-
Page 51: Copyright
Support & Warranty CAPACITY DEFINITION AND DISCLAIMER For G-Technology products 1TB or greater: “One gigabyte (GB) is equal to one billion bytes and one terabyte (TB) equals 1,000 GB (one trillion bytes). Accessible capacity will vary from the stated capacity due to formatting and partitioning of the hard drive, the computer’s operating system, and other factors.
Need help?
Do you have a question about the G-RAID with Thunderbolt and is the answer not in the manual?
Questions and answers