G-Technology G CONNECT Product Manual
Wireless storage for your ipad or iphone
Hide thumbs
Also See for G CONNECT:
- Product manual (34 pages) ,
- User manual (34 pages) ,
- Product manual (32 pages)
Table of Contents
Advertisement
Advertisement
Table of Contents

Related Manuals for G-Technology G CONNECT


Summary of Contents for G-Technology G CONNECT
- Page 1 PRODUCT MANUAL Wireless Storage for your iPad® or iPhone® g-technology.com...
-
Page 2: Table Of Contents
Table of Contents Safety & General Use ..........3 Navigation Bar ..............40 Preferences: iPad App ..........41 Safety Precautions ............4 Main User Interface (UI) ..........42 FCC Statement..............5 Header Bar ............... 43 Removing the Battery for Recycling ......7 Offline Mode ..............44 Welcome to G-CONNECT ........8 Unique G-CONNECT Features ......45 Introduction ...............9... -
Page 3: Safety & General Use
Safety & General Use Safety Precautions ............p.4 • FCC Statement ..............p.5 • Removing the Battery for Recycling ......p.7 •... -
Page 4: Safety Precautions
The G-CONNECT device’s Limited Warranty may be void as a result of the failure to respect the precautions listed here. If you detect a problem with your drive, please contact our Technical g-technology.com/support/g-connect/ Support department at If the G-CONNECT product is returned with damage caused by improper handling, the Limited Warranty will be void and liability will rest with the user. -
Page 5: Fcc Statement
Safety & General Use Multiple Backups To help prevent the loss of your data, we highly recommend that you keep TWO copies of your data in separate storage locations. Keep one copy on your G-CONNECT device. Keep a second copy on your internal hard drive, another HGST device, or a form of removable storage media. FCC Statement NOTE: This equipment has been tested and found to comply with the limits for a Class B digital device, pursuant to Part 15 of the FCC Rules. - Page 6 Safety & General Use IMPORTANT NOTE: Radiation Exposure Statement This equipment complies with FCC radiation exposure limits set forth for an uncontrolled environment. This equipment should be installed and operated with minimum distance 20 cm between the radiator & your body. This transmitter must not be co-located or operating in conjunction with any other antenna or transmitter.
-
Page 7: Removing The Battery For Recycling
G-CONNECT device to HGST for warranty replacement or disposal using the HGST Warranty Return System at g-technology.com/support/g-connect Do not dispose of this product in your household trash. Please return the G-CONNECT device to HGST or recycle in accordance with local regulations. For more information, go to the HGST g-technology.com/support/g-connect... -
Page 8: Welcome To G-Connect
Welcome to G-CONNECT Introduction ..............p.9 • System Requirements ..........p.10 • Hardware Specifications ..........p.11 •... -
Page 9: Introduction
Welcome to G-CONNECT Introduction Welcome to the G-CONNECT™ Wireless iPad® Storage from G-Technology®. The G-CONNECT offers wireless access to your personal content anytime and anywhere. The unique and simplistic design highlights portability and style. Designed to partner with numerous mobile platforms, G-CONNECT allows you on-the-go access in addition to expanding your storage capabilities. -
Page 10: System Requirements
Welcome to G-CONNECT System Requirements The G-CONNECT device has support for the following Operating Systems. The device is ready for use with Apple OS X and Microsoft Windows systems and ® ® ® ® ® comes formatted as FAT-32, which is ideal for cross-platform use. Operating Systems •... -
Page 11: Hardware Specifications
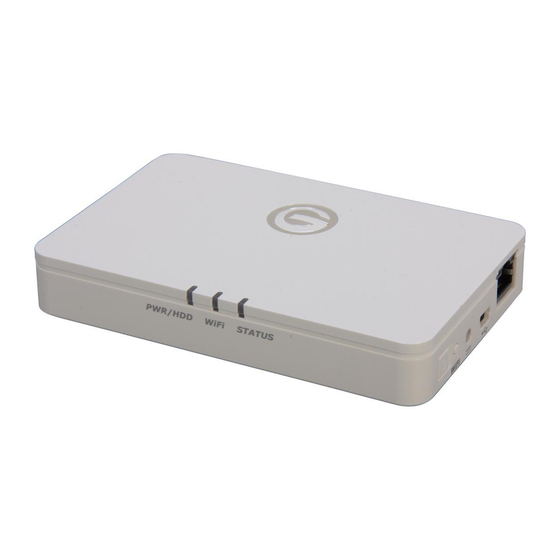
Welcome to G-CONNECT Hardware Specifications The following items are included in your G-CONNECT box: Product Features & Diagram The following diagram will help you become familiar with your new G-CONNECT device. p.11... - Page 12 Welcome to G-CONNECT Power Button Press the Power button on the device to turn the G-CONNECT ‘On’ or ‘Off’ . The Power HDD light will begin to flash and the Wi-Fi light and Status light will blink when the ® device is turned on.
-
Page 13: Setting Up G-Connect
Setting Up G-CONNECT STEP 1: Turn on G-CONNECT ........p.14 • STEP 2: Connect to Wireless Network ..... p.14 • STEP 3: Setup Your Device .......... p.16 • Add Content to G-CONNECT ........p.19 • Copy Content in USB Mode ........p.20 •... -
Page 14: Step 1: Turn On G-Connect
Setting Up G-CONNECT Setting Up G-CONNECT To get started, you will need your G-CONNECT and a personal computer with a web browser installed. System Requirements section Please review the make sure you have a supported operating system and web browser. STEP 1: Turn on G-CONNECT Plug in the included power adapter to the G-CONNECT and a wall outlet. - Page 15 Setting Up G-CONNECT : If you are using a Mac, go to the Windows PC: If you are using Windows PC, go ® ® top taskbar and click on the wireless to your bottom taskbar and double-click to open network icon. the ‘Wireless Network Connection Status’...
-
Page 16: Step 3: Setup Your Device
Setting Up G-CONNECT STEP 3: Setup Your Device The G-CONNECT Setup page contains two main sections with checkboxes at the bottom. The information that you enter on this page is used to operate your G-CONNECT device. 1. Wireless Network (SSID) name The Wireless Network (SSID) name displays the default name of the G-CONNECT wireless network. - Page 17 Setting Up G-CONNECT 2. Admin Account The Admin is typically the owner of the G-CONNECT device and can manage all of the content. The default username is ‘admin’ and cannot be changed. Create a password for the Admin account. The password must be at least eight characters in length and include at least one numeric character.
- Page 18 Setting Up G-CONNECT 4. Finishing Setup Once you’ve entered your information click on the Submit button to complete setup. A dialog box will appear notifying you that the device is being configured. 5. Changing the Wireless Network (SSID) Name If you decided to change the default Wireless Network (SSID) name during the Setup process, once you click on the Submit button your current G-CONNECT-XXXX Wi-Fi network will be dropped.
-
Page 19: Add Content To G-Connect
Setting Up G-CONNECT Add Content to G-CONNECT Once your G-CONNECT device is set up, you will be ready to transfer content onto it for your viewing pleasure. The device has been pre-loaded with the following category folders, which is the recommended way to organize your files when you add content. -
Page 20: Copy Content In Usb Mode
Setting Up G-CONNECT Copy Content in USB Mode Now that your G-CONNECT device has been setup, you are ready to add content to the device. There are many ways to add your files to the G-CONNECT. The recommended way in which you can add content quickly to the device is via your personal computer using the included USB Y-Cable. -
Page 21: Copy Content As A Network Drive (Mac )
Setting Up G-CONNECT Copy Content as a Network Drive (Mac ® An alternate way to add content quickly to G-CONNECT is by treating the device as a network drive. Here are the steps on a Mac computer. 1. First, select your G-CONNECT Wireless Network (SSID) through your Wireless Network Manager. -
Page 22: Copy Content As A Network Drive (Win)
Setting Up G-CONNECT Copy Content as a Network Drive (Win) As already mentioned, you can alternately add files to G-CONNECT by treating the device as a network drive. Here are the steps on a Windows machine. ® 1. First, select your G-CONNECT Wireless Network (SSID) through your Wireless Network Manager. - Page 23 Setting Up G-CONNECT 4. After clicking Finish, you will be prompted to log into the server. Enter the G-CONNECT Username (Admin or Guest) and Password that you use for the iPad ® iPhone App or Web Application. ® 5. After clicking Ok, the G-CONNECT drive will appear in Computer as a drive. You can now transfer files to and from the device like any directly attached drive.
-
Page 24: Upload Files With Web Application
Setting Up G-CONNECT Upload Files with Web Application You may also upload files directly to the device by using the G-CONNECT Web Application Upload feature. We recommend this if you have an individual file or small groups of files. This is a perfect option for users who are on-the-go. Instructions for the Web Application are in the next section... -
Page 25: Overview Of Web Application
Overview of Web Application Sign into Web Application ......... p.26 • Admin and Guest Users ..........p.26 • Getting Started .............. p.27 • User Interface ..............p.28 • Navigation Bar ............... p.29 • Header Bar ............... p.30 • Main User Interface (UI) Screen ........ p.31 •... -
Page 26: Sign Into Web Application
Overview of Web Application Overview of Web Application The G-CONNECT allows you to utilize two different applications when viewing your content: the Web Application and the iPad /iPhone App. Both have a similar user ® ® interface and features so you can easily switch between them. Sign into Web Application You can use the Web Application to view and manage the files on G-CONNECT from a variety of devices, including your personal computer and other mobile devices. -
Page 27: Getting Started
G-CONNECT experience. For additional online resources, please visit the following links. • Video Tutorials: Click this icon to view informational videos, tips and tricks for the G-CONNECT device. The URL to this page is g-technology.com/support/g-connect. / iPad • iPhone App: Click on this icon to take you to the Apple iTunes ®... -
Page 28: User Interface
Overview of Web Application User Interface The G-CONNECT Web Application offers an intuitive User Interface (UI) allowing you to browse, play and manage your content. There are three main areas of the interface: Navigation Bar, Header Bar and the Main UI. p.28... -
Page 29: Navigation Bar
Overview of Web Application Navigation Bar The left side Navigation Bar contains quick links to different browsing views. As you drill down into most of these links, the content will update in the Main UI window. The following links are available on the left side Navigation Bar. •... -
Page 30: Header Bar
Overview of Web Application Header Bar Horizontally across the top of the screen is the Header Bar, which contains helpful features such as the Search box and links for Preferences, Help and Sign Out. • Search field: Enter keywords in this field to search for files on your G-CONNECT. Click on the magnify glass or hit the <ENTER>... -
Page 31: Main User Interface (Ui) Screen
Overview of Web Application Main User Interface (UI) Screen The Main User Interface (UI) is where you view and interact with the content on their G-CONNECT device. When you click a link in the Navigation Bar, the Main UI will display the related content in a browsing view. - Page 32 Overview of Web Application Thumbnail Viewing Mode Thumbnail Viewing mode displays small pictorial images of files on G-CONNECT along with the file name underneath. The image that is displayed represents the media type, such as a .JPEG or .PDF document. Folders and subfolders that you create will also be displayed here.
-
Page 33: File Browser
Overview of Web Application File Browser The following functionality is available in the File Browser for the Web Application, to view and manage content. Breadcrumb Path The breadcrumb path displays the folder levels that a file is stored within. The breadcrumb path is clickable and Admin users can drag and drop files from one location to another by dropping the files onto the breadcrumb path link. -
Page 34: Media Browser
Overview of Web Application Media Browser The following functionality is available in the Media Browser of the Web Application, to view and manage content. Filter: Select Years This filter option is available in the List Viewing mode for Photos, Videos and Documents only. -
Page 35: Overview Of Ipad/Iphone App
Overview of iPad/iPhone App Launch the iPad App ............ p.36 • Getting Started ............. p.39 • Navigation Bar ..............p.40 • Preferences: iPad App ..........p.41 • Main User Interface (UI) ..........p.42 • Header Bar ..............p.43 • Offline Mode ..............p.44 •... -
Page 36: Launch The Ipad App
Overview of iPad /iPhone ® ® Overview of iPad /iPhone ® ® The G-CONNECT iPad/iPhone App is a great way to access your G-CONNECT content while traveling, or when you don’t have your personal computer with you. These apps are free and can be downloaded from the Apple App Store on your device or personal computer through iTunes®. - Page 37 Overview of iPad /iPhone ® ® Once you tap the G-CONNECT iPad App icon, the first screen you will come to is the iPad Welcome to G-CONNECT page. On the bottom left of the screen you will find an iPad icon and a G-CONNECT icon. Select the G-CONNECT icon and the ‘Connect to’...
- Page 38 Overview of iPad /iPhone ® ® In the Username field, choose whether you are signing in as Admin or Guest. The Admin user is the owner of the G-CONNECT device. The Admin user may give friends and family access to their G-CONNECT by sharing with them the Guest password.
-
Page 39: Getting Started
Overview of iPad /iPhone ® ® Getting Started When you launch the iPad App, the Main UI window will display the Welcome to G-CONNECT screen. The screen contains four large icons for Photos, Music, Videos and Documents. Clicking on these icons is a quick way to view content in each of these categories. -
Page 40: Navigation Bar
Overview of iPad /iPhone ® ® Navigation Bar The left-side Navigation Bar is where you can select options and drill down into folders in order to find their media. This organization is similar to a file directory structure. The top of the Navigation Bar will always show where you are as you drill down, like in a breadcrumb path. -
Page 41: Preferences: Ipad App
Overview of iPad /iPhone ® ® Preferences: iPad App Located at the top of the Navigation Bar, this option is available only to Admin users to update their device preferences and passwords. • SSID Hotspot: Wireless Network (SSID) name entered during setup. You may change this information here. -
Page 42: Main User Interface (Ui)
Overview of iPad /iPhone ® ® Main User Interface (UI) The Main User Interface (UI) is where you view and interact with the content on your G-CONNECT device. When you click on a link in the Navigation Bar, the Main UI will display the related content in a browsing view. -
Page 43: Header Bar
Overview of iPad /iPhone ® ® Header Bar Horizontally across the top of the screen is the Header Bar, which contains features such as the Thumbnail View, List View and Sort. Thumbnail Viewing Mode Button Thumbnail Viewing mode displays small pictorial images of files on G-CONNECT along with the file name underneath. -
Page 44: Offline Mode
Overview of iPad /iPhone ® ® Offline Mode In the Navigation Bar, select the iPad icon. This is used to view content that has been locally saved to the iPad device. When you tap this option, you will be taken into an offline version (not connected) of the G-CONNECT iPad application. -
Page 45: Unique G-Connect Features
Unique G-CONNECT Features Stream Content to Other Devices ......p.46 • Create a Wi-Fi Hotspot ..........p.46 ® • Private and Public Content ........p.47 • Provide Guest Access ........... p.47 • Offline Mode for iPad ........... p.48 •... -
Page 46: Stream Content To Other Devices
Unique G-CONNECT Features Unique G-CONNECT Features G-CONNECT offers many simple and unique features that allow you to view and manage your content while in your home, dorm room, office or on-the-go. Stream Content to Other Devices For a terrific entertainment option, use G-CONNECT to wirelessly stream content from the device to iTunes, iPad, personal computers and other DLNA compliant devices. -
Page 47: Private And Public Content
Overview of Web Application Private and Public Content Admin and Guest users can access content located on the G-CONNECT device via the File Browser. The device comes with two ways to secure content either by placing them in a Private area or a Public Folder. Admin users have access to all content on the G-CONNECT device. -
Page 48: Offline Mode For Ipad
Unique G-CONNECT Features Offline Mode for iPad You do not need to connect to the device in order to access your files, since they are directly stored on your iPad. To save files for viewing in Offline Mode, you must select a file and view the Actions Menu for that file. -
Page 49: Additional Resources
Additional Resources Connecting to the Internet ........p.50 • Web Application Preferences ........p.50 • How to View Files: Web Application ....... p.55 • How to View Files: iPad App ........p.56 ® • Sharing Files ..............p.57 • Uploading Files: Web Application ......p.57 •... -
Page 50: Connecting To The Internet
Additional Resources Connecting to the Internet You can use your G-CONNECT device as a Wi-Fi hotspot to browse the Internet. Just plug the Ethernet cable from your home router into the G-CONNECT device and open a browser to begin surfing the web. Web Application Preferences You may update your System Preferences in both the Web and Mobile applications by clicking on the Preferences link. - Page 51 Additional Resources Wireless Settings Tab The Wireless Settings tab gives options for changing the current Wireless Network (SSID) Name as well as the Wireless & Guest Password information. Wireless Network (SSID) Name This field displays the current name of your G-CONNECT wireless network.
- Page 52 Additional Resources Admin Settings Tab The Admin Settings tab is where the Admin user can update their password and password hint information. The Admin username is always ‘admin’ and not editable, but the Admin password can be changed. Passwords must be 8 to 63 characters and contain at least one numeric character.
- Page 53 Additional Resources Streaming Folders Tab The Streaming Folders tab displays a list of folders that are being streamed to DLNA and iTunes Streaming devices. To un-share a folder in this list, hover over a folder and click on the red REMOVE button. Folders are added to this Streaming list with the ‘Streaming Share’...
- Page 54 Additional Resources About Tab The About tab displays information regarding the technical specifications of the G-CONNECT software such as the Software version, API version and links to the Terms of Use and Privacy Policy. Capacity Gauge Each tab of the Preferences pages shows a Capacity Gauge. This is a horizontal bar displaying the total storage capacity of your G-CONNECT device and a breakdown of the media types currently stored.
-
Page 55: How To View Files: Web Application
Additional Resources How to View Files: Web Application In the Web Application, you can easily view and play files located on G-CONNECT from either the File Manager or Media Browsing views. Both of these options display your content in Thumbnail and List Viewing modes so you can easily find the file that you want. -
Page 56: How To View Files: Ipad App
Additional Resources How to View Files: iPad ® In the iPad App, in both Thumbnail and List Viewing modes, you can click on the file itself to launch. • Single clicking on a Photo thumbnail will launch the photo in a zoomed view, where you will have options to begin a slideshow, move forward and backwards and rotate the photo. -
Page 57: Sharing Files
Additional Resources Sharing Files Sharing files on the G-CONNECT is easy with Guest access. The Admin user can give Guest access to an unlimited amount of friends and place content to share in the Public Folder. Admin users may also share files such as Photos or Documents by emailing them from the G-CONNECT device, and using their default email program on their device. -
Page 58: Downloading Files
Additional Resources Downloading Files You can download files from your G-CONNECT directly to your personal computer using the G-CONNECT Web Application or to your iPad /iPhone device using the ® ® mobile applications. Downloading Files: Web Application Using the Web Application, locate the file type that you want to download. You can easily download files from the G-CONNECT in either the File Manager or Media Browsing views in both the Thumbnail and List Viewing modes. -
Page 59: Frequently Asked Questions
Frequently Asked Questions Supported iPad Video Formats ....... p.60 ® • Enable Gigabit Ethernet Connection ..... p.60 • Factory Reset/Reset Your Device ......p.61 • Problems with Connectivity ........p.62 • Use with Apple Time Machine ......... p.62 ® • Drive Formatting ............ -
Page 60: Supported Ipad Video Formats
Frequently Asked Questions Supported iPad Video Formats ® The following table represents supported video playback requirements for the G-CONNECT iPad App. Due to the well-documented complexity in video formatting, there may be unique combinations of encoding, settings and file formats which may not play via the G-CONNECT iPad App. -
Page 61: Factory Reset/Reset Your Device
Frequently Asked Questions Factory Reset/Reset Your Device If you need to reset your device back to the Factory Settings make sure the device is powered on and following the steps below: 1. Once the device is powered on, plug an Ethernet cord into the Ethernet port. 2. -
Page 62: Problems With Connectivity
Out of the box, the G-CONNECT device is ready for use with Mac OS X and Windows ® systems and comes formatted as FAT-32, which is ideal for cross-platform use. Links to Support Page For more information, please visit our online technical support page for videos, FAQ’s and other supporting documentation at g-technology.com/support/g-connect. p.62... -
Page 63: Support & Warranty
Support & Warranty Technical Support ............p.64 • Limited Warranty ............p.65 • Copyright ................ p.67 •... -
Page 64: Technical Support
If you have any comments or questions about this manual or the product, please let us know! G-Technology appreciates and values its customers, striving to give you the finest service and support. If you encounter any difficulties while installing or the G-CONNECT device, please contact G-Technology Technical Support at g-technology.com/support/contact_support. -
Page 65: Limited Warranty
Support & Warranty Limited Warranty HGST, a Western Digital Company (“HGST”) Including G-Technology for External Hard Disk Drives What does this limited warranty cover? This Limited Warranty applies to new HGST products purchased from an authorized HGST dealer by the original purchaser for normal use and not for resale. HGST warrants that a covered product is free from defects in materials and workmanship, with the exceptions stated below. - Page 66 To obtain limited warranty service, you must first obtain a Return Materials Authorization (RMA) g-technology.com/support and ship-to address by contacting G-Technology at . Please follow the instructions found on the website. You must return the covered hard disk drive using approved packaging to our logistics center.
-
Page 67: Copyright
Support & Warranty CAPACITY DEFINITION AND DISCLAIMER For G-Technology products 1TB or greater: “One gigabyte (GB) is equal to one billion bytes and one terabyte (TB) equals 1,000 GB (one trillion bytes). Accessible capacity will vary from the stated capacity due to formatting and partitioning of the hard drive, the computer’s operating system, and other factors”...
Need help?
Do you have a question about the G CONNECT and is the answer not in the manual?
Questions and answers