Table of Contents
Advertisement
Advertisement
Table of Contents

Related Manuals for Fujitsu Siemens Computers FGSW-1602


Summary of Contents for Fujitsu Siemens Computers FGSW-1602
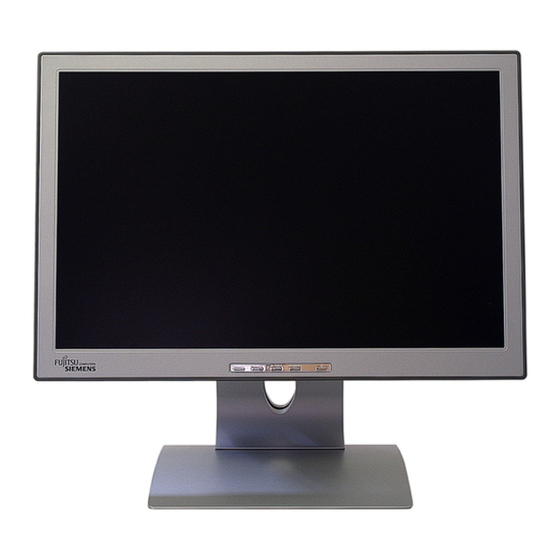
- Page 1 Monitor English Operating Manual SCALEOVIEW S17-2 / S19-2...
- Page 2 Are there ..any technical problems or other questions which you would like to be clarified? Please contact our help desk (see Warranty Booklet). The latest information on our products, tips, updates, etc., can be found on the internet under: http://www.fujitsu-siemens.com...
- Page 4 This manual was produced by cognitas. Gesellschaft für Technik-Dokumentation mbH – www.cognitas.de Published by Fujitsu Siemens Computers GmbH Order No.: A26361-K1018-Z120-1-7619 Edition 1 AG 0405 04/05...
- Page 5 SCALEOVIEW S17-2 / S19-2 LCD monitor Operating Manual April 2005 edition...
- Page 6 VESA, DDC and DPMS are registered trademarks of Video Electronics Standards Association. Copyright © Fujitsu Siemens Computers GmbH 2005 All rights, including rights of translation, reproduction by printing, copying or similar methods, in part or in whole, are reserved. Offenders will be liable for damages. All rights, including rights created by patent grant or registration of a utility model or design, are reserved.
-
Page 7: Table Of Contents
Contents Introduction............................1 Important notes............................. 2 Safety notes..........................2 Power cable..........................4 Transport ............................4 Cleaning ............................4 CE marking........................... 5 FCC Class B Compliance Statement ....................5 Energy Star Guidelines......................... 6 Disposal and recycling ......................... 6 Checking the contents of the consignment................... 7 Installing an ergonomic video workstation.................... -
Page 9: Introduction
Introduction Your new LCD (Liquid Crystal Display) monitor SCALEOVIEW S17-2 / S19-2 offers numerous features and functions, for example: ● TFT display (Thin Film Transistor; active matrix) ● minimal space requirements thanks to slim casing ● optimum ergonomic characteristics (totally distortion-free, excellent picture definition and colour purity right into the corners) ●... -
Page 10: Important Notes
SCALEOVIEW S17-2 / S19-2 Notational conventions The meanings of the symbols and fonts used in this manual are as follows: Pay particular attention to texts marked with this symbol. Failure to observe this warning endangers your life, destroys the system, or may lead to loss of data. Supplementary information, remarks, and tips follow this symbol. - Page 11 SCALEOVIEW S17-2 / S19-2 ● The monitor automatically sets itself to a mains voltage in the range of 100 V to 240 V. Ensure that the local mains voltage lies within these limits. ● Ensure that the power socket on the device or the grounded mains outlet is freely accessible. ●...
-
Page 12: Power Cable
SCALEOVIEW S17-2 / S19-2 Power cable To guarantee safe operation, use the cable supplied. Use the following guidelines if it is necessary to replace the original cable set. ● The female/male receptacles of the cord set must meet IEC60320/CEE-22 requirements. ●... -
Page 13: Ce Marking
SCALEOVIEW S17-2 / S19-2 CE marking The shipped version of this device complies with the requirements of the EEC directives 89/336/EEC "Electromagnetic compatibility" and 73/23/EEC "Low voltage directive". FCC Class B Compliance Statement The following statement applies to the products covered in this manual, unless otherwise specified herein. -
Page 14: Energy Star Guidelines
SCALEOVIEW S17-2 / S19-2 Energy Star Guidelines The Fujitsu Siemens LCD colour monitor SCALEOVIEW S17-2 / S19-2 is designed to conserve electricity by dropping to less than 5 W when it goes into standby, suspend and OFF mode. With this new power management the monitor SCALEOVIEW S17-2 / S19-2 qualifies for the U.S. -
Page 15: Checking The Contents Of The Consignment
SCALEOVIEW S17-2 / S19-2 Checking the contents of the consignment The display surface of the LCD monitor is sensitive to pressure and scratches. Always hold the device by the casing! ► Unpack all the individual parts. ► Check the delivery for damage incurred during transportation. ►... -
Page 16: Installing An Ergonomic Video Workstation
SCALEOVIEW S17-2 / S19-2 Installing an ergonomic video workstation Before you set up your equipment, you should select a suitable position for working at the monitor. Please observe the following advice when installing a video workstation. 600 mm 600 mm Avoid glare from electric Windows Edge of desk... -
Page 17: Mounting And Removing The Monitor Base
SCALEOVIEW S17-2 / S19-2 Mounting and removing the monitor base The monitor surface is susceptible to scratching! Therefore, lay the monitor on a soft surface when mounting or removing the monitor base. Folding out monitor base When delivered the lower part of the monitor base is folded in. ►... -
Page 18: Removing Monitor Base
SCALEOVIEW S17-2 / S19-2 Removing monitor base Before you can use a swivel arm or a wall bracket, you must remove the monitor base: ► Lay the monitor on its face on a soft surface. The monitor surface is susceptible to scratching! ►... -
Page 19: Connecting The Monitor
SCALEOVIEW S17-2 / S19-2 Connecting the monitor Please take note of the safety information in the "Important notes" chapter. CE conformance and optimum picture quality are guaranteed only if you use the data cables supplied. Do not cover the ventilation openings of the monitor. The computer power plug must be pulled out! ►... -
Page 20: Connecting Cables To The Computer
SCALEOVIEW S17-2 / S19-2 ► Firmly insert the socket with the power cable supplied into the power cable connection of the power adapter and check whether the socket is securely seated. A lock (Kensington Lock) can be mounted in the security slot (6) to protect the monitor from theft. -
Page 21: Switching The Monitor On/Off
SCALEOVIEW S17-2 / S19-2 Adjusting height The height of the monitor can be adjusted (six positions). ► Grasp the monitor by the handle on the back and pull it in the direction of the arrow into the desired position. ► If you want to reduce the height, press the button for the height adjustment (1) - repeatedly if necessary. -
Page 22: Notes On Power Management
SCALEOVIEW S17-2 / S19-2 When you switch the computer system on, you must proceed in the following order: ► First switch on the LCD monitor with the ON/OFF switch (3). ► Then switch on the computer. If your computer has a power management function (energy-saving mode), you should read the "Notes on power management"... - Page 23 SCALEOVIEW S17-2 / S19-2 Your monitor should now already be properly adjusted. If none of the above operating systems is used or minor corrections are to be made to the screen display, then change the monitor settings with the OSD menu. Changing the monitor settings with the buttons of the control panel MENU/SEL DOWN...
- Page 24 SCALEOVIEW S17-2 / S19-2 Monitor settings using the OSD menu With the buttons on the control panel, call up and use the integrated OSD (On-Screen display) menu. The OSD menu is available in different languages. The English menu names are used in the following description (default setting).
- Page 25 SCALEOVIEW S17-2 / S19-2 The first function (H-Position) is highlighted. If necessary, press the 6 or 5 button to ► mark another function. ► Press the MENU/SEL button to select the highlighted function. Press the 6 or 5 button to adjust the value ►...
- Page 26 SCALEOVIEW S17-2 / S19-2 Adjusting size and position Calling the Image adjust setting window H-Position Adjusting the horizontal position With this function you move the picture to the left or to the right. V-Position Adjusting the vertical position With this function you move the picture up or down. Setting synchronisation Clock With this function you adjust the picture width to eliminate vertical picture...
- Page 27 SCALEOVIEW S17-2 / S19-2 Setting display of the OSD menu Calling the OSD Setup setting window Setting language for the OSD menu Language With this function you select the language for the OSD menu. The following languages are offered: English (default setting) French Swedish Spanish...
-
Page 28: Notes On Ergonomic Colour Adjustment
SCALEOVIEW S17-2 / S19-2 Notes on ergonomic colour adjustment If you select colours for the display in your application programmes, take note of the information below. The primary colours blue and red on a dark background do not produce the minimum required contrast of 3:1 and are therefore not suitable for continuous text and data entry. -
Page 29: Troubleshooting
SCALEOVIEW S17-2 / S19-2 Troubleshooting Should an error occur, first check the following points. If the distortion is still not eliminated, the monitor should, if possible, be checked on another computer and/or with another data cable. If you are unable to solve the problem, please inform our help desk. Having this problem? Check the following points: No screen display... - Page 30 SCALEOVIEW S17-2 / S19-2 Having this problem? Check the following points: Picture is shaking ► Check whether the data cable for the monitor is correctly attached to the monitor port on the computer. ► Press the AUTO/EXIT button to perform the auto-adjustment of the screen.
-
Page 31: Technical Data
SCALEOVIEW S17-2 / S19-2 Technical data Dimensions and weight (LCD monitor) S17-2 S19-2 Visible diagonals: 43 cm 48 cm Dot pitch: 0.264 mm 0.294 mm Screen size: Width: 337.9 mm 376 mm Height: 270.3 mm 301 mm Maximal resolution: 1280 x 1024 1280 x 1024 Dimensions Width:... -
Page 32: Vesa-Ddc-Compatible Vga Interface
SCALEOVIEW S17-2 / S19-2 Environmental conditions Environment class 3K2, IEC 721 Rated range of operation: 15 °C ..35 °C Humidity: 20 % ..85 % Limit range of operation: 5 °C ..35 °C Humidity: 20 % ..85 % Condensation must be avoided. -
Page 33: Power Supply Plug
SCALEOVIEW S17-2 / S19-2 Power supply plug +12 V DC Monitor port DVI-I C1 C2 Pin Meaning Pin Meaning Pin Meaning TMDS Data2- TMDS Data 1/3 Shield TMDS Data2+ TMDS Clock Shield TMDS Data 2/4 Shield Clock+ NC (Not connected) +5V Power Clock- Earth...
Need help?
Do you have a question about the FGSW-1602 and is the answer not in the manual?
Questions and answers