Table of Contents
Advertisement
Quick Links
Advertisement
Table of Contents

Related Manuals for AG Neovo TX-22


Summary of Contents for AG Neovo TX-22
- Page 1 TX-22 LED-Backlit Touch Display User Manual...
- Page 2 The information contained in this document is subject to change without notice. This document contains proprietary information that is protected by copyright. All rights are reserved. No part of this document may be reproduced,translated to another language or stored in a retrieval system, or transmitted by any means, electronic, mechanical, photocopying, recording, or otherwise, without prior written permission.
-
Page 3: Table Of Contents
TABLE OF CONTENTS Usage Notice Precautions ............................4 Chapter 1: Introduction 1.1 About TX-22 ............................5 1.2 Touch Screen for TX-22 ........................5 1.3 Package Overview ..........................6 Chapter 2: Installation 2.1 Product Overview ..........................7 2.1.1 Front View ..........................7 2.1.2... -
Page 4: Usage Notice
- Extremely hot, cold or humid environment. - Areas susceptible to excessive dust and dirt. - Near any appliance generating a strong magnetic field. - In direct sunlight. TX-22 is to be used as commercial and light industrial equipment only. -
Page 5: Chapter 1: Introduction
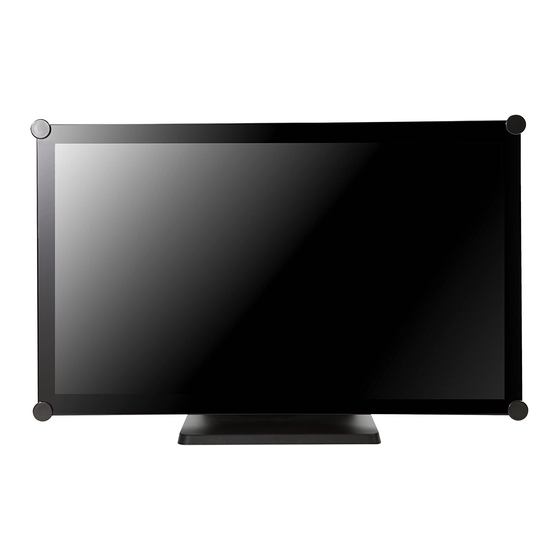
CHAPTER 1: INTRODUCTION 1.1 About TX-22 The TX-22 is a 21.5” flat panel screen with an active matrix, thin-film transistor (TFT) liquid crystal display (LCD). Features include: • Direct Analog signal input • Direct Digital signal input • Active matrix TFT LCD technology •... -
Page 6: Package Overview
PRODUCT DESCRIPTION 1.3 Package Overview LCD Display VGA Signal Cable Power Cord USB Cable ( A to B) DVI-D Cable DC Power Supply Cable Cover Screw... -
Page 7: Chapter 2: Installation
CHAPTER 2: INSTALLATION 2.1 Product Overview 2.1.1 Front View 2.1.2 Bottom View (Without Stand) DC IN RJ11... -
Page 8: Vesa Mount For Your Monitor
INSTALLATION 2.2 VESA Mount for Your Monitor This monitor conforms to the VESA Flat Panel Mounting Physical Mounting Interface standard which defines a physical mounting interface for flat panel monitors, and corresponding with the standards of flat panel monitor mounting devices, such as wall and table arms. The VESA mounting interface is located on the back of your monitor. -
Page 9: Start Your Installation
INSTALLATION 2.3 Start Your Installation Please follow these instructions so that you can hook up the cables to associated connectors. 1. Lay the LCD flat on an even surface. 2. Move the stand into position as seen in the step 1 diagram. 3. -
Page 10: Connecting The Display
INSTALLATION 2.4 Connecting the Display To setup this display, please refer to the following figure and procedures. 1. Be sure all equipment is turned off. 2. Connect the DC plug to the power connector on the monitor and the other end into an electrical outlet. -
Page 11: Chapter 3: User Controls
CHAPTER 3: USER CONTROLS 3.1 Side Panel Controls Icon Key Name Menu Down Select Power Menu off status Menu on status Menu appear Menu disappear / return to main item Brightness Main item select up / Adjust up Contrast Main item select down / Adjust down Select sub-item function Power On / Off... -
Page 12: How To Use The Osd Menus
USER CONTROLS 3.2 How to Use the OSD Menus Icon Key Name Menu Down Select Power 1. Press the “Menu” button to pop up the “on-screen menu” and press “Up” or “Down” button to select among the five functions in the main menu. 2. -
Page 13: On-Screen Display Menus
USER CONTROLS 3.3 On-Screen Display Menus Main OSD Menu: ITEM CONTENT Contrast The monitor luminance level control. Brightness The monitor backlight level control. Auto Adjust Fine-tune the image to full screen automatically. Left/Right Moving screen image horizontal position to left or right. Up/Down Moving screen image vertical position to up or down. -
Page 14: Chapter 4: Appendix
CHAPTER 4: APPENDIX 4.1 Troubleshooting If you are experiencing trouble with the LCD display, refer to the following. If the problem persists, please contact your local dealer or our service center. Problem: No image appears on screen. ► Check that all the I/O and power connectors are correctly and well connected as described in the “Installation”... -
Page 15: Warning Signal
APPENDIX 4.2 Warning Signal If you see warning messages on your LCD screen, this means that the LCD display cannot receive a clean signal from the computer graphics card. Below are the three kinds of Warning Signal. Please check the cable connections or contact your local dealer or our service center for more information. -
Page 16: Product Dimensions
APPENDIX 4.3 Product Dimensions 528.4 mm ► Front View 48.2 mm ► Side View 214.8 mm ► Top View... - Page 17 APPENDIX Rotate 324.3 mm ► Front View 48.2 mm ► Side View 214.8 mm ► Top View...
-
Page 18: Compatibility Modes
APPENDIX 4.4 Compatibility Modes Mode Resolution H-Frequency(khz) V-Frequency(hz) IBM VGA 720X400 31.47 IBM VGA 640X480 31.47 Apple MacII 640X480 35.00 VESA VGA 640X480 37.86 VESA VGA 640X480 37.50 VESA SVGA 800X600 35.16 VESA SVGA 800X600 37.88 VESA SVGA 800X600 48.08 VESA SVGA 800X600 46.88... -
Page 19: Touch Screen Driver Installation
No additional software driver is required for general operation of the touch screen. 2. For TX-22, the system requires 15 seconds for Windows 7 to install/uninstall the touch drivers while turning power on/off or plugging/unplugging USB cable. - Page 20 APPENDIX If you are using a PC running Windows ® CE, follow the instructions below: 1. Power on the computer. 2. Make sure that the USB cable is connected to the computer. 3. Using Platform Builder, build an image file by following the step-by-step instructions found in the folder file on the CD-ROM.
-
Page 21: Chapter 5: Specifications
CHAPTER 5: SPECIFICATIONS 5.1 Display Specifications TX-22 Panel Size 21.5” Panel Max. Resolution 1920 x 1080 H.Freq 31.47kHz – 82.3kHz Frequency (H/V) V.Freq 56Hz – 75Hz 15-Pin D-Sub Input 24-Pin DVI-D Technology Projected Capacitive Touch Screen Positioning Accuracy ±2.5mm Panel Interface USB (Type–B, HID compliant)
Need help?
Do you have a question about the TX-22 and is the answer not in the manual?
Questions and answers