Garland MWE3W Installation And Operation Manual
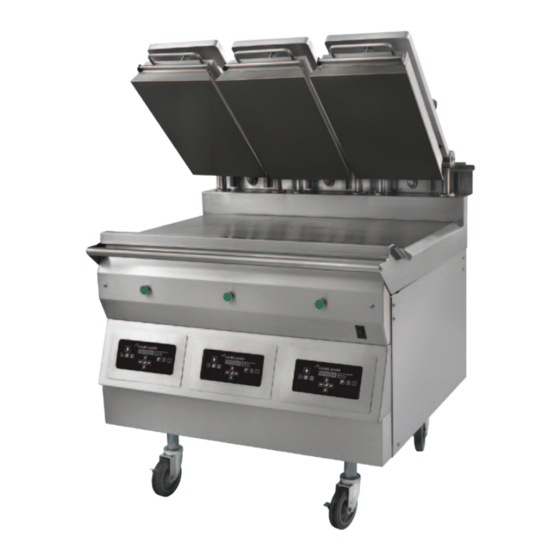
Garland gas & electric clamshell grills with product recognition
Hide thumbs
Also See for MWE3W:
- User manual ,
- Service manual (72 pages) ,
- Installation and operation manual (36 pages)
Table of Contents
Advertisement
Quick Links
INSTALLATION AND
OPERATION MANUAL
GARLAND GAS & ELECTRIC
CLAMSHELL GRILLS
WITH PRODUCT RECOGNITION
MODELS:
MWE3W
MWE3S
MWG3W
IMPROPER INSTALLATION, ADJUSTMENT, ALTERATION, SERVICE OR MAINTENANCE CAN CAUSE
PROPERTY DAMAGE, INJURY OR DEATH. READ THE INSTALLATION, OPERATING AND MAINTENANCE
INSTRUCTIONS THOROUGHLY BEFORE INSTALLING OR SERVICING THIS EQUIPMENT.
PLEASE READ ALL SECTIONS OF THIS MANUAL AND RETAIN FOR FUTURE REFERENCE.
THIS EQUIPMENT MUST BE INSTALLED AND COMMISSIONED BY A PROFESSIONAL,
THIS EQUIPMENT MUST BE OPERATED UNDER AN APPROVED HOOD SYSTEM ONLY.
NOTE: This manual pertains to all grill models listed above. The reader/operator must interpret its contents
to applicable needs. If you have questions about any instructional materials pertaining to Garland grills,
please contact our Customer Service Department at one of the phone numbers below.
TOLL FREE: (800) 446-8367 PHONE: (570) 636-1000 FAX: (570) 636-9874
PART #4521777 (10/09/09)
WARNING:
FACTORY-TRAINED TECHNICIAN.
MANUFACTURED EXCLUSIVELY FOR McDonald's BY
GARLAND COMMERCIAL INDUSTRIES, LLC
185 EAST SOUTH STREET FREELAND, PENNSYLVANIA 18224
E-mail: clamshell@garland-group.com
http://www.garland-group.com
Advertisement
Table of Contents

Related Manuals for Garland MWE3W


Summary of Contents for Garland MWE3W
- Page 1 NOTE: This manual pertains to all grill models listed above. The reader/operator must interpret its contents to applicable needs. If you have questions about any instructional materials pertaining to Garland grills, please contact our Customer Service Department at one of the phone numbers below.
-
Page 3: Table Of Contents
GARLAND CLAMSHELL GRILLS WITH PRODUCT RECOGNITION INSTALLATION/OPERATION MANUAL CONTENTS CONTENTS ........3 OPERATING PROCEDURES . -
Page 4: Introduction
The equipment warranty coverage remains in force for two (2) years, (parts and labor), from the date the equipment is put into operation. The Garland Group agrees to repair or replace, at it’s option, any part that proves to be defective in material or workmanship at no charge for the part or normal labor. -
Page 5: Safety
External equipotential bonding conductor provided on rear of appliance. Use as applicable, in accordance with local wiring rules. The Garland clamshell grill is a semi-automatic cooking appliance. The upper platen is lowered automatically, following the manual, single-handed initiation of the cooking cycle, and raised automatically upon completion of the cooking cycle. -
Page 6: Shipping Damage Claim Procedure
GARLAND CLAMSHELL GRILLS WITH PRODUCT RECOGNITION SHIPPING DAMAGE CLAIM PROCEDURE Please note that the Garland equipment was carefully inspected and packed by skilled personnel before leaving the factory. The transportation company assumes full responsibility for safe delivery upon acceptance of the equipment. What to do if the equipment arrives damaged: 1. - Page 7 GARLAND CLAMSHELL GRILLS WITH PRODUCT RECOGNITION INSTALLATION/OPERATION MANUAL CLEANING & MAINTENANCE continued • Open one packet of McD Hi-Temp Grill Cleaner • Apply the grill cleaner to and empty the contents outer edges of right and into a lid or stainless left platens.
- Page 8 INSTALLATION/OPERATION MANUAL GARLAND CLAMSHELL GRILLS WITH PRODUCT RECOGNITION CLEANING & MAINTENANCE continued • Scrub front side of • Scrub inner edges of the platens from right platen right and left platens. to left platen with KAY • Press green button to Grill Cleaning Pad Holder raise the center platen.
- Page 9 GARLAND CLAMSHELL GRILLS WITH PRODUCT RECOGNITION INSTALLATION/OPERATION MANUAL CLEANING & MAINTENANCE continued • Pour a small amount of lukewarm water on a • Empty, wash, rinse, clean, sanitizer-soaked and replace the grease grill cloth over the troughs. bottom grill surface and wipe off residue.
-
Page 10: Specifications
INSTALLATION/OPERATION MANUAL GARLAND CLAMSHELL GRILLS WITH PRODUCT RECOGNITION SPECIFICATIONS Dimensions: 19.001 7.110 [483mm] [181mm] Models MWE3W, MWG3W 4.895 7.111 [124mm] [181mm] 24.000 [610mm] (PLATE DEPTH) 34.968 [888mm] 5.475 36.000 [139mm] [914mm] (PLATE WIDTH) 38.000 4.064 [965mm] [103mm] .737 "COLD ZONE"... -
Page 11: Dimensions: Model Mwe3S
GARLAND CLAMSHELL GRILLS WITH PRODUCT RECOGNITION INSTALLATION/OPERATION MANUAL SPECIFICATIONS Dimensions: Model MWE3S 21.65 [550mm] PLATE DEPTH 5.475 [139mm] 36.00 [914mm] PLATE WIDTH 32.60 [828mm] 38.00 [965mm] 1.70 [43mm] “COLD ZONE” 48° 1.50 [38mm] 30.714 26.42 [780mm] [671mm] .787 15.384 [20mm] 1.598... -
Page 12: Input Specifications, Electric Grills, United States
55.2 55.2 55.2 15-50R INTERLOCK HVAC Hood / Fire Suppression Interlock Circuit: 7 Amps / 120V / Single Phase L21-20R Input Specifications, Electric Grills, CE Approved Models MWE3W-CE, MWE3S-CE: NOMINAL AMPS PER LINE LOADING: (kW/PHASE) TOTAL kW SUPPLY MENNEKES LOAD... -
Page 13: Input Specifications, Gas Grills, North America
GARLAND CLAMSHELL GRILLS WITH PRODUCT RECOGNITION INSTALLATION/OPERATION MANUAL SPECIFICATIONS Input Specifications, GAS Grills, North America: ELECTRICAL INPUT LOADING: (kW/PHASE) NOMINAL AMPS PER LINE (1) 30-AMP TOTAL NEMA CIRCUIT & 208V / 220V / 240V 208V / 60Hz 220V / 60Hz... -
Page 14: Installation Store Responsibilities
Once the installation is complete as per the procedures 1. One (1) grill below, a factory authorized service company MUST startup the grill according to Garland Commercial Industries 2. One (1) gas hose (for gas grills only) startup standards. 3. One (1) box containing: A startup DOES NOT include: a. - Page 15 GARLAND CLAMSHELL GRILLS WITH PRODUCT RECOGNITION INSTALLATION/OPERATION MANUAL INSTALLATION & STARTUP (continued) 1. Uncrate unit from crating material 3. Carefully rotate grill back on its casters. Now you may cut and remove the platen securing straps. IMPORTANT: RATING PLATE FOR THIS EQUIPMENT IS LOCATED IN TWO PLACES.
-
Page 16: Installation & Startup (Continued)
INSTALLATION/OPERATION MANUAL GARLAND CLAMSHELL GRILLS WITH PRODUCT RECOGNITION INSTALLATION & STARTUP (continued) 5. GAS GRILL ONLY, (for electric grills, skip to step 6 on 7. Install flue box to back of grill. the next page): Install the included quick-disconnect gas hose to the inlet fitting on the underside of the FLUE BOX IS grill by threading a 3/4”... -
Page 17: Startup Procedure
Garland Commercial Industries for reimbursement. At GRILL the time of receipt, Garland will start the warranty period PLATE which will conclude at the end of 2 years. You may contact... -
Page 18: Document The Startup
GARLAND CLAMSHELL GRILLS WITH PRODUCT RECOGNITION INSTALLATION & STARTUP (continued) Document the Startup All aspects of the Starup procedure must be documented using the Garland-issued form, part #4521780. GARLAND CLAMSHELL GRILL START – UP FORM ELECTRIC OR COMBINATION GAS / ELECTRIC (FOR USE IN MODEL MWE3W/MWG3W &... -
Page 19: Installation Of Wrap Around Release Material Mounting Brackets
GARLAND CLAMSHELL GRILLS WITH PRODUCT RECOGNITION INSTALLATION/OPERATION MANUAL INSTALLATION OF WRAP AROUND RELEASE MATERIAL MOUNTING BRACKETS CAUTION: UPPER PLATEN IS EXTREMELY HOT. WARNING: ISOLATE POWER SOURCE TO PREVENT ELECTRICAL SHOCK. 1. Ensure Electrical Power is unplugged before 4. Retighten four (4) screws on the platen lid. -
Page 20: Installation Of Release Material
INSTALLATION/OPERATION MANUAL GARLAND CLAMSHELL GRILLS WITH PRODUCT RECOGNITION INSTALLATION OF RELEASE MATERIAL 1. Slide release material rod through hemmed end of the release material sheet. RELEASE MATERIAL HEMMED FLAPS LOOP RELEASE MATERIAL FLAPS MATERIAL RELEASE MATERIAL “Teflon Sheet” available from your DC... -
Page 21: Grill Accessories
GARLAND CLAMSHELL GRILLS WITH PRODUCT RECOGNITION INSTALLATION/OPERATION MANUAL GRILL ACCESSORIES Teflon Sheet Splash Shield Item 4521792 Item 4523492 Teflon Sheet Rod Splash Shield, Japan Type Item 4521355 Item 4525436 Teflon Sheet Retaining Clip Item 4527294 Quick-Disconnect Gas Hose Vapor Shield Complete (2 shown) -
Page 22: Operating Instructions
INSTALLATION/OPERATION MANUAL GARLAND CLAMSHELL GRILLS WITH PRODUCT RECOGNITION OPERATING INSTRUCTIONS GARLAND GAS & ELECTRIC CLAMSHELL GRILLS WITH PRODUCT RECOGNITION Page 22 PART #4521777 (10/09/09) -
Page 23: Description Of Grill Control
GARLAND CLAMSHELL GRILLS WITH PRODUCT RECOGNITION INSTALLATION/OPERATION MANUAL DESCRIPTION OF GRILL CONTROL Right Arrow Button – In any mode, scrolls forward through a list Left Arrow Button – In any mode, scrolls backward through a list Enter Button – In the normal operating mode, this button is not active. -
Page 24: Operating Procedures
INSTALLATION/OPERATION MANUAL GARLAND CLAMSHELL GRILLS WITH PRODUCT RECOGNITION OPERATING PROCEDURES General Overview: Upon reaching the AM or PM set temperature (whichever is selected), the grill will stabilize in temperature for fifteen The PRC grill control will allow for 2 functions, both (15) minutes. -
Page 25: Indicator Lights
GARLAND CLAMSHELL GRILLS WITH PRODUCT RECOGNITION INSTALLATION/OPERATION MANUAL OPERATING PROCEDURES (continued) Indicator Lights load product on the grill. The LED lights on the main control indicate the 5. Press the GREEN pushbutton to initiate a cook cycle. temperature status of each zone. -
Page 26: Lunch In Auto Mode
PRODUCT RECOGNITION This Garland Clamshell grill is equipped with Product Recognition Controls (PRC). This new technology allows the user to simply start a cook cycle WITHOUT having to select a specific menu item. The PRC will recognize the product thickness by utilizing switches inside the upper platen and the magnets mounted on the platen arms. -
Page 27: Common Product Recognition Issues
GARLAND CLAMSHELL GRILLS WITH PRODUCT RECOGNITION INSTALLATION/OPERATION MANUAL COMMON PRODUCT RECOGNITION ISSUES Product Recognition Errors can appear in 2 ways: 1. After initiating cook cycle, the controller displays “PRODUCT NOT RECOGNIZED - NO RECIPE FOUND”. 2. The controller displays the incorrect product for the product that was layed on the grill. -
Page 28: Patty Placement
INSTALLATION/OPERATION MANUAL GARLAND CLAMSHELL GRILLS WITH PRODUCT RECOGNITION PATTY PLACEMENT This procedure for placement and removal of meat products on the clamshell grill should be followed as indicated below and as follows: 1. Each gray rectangle depicted below represents one cooking; the area beneath one upper platen. -
Page 29: Program Logic
GARLAND CLAMSHELL GRILLS WITH PRODUCT RECOGNITION INSTALLATION/OPERATION MANUAL PROGRAM LOGIC Press & Hold (3 seconds) Menu Item Displayed RIGHT or LEFT arrow buttons Scroll Menu Items Product Scroll Scroll Forward Library Backward Select Menu Item FLAT MENU ITEMS CLAM MENU ITEMS... -
Page 30: Control Programming
INSTALLATION/OPERATION MANUAL GARLAND CLAMSHELL GRILLS WITH PRODUCT RECOGNITION CONTROL PROGRAMMING Programming Modes; System Setup 6. PRESS the button. The current time unit will flash. To Change the Temperature Display Units 7. PRESS the arrow buttons to change the (Fahrenheit / Celcius) flashing time unit. -
Page 31: Programming Modes; Menu Items
GARLAND CLAMSHELL GRILLS WITH PRODUCT RECOGNITION INSTALLATION/OPERATION MANUAL CONTROL PROGRAMMING (continued) To activate / deactivate a menu item in the Normal 3. PRESS the arrow button. “Setup” will appear in the Operating mode library, or change its day-part display (Defaults are listed in section “OPERATING PROCEDURES”) 4. - Page 32 INSTALLATION/OPERATION MANUAL GARLAND CLAMSHELL GRILLS WITH PRODUCT RECOGNITION CONTROL PROGRAMMING (continued) To change the grill upper platen set point temperature To Change the Toast Buns time NOTE: Grill temperature set points are preset in the controller to the 1. Using the button, select the menu item that currently required standard.
- Page 33 GARLAND CLAMSHELL GRILLS WITH PRODUCT RECOGNITION INSTALLATION/OPERATION MANUAL CONTROL PROGRAMMING (continued) To Add NEW Menu Items 19. PRESS the button. The gap setting will begin to flash. The following programming instructions serves as a GUIDE for programming the basic settings for CLAM menu items.
-
Page 34: Probe Calibration
“FRONT TEMP CAL”. The zones are displayed in order of FRONT TEMP CAL, MIDDLE TEMP CAL, BACK TEMP CAL, TOP TEMP CAL. MWE3W: The electric grill’s thermocouple probes are located front to rear, as shown in the diagram to the right. Each upper platen has one thermocouple in the center. -
Page 35: Factory Default Settings
GARLAND CLAMSHELL GRILLS WITH PRODUCT RECOGNITION INSTALLATION/OPERATION MANUAL FACTORY DEFAULT SETTINGS (software version 202) Clam Menu Items MULTI MUST TOAST TOAST Menu DISPLAY GRILL SET PLATEN INSTANT REMOVE REMOVE TOO COOL PRODUCT STAGE MULTI/PR MULTI REMOVE IN BUNS IN BUNS... - Page 36 Installation & Operation Manual Gas & Electric Clamshell Grills With Product Recognition Garland Commercial Indutries, LLC, 185 East South Street, Freeland, Pennsylvania 18224 Phone: +1 (570) 636-1000 • Fax: +1 (570) 636-9874 TOLL FREE Service Hotline: (800) 446-8367 http://www.garland-group.com • Email: qsrservice@garland-group.com...
Need help?
Do you have a question about the MWE3W and is the answer not in the manual?
Questions and answers