
Related Manuals for Runco RS-900


Summary of Contents for Runco RS-900
- Page 1 ’ W N E R P E R A T I N G A N U A L RS-900 Series 1080p Digital Light Processing Projectors RS-900 RS-900/CineWide RS-900/CineWide with AutoScope...
-
Page 3: Two Year Limited Warranty
(6) months or 1000 hours, whichever comes first, from the effective date of delivery to the end user. In addition, Runco will provide a new or rebuilt replacement lamp for the lamp that fails due to defects in materials or workmanship for a period of six (6) months or 1000 hours, whichever comes first, from the effective date of delivery to the end user. - Page 4 IMPORTANT – WARRANTY REGISTRATION: Please fill out and mail your warranty registration card. It is imperative that Runco knows how to reach you promptly if we should discover a safety problem or product update for which you must be notified.
- Page 5 ADDITIONAL INFORMATION: To locate the name and address of the nearest Runco Authorized Service Center, or for additional information about this Limited Warranty, please call or write: RUNCO INTERNATIONAL, INC. Attn: Customer Service Department 2900 Faber Street Union City, CA 94587...
-
Page 6: Important Safety Instructions
Important Safety Instructions Thank you for your purchase of this quality Runco video projector! It has been designed to provide you with the quality of video that is expected in a home theater. For the best performance, please read this manual carefully as it is your guide through the menus and operation. -
Page 7: Compliance Information
Compliance Information DECLARATION OF CONFORMITY: Manufacturer’s Name: Runco International, a subsidiary of Planar Systems, Inc. Manufacturer’s Address: 2900 Faber Street, Union City, CA 94587 hereby declares that the products Model Numbers: RS-900, RS-900/CineWide and RS-900/CineWide with AutoScope conform with the provisions of: Council Directive 2004/108/EC on Electromagnetic Compatibility;... - Page 8 The recycling of materials will help to conserve natural resources. This symbol is only valid in the European Union. If you wish to discard this product, please contact your local authorities or dealer and ask for the correct method of disposal. viii Runco RS-900 Owner’s Operating Manual...
-
Page 9: Table Of Contents
Installing the Optional CineWide/AutoScope Lens Mount ...........21 Installing the AutoScope Lens Motor (RS-900/CineWide with AutoScope) ....22 Installing the Fixed CineWide Base Plate (RS-900/CineWide, Prismatic Lens) ..25 Installing the Fixed CineWide Base Plate (RS-900/CineWide, Cylindrical Lens) ..26 Runco RS-900 Owner’s Operating Manual... - Page 10 Installing and Adjusting the CineWide Anamorphic Lens ..........36 Anamorphic Lens Installation and Adjustment - RS-900/CineWide with AutoScope or RS-900/CineWide (McKinley or Rainier II Lens).......37 Anamorphic Lens Installation and Adjustment - RS-900/CineWide (Whitney Lens) 42 4. Operation .........................45 Selecting Video Memory .....................45 Selecting an Aspect Ratio ..................45...
- Page 11 Troubleshooting Tips ....................66 6. Serial Communications ..................69 RS-232 Connection and Port Configuration ...............69 Serial Command Syntax .....................69 7. Specifications ......................73 RS-900 Specifications ....................73 RS-900 Dimensions ....................76 RS-900/CineWide Dimensions ...................77 RS-900/CineWide with AutoScope Dimensions ............78 Supported Timings .....................79 Runco RS-900 Owner’s Operating Manual...
- Page 12 Table of Contents Notes: Runco RS-900 Owner’s Operating Manual...
- Page 13 3-6. RS-900 with Ceiling Mount Adapters/Projector Stands..........23 3-7. AutoScope Lens Motor Installation ................24 3-8. RS-900/CineWide with Whitney (Prismatic) Lens Base Plate and Ceiling Mounting Plate - Bottom View ......................25 3-9. RS-900/CineWide with Rainier II/McKinley (Cylindrical) Lens Base Plate and Ceiling Mounting Plate - Exploded View..................26...
- Page 14 List of Figures 7-1. RS-900 Dimensions ....................76 7-2. RS-900/CineWide Dimensions (with Whitney Anamorphic Lens).........77 7-3. RS-900/CineWide with AutoScope Dimensions............78 Runco RS-900 Owner’s Operating Manual...
-
Page 15: Introduction
Target Audience most out of the RS-900. Runco has made every effort to ensure that this manual is accurate as of the date it was printed. However, because of ongoing product improvements and customer feedback, it may require updating from time to time. You can always find the latest version of this and other Runco product manuals on-line, at www.Runco.com. -
Page 16: Using This Manual
Use the following table to locate the specific information you need in this manual. Using This Manual If you need..Turn to page: Information about obtaining service General information about the RS-900 DLP Projector Installation instructions First-time configuration instructions Advanced configuration instructions Troubleshooting tips Specifications for the RS-900 DLP Projector Runco RS-900 Owner’s Operating Manual... -
Page 17: Description, Features And Benefits
CineWide maintains constant vertical height on the screen just as in a movie theater. When a viewer transitions from 1.78:1 (16:9) program material to 2.35:1, the image simply gets wider while full height is maintained. Also available with the RS-900 is CineWide with AutoScope™, an enhanced, remote-controlled motorized version of CineWide. -
Page 18: Key Features And Benefits
• HDTV Compatible ➤ Parts List Your RS-900 is shipped with the following items. If any items are missing or damaged, please contact your Runco dealer or Runco Customer Service at (800) 23-RUNCO. • RS-900 DLP Projector • Remote Control Unit and two (2), AAA-size batteries •... -
Page 19: Controls And Functions
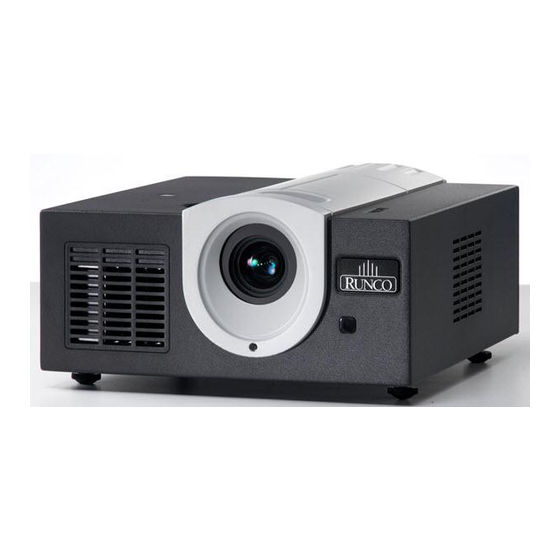
Controls and Functions Figure 2-1 and Figure 2-2 show the key RS-900 components. RS-900 at a Glance Figure 2-1. RS-900 Front/Side/Top View 1. EXHAUST VENT 2. ZOOM TAB Use this to change the projected image size. 3. TOP IR SENSOR... - Page 20 To rotate the logo, grip it at the sides, pull it away from the projector and rotate it 180 degrees. 9. FRONT IR SENSOR 10. PROJECTION LENS To adjust the focus, grasp the lens by the outer ring and rotate it. Runco RS-900 Owner’s Operating Manual...
- Page 21 Controls and Functions Figure 2-2. RS-900 Rear/Bottom/Side View 1. RUNCO LOGO The logo can be rotated to match the projector orientation: inverted (ceiling-mounted) or upright. To rotate the logo, grip it at the sides, pull it away from the projector and rotate it 180 degrees.
-
Page 22: Rs-900 Rear Panel
Controls and Functions Figure 2-3 shows the RS-900 rear panel. RS-900 Rear Panel S-VID / Figure 2-3. RS-900 Rear Panel 1. HDMI 1 (Digital) HDCP-compliant digital video input for connecting a DVD player or HD tuner with a DVI or HDMI output. - Page 23 9. 12-VOLT (250 mA) TRIGGER OUTPUT (3.5-mm, mini phono jack) Connection for a 12-volt trigger-controlled device. This can be a retractable screen, screen mask or the Runco CineWide with AutoScope system. 10. COMP 2 / RGB Five BNCs for connecting either RGB or component (YPbPr), SD or HD video signals.
-
Page 24: Rs-900 Remote Control
Controls and Functions Figure 2-4 shows the RS-900 remote control, and the paragraphs that follow describe its functionality. RS-900 Remote Control LIGHT S-VID COMP1 COMP2 HDMI HDMI 2 INFO ENTER EXIT MENU CONT TINT CUST1 CUST2 NIGHT LBOX VWIDE 16 : 9... - Page 25 Press this button to show or hide the on-screen display (OSD) controls. 5. Picture Adjustment Buttons: BRT (Brightness) Press to adjust black level. CONT (Contrast) Press to adjust white level. COL (Color) Press to adjust color intensity. TINT Press to adjust color hues. Runco RS-900 Owner’s Operating Manual...
- Page 26 For viewing 2.35:1 source material. VCINE (Virtual Cinema – CineWide-equipped projectors only) Selects the Virtual Cinema aspect ratio, used for viewing 16:9 source material on a 2.35:1 screen. 8. 0 - 9 Use these keys to enter menu passcodes. Runco RS-900 Owner’s Operating Manual...
- Page 27 Press to switch to the active window in PIP mode. Press to activate PIP mode. PIP+ Press to enlarge the PIP window. PIP- Press to shrink the size of the PIP window. 10. LENS Press to access the lens shift controls. Runco RS-900 Owner’s Operating Manual...
- Page 28 Controls and Functions Notes: Runco RS-900 Owner’s Operating Manual...
-
Page 29: Installation
• The remote control may fail to operate if the infrared remote sensor is exposed to bright sunlight or fluorescent lighting. • Ambient conditions may possibly impede the operation of the remote control. If this happens, point the remote control at the projector, and repeat the operation. Runco RS-900 Owner’s Operating Manual... -
Page 30: Quick Setup
Installation Table 3-1 gives a quick overview of the RS-900 installation process. The sections following this one provide detailed instructions. Quick Setup Installation should be performed by a qualified custom video Note installation specialist. Table 3-1. Installation Overview For Details, Refer to... -
Page 31: Installation Considerations
Images may then appear washed out and less vibrant. Runco RS-900 Owner’s Operating Manual... -
Page 32: Throw Distance
Estimating Throw Distance Throw Distance (TD) = Screen Width (w) x Lens Throw Ratio Figure 3-1. Estimating Throw Distance Table 3-3 gives the throw ratios for the RS-900, RS-900/CineWide and RS-900/CineWide with AutoScope. Table 3-3. Throw Ratios for the RS-900 Series... -
Page 33: Vertical And Horizontal Position
Figure 3-2. Ceiling Installation Ceiling Height Projection Distance Lens Center Screen Lens Center Floor Installation Screen Lens Center Height Lens Center Projection Distance Floor Figure 3-2. Projector Placement Runco RS-900 Owner’s Operating Manual... -
Page 34: Vertical Lens Shift
Figure 3-3. Vertical Lens Shift (Example Only) The RS-900 provides up to 40% of vertical lens shift above and up to 60% of vertical lens shift below the screen center. For example, with a 100 x 56-inch (16:9) screen, you can shift the image up to 22.40 inches (0.57 meters) above or 33.60 inches... -
Page 35: Folded Optics
• Keep the projector away from devices that radiate electromagnetic energy such as motors and transformers. Common sources of these include slide projectors, speakers, power amplifiers and elevators. If you are installing a standard (non-CineWide) RS-900, skip this step and proceed with Mounting the RS-900 (page 28). Installing the Optional... -
Page 36: Installing The Autoscope Lens Motor (Rs-900/Cinewide With Autoscope)
(4x) Nylon Spacer, 5/8” diameter x 3/16” high (4x) Figure 3-5. RS-900/CineWide with AutoScope Motor Assembly – Exploded View Remove Projector Front Height Adjusters: Place the projector upside down on a blanket or other soft surface. Then, remove the two... - Page 37 Using the four (4), supplied M6 x 12mm Flat-Head Phillips screws (item #6), attach the AutoScope Ceiling Mount Adapters/Projector Stands (items #4 and #5) to the projector as shown in Figure 3-6. Figure 3-6. RS-900 with Ceiling Mount Adapters/Projector Stands DO NOT OVER-TIGHTEN THE SCREWS. Caution...
-
Page 38: Autoscope Lens Motor Installation
4. Secure the AutoScope Ceiling Mount Adapters/Projector Stands to the motor using the two (2), supplied 10-32 x 1/4” Flat-Head Phillips screws (item #3). Figure 3-7. AutoScope Lens Motor Installation After you have installed the AutoScope lens motor, proceed with Mounting the RS-900 on page 28. Runco RS-900 Owner’s Operating Manual... -
Page 39: Installing The Fixed Cinewide Base Plate (Rs-900/Cinewide, Prismatic Lens)
1. Place the projector upside down on a blanket or other soft surface. Prismatic Lens) 2. If you are mounting the RS-900/CineWide on a ceiling: Line up the four holes on the projector ceiling mounting plate (included with the projector ceiling mount kit) with those on the bottom of the projector. -
Page 40: Installing The Fixed Cinewide Base Plate (Rs-900/Cinewide, Cylindrical Lens)
Installation ➤ Installing the Fixed Figure 3-9 shows the RS-900/CineWide cylindrical (Rainier II/McKinley) lens base plate CineWide Base Plate assembly. (RS-900/CineWide, Cylindrical Lens) Ceiling Mount Plate (part of Ceiling Mount Kit) Screw, Phillips Pan-Head, M6 x 1.0 x 12mm (4x) - Page 41 3. Line up the four mounting holes on the CineWide base plate (item #2) with those on the bottom of the projector. 4. If you are mounting the RS-900/CineWide on a ceiling: Line up the four holes on the projector ceiling mounting plate (included with the projector ceiling mount kit) with those on the bottom of the projector.
-
Page 42: Mounting The Rs-900
For fixed installations, and for those that want the projector out of sight or have a limited (Inverted) space for projector and audience, you can invert the RS-900 and suspend it from the ceiling using a specially-designed ceiling mount fixture. -
Page 43: Connections To The Rs-900
Installation Proceed as follows to connect the RS-900 to your video sources, external controller(s) – if present – and AC power. Connections to the RS-900 When connecting your equipment: • Turn off all equipment before making any connections. • Use the correct signal cables for each source. -
Page 44: Rgb Connections
Progressive Component Video Connections: Connect your progressive component source (DVD player or HD set top box) to the COMP 2/RGB input as shown in Figure 3-12. S-VID / DTV or Progressive Component (YPbPr) Source Figure 3-12. Progressive Component Video Connections Runco RS-900 Owner’s Operating Manual... -
Page 45: Composite, S-Video And Component Video Connections
Installation Composite/S-Video/Component Video Connections: Use the included cables to connect your composite, S-Video and component video sources to the RS-900 as shown in Figure 3-13. S-VID / DTV Source, DVD Player, VCR, Satellite Receiver etc. Figure 3-13. Composite, S-Video and Component Video Connections... -
Page 46: Rs-232 Controller Connection
Use the communication cable supplied with the projector to connect a PC or home Connection theater control/automation system (if present) to the RS-232 port on the RS-900; see Figure 3-14. For more information about using this connection, refer to Serial Communications on page 69. -
Page 47: Connecting 12-Volt Trigger Output To External Theater Equipment
Installation If you are installing an RS-900/CineWide with AutoScope, use the cable supplied with the Connecting 12-Volt AutoScope Lens Motor to connect the motor to the 12-volt trigger output as shown in Trigger Output to External Figure 3-15. Theater Equipment S-VID / 3.5-mm... -
Page 48: Connecting To Ac Power
3. Turn on the main power switch at the rear of the projector. The POWER LED lights orange. The LAMP and TEMP LEDs light red briefly, then go out. 4. Press the ON button on the remote control to turn on the RS-900. The POWER LED flashes green to indicate that it is warming up. -
Page 49: Changing The Osd Language
Installation The RS-900 OSD language is initially set to English, but can also display the menus in French, Spanish, Italian or German. To change the OSD language: Changing the OSD Language 1. Press MENU. 2. Select Installation from the Main Menu and press ENTER. -
Page 50: Installing And Adjusting The Cinewide Anamorphic Lens
The RS-900/CineWide is available with either a prismatic or a cylindrical anamorphic lens; the RS-900/CineWide with AutoScope always uses a cylindrical lens. If you are installing an RS-900/CineWide with a prismatic lens, refer to Anamorphic Lens Installation and Adjustment - RS-900/CineWide (Whitney Lens) on page 42. If you are installing an RS-900/CineWide with a cylindrical lens or an RS-900/CineWide with AutoScope, continue with the next section. -
Page 51: Anamorphic Lens Installation And Adjustment - Rs-900/Cinewide With
Installation The RS-900 Anamorphic lens mount kit consists of everything shown in Figure 3-17. Anamorphic Lens Some components shipped with your projector may differ slightly from what is shown in Installation and these instructions. Adjustment - RS-900/CineWide with AutoScope or... - Page 52 Cinema aspect ratio is selected. 6. Select the Cinema or Virtual Cinema aspect ratio to move the anamorphic lens into position, if it isn’t already. To do this, press CINEMA or VCINE on the RS-900 remote control (Figure 2-4). Runco RS-900 Owner’s Operating Manual...
- Page 53 Too Low Correct position Too High When the height is properly set, tighten the Height Adjustment T-Screws to secure the lens in place. Runco RS-900 Owner’s Operating Manual...
- Page 54 Note properly adjusted, especially at shorter throw distances. If this is the case, Runco recommends that you slightly over-scan the image into the screen frame area to mask the distortion. Adjusting the Yaw: Loosen the Yaw/X-Adjustment Levers to allow the lens to pivot freely from side to side.
- Page 55 Anamorphic Lens Set Screw (item #10) to secure the lens in place. (When viewed from the front, the rear opening on the anamorphic lens should appear as a tall, narrow oval.) Focus: Finally, rotate the Focus Ring on the anamorphic lens to fine-tune the optical focus. Runco RS-900 Owner’s Operating Manual...
-
Page 56: Anamorphic Lens Installation And Adjustment - Rs-900/Cinewide (Whitney Lens)
Installation ➤ Anamorphic Lens The RS-900/CineWide – Whitney lens mount kit consists of everything shown in Figure Installation and 3-19. Some components shipped with your projector may differ slightly from what is Adjustment - shown in these instructions. RS-900/CineWide (Whitney Lens) - Page 57 3. Slowly move the anamorphic lens into place so that there are no shadows on the top or bottom of the screen: Too Low Correct position Too High 4. When the height is properly set, tighten the Height Adjustment Screws to secure the lens in place. Runco RS-900 Owner’s Operating Manual...
- Page 58 Note properly adjusted, especially at shorter throw distances. If this is the case, Runco recommends that you slightly over-scan the image into the screen frame area to mask the distortion. Finally, rotate the Focus Ring on the anamorphic lens to fine-tune the optical focus.
-
Page 59: Operation
• Press TINT to adjust the hue of the image. For more information about these controls, refer to Picture Adjust on page 48. When you turn on the RS-900, it switches to the last selected input and looks for a valid signal. -
Page 60: Using Picture-In-Picture (Pip)
• Press MENU to turn off the OSD menu. (When the Main Menu is displayed, pressing EXIT also turns off the menu.) The RS-900 OSD menus are arranged hierarchically, as shown in Figure 4-1. Depending on the selected input source and signal characteristics, some menu options may not be available. -
Page 61: Source Select
OSD Position Vertical Blue Image On / Off Sleep Timer 0, 30, 60, 90 ... 360 min. Source Resolution Aspect Ratio Information (read only) Picture Memory Lamp Hours Serial Figure 4-1. RS-900 OSD Menu Structure Runco RS-900 Owner’s Operating Manual... -
Page 62: Main Menu
HDMI 2 RGB HD ➤ Picture Adjust Use the controls in the Picture Adjust menu to calibrate your RS-900 for optimum picture quality. To access the Picture Adjust menu, press MENU, highlight Picture Adjust and press ENTER. Picture Adjust Picture Memory... - Page 63 Operation Picture Memory: For each input, the RS-900 lets you store picture quality settings as presets that you can recall at a later time. You can create up to four presets per input and resolution, to accommodate changing lighting conditions or viewer preferences.
- Page 64 Brightness and Contrast controls are interactive. A change to one Note may require a subtle change to the other in order to achieve the optimum setting. Runco RS-900 Owner’s Operating Manual...
- Page 65 While looking at the color bar pattern through a blue filter, adjust the tint level until the cyan and magenta color bars (on either side of the green bar) appear to be a single shade of blue. Runco RS-900 Owner’s Operating Manual...
- Page 66 “sweep” patterns at the top and bottom. Lower the sharpness setting to eliminate them. Figure 4-5. Typical Test Pattern for Adjusting Sharpness Color Temperature: The RS-900 has five memory settings for Color Temperature: • 5400 kelvins Color Temperature •...
-
Page 67: Aspect Ratio
(by the same 4:3 Image on amount on all sides) to fill a 16:9 Display (Letterbox aspect ratio) 16:9 display. Letterbox is best suited for viewing LaserDisc movies or non-anamorphic DVDs on a 16:9 screen. Runco RS-900 Owner’s Operating Manual... - Page 68 2.35:1 Screen ( Cinema aspect ratio / CineWide) image area fills the 16:9 chip surface, eliminating the black bars. The secondary, anamorphic lens then restores the proper geometry to the 2.35:1 image. Runco RS-900 Owner’s Operating Manual...
-
Page 69: Installation
Orientation: Press the button to change the orientation of the projected image. The RS-900 can be installed on a ceiling or in a rear-screen configuration with one or more mirrors. There are four settings: Floor Front, Ceiling Front, Floor Rear and Ceiling Rear. - Page 70 V. Keystone or H. Keystone from the GeoCorrection menu and use the H. Keystone button to make the image rectangular. See Figure 4-6. Pincushion Runco recommends that the keystone feature not be used unless absolutely necessary, as it may cause artifacts in the image. Horizontal Keystone Correction Projector...
- Page 71 Pincushion from the GeoCorrection menu and use the button to make the image rectangular. See Figure 4-7. Projector Projected Image Negative values Positive values decrease image height increase image height at screen center. at screen center. Figure 4-7. Pincushion Correction Runco RS-900 Owner’s Operating Manual...
- Page 72 (A warning appears on-screen one minute before this is to occur.) Use the button to set the timer for anywhere from 30 minutes to 6 hours, in 30-minute increments. To disable the Sleep Timer, set it to 0. Runco RS-900 Owner’s Operating Manual...
-
Page 73: Information
This menu also displays the projector serial number. Information Source HDMI 1 Should you ever need to contact Runco Technical Support, this information will help them Resolution 1920x1080 answer your questions or resolve product performance issues. Aspect Ratio... - Page 74 Similarly, the Vertical control adjusts the image height while keeping the width constant. Auto Off: When using the RS-900 with a computer, use the Auto Off feature to have the RS-900 go into standby mode when no source signal is present on the current input. (A warning message appears on-screen for approximately eight seconds before this occurs.)
-
Page 75: Isf
Figure 4-8 shows how the Gain and Offset controls interact with each other. OFFSET = 1023 OFFSET = 512 OFFSET = 0 OFFSET = 1023 OFFSET = 512 OFFSET = 0 1023 GAIN Figure 4-8. Gain and Offset Runco RS-900 Owner’s Operating Manual... - Page 76 Conversely, if the image is washed out and unnatural, with excessive detail in black areas, increase the setting. Again, good gamma improves contrast while maintaining good details for blacks and whites. Runco RS-900 Owner’s Operating Manual...
- Page 77 (ACE) controls in the Calibration menu are adequate for producing accurate and realistic colors from a variety of sources. In rare cases, though, you may need more precise control over the RS-900 display color gamut (range). For example, you may require a unique color gamut for a given projector or application.
- Page 78 White x:312 y:329 Y:045 3. Highlight “Settings” and press to select “Manual.” x:640 y:330 Y:015 4. Highlight “White” and press ENTER. The RS-900 displays a white field on the screen. Green x:300 y:600 Y:022 Blue x:150 y:060 Y:018 5. Using the color analyzer, measure the x and y coordinates for about 15 seconds.
-
Page 79: Maintenance And Troubleshooting
5. Maintenance and Troubleshooting The lamp should be replaced when it reaches the end of its life (typically 2000 hours), or sooner if a noticeable degradation in brightness occurs. Contact your Runco dealer to Lamp Replacement obtain a replacement lamp. -
Page 80: Troubleshooting Tips
Maintenance and Troubleshooting Table 5-1 provides some general guidelines for troubleshooting problems you may encounter with the RS-900. If the suggested solutions fail to resolve the problem or if you Troubleshooting Tips encounter an issue not described here, please contact Runco Technical Support. - Page 81 Table 5-1. Troubleshooting Chart (continued) Symptom Possible Cause(s) Solution TEMP LED lights solid red. • RS-900 internal • Power off the RS-900 and temperature is too high or allow it to cool down. one or more fans have Ensure that the intake and failed.
- Page 82 Maintenance and Troubleshooting Notes: Runco RS-900 Owner’s Operating Manual...
-
Page 83: Serial Communications
• Commands must be in UPPERCASE; for example, X001X, not x001x. • When you enter a valid command, the RS-900 executes it and echoes the command back to the PC or control system. For example, when you send the command X001X, the RS-900 responds with X0_001X<CR>. - Page 84 16:9 aspect ratio X062X 4:3 aspect ratio X063X Letterbox aspect ratio X064X VirtualWide aspect ratio X065X Cinema aspect ratio X066X Virtual Cinema aspect ratio X082X Image orientation = floor front X083X Image orientation = ceiling front Runco RS-900 Owner’s Operating Manual...
- Page 85 Switch to HDMI 2 input X137X Switch to RGBHV input X151X Reset Lamp Timer X156X Background Color = Blue X157X Background Color = Gray X158X Background Color = Black X180X Blue Image ON X181X Blue Image OFF Runco RS-900 Owner’s Operating Manual...
- Page 86 Serial Communications Notes: Runco RS-900 Owner’s Operating Manual...
-
Page 87: Specifications
7. Specifications Table 7-1 lists the RS-900 specifications. RS-900 Specifications Table 7-1. RS-900 Specifications Projector Type: Digital Light Processing (DLP), Single-Chip SuperOnyx DMD Native Resolution: 1920 x 1080 (16:9) Aspect Ratios: 4:3, Letterbox, 16:9, VirtualWide, Cinema, Virtual Cinema Video Standards:... - Page 88 - Contrast Ratio: 3000:1 These are typical projector brightness and contrast specifications found in most companies’ sales literature. Runco includes these measurements in its literature to allow for direct comparison with other manufacturers’ projectors. These measurements are typically taken at 9,000K to 13,000K to get expected performance data when the projector is used in professional, commercial and industrial displays.
- Page 89 41°F to 95°F (5°C to 35°C), 20% to 80% humidity (non-condensing) Dimensions: RS-900: See Figure 7-1 RS-900/CineWide: See Figure 7-2 RS-900/CineWide with AutoScope: See Figure 7-3 Weight (without lens): 34 lbs. (15.42 kg) Regulatory Approvals: Complies with FCC Class B, CE, C-Tick, GOST, TUV-GS,...
-
Page 90: Rs-900 Dimensions
Specifications Figure 7-1 shows the RS-900 dimensions (all dimensions are in inches). RS-900 Dimensions Figure 7-1. RS-900 Dimensions Runco RS-900 Owner’s Operating Manual... -
Page 91: Rs-900/Cinewide Dimensions
Specifications Figure 7-3 shows the RS-900/CineWide dimensions (all dimensions are in inches). RS-900/CineWide Dimensions 19.7 19.7 19.7 18.5 18.7 15.3 14.9 15.1 14.0 14.2 Figure 7-2. RS-900/CineWide Dimensions (with Whitney Anamorphic Lens) Runco RS-900 Owner’s Operating Manual... -
Page 92: Rs-900/Cinewide With Autoscope Dimensions
Specifications Figure 7-3 shows the RS-900/CineWide with AutoScope dimensions (all dimensions are in inches). RS-900/CineWide with AutoScope Dimensions 19.7 19.7 19.7 18.5 18.7 17.9 15.3 15.1 14.9 14.3 14.2 13.5 Figure 7-3. RS-900/CineWide with AutoScope Dimensions Runco RS-900 Owner’s Operating Manual... -
Page 93: Supported Timings
Specifications Table 7-2 lists the signal types supported by each input on the RS-900. Supported Timings Table 7-2. Supported Signal Timings Horizontal Pixel Frequency Format Resolution Refresh Rate (Hz) Frequency (kHz) (MHz) Analog/Digital PC SIgnals (RGB HD / HDMI 1 / HDMI 2) - Page 94 1080/60i 1920x1080 59.94/60.00 33.716/33.750 74.175/74.250 1080/24p 1920x1080 23.98/24.00 26.978/27.000 74.175/74.250 1080/48p 1920x1080 48.000 27.000 148.500 1080/25p 1920x1080 25.000 28.125 74.250 1080/30p 1920x1080 29.97/30.00 33.716/33.750 74.175/74.250 1080/50p 1920x1080 50.00 56.250 148.500 1080/60p 1920x1080 59.94/60.00 67.433/67.500 148.350/148.500 Runco RS-900 Owner’s Operating Manual...
- Page 95 – 59.94/60.00 15.734/15.750 3.580 NTSC 4.43 – 59.94/60.00 15.734/15.750 4.430 PAL-B/G – 50.00 15.625 4.430 PAL-M – 59.94/60.00 15.734/15.750 3.580 PAL-N – 50.00 15.625 3.580 PAL-60 – 59.94/60.00 15.734/15.750 4.430 SECAM – 50.00 15.625 4.250/4.410 Runco RS-900 Owner’s Operating Manual...
- Page 96 Specifications Notes: Runco RS-900 Owner’s Operating Manual...
- Page 98 S ER IAL N UM B E R 020-0706-00 Rev. B November 2007 Runco International • 2900 Faber Street • Union City, CA 94587 • Ph (510) 324-7777 / (800) 23RUNCO / Fax (510) 324-9300 www.runco.com Runco CL-810 Owner’s Operating Manual...
Need help?
Do you have a question about the RS-900 and is the answer not in the manual?
Questions and answers