
Related Manuals for IOGear GCS1002


Summary of Contents for IOGear GCS1002
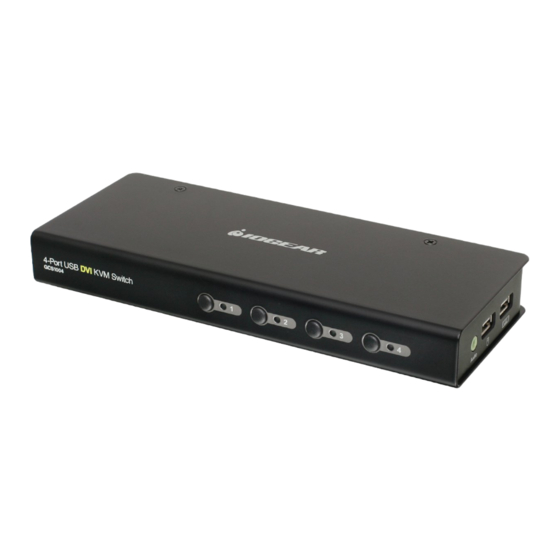
- Page 1 User Manual 2/4-Port USB DVI KVM Switch GCS1002 / GCS1004 PART NO. M1265-a www.iogear.com...
- Page 2 ©2014 IOGEAR. All Rights Reserved. Part No. M1265-a IOGEAR, the IOGEAR logo, MiniView®, VSE are trademarks or registered trademarks of IOGEAR. Microsoft and Windows are registered trademarks of Microsoft Corporation. IBM is a registered trademark of International Business Machines, Inc. Macintosh, G3/G4 and iMac are registered trademarks of Apple Computer, Inc. IOGEAR makes no warranty of any kind with regards to the information presented in this document.
-
Page 3: Table Of Contents
Table of Contents Introduction Package Contents Features Requirements Overview Hardware Installation Basic Operation Hotkey Operation Keyboard Emulation The Firmware Upgrade Utility Specifications Troubleshooting Federal Communications Commission (FCC) Statement CE Compliance Limited Warranty Contact... -
Page 4: Introduction
Introduction This IOGEAR DVI KVM Switch GCS1002 / GCS1004 allows users to access up to two (GCS1002) or four (GCS1004) computers from a single USB keyboard, USB mouse, and DVI monitor. It supports resolutions up to 1920x1200 @60Hz. With IOGEAR’s DynaSyncTM, there is no more delay or change of video resolution when switching between, or booting the computers. -
Page 5: Requirements
• DVI-D KVM cable set – 4ft 44-pin cable / 6ft 44-pin cable (GCS1004 only) specifically de- signed to work with this switch, may be used to link the computers. One (GCS1002) or two (GCS1004) cable set(s) are provided with this package. -
Page 6: Overview
Operating Systems: The supporting operating systems are listed in the table below: Version Windows XP / 2003 / 2008 / Vista / X86 / X64 / 7 / 8 / 8.1 Linux RedHat 9.0 and higher SuSE 10 / 11.1 and higher Mandriva (Mandrake) Linux 2006 and higher Debian 3.1 / 4.0... - Page 7 The cable(s) that link the switch to your computers plug in here. Note: You can identify the computers by the port they are con- nected to – they are labeled CPU1 / CPU2 for GCS1002; CPU1 / CPU2 / CPU3 / CPU4 for GCS1004.
-
Page 8: Hardware Installation
Keyboard Power On function. Cable Connections: To set up your GCS1002 / GCS1004, refer to the installation diagram (the numbers in the diagram correspond to the steps below), and follow the steps below: 1. - Page 9 3. Plug your DVI monitor into the DVI Console port located on the unit’s rear panel and power on the monitor. 4. Using the provided 44-pin cable set, plug the 44-pin connector into the Computer port(s) of the switch. 5. At the other end of the cable, plug the USB, DVI-D and speaker connectors into their respec- tive ports on the computer.
-
Page 10: Basic Operation
2. Update the firmware manually via command line by following the instructions shown on the screen. Powering off and Restarting If it becomes necessary to Power Off the GCS1002 / GCS1004 unit, before starting it back up you must do the following: 1. Shut down all computers that are attached to the switch. -
Page 11: Hotkey Operation
KVM focus to the next port on the installation (1 to 2; 2 to 1 for GCS1002; 1 to 2; 2 to 3; 3 to 4; 4 to 1 for GCS1004). [Scroll Lock] [Scroll Lock] [Port ID] [Enter] For GCS1004 only –... - Page 12 [Scroll Lock] [Scroll Lock] method, invoke HSM, then press and release the X key again. Auto Scanning The GCS1002 / GCS1004’s Auto Scan feature automatically cycles the KVM focus through the computer ports at regular intervals. This allows you to monitor the computer activity without having to take the trouble of switching from port to port manually.
- Page 13 To manually detect and remember monitor EDIDs, do the following: 1. Invoke HSM (see page 11). 2. Press [D] [Enter]. Note: If the monitor is disconnected and reconnected, the GCS1002 / GCS1004 will re-exe- cute Video DynaSyncTM. Mouse Emulation Control The default setting is enabled.
- Page 14 Note: nn is a two-digit number that represents the keyboard language code (US English: 33; French: 08; Japanese: 15). Restore Default Settings To reset the GCS1002 / GCS1004 to its default hotkey setting, do the following: 1. Invoke HSM (see page 11). 2. Press [R] [Enter].
- Page 15 • [3] changes scan interval to 10 seconds • [4] changes scan interval to 20 seconds To exit Auto Scan, press [Esc] or [Spacebar]. [D] [Enter] Invokes Video DynaSyncTM, IOGEAR’s exclusive technology that eliminates boot-up display problems and optimizes resolution when switching between ports.
-
Page 16: Keyboard Emulation
Keyboard Emulation Mac Keyboard The PC compatible (101 / 104 key) keyboard can emulate the functions of the Mac keyboard. The emulation mappings are listed in the table below Note: When using key combinations, press and release the first key (Ctrl), then press and release the activation key. - Page 17 Sun Keyboard The PC compatible (101 / 104 key) keyboard can emulate the functions of the Sun keyboard when the Control key [Ctrl] is used in conjunction with other keys. The corresponding functions are shown in the table below. Note: When using key combinations, press and release the first key [Ctrl], then press and release the activation key.
-
Page 18: The Firmware Upgrade Utility
2. Choose the Firmware Upgrade Package you want to install (usually the most recent), and download it to your computer. 3. Power off the GCS1002 / GCS1004 and disconnect it from your KVM installation. Connect the 44-pin connector of the custom KVM cable set to the 44-pin Computer Port 1. - Page 19 Starting the Upgrade 1. Run the downloaded Firmware Upgrade Package file – either by double clicking the file icon, or using a command line to enter the full path. The Firmware Upgrade Utility Welcome screen will appear. 2. Read the License Agreement (click the I Agree button). 3.
- Page 20 If the Upgrade Successful screen doesn’t appear, it means that the upgrade failed to complete successfully, in which case you should do the following: 1. Power off the GCS1002 / GCS1004 by removing the power jack. 2. Invoke Firmware Upgrade Mode by holding down the front panel Port 1 pushbutton (see page 19) and power on the GCS1002 / GCS1004.
-
Page 21: Specifications
Specifications Function GCS1002 GCS1004 Computer Connections Console Connections Port Selection Hotkey, Mouse switch, Front panel pushbuttons 1 x USB Type A F (Iron) Video 1 x DVI-D F (White) Console Ports Mouse 1 x USB Type A F (Iron) Speakers... -
Page 22: Troubleshooting
Troubleshooting Operation problems can be due to a variety of causes. The first step in solving them is to make sure that all cables are securely attached and seated completely in their sockets. In addition, updating the product’s firmware may solve problems that have been discovered and resolved since the prior version was released. -
Page 23: Federal Communications Commission (Fcc) Statement
R&TTED (1999/5/EC). Limited Warranty WE’RE HERE TO HELP YOU! NEED ASSISTANCE SETTING UP THIS PRODUCT? Make sure you: 1. Visit www.iogear.com for more product information 2. Visit www.iogear.com/support for live help and product support Warranty Information This product carries a 3 Year Limited Warranty. For the terms and conditions of this warranty, please go to http://www.iogear.com/support/warranty... - Page 24 © 2014 IOGEAR ®...
Need help?
Do you have a question about the GCS1002 and is the answer not in the manual?
Questions and answers