
Related Manuals for IOGear GCS1953


Summary of Contents for IOGear GCS1953
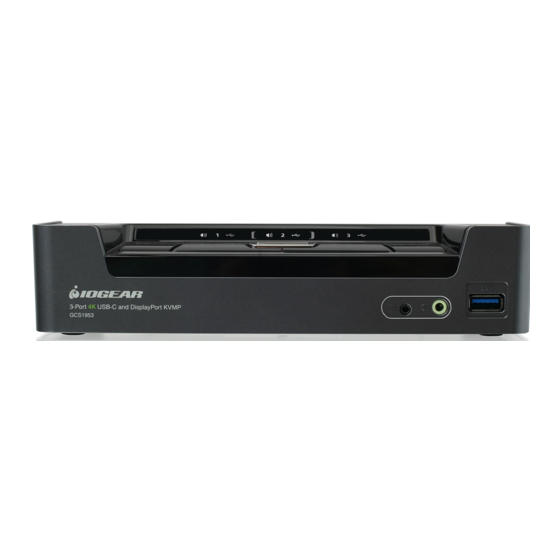
- Page 1 User Manual 3-Port 4K USB-C and DisplayPort KVMP Switch with Power Delivery GCS1953 PART NO. M1657 www.iogear.com...
- Page 2 ©2021 IOGEAR. All Rights Reserved. Part No. M1657. IOGEAR, the IOGEAR logo is trademarks of IOGEAR. Microsoft and Windows are registered trademarks of Microsoft Corporation. IOGEAR makes no warranty of any kind with regards to the information presented in this document. All information furnished here is for informational purposes only and is subject to change...
-
Page 3: Table Of Contents
Table of Contents Safety Instructions Conventions Introduction Package Contents Features Requirements Operating Systems Overview Hardware Setup Hotkey Operation Keyboard Emulation The Firmware Upgrade Utility Specifications Chart Trouble Shooting FCC Information Limited Warranty Contact Us... -
Page 4: Safety Instructions
■ To ensure reliable operation, and protect against overheating, never cover the top of GCS1953. ■ The device should never be placed on a soft surface (bed, sofa, rug, etc.) as this will block its ventilation openings. - Page 5 ■ Position system cables and power cables carefully; Be sure that nothing rests on any cable. ■ Never push objects of any kind into or through cabinet slots. They may touch dangerous voltage points or short out parts resulting in a risk of fire or electrical shock. ■...
-
Page 6: Conventions
Conventions This manual uses the following conventions Monospaced Indicates text that you should key in Indicates keys you should press. For example, [Enter] means to press the Enter key. If keys need to be chorded, they appear together in the same bracket with a plus sign between them: [Ctrl+Alt]. -
Page 7: Introduction
GCS1953 offers hotkeys to help switch ports and configure device settings. A Power On Detection feature also ensures that if one computer is powered off, the GCS1953 will automatically switch ports to the next powered-on computer. -
Page 8: Features
• DisplayPort 1.2 compliant; HDCP 1.4 compliant • Supports HD Audio³ • Power on detection – if a computer is powered off, the GCS1953 automatically switches to the next powered-on computer • DisplayPort Dual-Mode technology (DP++) supports HDMI and DVI signals via a DisplayPort-to-HDMI/DVI DP++ adapter⁴... -
Page 9: Requirements
Note: For video output to work through a USB-C port, the device must support DP Alt Mode. Cables To guarantee video quality, we recommend using only IOGEAR DisplayPort KVM cables which are certified by the VESA Compliance Program. Note: The quality of the display is affected by the quality of the cables.We recommend the total length from the source to the monitor to not exceed 3 meters (1.5 meters between the PC... -
Page 10: Overview
Overview Front View 3-Port USB-C and DisplayPort KVMP GCS1953 Component Description Remote Port The Remote Port Selector plugs in here. Selector Jack Audio Jack Your main console speakers plug in here Note: The speakers plugged into this jack have priority over those plugged into the rear panel. - Page 11 Rear View CONSOLE CPU 3 CPU 2 CPU 1 PD 3.0 4K60 4K30 Component Description Grounding Terminal The grounding wire used to ground the switch attaches here. 4K Resolution Switches between 4K60 and 4K30 resolution for USB-C Switch device connected to CPU 3. 4K60: The CPU 3 provides 4K @ 60Hz resolution and USB 2.0 data transfer rate.
- Page 12 Top View Component Description LED Status The LEDs will light to indicate its mode and status: Panel Audio KVM USB • Lights DIM ORANGE to indicate that the computer attached to the corresponding port is connected (online). • Changes to BRIGHT ORANGE to indicate that the computer attached to its corresponding port is the one that has the KVM focus (Selected).
- Page 13 Port For manual port selection (see Manual Switching, page 17): Selection • Press a switch for less than two seconds to bring the KVM, Pushbuttons USB hub, and audio focus to the computer attached to its correspond- ing port. • Press a port selection pushbutton for longer than two seconds to only bring the KVM focus to the computer attached to its corre- sponding port.
-
Page 14: Hardware Setup
(the numbers in the diagram on page 16 correspond to the steps below), and do the following: 1. Ground the GCS1953 by connecting one end of a grounding wire to the Grounding Terminal and the other end to a suitable grounded object. - Page 15 Hz) or 4K DCI (4096 x 2160 @ 60 Hz) resolutions can be reached. ○ It is highly recommended that the GCS1953 is kept powered on at all times. ○ Make sure the computers and devices that the GCS1953 connects to are also...
- Page 16 Installation Diagram 3-Port USB-C and DisplayPort KVMP GCS1953 CONSOLE CPU 3 CPU 2 CPU 1 PD 3.0 4K60 4K30...
- Page 17 Operation Port Switching There are four convenient methods to switch between the computers: Manual – by pressing the port selection pushbuttons on the front panel, Mouse – by clicking the scroll wheel of the mouse, Hotkey – by entering combinations on the keyboard, and Remote Port Selector – by pressing the remote port selector button.
- Page 18 Powering Off and Restarting If it becomes necessary to power off the GCS1953 unit, before starting it back up, you must do the following: 1. Shut down all the computers that are attached to the switch.
- Page 19 Port ID Numbering Each KVM port section on the GCS1953 switch is assigned a port number (1 to 4). The port numbers are marked (CPU 1, CPU 2, and CPU 3) on the rear panel of the switch (see page 11 for details).
-
Page 20: Hotkey Operation
Hotkey Operation The GCS1953 provides an extensive, easy-to-use, Hotkey function that makes it convenient to control and configure your KVM installation from the keyboard. Hotkeys provide asynchronous (independent) switching of the KVM, USB hub and audio focus. If you wish, you can give one computer the KVM console focus, another the USB hub focus and the other two the audio focus. - Page 21 Lock] [A] [n] [Enter] Note: • The n stands for the number of seconds that the GCS1953 should dwell on a port before moving on to the next. Replace the n with a number between 1 and 99 when entering this Hotkey combination.
- Page 22 Hotkey Setting Mode (HSM) Hotkey Setting Mode (HSM) is used to set up your GCS1953 switch configuration. All operations begin with invoking Hotkey Setting Mode. Invoking HSM To invoke HSM do the following: 1. Press and hold down [Num Lock].
- Page 23 Keyboard Operating Platform The GCS1953’s default port configuration is for a PC compatible keyboard operating platform. If your console uses a PC compatible keyboard and you have a Mac or Sun attached to a port, for example, you can change the port’s keyboard operating platform configuration so that the PC compatible keyboard emulates the Mac or Sun keyboard.
- Page 24 The front panel LEDs flash to indicate Firmware Upgrade Mode is in effect. Note: To exit Firmware Upgrade Mode, you must power off the switch. Restore Default Settings To reset the GCS1953 to its default Hotkey settings, do the following: 1. Invoke HSM (see page 22). 2. Press [R] [Enter].
- Page 25 Alternative Manual Port Selection Settings To toggle between the default and the alternative front panel pushbutton manual port selection settings, do the following: 1. Invoke HSM (see page 22). 2. Press [S]. See Alternative Manual Port Selection Settings, page 19, for full details of the alternative front panel pushbutton manual port selection settings.
- Page 26 HSM Summary Table After invoking HSM (see page 22), key in one of the following keys to perform the corresponding function: Function [F1] Sets the keyboard and mouse to SPC mode so that it can work under special operating systems as a standard (104 key) keyboard and mouse. [F2] Enables Mac keyboard emulation.
- Page 27 Hotkey Default Setting The PC compatible (101/104 key) keyboard can emulate the functions of Mac keyboard. The emulation mapping are listed in table below Setting Default Port Switching [Scroll Lock] [Scroll Lock] Invoking HSM [Number Lock] [-] Keyboard Emulation Enabled Mouse Emulation Enabled Auto Scan Interval...
-
Page 28: Keyboard Emulation
Keyboard Emulation Mac Keyboard The PC compatible (101/104 key) keyboard can emulate the functions of Mac keyboard. The emulation mapping are listed in table below PC Keyboard Mac Keyboard [Shift] Shift [Ctrl] Ctrl [Ctrl][1] [Ctrl][2] [Ctrl][3] [Ctrl][4] [Alt] [Print Screen] [Scroll Lock] [Enter] Return... - Page 29 Sun Keyboard The PC compatible (101/104 key) keyboard can emulate the functions of the Sun keyboard when the control key [Ctrl] is used in conjunction with other keys. The corresponding functions are shown in the table below. PC Keyboard Sun Keyboard [Ctrl] [T] Stop [Ctrl] [F2]...
-
Page 30: The Firmware Upgrade Utility
1. From a computer that is not part of your KM installation, go to our IOGER Support → Drivers site and choose the model name that relates to your device (GCS1953) to get a list of available Firmware Upgrade Packages. 2. Choose the Firmware Upgrade Package you want to install (usually the most recent), and download it to your computer. - Page 31 • The USB cable’s USB Type B connector can be connected to any KVM port section, but the Port Selection pushbutton must be Port 1. • While the GCS1953 is in Firmware Upgrade Mode, normal keyboard and mouse functions are suspended. You must complete the firmware upgrade or exit Firmware...
- Page 32 Starting the Upgrade To upgrade your firmware: 1. Run the downloaded Firmware Upgrade Package file – either by double clicking the file icon, or by opening a command line and entering the full path to it. The Firmware Upgrade Utility Welcome screen appears: Note: The screens shown in this section are for reference only.
- Page 33 3. Click Next to continue. The Firmware Upgrade Utility main screen appears: The Utility inspects your installation. All the devices capable of being upgraded by the package are listed in the Device List panel. 4. As you select a device in the list, its description appears in the Device Description panel.
- Page 34 5. After you have made your device selection(s), Click Next to perform the upgrade. If you enabled Check Firmware Version, the Utility compares the device’s firmware level with that of the upgrade files. If it finds that the device’s version is higher than the upgrade version, it brings up a dialog box informing you of the situation and gives you the option to Continue or Cancel.
- Page 35 Click Finish to close the Firmware Upgrade Utility. After a successful completion, the switches exit Firmware Upgrade Mode, and reset themselves. Upgrade Failed If the Upgrade Succeeded screen doesn’t appear, it means that the upgrade failed to complete successfully, and you should repeat the upgrade procedure from the beginning.
-
Page 36: Specifications Chart
Specifications Chart Function GCS1953 Computer Connections Direct Port Selection Pushbutton, Hotkey, Remote Port Selector, Mouse* Connectors Console Ports keyboard 1 x USB Type A Female mouse 1 x USB Type A Female video 1 x DisplayPort Female (Black) speakers 2 x 3.5mm Audio Jack Female (Green; 1 x front, 1 x rear) - Page 37 Physical Properties Housing Metal + Plastic Weight 0.50 kg (1.1 lb) Dimensions (L x W x H) 20.63 x 7.54 x 4.40 cm (8.12 x 2.97 x 1.73 in.) Note: * Port switching only works with 3-key USB mouse wheel in emulation mode.
-
Page 38: Trouble Shooting
GCS1953’s rear panel, then plug it back in. PC or OS does The GCS1953 has a built-in USB 3.0 hub, so will not not support USB support PCs or OS that do not support USB 2.0/3.0. 2.0/3.0. -
Page 39: Fcc Information
FCC Information FEDERAL COMMUNICATIONS COMMISSION STATEMENT: This equipment has been tested and found to comply with the limits for a Class B digital device, pursuant to part 15 of the FCC Rules. These limits are designed to provide reasonable protection against harmful interference when the equipment is operated in a commercial environment. -
Page 40: Limited Warranty
Limited Warranty Warranty Information This product carries a 3 Year Limited Warranty. For the terms and conditions of this warranty, please go to https://www.iogear.com/support/warranty Register online at https://www.iogear.com/registration Important Product Information Product Model____________ Serial Number____________... -
Page 41: Contact Us
Contact Us WE’RE HERE TO HELP YOU! NEED ASSISTANCE SETTING UP THIS PRODUCT? Make sure you: 1. Visit www.iogear.com for more product information 2. Visit www.iogear.com/support for live help and product support IOGEAR www.iogear.com https://iogear.custhelp.com/ support@iogear.com...
Need help?
Do you have a question about the GCS1953 and is the answer not in the manual?
Questions and answers