Table of Contents
Advertisement
Quick Links
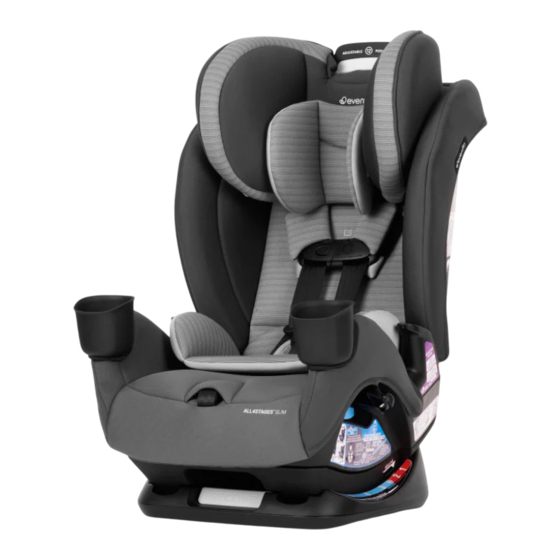
All4Stages Slim
4-in-1 Car Seat Owner's Manual
Keep instructions for future use.
REAR-FACING
FORWARD-FACING
WITH HARNESS
HIGH-BACK
BOOSTER
BACKLESS
BOOSTER
WARNING!
To reduce the risk of serious injury or death,
read this owner's manual prior to installing and
using this child seat.
© 2024 Evenflo Company, Inc.
25701833
EN
09/24
Advertisement
Table of Contents

Related Manuals for Evenflo All4Stages Slim


Summary of Contents for Evenflo All4Stages Slim
- Page 1 Keep instructions for future use. REAR-FACING FORWARD-FACING WITH HARNESS HIGH-BACK BOOSTER BACKLESS BOOSTER WARNING! To reduce the risk of serious injury or death, read this owner’s manual prior to installing and using this child seat. © 2024 Evenflo Company, Inc. 25701833 09/24...
- Page 2 According to the U.S. National Highway Traffic Safety Administration (NHTSA), car seats and boosters provide protection for infants and children in a crash, yet car crashes are a leading cause of death for children. To reduce the risk of SERIOUS INJURY or DEATH, read this owner’s manual and your vehicle owner’s manual before installing and using this Car Seat.
-
Page 3: Table Of Contents
Table of Contents Important Information Child Requirements ............... 4 Premature Infant Use ............. 6 Warnings ................7 Using a Locking Clip ............13 Safe Practices ..............18 Recall Information for U.S. Customers ......... 18 Public Notice for Canadian Customers ........ 19 Motor Vehicle/Aircraft Usage .......... -
Page 4: Rear-Facing
This child restraint is designed for use by children in both rear-facing and forward-facing orientations. To use this child restraint properly, children MUST meet the size and age requirements below. In addition, Evenflo recommends consulting with your child’s physician before allowing your child to transition from rear-facing to forward-facing use of this child restraint. - Page 5 Child Requirements Forward-facing with Harness • 13.6 - 29.4 kg (30 - 65 lbs) • 89 - 124 cm (35 - 49 in.) • Tops of the child’s ears are at or below the top of the child restraint headrest •...
-
Page 6: Premature Infant Use
Preterm and low-birth weight infants are at additional risk of breathing difficulties and heart problems when placed in a Child Restraint. Evenflo requires that the evaluation recommended by the AAP be conducted for all infants born earlier than 37 weeks and all newborn infants who weigh less than 2.26 kg (5 lbs) at birth before their first car trip to... -
Page 7: Warnings
WARNING! DEATH or SERIOUS INJURY can occur. Airbag Warnings WARNING / MISE EN GARDE DO NOT place rear-facing child seat on front seat with air bag. DEATH OR SERIOUS INJURY can occur. The back seat is the safest place for children 12 and under. -
Page 8: General Warnings
WARNING! DEATH or SERIOUS INJURY can occur. General Warnings • Failure to follow the Child Usage Requirements for rear-facing, forward-facing and booster mode for this child restraint could result in serious injury or death. (See "Child Requirements" on pages 4 - 5). •... - Page 9 If the child restraint cannot be properly installed, DO NOT use the child restraint. Consult vehicle owner’s manual, try a different seating location, or call Evenflo for further assistance. • ONLY use this child restraint on forward-facing vehicle seats.
- Page 10 WARNING! DEATH or SERIOUS INJURY can occur. Rear-Facing Warnings • When using this restraint rear-facing, DO NOT loosen the vehicle seat belt to provide more leg room, as this may keep the child restraint from protecting your child. • Fold-down armrests could pose a hazard to a rear- facing child in certain types of collisions.
- Page 11 WARNING! DEATH or SERIOUS INJURY can occur. Booster Mode Warnings • Warning! Use only the vehicle’s lap and shoulder belt system when restraining the child in this booster seat. Never use a booster with only a lap belt, as this could cause serious injuries.
- Page 12 WARNING! DEATH or SERIOUS INJURY can occur. Seat Belt Warnings • ALWAYS read your vehicle Retractor owner's manual to determine what vehicle belts and retractors are used in your vehicle. Lock your retractors if available in your vehicle. • DO NOT use this child restraint if it moves more than 2.5 cm (1 in.) side to side or front to back at the belt path in use.
-
Page 13: Using A Locking Clip
WARNING! DEATH or SERIOUS INJURY can occur. Seat Belt Warnings • DO NOT use with lap/shoulder belts with two retractors. If the vehicle seat belts are not routed and fastened correctly, the child restraint may not protect the child in a crash. •... - Page 14 WARNING! DEATH or SERIOUS INJURY can occur. Seat Belt Warnings If you have any of these types of vehicle belt systems listed, these are SAFE to use to install your child restraint in the vehicle. Review vehicle owner’s manual for specific instructions on child restraint installation. LATCH connectors can be used IN PLACE OF these vehicle belt types.
-
Page 15: Latch Warnings
WARNING! DEATH or SERIOUS INJURY can occur. LATCH Warnings What is LATCH/UAS? Vehicle Top Tether Anchor Points LATCH and UAS are acronyms for Lower Anchors and Tethers for CHildren (USA) and Universal Anchorage System (Canada), and refer to a pair of fixed Lower Anchors (or bars) and a Top Tether anchor that are built into your vehicle, in vehicles built after... - Page 16 WARNING! DEATH or SERIOUS INJURY can occur. LATCH Warnings • DO NOT use the lower anchors of the child restraint anchorage system (LATCH system) to attach this child restraint when restraining a child weighing more than 18.1kg (40 lbs) with the internal harnesses of the child restraint.
-
Page 17: Additional Warnings
DO NOT place any cups that contain hot liquids in the cup holder. • DO NOT attach additional padding, toys, or other devices not made by Evenflo or described in these instructions for the child restraint. Items not tested with the child restraint could injure the child. Additional... -
Page 18: Safe Practices
You must register this restraint to be reached in a recall. Send your name, address, email address (optional), phone number (optional), and the restraint's model number and manufacturing date to: Evenflo Company, Inc. 1801 Commerce Dr. Piqua, OH 45356 or call 1-800-233-5921 or register online at https://registration.evenflo.com/evenflo/us/carseats... -
Page 19: Public Notice For Canadian Customers
The information you provide must be complete. Or register online at www.evenflo.com/registercarseatcanada. Evenflo Company, Inc. ATTENTION : Cette carte pourait être importante à la sécurité de votre enfant. -
Page 20: Child Seat Features
Child Seat Features Front Back... - Page 21 Child Seat Features* Description 1. Headrest Adjustment Handle 2. Adjustable Headrest 3. Shoulder Belt Guide 4. Instruction Manual Storage (see pg. 83) 5. Chest Clip (see pg. 81 ) 6. Harness Straps 7. Cup Holders (both sides of seat) 8. Harness Release Button (under flap) 9.
- Page 22 Child Seat Features Cup Holders IMPORTANT: Cup holders MUST be installed before use of this Child Seat and MUST remain attached to the seat at all times. Slide each cup holder into the grooves in the car seat shell and press in to seat to secure.
-
Page 23: Head Pillow
Child Seat Features Body Pillow* The optional Body Pillow is for REAR-FACING use only and, when placed in the seat as shown, helps support your child. When using the lower headrest/ harness positions, make sure the bottom of the headrest flap is behind the body pillow flap as shown. - Page 24 Connector is on Your Child Seat? Your child seat will have the SecureTight Connectors (shown below). SecureTight is Evenflo's LATCH system. Release Button Use the instructions on the following pages to properly install the SecureTight Strap on your child seat.
- Page 25 Child Seat Features Remove SecureTight Connectors from Storage Press the release button to remove the SecureTight connector from its storage location. Forward-Facing Rear-Facing D-Ring LATCH LATCH Storage Storage Rear-Facing Forward-Facing Belt path Belt path Canopy Installation* (Rear Facing Mode Only) •...
-
Page 26: Using The Child Seat Rear-Facing
Using the Child Seat Rear-facing WARNING! DEATH or SERIOUS INJURY can occur. When using this seat rear-facing, DO NOT loosen the vehicle seat belt to provide more leg room as this may keep the child seat from protecting your child. Child Requirements: •... -
Page 27: Rear-Facing Installation With Securetight (Latch) Connectors
Rear-facing Installation with SecureTight (LATCH) Connectors Moving SecureTight Connector Strap to Rear-facing Belt Path Your car seat comes with the SecureTight connector strap installed in the rear-facing belt path. See the steps below to place them back in the rear-facing path if they have been moved. - Page 28 Rear-facing Installation with SecureTight (LATCH) Connectors ALWAYS store the tether strap (pg. 70). Never use tether strap when the car seat is rear-facing. 1. Pull the recline handle and adjust the rear-facing seat recline between positions 1-4. 2. Make sure vehicle is on level ground.
- Page 29 Rear-facing Installation with SecureTight (LATCH) Connectors Securing the Child Seat with SecureTight 6. Loosen the SecureTight strap and attach the SecureTight connectors to the lower anchors in the vehicle. Remove from storage 7. The SecureTight strap must be as tight as possible. Using your full Attach connector weight, push...
-
Page 30: Rear-Facing Installation With Securetight Connectors
Rear-facing Installation with SecureTight Connectors 9. Recheck the level indicator. Bubble Level Level Line * Not all features are available on all models. Styles may vary. NOTE: Check that the level line is parallel to the ground. If equipped with a bubble level, check that the bubble is within the level area. -
Page 31: Rear-Facing Installation With Vehicle Seat Belts
Rear-facing Installation with Vehicle Seat Belts IMPORTANT: • Before installing this child seat rear-facing with the vehicle seat belt, you MUST move the SecureTight Connector Assembly to the forward-facing belt path so that it does not interfere with the vehicle seat belt. - Page 32 Rear-facing Installation with Vehicle Seat Belts 1. Pull the recline handle and adjust the rear-facing seat angle using Positions 1-4. 2. Make sure vehicle is on level ground. Place child seat rear- facing on the vehicle seat. 3. Make sure the bottom of the child seat sits flat on the vehicle seat.
- Page 33 Rear-facing Installation with Vehicle Seat Belts Rear-facing Installation with Lap Belt Pull the seat pad off of the Rear-facing belt path front of the child seat. Route the lap belt through the rear- facing belt path and continue through the opposite opening of the child seat.
-
Page 34: Rear-Facing Installation With Lap/Shoulder Belt
Rear-facing Installation with Vehicle Seat Belts Rear-facing Installation with Lap/Shoulder Belt 1. Pull the seat pad off of Rear-facing the front of the child seat. belt path Route the vehicle belt through the rear-facing belt path and continue through the opposite belt path on the child seat. -
Page 35: Rear-Facing Installation Checklist
Rear-facing Installation Checklist 1. Secure child seat to the vehicle seat. Child seat is in one of the four rear-facing recline positions, so that the child seat is in the proper recline zone for the weight of the child. (pgs. 28 and 32). -
Page 36: Using The Child Seat Forward-Facing With Harness
Using the Child Seat Forward- facing with Harness Child Requirements: • Weight: 13.6 - 29.4 kg (30 - 65 lbs) • Height: 89 - 124 cm (35 - 49 in.) and tops of child’s ears are at or below the top of the child seat headrest. -
Page 37: Forward-Facing Installation With Securetight (Latch) Connectors
Forward-facing Installation with SecureTight (LATCH) Connectors Moving SecureTight Connector Strap to Forward-facing Belt Path To access the SecureTight Connector Strap you will first need to remove the SecureTight Connectors from their storage location (see pg. 24). (Illustrations below show pad off for clarity only) To install this child seat properly in the forward-facing Connector Assembly MUST position, the SecureTight... - Page 38 Forward-facing Installation with SecureTight (LATCH) Connectors Securing the Seat with SecureTight DO NOT install by this method for a child weighing more than 18.1 kg (40 lbs). Infants who weigh less than 13.6 kg (30 lbs) and are less than 89 cm (35 in.) MUST always be rear-facing. 1.
- Page 39 Forward-facing Installation with SecureTight (LATCH) Connectors 5. Attach SecureTight connectors to the vehicle lower anchors until they lock onto the bars on both sides of the seat. CLICK! IMPORTANT: Make sure both lower anchor connectors are facing upward and the straps are not twisted. Correct Incorrect 6.
- Page 40 Forward-facing Installation with SecureTight (LATCH) Connectors 7. Test for tightness. If you can move the child seat more than 2.5 cm (1 in.) side to side or front to back at the forward-facing belt path, the lower anchor connector assembly strap is not tight enough.
- Page 41 Forward-facing Installation with SecureTight (LATCH) Connectors Attaching the Tether Strap 9. Connect the tether Hook hook to the vehicle Strap Tether tether anchor behind Anchor the vehicle seat, as shown. (Please consult your vehicle owner’s manual, as tether anchor locations may vary.) Pull the strap and tighten the tether securely.
-
Page 42: Forward-Facing Installation With Vehicle Seat Belt
Forward-facing Installation with Vehicle Seat Belt IMPORTANT: • Before installing this child seat forward-facing with the vehicle seat belt, you MUST move the connector strap to the rear-facing belt SecureTight path so that it does not interfere with the vehicle seat belt. - Page 43 Forward-facing Installation with Vehicle Seat Belt 3. Unhook tether strap Tether Strap from the rear of the child seat and place tether hook with red adjuster (pg. 70) over back of vehicle seat. 4. Place child seat in your vehicle forward-facing, as shown.
- Page 44 Forward-facing Installation with Vehicle Seat Belt Forward-facing with Lap Belt Only 6. Raise headrest to the Lap belt Back pad highest position (pg. 64), then lift back pad away from child seat for easier access. Route the lap belt through the forward-facing belt path and continue through the opposite opening of the...
- Page 45 Forward-facing Installation with Vehicle Seat Belt Forward-facing with Lap/Shoulder Belt 6. Raise headrest to its Lap/Shoulder belt highest position (pg. 64), Back then lift back pad away from child seat for easier access. Route the lap/ shoulder belt through the forward-facing belt path and continue through the opposite opening of the...
- Page 46 Forward-facing Installation with Vehicle Seat Belt Attaching the Tether Strap 11. Connect the tether Hook Strap Tether hook to the vehicle Anchor tether anchor behind the vehicle seat, as shown. (Please consult your vehicle owner’s manual, as tether anchor locations may vary.) Pull the strap and tighten the tether securely.
- Page 47 Forward-facing Installation with Vehicle Seat Belt Attaching the Tether Strap • After adjusting the tether strap, you may have excess strap; DO NOT cut it off. If you do, it may not be long enough to use in another vehicle. Instead, tightly roll up the excess tether strap and place the rubber band around the bundle.
-
Page 48: Forward-Facing Installation Checklist
Forward-facing Installation Checklist 1. Secure child seat to the vehicle seat. Child seat is in recline position 5 or 6. Child seat base sits flat on vehicle seat. Assembly (pg. 38) or Install with SecureTight vehicle seat belt (pg. 42). Shoulder belt MUST be routed through forward- facing belt guide when installing with lap/shoulder belt. -
Page 49: Using The Child Seat As A Booster Seat
Using the Child Seat as a Booster Seat When to Put Your Child in a Booster Seat Booster seats raise the child up and help to position the vehicle lap and shoulder belt correctly. When the child is properly restrained in a booster seat, their risk of injury in all types of crashes is reduced, as the lap and shoulder belt provides... - Page 50 When to Put Your Child in a Booster Seat • Check that the shoulder belt lies across the middle of the shoulder and that the lap belt is low on the hips, just touching the thighs. • Base of booster should be flat on vehicle seat, and in one of the upright positions only.
-
Page 51: Using Your Booster Seat In High-Back Mode
Using Your Booster Seat in High-Back Mode Child Requirements • Weight: 18.1 - 45.3 kg (40 - 100 lbs) • Height: 112 - 145 cm (44 - 57 in.) AND tops of the child’s ears are at or below the top of the booster seat headrest. •... - Page 52 Using Your Booster Seat in High-Back Mode Converting Seat into High-Back Booster 1. Loosen harness straps by pushing the harness release button on the front of the seat. At the same time, pull harness straps to extend completely. Unfasten the chest clip and buckle.
- Page 53 Using Your Booster Seat in High-Back Mode Converting Seat into High-Back Booster 4. Raise headrest to desired height, then pull harness straps, chest clip, and buckle tongues through the forward- facing belt guides. Snap the two halves of the chest clip together behind the seat.
- Page 54 Using Your Booster Seat in High-Back Mode Converting Seat to Harness Mode Convert from High-Back Booster to Harness Mode 1. Lift the back pad. 2. Disconnect the buckle from the harness. Buckle 3. Disconnect the two halves of the chest clip, then pull the harness straps, chest clip, and buckle tongues through...
- Page 55 Using Your Booster Seat in High-Back Mode Converting Seat to Harness Mode 5. Replace the buckle. See "Adjusting Buckle Position" on pg. 64. 6. Adjust the recline if necessary. Recline Handle 7. Make sure the harness webbing is not twisted and lays flat.
-
Page 56: High-Back Booster Installation Checklist
High-Back Booster Installation Checklist 1. Convert child seat to booster seat. See "Converting Seat Into High-Back Booster" (pg. 58). 2. Secure booster seat to the vehicle seat. Make sure the seat base is flat on vehicle seat in recline position 6 (pg. 50). Make sure the bottom and back of the booster seat are touching vehicle seat and back. -
Page 57: Using Your Booster Seat In Backless Booster Mode
Using Your Booster Seat in Backless Booster Mode Child Requirements • Weight: 18.1 - 54.4 kg (40 - 120 lbs) • Height: 112 - 152 cm (44 - 60 in.) AND tops of the child’s ears are at or below the top of the vehicle seat headrest. - Page 58 Using Your Booster Seat in Backless Booster Mode Converting Seat into Backless Booster 1. Lift up panel in seat pad to access release handle. NOTE: If buckle is still attached, remove and store by following directions on pg. 66. Release Handle 2.
- Page 59 Using Your Booster Seat in Backless Booster Mode Using the Shoulder Belt Clip If the shoulder belt does not cross midway between child’s shoulder and neck, then the shoulder belt clip must be used. 1. Attach shoulder belt clip as shown. 2.
- Page 60 Using Your Booster Seat in Backless Booster Mode Backless Booster Feet Convert your Child Seat to Backless Booster mode as shown in “Converting Seat into Backless Booster” on page 58. 1. Install shoulder belt clip if needed (see pg. 59). 2.
-
Page 61: Backless Booster Installation Checklist
Backless Booster Installation Checklist 1. Remove the booster base from the seat back. See "Converting Seat into Backless Booster" (pg. 58). 2. Engage Booster Leveling Feet pg. 60. 3. Place the booster seat on the vehicle seat. Store the SecureTight connectors by attaching to the vehicle anchors (pg. -
Page 62: Reattaching The Booster Seat
Reattaching the Booster Seat 1. Replace buckle if seat will be used in harness mode. See page 64. 2. Slide buckle tongues and chest clip up toward the head pad, and ensure the harness straps are straight and not twisted. NOTE: Shorten harness adjust strap so that it is about 3"... -
Page 63: Reattaching The Booster Base
Reattaching the Booster Base To check installation of booster base: 1. Pull up on base to check that it is securely attached. 2. Ensure harness straps , buckle , and harness adjuster strap are not twisted and are not trapped between base and seat back. -
Page 64: Adjusting The Headrest/Harness Position
Adjusting the Headrest/Harness Position To adjust, squeeze the Handle headrest adjustment handle while sliding the headrest up or down to the desired position. When the headrest is in one of the locking positions, the adjustment handle will lock into its original position. Pull up and down on the headrest to ensure it is locked into position. -
Page 65: Reclining Child Seat
Reclining Child Seat To raise or lower the recline, pull the recline handle on the front edge of the seat base and push or pull seat into the desired recline position as indicated below: • Rear-Facing: The seat is in one of the four rear-facing recline positions and the proper recline zone for the weight of the child. -
Page 66: Adjusting The Buckle Position
Adjusting the Buckle Position To reposition the buckle, first recline the seat (pg. 65) and locate the buckle anchor under the base. Slot Anchor Turn the buckle anchor sideways and push it up through the slot in the bottom of the seat shell. Bottom view Anchor Reposition the buckle into... -
Page 67: Securing The Child In The Child Seat
Securing the Child in the Child Seat Place baby in the child seat. The baby’s back and bottom should be flat against the seat. If there is a gap, the baby will not be comfortable. 1. Push the harness release button on the front of the seat. - Page 68 Securing the Child in the Child Seat 4. Insert both buckle tongues into the buckle. Pull up on the harness strap to check that the buckle tongues are fastened and to remove any slack from the webbing around the CLICK! child's legs.
-
Page 69: Removing The Child From The Child Seat
Removing the Child from the Child Seat 1. Loosen the harness strap by pressing the harness release button located on the front of the seat. 2. While pressing the button, pull out on the harness straps. To unfasten the chest clip, push the release button and pull apart. -
Page 70: Removing The Tether Strap
Removing the Tether Strap WARNING! DEATH or SERIOUS INJURY can occur. • To avoid a strangulation hazard, you MUST tightly roll or fold excess tether strap and secure with the strap/ rubber band. • Attach the tether hook to one of the two storage clips on the seat back when not in use (rear-facing mode only). -
Page 71: Installing Child Seat In Aircraft
Installing Child Seat in Aircraft The Federal Aviation Administration (FAA) recommends that you secure your child for air travel in an appropriate child seat based on your child’s weight and size. Turbulence can happen with little or no warning. When turbulence occurs, the safest place for your child is in a properly installed child seat, not in an adult’s lap or on the aircraft seat with its seat belt. - Page 72 Installing Child Seat Rear-facing in Aircraft IMPORTANT: Before installing the child seat, make sure the aircraft seat is in a fully upright position. 1. Unbuckle the aircraft seat belts and lay over the armrests, as shown. Aircraft seat Place the child seat on the aircraft seat rear- facing.
- Page 73 Installing Child Seat Rear-facing in Aircraft 4. The aircraft seat belt must be as tight as possible. Using your full weight, push the child seat firmly onto the aircraft seat while pulling on the excess seat belt strap to tighten. Route the excess seat belt strap back through the rear-facing belt path opening, as shown below.
- Page 74 Installing Child Seat Forward-facing in Aircraft IMPORTANT: Before installing the child seat, make sure the aircraft seat is in a fully upright position. 1. Adjust the child seat to the fully upright position, then place Forward- it on the aircraft seat facing belt forward-facing.
- Page 75 For your child’s comfort, Evenflo recommends cushioning the child’s back by placing a small pillow or folded-up blanket, or a folded-up jacket, over the belt buckle.
-
Page 76: Removing The Seat Cover
Removing the Seat Cover 1. Push the harness release button on the front of the seat. At the same time, pull on the harness straps. Button Elastic 2. Raise headrest and straps remove elastic straps from around headrest adjustment handle. 3. - Page 77 Removing the Seat Cover 5. On either side of the back pad, pull the corners of the cover off the seat shell. 6. Pull the cover over the back of the seat 7. Disconnect the hook-and-loop connectors in the lower part of back pad, and lift cover off of seat.
- Page 78 Removing the Seat Cover 8. Disconnect snaps on both sides of the front of the seat, and lift up. Snaps Snaps 9. Disconnect snaps at back and remove pockets from tabs on either side of seat pad. 10. Push buckle through slot in seat.
-
Page 79: Reattaching The Seat Cover
Reattaching the Seat Cover 1. Pull seat pad over seat base and reconnect snaps on front of seat at both sides. Pull harness adjust strap through slot at front of seat pad, and pull buckle through slot in seat. NOTE: It is not Snaps necessary to remove the cup holders in order to... - Page 80 Reattaching the Seat Cover 4. Insert the corners into the pockets on either side of back pad. 5. Pull back pad over car seat shell. 6. Replace elastic straps around shoulder belt guides. Pull harness straps through opening in headrest pad.
-
Page 81: Care And Cleaning
Care and Cleaning • DO NOT lubricate or immerse in water the SecureTight connectors, the buckle, or any other part of this child seat, unless rinsing is permitted, as stated on the back of the buckle for your seat. • Plastic and metal parts may be wiped clean with mild soap and water and dried with a soft cloth. -
Page 82: Recording Model Information
Backless Mode Proper Disposal When this child seat reaches the expiration date found on the date of manufacture label, Evenflo encourages you to dispose of it properly. Most components of this child seat are recyclable. 1. Remove all fabric and padding. -
Page 83: Replacement Parts
Replacement Parts To order replacement parts you can order online at www.evenflo.com or contact Evenflo. When you contact us, please have the product model number and date of manufacture (found on the back of the child seat). Not available on all models. Styles may vary. -
Page 84: Limited Warranty
Evenflo’s sole obligation under this express limited warranty shall be, at Evenflo’s option, to repair or replace any Product that is determined to be defective by Evenflo and determined to be covered by this warranty.
Need help?
Do you have a question about the All4Stages Slim and is the answer not in the manual?
Questions and answers
in this model does the canopy included?
No, the Evenflo Slim model does not include a canopy.
This answer is automatically generated