Table of Contents
Advertisement
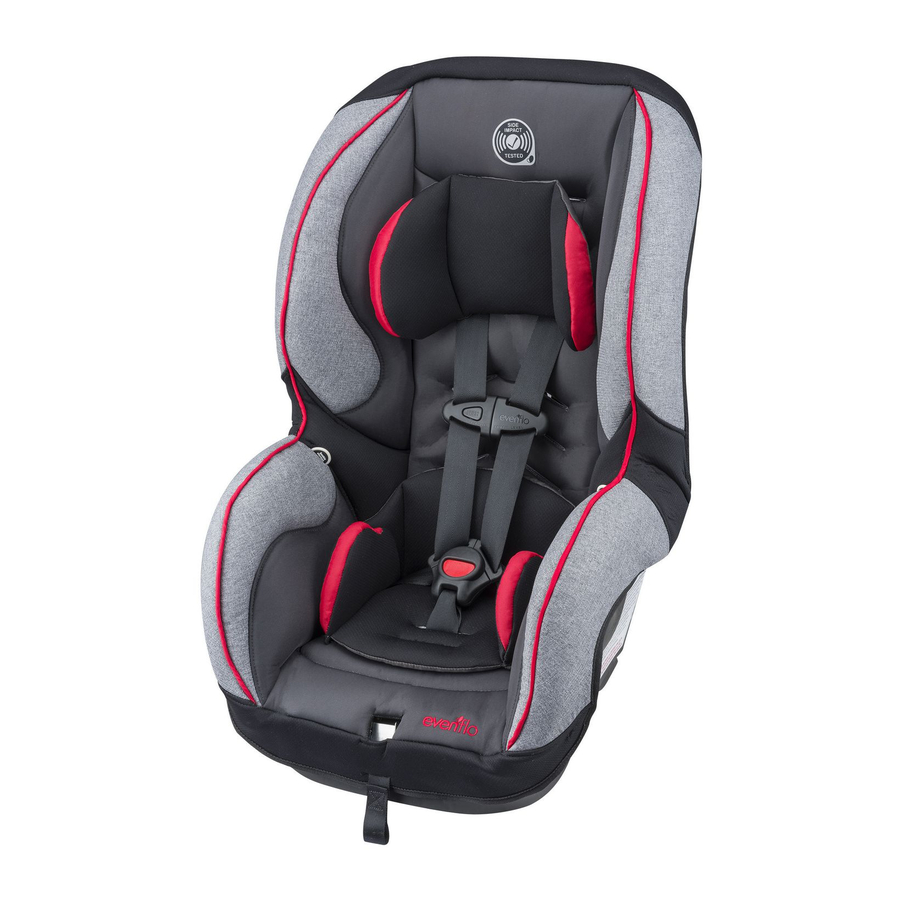
SureRide
Child Restraint System
Owner's Manual
Keep for future use.
Rear-facing*
2.3 to 18 kg
(5 to 40 lbs)
48 to 102 cm
(19 to 40 in.)
Forward-facing*
10 to 29.4 kg
(22 to 65 lbs)
71 to 137 cm
(28 to 54 in.)
At least 2 years old
* See page 2 for complete requirements.
Para instrucciones en Español,
llamar al: 1-800-233-5921
WARNING:
To reduce the risk of serious injury
or death, read this owner's manual prior
to installing and using this child restraint.
© 2017 Evenflo Company, Inc.
/Titan
TM
65
®
25701553
9/19
Advertisement
Table of Contents

Related Manuals for Evenflo SureRide Titan 65


Summary of Contents for Evenflo SureRide Titan 65
- Page 1 * See page 2 for complete requirements. Para instrucciones en Español, llamar al: 1-800-233-5921 WARNING: To reduce the risk of serious injury or death, read this owner’s manual prior to installing and using this child restraint. © 2017 Evenflo Company, Inc. 25701553 9/19...
- Page 2 More children are killed every year as passengers in car crashes than by any other type of injury. To reduce the risk of SERIOUS INJURY or DEATH, read this owner’s manual and your vehicle owner’s manual before installing and using this child restraint. Using a child restraint makes a big difference.
-
Page 3: Table Of Contents
Table of Contents Important Information Child Requirements ............2 Premature Infant Use ..........3 Warnings ..............4 LATCH Warnings ............8 Safe Practices ............10 Recall Information for U.S. Customers ......10 Public Notice for Canadian Customers .....11 Motor Vehicle/Aircraft Usage ........11 Storing Your Instructions ..........11 Visual Glossary ............12 Child Restraint Features ..........14 Rear-facing Use... -
Page 4: Child Requirements
MUST meet the size and age requirements below. In addition, Evenflo recommends consulting with your child’s physician before allowing your child to transition from rear-facing to forward-facing use of this child restraint. The American Academy of Pediatrics (AAP) recommends keeping children rear-facing until they reach the maximum height or weight for their child restraint in rear-facing orientation. -
Page 5: Premature Infant Use
Preterm and low-birth weight infants are at additional risk of breathing difficulties and heart problems when placed in a child restraint. Evenflo requires that the evaluation recommended by the AAP be conducted for all infants born earlier than 37 weeks... -
Page 6: Warnings
WARNING Air Bag Warnings • DO NOT use this child restraint in the front seat of a vehicle equipped with an air bag, unless the air bag has been deactivated. Air bags may cause serious injury or death to children under 12. If your vehicle has an air bag, please refer to your vehicle owner’s manual for child restraint installation. - Page 7 If the child restraint cannot be properly installed, DO NOT use the child restraint. Consult vehicle owner’s manual, try a different seating location, or call Evenflo for further assistance.
- Page 8 WARNING Location Warnings – continued Rear-facing and Forward-facing Use • ONLY use this child restraint on forward-facing vehicle seats. DO NOT use this restraint with vehicle seats that face the rear or side. • ONLY use this child restraint on vehicle seats with backs that lock into place.
- Page 9 WARNING Forward-facing Only Warnings – continued • The headrest on the vehicle seat in front of the child should be put in its lowest position. The vehicle seat back that the child faces must be fully padded and free of any hard objects. Seat Belt Warnings Rear-facing and Forward-facing Use •...
-
Page 10: Latch Warnings
WARNING LATCH Warnings Rear-facing and Forward-facing Use • Do not use the lower anchors of the child restraint anchorage system (LATCH System) to attach this child restraint when restraining a child weighing more than 24.9 kg (55 lbs) with the internal harnesses of the child restraint. - Page 11 • DO NOT attach additional padding, toys, or other devices not made by Evenflo or described in these instructions for the child restraint. Items not tested with the child restraint could injure the child. Additional pads or pillows may interfere with the function of the harness system, or cause breathing problems if the child’s head falls forward, increasing...
-
Page 12: Safe Practices
You must register this restraint to be reached in a recall. Send your name, address, e-mail address if available, and the restraint’s model number and manufacturing date to: Evenflo Company, Inc., 1801 Commerce Dr., Piqua, OH 45356 or call 1-800-233-5921. -
Page 13: Public Notice For Canadian Customers
• Child restraints could be recalled for safety reasons. You must register this restraint to be reached in a recall. Send your name, address, and the restraint’s model number and manufacturing date to: Evenflo Company, Inc., 1801 Commerce Dr., Piqua, OH 45356 or call 1-937-773-3971. -
Page 14: Visual Glossary
Visual Glossary Your vehicle components may be significantly different than pictured. Consult your owner’s manual to help you identify your vehicle components. Fold-down Armrest Rear Consult your vehicle’s Headrests owners manual. Back Seat Tether Anchors Belt Buckles Forward-facing ONLY Center Lap Belt Back Seat Retractor... - Page 15 Visual Glossary Front Seat Lap and Shoulder Belts Front Headrests mporTanT mporTanT Consult your vehicle owner’s manual to determine proper placement of child restraint in your vehicle and familiarize yourself with your vehicle’s Front Seat Retractor components.
-
Page 16: Child Restraint Features
Child Restraint Features Front View Back View Top 2 Harness Positions for Forward-facing ONLY For U.S. Customers: This set of harness slots can be for either forward-facing or rear-facing use. For Canadian Customers: This set of harness slots can ONLY be used forward-facing. - Page 17 Child Restraint Features Description Head Pillow Harness Covers* Harness Straps Seat Pad Body Pillow Chest Clip Buckle Crotch Strap Buckle Cover* Harness Release Button Harness Adjuster Strap Tether Strap and Hook Instruction Storage Area Lower Anchor Connector Assembly Harness Straps Splitter Plate * Not all features are available on all models.
- Page 18 Using the Child Restraint Rear-facing Child Requirements: • Weight: 2.3 to 18 kg (5 to 40 lbs) • Height: 48 to 102 cm (19 to 40 in.) and top of child’s head is at least 25 mm (1 in.) below the top of the child restraint seat back 25 mm (1 in.) or more...
-
Page 19: Rear-Facing Installation Checklist
Rear-facing Installation Checklist 1. Secure child restraint to the vehicle seat. • Recline stand is flipped to the recline position (page 38). • Install with Lower Anchor Connector Assembly (page 18) or vehicle seat belt (page 22). • Towel rolled up and placed beneath the recline stand, if necessary (page 40). -
Page 20: Rear-Facing Installation With Lower Anchor Connectors
Rear-facing Installation with Lower Anchor Connectors LATCH is a system for attaching the child restraint to your vehicle seat. It is to be used in place of your vehicle’s seat belts and can be used in vehicles with LATCH anchors. install this child restraint with LATCH and the vehicle’s seat belts. - Page 21 Rear-facing Installation with Lower Anchor Connectors WARNING Make sure both harness straps are installed completely on the splitter plate, as shown. Failure to properly attach the harness straps to the splitter plate may result in a loose harness and serious injury or death to your child.
- Page 22 Rear-facing Installation with Lower Anchor Connectors WARNING DO NOT use the two upper harness slots rear-facing. The harness may not properly restrain the child during a crash. Make sure the harness straps are in one of the three lower strap slots The harness straps MUST start at shoulder height...
- Page 23 Rear-facing Installation with Lower Anchor Connectors WARNING DO NOT use this child restraint if it moves more than 25 mm (1 in.) side-to-side or front to back at the rear-facing belt path. Serious injury or death may result from poor installation. If you can not tightly secure the child restraint, try again or move it to another location, or install with the vehicle seat belt.
-
Page 24: Rear-Facing Installation With Seat Belt
Rear-facing Installation with Seat Belt WARNING NEVER turn a child restraint forward-facing with a child who weighs less than 10 kg (22 lbs). Crash forces may cause serious injury or death. For complete child requirements for forward-facing use, see page 2. Infants MUST always ride facing the rear of... - Page 25 Rear-facing Installation with Seat Belt WARNING DO NOT use the two upper harness slots rear-facing. The harness may not properly restrain the child during a crash. Make sure the harness straps are in one of the three lower strap slots The harness straps MUST start at shoulder height...
- Page 26 Rear-facing Installation with Seat Belt Install Locking Clip (not included), if necessary. Locking Clip If your vehicle was built prior installed properly to model year 1996, and has a lap/shoulder belt that is equipped with an emergency locking retractor (ELR) AND 13 mm sliding latch plate, you MUST...
- Page 27 Rear-facing Installation with Seat Belt WARNING • If vehicle seat belts are not routed and fastened correctly, the child restraint may not protect your child in a crash. • Check your vehicle owner’s manual to determine how to lock your seat belt for child restraint installation. The seat belt must be locked to properly secure the child restraint.
- Page 28 Using the Child Restraint Forward-facing Child Requirements: • Weight: 10 to 29.4 kg (22 to 65 lbs) • Height: 71 to 137 cm (28 to 54 in.) and tops of the child’s ears are at or below the top of the child restraint seat back •...
-
Page 29: Forward-Facing Installation Checklist
Forward-facing Installation Checklist 1. Secure child restraint to the vehicle seat. • Recline stand is flipped to the upright position (page 38). • Install with Lower Anchor Connector Assembly (page 28) or vehicle seat belt (page 32). • Install tether strap (pages 31 and 35). •... -
Page 30: Forward-Facing Installation With Lower Anchor Connectors
Forward-facing Installation with Lower Anchor Connectors LATCH is a system for attaching the child restraint to your vehicle seat. It is to be used in place of your vehicle’s seat belts and can be used in vehicles with LATCH anchors. install this child restraint with LATCH and the vehicle’s seat belts. - Page 31 Forward-facing Installation with Lower Anchor Connectors WARNING DO NOT use the three lower harness slots forward-facing. The harness may not properly restrain the child in the event of a crash. Make sure that the harness straps are in one of the three upper strap slots .
- Page 32 Know Your Lower Anchor Connector Assembly The lower anchor connector assembly that comes with your child restraint will be one of the two types below. SecureRight Quick Connector Adjuster Strap Clip Hook Strap Adjuster Refer to your vehicle owner’s manual to locate the lower anchor bars on your vehicle seat.
- Page 33 Check with your vehicle dealer. If you have questions regarding tether anchors that are not addressed by the vehicle owner’s manual or answered by an authorized dealer/vehicle manufacturer, call Evenflo’s ParentLink at 1-800-233-5921 (U.S.) or 1-937-773-3971 (Canada), or 01-800-706-12-00 (Mexico).
-
Page 34: Forward-Facing Installation With Seat Belt
Forward-facing Installation with Seat Belt WARNING DO NOT use the three lower harness slots forward-facing. The harness may not properly restrain the child in the event of a crash. Make sure that the harness straps are in one of the three upper strap slots . - Page 35 Forward-facing Installation with Seat Belt Lap Belt Only Lap & Shoulder Belt Fasten the vehicle seat belt as shown depending on your type of seat belt. Note: Install locking clip on lap and shoulder belt combinations, if necessary. Install Locking Clip (not included), if necessary.
- Page 36 Forward-facing Installation with Seat Belt WARNING • If vehicle seat belts are not routed and fastened correctly, the child restraint may not protect your child in a crash. • Check your vehicle owner’s manual to determine how to lock your seat belt for child restraint installation. The seat belt must be locked to properly secure the child restraint.
- Page 37 Check with your vehicle dealer. If you have questions regarding tether anchors that are not addressed by the vehicle owner’s manual or answered by an authorized dealer/vehicle manufacturer, call Evenflo’s ParentLink at 1-800-233-5921 (U.S.) or 1-937-773-3971 (Canada), or 01-800-706-12-00 (Mexico).
-
Page 38: General Information
General Information Positioning the Harness Strap Shoulder harness straps on this child restraint are adjustable to six positions. Rear-facing: U.S. Customers: The shoulder harness straps MUST start at or below shoulder height using the strap slots closest to your child’s shoulders in one of the four lower harness positions . - Page 39 To change the harness strap position, loosen the shoulder harness as shown on page 43, step 2. Slide the harness strap off the splitter plate Pull harness strap through to the front of the child restraint. Thread each harness strap through the appropriate slot.
-
Page 40: Adjusting The Recline Stand
Note: Never route the harness belts over the recline stand. Adjusting the Recline Stand Lift the child restraint and flip the recline stand located under the child restraint seat, to either the upright or recline position. Note: Recline position is to be used for rear-facing ONLY. - Page 41 FOR CANADIAN CONSUMERS ONLY: When the recline stand is in the recline position, wrap Velcro strap around ® the recline stand insert the end of the strap through the D-ring , as shown. Pull until just taut and adhere Velcro to itself, as shown.
- Page 42 Rear-facing Recline The child restraint MUST in the RECLINE position for rear-facing use. Child MUST weigh 2.3 to 18 kg (5 to 40 lbs). If the level arrow is not parallel to the ground, use a tightly rolled towel or small blanket beneath the front edge of the recline stand.
-
Page 43: Securing The Child In The Child Restraint
Securing the Child in the Child Restraint Place baby in the child restraint. The baby’s back and bottom should be flat against the restraint. If there is a gap, the baby will not be comfortable. Bring each harness strap over Fasten the chest clip the child’s shoulders. -
Page 44: Adjusting The Crotch Strap
Adjusting the Crotch Strap This Child Restraint Has Two Crotch Strap Positions To reposition the crotch strap, first turn the child restraint upside down. Turn the crotch strap harness anchor sideways and push it through the slot in the bottom of the seat shell Reposition the harness anchor into the other slot. -
Page 45: Adjusting The Harness Strap
Adjusting the Harness Strap To tighten the harness straps, pull on the long harness adjuster strap on the front of the seat. To loosen the harness straps, push the harness release button on the front of the seat. At the same time, pull up on the harness strap near... -
Page 46: Removing The Child From The Child Restraint
Removing the Child from the Child Restraint Push the release button and pull the chest clip apart. Press the red buckle release and remove the buckle tongues Removing the Tether Strap The tether strap that comes with your child restraint will be one of the two types below. Press the adjuster release Tilt the adjuster button... - Page 47 WARNING MUST • To avoid a strangulation hazard, you tightly roll or fold excess tether strap and secure with the strap/rubber band. • Attach the tether hook to the storage clip when not in use. This will keep an unused tether or tether hook from hitting someone during a crash.
-
Page 48: Removing The Lower Anchor Connectors
Removing the Lower Anchor Connectors Using your full weight, push the child restraint into the vehicle seat while loosening the adjuster. Press the adjuster release Tilt the adjuster button to loosen. slide the strap to loosen. The Lower Anchor Connector that comes with your child restraint will be one of the two types below. - Page 49 Removing the Lower Anchor Connectors When the Lower Anchor Connector assembly is not in use you MUST attach the hooks the back of the child restraint. A loose Lower Anchor Connector assembly strap and hook may injure your child.
-
Page 50: Installing The Optional Accessories
Installing the Optional Accessories Not available on all models. Styles may vary. WARNING • Use the cup holder with the child restraint in the forward-facing position ONLY. • DO NOT use the cup holder to store cans or hard cups. Only for use with soft cups. - Page 51 Note: The optional Infant Head Support and Body Pillow are for Rear-facing use only. The optional Body Pillow when placed in the restraint, as shown, helps support your child. The optional Infant Head Support should lie flat against the seat back, as shown.
-
Page 52: Securing Your Child Restraint In Aircraft
Securing Your Child Restraint in Aircraft The Federal Aviation Administration (FAA) recommends that you secure your child for air travel in an appropriate child restraint based on your child’s weight and size. Turbulence can happen with little or no warning. When turbulence occurs, the safest place for your child is in a properly installed child restraint, not in an adult’s lap or on the aircraft seat with its seat belt. - Page 53 Installing Child Restraint Rear-facing in Aircraft Pull the seat pad off the front of the child restraint. Route the aircraft seat belt through the rear-facing belt path opening on one side and continue through the belt path opening on the opposite side of the child restraint, as shown above.
- Page 54 Installing Child Restraint Rear-facing in Aircraft The aircraft seat belt must be as tight as possible. Route the excess seat belt strap back through the rear-facing belt path opening, as shown above. Using your full weight, push the child restraint firmly onto the aircraft seat while pulling on the excess seat belt strap to tighten.
-
Page 55: Installing Child Restraint Forward-Facing In Aircraft
Installing Child Restraint Forward-facing in Aircraft IMPORTANT: Before installing the child restraint, make sure the aircraft seat is in a fully upright position. Aircraft Seat Belt Adjust the child restraint to its upright position (page 38), then place it on the aircraft seat forward-facing, as shown above. - Page 56 Note: Because of the fixed length of aircraft seat belts, the belt buckle could be behind the child’s back after tightening the belt. For your child’s comfort, Evenflo recommends cushioning the child’s back by placing a small pillow or folded-up blanket, or a folded-up jacket, over the belt buckle.
-
Page 57: Care And Cleaning
Care and Cleaning • DO NOT lubricate or immerse in water the LATCH connectors, the buckle, or any other part of this child restraint, unless rinsing is permitted, as stated on the back of the buckle for your restraint. • Plastic and metal parts may be wiped clean with mild soap and water and dried with a soft cloth. -
Page 58: Replacement Parts
Seat pad Head Foam Proper Disposal of This Child Restraint At the end of this child restraint’s useful life, Evenflo encourages you to dispose of it properly. Most of the components in this child restraint are recyclable. 1. Remove all fabric and padding. -
Page 59: Limited Warranty
Evenflo’s sole obligation under this express limited warranty shall be, at Evenflo’s option, to repair or replace any Product that is determined to be defective by Evenflo and determined to be covered by this warranty. - Page 60 • www.evenflo.com • USA: 1-800-233-5921 8 AM – 5 PM E.T. • Canada: 1-937-773-3971 • México: 01-800-706-12-00...
Need help?
Do you have a question about the SureRide Titan 65 and is the answer not in the manual?
Questions and answers