Table of Contents
Advertisement
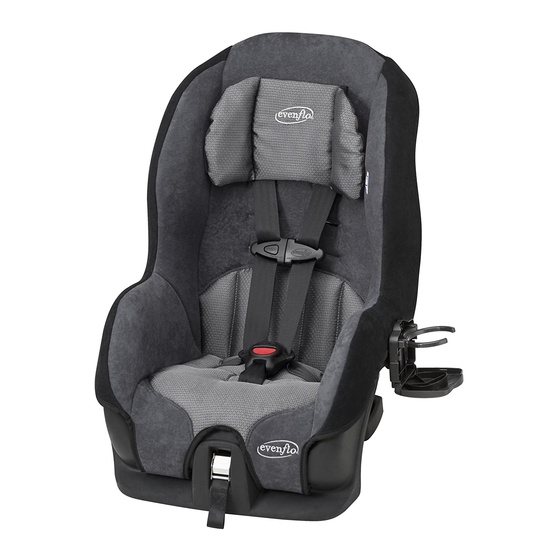
Tribute
Child Restraint System
Owner's Manual
Keep for future use.
Rear-facing
2.3 to 18 kg
(5 to 40 lbs)
48 to 94cm
(19 to 37 in.)
Forward-facing
10 to 18 kg
(22 to 40 lbs)
71 to 102 cm
(28 to 40 in.)
Para instrucciones en Español,
llamar al: 1-800-233-5921.
WARNING:
To reduce the risk of serious injury
or death, read this owner's manual prior
to installing and using this child restraint.
© 2014 Evenflo Company, Inc.
™
25706660
8/14
Advertisement
Table of Contents

Related Manuals for Evenflo Tribute


Summary of Contents for Evenflo Tribute
- Page 1 Tribute ™ Child Restraint System Owner’s Manual Keep for future use. Rear-facing 2.3 to 18 kg (5 to 40 lbs) 48 to 94cm (19 to 37 in.) Forward-facing 10 to 18 kg (22 to 40 lbs) 71 to 102 cm (28 to 40 in.)
-
Page 2: Table Of Contents
Removing Your Child from the Child Restraint ..15 restraint. Using the Tribute™ Rear-facing .....16 Positioning the Recline Stand ....... 18 For Forward-facing Use Installing with Lower Anchor Connectors .... 19 Installing with a Seat Belt ........ -
Page 3: Warnings
WARNING WARNING General Warnings Air Bag Warnings Rear-facing and Forward-facing Use Rear-facing and Forward-facing Use • Failure to follow installation instructions can result in • DO NOT use this child restraint in the front seat of a the child striking the vehicle’s interior during a sudden vehicle equipped with an air bag, unless the air bag stop or crash. - Page 4 Consult vehicle owner’s is in the rear-facing position. manual, try a different seating location, or call Evenflo for • The headrest on the vehicle seat that the child faces further assistance.
- Page 5 WARNING WARNING Seat Belt Warnings LATCH Warnings Rear-facing and Forward-facing Use Rear-facing and Forward-facing Use • The LATCH system is intended to be used ONLY • DO NOT use this child restraint if it moves more than described in these instructions. Serious injury or death 25 mm (1 inch) side to side or front to back at either may result from misuse.
-
Page 6: Safe Practices
DO NOT attach additional padding, toys, or other such as lollipops or ice cream on a stick. The object devices not made by Evenflo or described in these can injure the child if the vehicle swerves or hits a bump. -
Page 7: Recall Information For U.s. Customers
You must register this restraint to be reached in a recall. Send your name, address, e-mail address, the restraint’s model number, and manufacturing date After thoroughly Evenflo Company, Inc., 1801 Commerce Dr., reading and Piqua, OH 45356, or call 1-800-233-5921. following these... -
Page 8: Visual Glossary
Visual Glossary Visual Glossary Your vehicle components may be significantly different than pictured. Consult your owner’s manual to help you identify your vehicle components. Front Seat Lap and Shoulder Belts Fold-down Armrest Consult your vehicle’s owners manual. Front Rear Headrests Back Seat Tether Anchors Headrests... -
Page 9: Securing Your Child In The Child Restraint
Securing Your Child in the Child Removing Your Child from the Restraint Child Restraint Using the 2-piece Chest Clip Place baby in the child restraint. The baby’s back and bottom should be flat against the restraint. If there is a gap, the baby will not be comfortable. -
Page 10: Using The Tribute™ Rear-Facing
Using the Tribute™ Rear-facing Installation Checklist Rear-facing 1. Secure child restraint to the vehicle seat. • Recline Stand is flipped to the Recline position Child Requirements for Rear-facing: (page 18). • Weight: 2.3 to 18 kg (5 to 40 lbs) •... -
Page 11: Rear-Facing Recline
Positioning the Recline Stand for Installing the Child Restraint Rear-facing Use Rear-facing with Lower Anchor Connectors Lift the child restraint and LATCH is a system for attaching the child restraint to flip the recline stand your vehicle seat. It is to be used in place of your toward the front, as vehicle’s seat belts, and can be used in vehicles with shown, to the Recline... -
Page 12: Rear-Facing With Lower Anchor Assembly
WARNING Pull the seat pad off of the front of the child restraint. NEVER turn a child restraint Route the Lower Anchor forward-facing with an infant Connector strap weighing less than 10 kg (22 lbs) and hook through the or less than one year of age. rear-facing belt paths Crash forces may cause serious injury or death. -
Page 13: Rear-Facing With Seat Belt Assembly
Installing the Child Restraint Rear-facing with a Seat Belt WARNING NEVER turn a child restraint forward-facing with an infant weighing less than 10 kg (22 lbs) or less than one year of age. Crash forces may cause serious injury or death. Infants MUST always ride... - Page 14 Lap & Shoulder Lap Belt Only Belt Combination Pull the seat pad off of the front of the child restraint. Route the vehicle seat belt through the rear-facing belt path , continue through the opposite opening of the child restraint. Fasten the vehicle seat belt, as shown, depending on your type of seat belt.
-
Page 15: Using The Tribute Forward-Facing
Using the Tribute ™ Forward-facing Installation Checklist Forward-facing WARNING Child Requirements for Forward-facing: If your child weighs more than 18 kg (40 lbs) or their shoulders are above the highest harness level, you MUST • Weight: 10 to 18 kg (22 to 40 lbs) discontinue use or the child restraint will not protect your •... -
Page 16: Positioning The Recline Stand
Positioning the Recline Stand for Installing the Child Restraint Forward-facing Use Forward-facing with Lower Anchor Connector Assembly Lift the child restraint and LATCH is a system for attaching the child restraint to your flip the recline stand vehicle seat. It is to be used in place of your vehicle’s seat toward the rear, as shown, belts, and can be used in vehicles with LATCH anchors. -
Page 17: Forward-Facing With Lower Anchor Assembly
WARNING DO NOT use the lowest set of harness slots for forward-facing. The harness may not properly restrain the child in the event of a crash. Refer to your vehicle owner’s manual to locate the lower anchor bars on your vehicle seat. Attach the right hook to the right anchor bar , and the left... - Page 18 Older vehicles may not come equipped with anchor from seat for easier access. bracket hardware. Check with your vehicle dealer. If you have questions regarding tether anchors which are not addressed by the vehicle owner’s manual, or answered by an authorized dealer/vehicle manufacturer call Evenflo’s ParentLink.
- Page 19 Lap Belt Only Lap & Shoulder Belt Fasten the vehicle seat belt as shown depending on your type of seat belt. Note: Install locking clip on lap and shoulder belt combinations, if necessary. The vehicle seat belt must be as tight as possible. Using your full weight, push the child restraint firmly Install Locking Clip, into the vehicle seat as you tighten the vehicle belt.
-
Page 20: Positioning The Harness Strap
We recommend which are not addressed by the vehicle owner’s that you move your child to a larger child restraint or manual, or answered by an authorized dealer/vehicle booster seat. manufacturer call Evenflo’s ParentLink. -
Page 21: Adjusting The Crotch Strap
Adjusting the Crotch Strap This Child Restraint Has Two Buckle Harness Positions To change the harness strap position, loosen the shoulder harness, as shown on page 39, step 2. Slide the harness strap off of the splitter plate We suggest you do this one side at a time. Pull harness strap through to the front To reposition the crotch strap, first turn the child... -
Page 22: Removing The Tether Strap
Removing the Tether Strap Removing the Lower Anchor Connectors The tether strap that comes with your child restraint will be one of the two types below. The Lower Anchor Connector that comes with your child restraint will be one of the two types below. -
Page 23: Installing The Accessories
MACHINE WASH. Proper Disposal of this Child Restraint WARNING At the end of this child restraint’s useful life, Evenflo • DO NOT use the cup holder to store bottles or hard encourages you to dispose of it properly. Most of the containers. -
Page 24: Securing Your Child Restraint In Aircraft
Securing Your Child Restraint in Installing Child Restraint Rear-facing in Aircraft Aircraft The Federal Aviation Administration (FAA) recommends that you secure your child for air travel in an appropriate child restraint based on your child’s weight and size. Turbulence can happen with little or no warning. When turbulence occurs, the safest place for your child is in a properly installed child restraint, not in an adult’s lap or on the aircraft seat with its seat... -
Page 25: Installing Child Restraint Forward-Facing In Aircraft
Installing Child Restraint Rear-facing Installing Child Restraint Forward-facing in Aircraft in Aircraft IMPORTANT: Before installing the child restraint, make sure the aircraft seat is in a fully upright position. Fasten the aircraft seat belt Aircraft Seat Belt Adjust the child restraint to its upright position (page 28), then place it on the aircraft seat forward-facing, as shown above. -
Page 26: Replacement Parts
Cup Holder the belt. For your child’s comfort, Evenflo recommends cushioning the child’s back by placing a small pillow or folded-up blanket, or a folded-up jacket, over the belt buckle. -
Page 27: Limited Warranty
Evenflo’s sole obligation under this express limited warranty shall be, at Evenflo’s option, to repair or replace any Product that is determined to be defective by Evenflo and determined to be covered by this warranty. - Page 29 • USA: 1-800-233-5921, 8 AM to 5 PM E.T. • Canada: 1-937-773-3971 • México: 01-800-706-12-00...
Need help?
Do you have a question about the Tribute and is the answer not in the manual?
Questions and answers