Table of Contents
Advertisement
Advertisement
Table of Contents

Related Manuals for Matrix T7xe


Summary of Contents for Matrix T7xe
- Page 1 T7xe PREMIUM TREADMILL OWNER’S MANUAL...
-
Page 3: Important Precautions
IMPORTANT PRECAUTIONS SAVE THESE INSTRUCTIONS When using an electrical product, basic precautions should always be followed, including the following: Read all instructions before using this treadmill. It is the responsibility of the owner to ensure that all users of this treadmill are adequately informed of all warnings and precautions. - Page 4 dANGER TO REdUCE THE RISk Of ElECTRICAl SHOCk: Always unplug the treadmill from the electrical outlet immediately after using, before cleaning, performing maintenance and putting on or taking off parts. CAUTION If you experience any kind of pain, including but not limited to chest pains, nausea, dizziness, or shortness of breath, stop exercising immediately and consult your physician before continuing.
- Page 5 WARNING (CONT.) • At NO time should pets or children under the age of 13 be closer to the treadmill than 10 feet. • At NO time should children under the age of 13 use the treadmill. • Children over the age of 13 or disabled persons should not use the treadmill without adult supervision. •...
-
Page 6: Electrical Requirements
CIRCUIT ANd ElECTRICAl INfO All Matrix units require the use of a 15 amp or 20 amp “dedicated circuit, ” with a non-looped (isolated) neutral/ground, for the power requirement. Quite simply this means that each outlet you plug into should not have anything else running on that same circuit. The easiest way to verify this is to locate the main circuit breaker box, and turn off the breaker(s) one at a time. -
Page 7: Grounding Instructions
120V UNITS The Matrix T5x, T7x and T7xe 120 treadmill is for use on a nominal 120-volt circuit and has a non-looped grounding plug. Make sure that the 110-volt treadmill is connected to an outlet, NEMA 5-20R, having the same configuration as the plug. No adapter should be used with this product. -
Page 9: Basic Operation
BASIC OPERATION... -
Page 10: Location Of The Treadmill
lOCATION Of THE TREAdMIll 12” 300 mm Place the treadmill on a level and stable surface. Please leave a clear zone behind the treadmill that is at least the width of the treadmill and at least 79” (2000 mm) long. This zone must be clear of any obstruction and provide the user a clear exit path from the machine. -
Page 11: Leveling The Treadmill
lEVElING THE TREAdMIll Use of shim or adding leveling foot. NOTE: It is extremely important that the levelers are correctly adjusted for proper operation. An unbalanced unit may cause belt misalignment or other issues. Use of a level is recommended. Remove the leveling shim provided on the underside of the treadmill. -
Page 12: Tensioning The Running Belt
TENSIONING THE RUNNING bElT After placing the treadmill in the position it will be used, the belt must be checked for proper tension and centering. The belt might need to be adjusted after the first two hours of use. Temperature, humidity, and use cause the belt to stretch at different rates. If the belt starts to slip when a user is on it, be sure to follow the directions below. - Page 13 TIGHTENS RIGHT SIdE Of ROllER TIGHTENS lEfT SIdE Of ROllER bElT IS TOO fAR TO THE RIGHT SIdE bElT IS TOO fAR TO THE lEfT SIdE...
-
Page 14: Using The Heart Rate Function
USING THE HEART RATE fUNCTION Your unit could be equipped with a heart rate pulse grip. The heart rate function on this product is not a medical device. While heart rate grips can provide a relative estimation of your actual heart rate, they should not be relied on when accurate readings are necessary. Some people, including those in a cardiac rehab program, may benefit from using an alternate heart rate monitoring system like a chest or wrist strap. -
Page 15: Wireless Heart Rate Receiver
WIRElESS HEART RATE RECEIVER When used in conjunction with a wireless chest transmitter, your heart rate can be transmitted wirelessly to the unit and displayed on the console. Prior to wearing the wireless chest transmitter on your chest, moisten the two rubber electrodes with water. Center the chest strap just below the breast or pectoral muscles, directly over your sternum, with the logo facing out. -
Page 17: Troubleshooting And Maintenance
TROUBLESHOOTING & MAINTENANCE... -
Page 18: Deck And Belt Replacement
Use a mild soap and damp cloth. DO NOT use ammonia free lubricating system on the market. The Matrix Ultimate Deck™ based cleaner. This will cause discoloring of the aluminum does not require any maintenance, other than cleaning and belt and plastics it comes into contact with. -
Page 19: Check For Damaged Parts
Ensure that any person(s) making adjustments or performing maintenance or repair of any kind is qualified to do so. Matrix Fitness Systems will provide service and maintenance training at our corporate facility upon request... -
Page 21: Treadmill Assembly
ENTER YOUR SERIAL NUMBER AND MODEL NAME IN THE BOXES BELOW: SERIAl NUMbER lOCATION CONSOLE SERIAL NUMBER*: FRAME SERIAL NUMBER: MATRIX MODEL NAME: » Refer to the SERIAL NUMBER and MODEL NAME when calling for service. *The console serial number can be found in the Manager Mode. - Page 24 REQUIRED fASTENERS Part #: Part Name: Outline: Dimensions: Quantity: Bag Color: 020090-00 SOCket heaD CaP SCrew M8 x 20mm BlaCk 0000086571 Flat waSher 8.2 x 16 x 2.0t BlaCk 0000084935 leFt CONNeCtiON BraCket SPhC 4.0t 0000084936 right CONNeCtiON BraCket SPhC 4.0t 004541-aC SOCket heaD CaP SCrew M8 x 1.25P x 45 mm...
-
Page 25: Required Tools
020072-00 SOCket heaD CaP SCrew M8 x 1.25 x 60mm YellOw 062769-00 SOCket heaD CaP SCrew M8 x 1.25 x 15mm YellOw 0000089835 riBBeD lOCk waSher 8.5 x 12.8 x .8/1.3h YellOw 005394-00 t-ShaPeD wreNCh 8mm x 186l REQUIRED TOOlS QUANTITY SKETCH DESCRIPTION... -
Page 26: Assembly Step
ASSEMBLY STEp 1 Cut the yellow banding straps and lift the running deck upward to remove all contents from underneath the running deck. Open hardware bag 1. Slide main frame boot up console mast. Place right console mast over main frame bracket. -
Page 27: Open Hardware Bag
ASSEMBLY STEp 2 Open hardware bag 2. blACk HARdWARE bAG CONTENTS : With the console upside down, attach the console mast caps to the console SOCKET HEAD CAP SCREW (M8 x 20mm) FLAT WASHER (6.2 x 12 x 1.6) Qty: 10 Qty: 10 using 4 bolts (e) and 4 spring washers (b). - Page 28 ASSEMBLY STEp 3 Open HARdWARE bAG 3. WHITE HARdWARE bAG CONTENTS : Slide CONSOlE through the CONSOlE SOCKET HEAD CAP SCREW FLAT WASHER MAST bOOTS. Qty: 2 Qty: 6 NOTE: Make sure the arrows on the mast rings SOCKET HEAD CAP SCREW Qty: 4 are pointing upward towards the console when sliding into place.
- Page 29 ASSEMBLY STEp 4 Open HARdWARE bAG 4. blUE HARdWARE bAG CONTENTS : Attach MAIN fRAME bOOTS using 4 SOCKET HEAD CAP SCREW SPACER SCREWS (d). Qty: 2 Qty: 2 Before the first use, lubricate the treadmill deck by following the instructions in the MAINTENANCE section in the TREADMILL GUIDE.
- Page 30 ASSEMBLY STEp 5 Open HARdWARE bAG 3. REd HARdWARE bAG CONTENTS : Slide CONSOlE through the CONSOlE BUTTON SOCKET HEAD CAP SCREW FLAT WASHER MAST bOOTS. Qty: 6 Qty: 6 NOTE: Make sure the arrows on the mast rings are pointing upward towards the console when sliding into place.
- Page 31 ASSEMBLY STEp 6 Open HARdWARE bAG 4. yEllOW HARdWARE bAG CONTENTS : Attach MAIN fRAME bOOTS using 4 SOCKET HEAD CAP SCREW RIBBED LOCK WASHER SCREWS (d). Qty: 4 Qty: 6 Before the first use, lubricate the treadmill SOCKET HEAD CAP SCREW Qty: 2 deck by following the instructions in the MAINTENANCE section in the TREADMILL...
- Page 32 ASSEMBLY STEp 7 Open HARdWARE bAG 4. Attach MAIN fRAME bOOTS using 4 SCREWS (d). Before the first use, lubricate the treadmill deck by following the instructions in the MAINTENANCE section in the TREADMILL GUIDE. ASSEMBLY COMPLETE!
-
Page 33: Treadmill Operation
TREADMILL OPERATION... - Page 34 MANAGER pREfERENCE MOdE 3X ANd 5X CONSOlES: This section allows a user to manipulate default settings for the machines. It may be accessed by pressing the level Up/level down keys simultaneously for 5 seconds. To change a setting, press “Enter” on the keypad and use the Level buttons and numeric keypad to change the values.
- Page 35 CONSOlE dESCRIpTION: The Matrix machine is inspected before it is packaged. It is shipped in two pieces: the base and the console. Carefully unpack the unit and dispose of the box material.
-
Page 37: T5X Console Description
T5X CONSOlE dESCRIpTION Note: There is a thin protective sheet of clear plastic on the overlay of the console that should be removed before use. A) WORkOUT kEyS: Simple program view and selection buttons. Press Fitness Test button to cycle through available tests. b) QUICk START/GO: One Touch Start and Quick Start. -
Page 39: Console Description
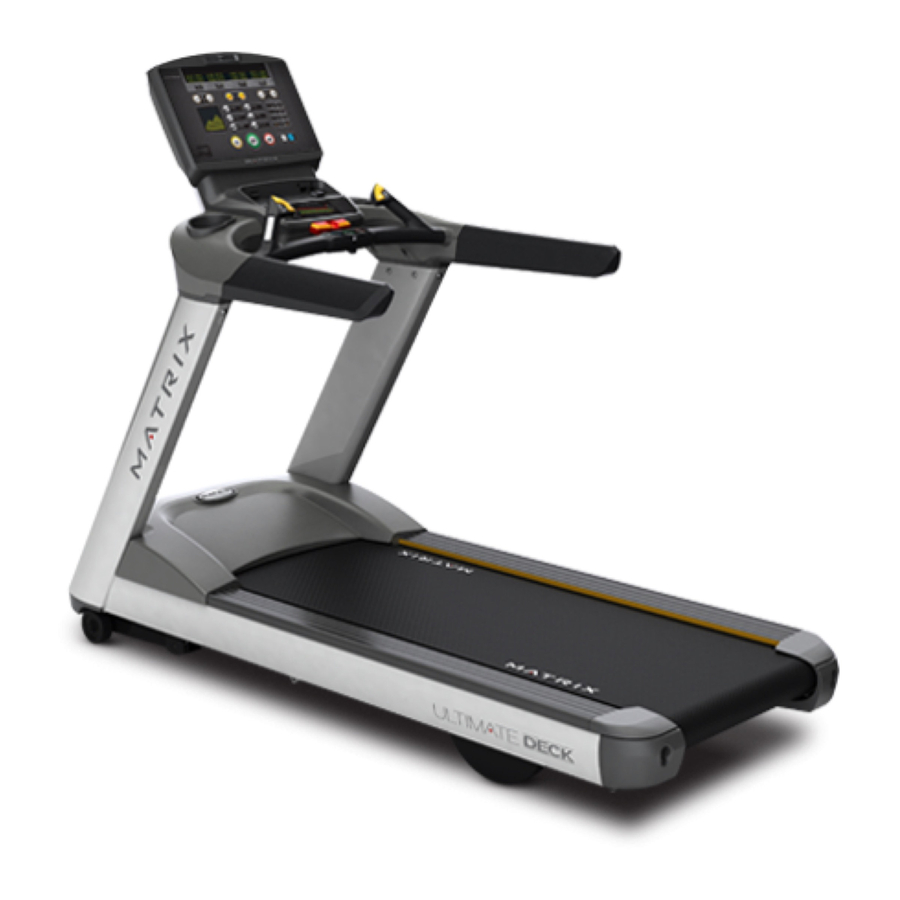
T7X CONSOlE dESCRIpTION Note: There is a thin protective sheet of clear plastic on the overlay of the console that should be removed before use. A) MUlTI-pURpOSE kEyS: Keys have different functions depending on each screen. b) QUICk START/GO: One Touch Start and Quick Start. C) ENTER: To confirm each program setting. - Page 41 T7XE CONSOlE dESCRIpTION The T7xe has a full integrated touch screen display. All information required for workouts is explained on screen. Exploration of the interface is highly encouraged. The information explaining how to program for various workouts will give an explanation about the contents of each screen on the T7xe.
-
Page 42: Workout Descriptions
Press the GO or QUICk START button(s) and the treadmill will Your Matrix treadmill offers a variety of level-based workouts to enter into a manual mode of operation. All energy expenditure challenge users of all fitness levels. The following information will values will be calculated using the default wight measurement. -
Page 43: Heart Rate Control Workout Operation
HEART RATE CONTROl WORkOUT OpERATION Fat burn is a level-based workout that is designed to help users Your Matrix treadmill offers a heart rate control workout mode. burn fat through various resistance changes. The heart rate control workout mode allows the user to program... - Page 44 WORkOUT dESCRIpTIONS fIT TEST Your Matrix treadmill offers a variety of fitness tests-the Gerkin firefighter protocol, the WFI firefighter protocol, the Army, Navy, USMC, and USAF as well as the Physical Efficiency Battery (PEB). The Gerkin protocol was developed by Dr. Richard Gerkin of the Phoenix (Arizona) Fire Department. It is a sub-maximal graded treadmill evaluation used by many Fire Departments across the United States to assess the physical condition of the firefighters.
- Page 45 7) Press GO or QUICk START to begin the workout. 36.7 34.6 32.3 29.4 35.2 33.8 30.9 28.2 FAIR To enter into the Gerkin testing workout on a T7x or a T7xe, 33.8 32.3 29.5 26.9 follow the onscreen prompts. 32.3 30.5 28.3 25.5 POOR 30.6...
- Page 46 WORkOUT dESCRIpTIONS fIT TEST The WFI (Wellness Fitness Initiative) protocol is a modified Gerkin test used by firefighters to evaluate aerobic fitness capacity as part of pre-employment testing and annual fitness testing. The goal is to meet or exceed 12 minutes and 30 seconds. This assessment is a series of one-minute intervals, alternating between speed and percent grade.
- Page 47 5) Enter the desired start speed using the ARROW kEyS or the NUMbER kEypAd and press ENTER. 6) Press GO or QUICk START to begin the workout. To enter into a Military Fitness Test workout on a T7x or a T7xe, follow the onscreen prompts.
-
Page 48: Usb Features
USb fEATURES • Software Updates • USB Charging • Record Workout Statistics to USB • Upload Workout Statistics to www.livestrong.com SOfTWARE UpdATES Note: The USB drive does not need to be in the entire workout. It must be inserted before the workout summary screen ends or The USB port is used to update the console firmware. -
Page 49: Getting Started
AVAIlAblE ON All T7X ANd T7XE CONSOlES NIkE + OpERATION REQUIREMENTS REAdy Connect your Nike Plus-compatible device to the built-in Nike Plus – compatible iPod or iPhone (See www.apple.com/nikeplus for Made for iPod connector on Nike + iPod compatible more information). -
Page 51: Product Specifications
PRODUCT SPECIFICATIONS... - Page 52 0.5 - 15* MPH 0.5 - 15* MPH CONTACT & TELEMETRIC HR SENSORS DRIVE SYSTEM MOTOR MATRIX 5.0 HP AC DYNAMIC RESPONSE DRIVE SYSTEM™ MATRIX 5.0 HP AC DYNAMIC RESPONSE DRIVE SYSTEM™ MOTOR CONTROLLER COMMERCIAL TREADMILL AC DRIVE COMMERCIAL TREADMILL AC DRIVE...
- Page 53 0-15% (1,300 LB THRUST INCLINE MOTOR) SPEED RANGE 0.5 - 12 MPH CONTACT & TELEMETRIC HR SENSORS DRIVE SYSTEM MOTOR MATRIX 5.0 HP AC DYNAMIC RESPONSE DRIVE SYSTEM™ MOTOR CONTROLLER COMMERCIAL TREADMILL AC DRIVE CONSOLE DISPLAY TYPE DOT-MATRIX LED DISPLAY FEEDBACK...
- Page 54 Matrix fitness 1-866-693-4863 1600 landmark drive, www.matrixfitness.com Cottage Grove, WI 53527 Matrix Premium Treadmills Rev 1.8 | © 2012 Matrix Fitness...
Need help?
Do you have a question about the T7xe and is the answer not in the manual?
Questions and answers