Manitowoc SM Installation Use And Care Manual
Self-contained air-cooled
Hide thumbs
Also See for SM:
- Installation, use & care manual (42 pages) ,
- Installation, use & care manual (48 pages)
Table of Contents
Advertisement
Quick Links
Thank you for selecting a Manitowoc Ice Machine, the dependability leader in ice making equipment and related
products. With proper installation, care and maintenance, your new Manitowoc Ice Machine will provide you with many
years of reliable and economical performance.
This manual is updated as new information and models
are released. Visit our website for the latest manual.
www.manitowocice.com
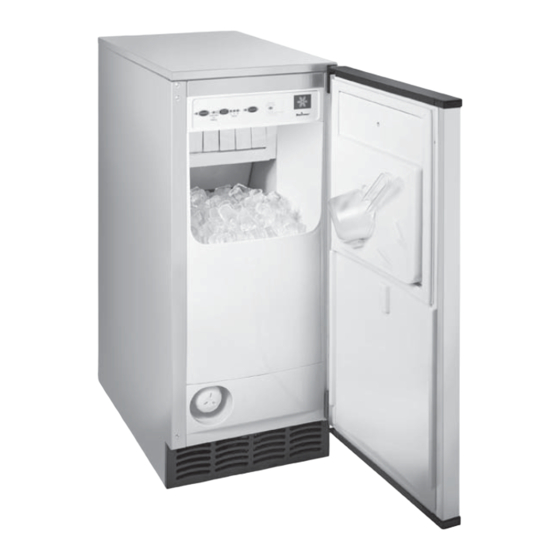
SM Model
Ice Machines
Installation
Use and Care
Manual
Part Number 000001590
09/2008
Advertisement
Table of Contents

Related Manuals for Manitowoc SM


Summary of Contents for Manitowoc SM
- Page 1 Use and Care Manual Thank you for selecting a Manitowoc Ice Machine, the dependability leader in ice making equipment and related products. With proper installation, care and maintenance, your new Manitowoc Ice Machine will provide you with many years of reliable and economical performance.
-
Page 2: Safety Notices
Safety Notices Procedural Notices As you work on this Ice Machine, be sure to pay close As you work on this Ice Machine, be sure to read the attention to the safety notices in this manual. procedural notices in this manual. These notices supply Disregarding the notices may lead to serious injury and/ helpful information which may assist you as you work. -
Page 3: Table Of Contents
Table of Contents Section 1 General Information Model Numbers ..........How to Read a Model Number . - Page 4 Table of Contents (continued) Section 3 Ice Machine Operation Component Identification ......... Control Panel .
-
Page 5: Model Numbers
PERSONAL INJURY POTENTIAL MANITOWOC CLEANER AND SANITIZER Do not operate equipment that has been misused, Manitowoc Ice Machine Cleaner and Sanitizer are abused, neglected, damaged, or altered/modified available in convenient 16 oz. (473 ml) bottles. These from that of original manufactured specifications. -
Page 6: Model/Serial Number Location
General Information Section 1 Model/Serial Number Location These numbers are required when requesting The model and serial number are listed on the MODEL/ information from your local Manitowoc distributor, or SERIAL NUMBER DECAL affixed to the ice machine. Manitowoc Foodservice. Model/Serial Decal Location Model/Serial... -
Page 7: Owner Warranty Registration Card
Section 1 General Information Owner Warranty Registration Card GENERAL EXCLUSIONS The packet containing this manual also includes The following items are not included in the ice machine’s warranty information. Warranty coverage begins the day warranty coverage: your new ice machine is installed. 1. -
Page 8: Residential Ice Machine Limited Warranty
Product and is not transferable. RODUCT MPLIED ARRANTIES TRICTLY IMITED URATION IMITED ARRANTY WHAT ARE MANITOWOC ICE’S OBLIGATIONS PPLICABLE RODUCTS TATED BOVE UNDER THIS LIMITED WARRANTY? NCLUDING IMITED ARRANTY If a defect arises and Manitowoc receives a valid... -
Page 9: Installation Prerequisites
Section 2 Installation Instructions Section 2 Installation Instructions Installation Prerequisites General • Must have open site (gravity) drain available or Call Manitowoc Foodservice at (800) 235-9698 for the purchase optional drain pump (see Water Supply and name of a local company capable of installation and Drain Requirements). -
Page 10: Ice Machine Dimensions
Installation Instructions Section 2 Ice Machine Dimensions AIR-COOLED ICE MACHINES 33.5” 851 mm 3.5” 2.5” 0.5” 89 mm 63.5 mm 12.7 mm 14.75” 375 mm 23” 584 mm MINIMUM CUT-OUT FOR BUILT-IN INSTALLATIONS/ Height Width Depth Part Number 000001590... -
Page 11: Location Of Ice Machine
Section 2 Installation Instructions Location of Ice Machine The location selected for the ice machine must meet the CLEARANCES following criteria. If any of these criteria are not met, Top/Sides 5” (12.7 cm)* select another location. Back 5” (12.7 cm) •... -
Page 12: Electrical Service
Installation Instructions Section 2 Electrical Service GENERAL Important Observe correct polarity of incoming line voltage. Warning All wiring must conform to local, state and national Incorrect polarity can lead to erratic ice machine codes. operation and a safety issue. Prepare electrical circuit before installation of your ice MINIMUM CIRCUIT AMPACITY machine. -
Page 13: Water Supply And Drain Requirements
Section 2 Installation Instructions Water Supply and Drain Requirements WATER SUPPLY Prepare water supply line and drain before installation of DRAIN CONNECTIONS your ice machine. Installation requires a 1/4" ID copper Follow these guidelines when installing drain lines to cold water line and compression fitting (not supplied). prevent drain water from flowing back into the ice The ice machine is supplied with a drain hose for gravity machine and storage bin:... -
Page 14: Step-By-Step Installation Procedure
Installation Instructions Section 2 Step-by-Step Installation Procedure 1. Prepare the site by following the instructions under Electrical Service and Water Supply and Drain Requirements. 2. Remove ice machine from carton. 3. Inspect for damage. 4. Remove literature/warranty packet and drain hose from inside the ice machine. -
Page 15: Leveling The Ice Machine
Section 2 Installation Instructions 11. Place ice machine back in position and check Leveling the Ice Machine leveling again. Make any necessary adjustments. 1. Adjust the levelers close to desired height. 12. Prepare sanitizer solution and sanitize the ice 2. Move the bin into its final position. machine according to In Place Cleaning/Sanitizing Procedure steps 5 and 6 on page 4-2. -
Page 16: Drain Pump Option
Installation Instructions Section 2 Drain Pump Option Leg Option 1. Remove the leg levelers from the bottom of the ice Warning machine. Disconnect power to ice machine before proceeding. 2. Screw the legs into the bottom of the ice machine. 3. -
Page 17: Reversing Door Swing
Section 2 Installation Instructions Reversing Door Swing Lift Along Edge with Putty Knife to Remove 1. Remove top cover from the door - Use a putty knife to lift the inside edge of the top door cover out and up to disengage from the door panel. Repeat on bottom cover. -
Page 18: Installation Check List
Installation Instructions Section 2 Installation Check List Is the Ice Machine level? Is the ice machine drain line routed to an open site drain? Has all of the internal packing been removed? Are all electrical leads free from contact with refrigeration lines and moving equipment? Have all of the electrical and water connections been made? -
Page 19: Before Starting The Ice Machine
Section 2 Installation Instructions Before Starting the Ice Machine Sanitize the ice machine. All Manitowoc ice machines are factory-operated and adjusted before shipment. Normally, new installations do not require any adjustment. To ensure proper operation, follow the Operational Checks in Section 3 of this manual. Starting the ice machine and completing the Operational Checks are the responsibilities of the owner/operator. - Page 20 Installation Instructions Section 2 THIS PAGE INTENTIONALLY LEFT BLANK 2-12 Part Number 000001590...
-
Page 21: Ice Machine Operation
Section 3 Ice Machine Operation Section 3 Ice Machine Operation Component Identification Bin Light Control Panel Water Pump Water Shutters Water Trough Evaporator Evaporator Compartment Water Shutter Assembly Optional Water Filter Grill Bin Thermostat Optional Located Behind Grill Legs Water Supply Line Water Pump Note: Evaporator... -
Page 22: Control Panel
Ice Machine Operation Section 3 Control Panel Replace Water Filter Delay Power Clean Start Automatic To reset: Push and hold Clean button Hours for 6 seconds. Making FUNCTIONS Power Button (Green) Clean (Green) Pressing the “Power” button once will energize the ice Pressing the “Clean”... -
Page 23: Sequence Of Operation
Section 3 Ice Machine Operation Sequence of Operation 5. Automatic Shut-Off The level of ice in the storage bin controls the ice Depending on ambient conditions and cold water supply machine shut-off. When the bin is full, ice will temperature, the ice making process will take contact the bin thermostat bulb holder. -
Page 24: Operational Checks
If the ice machine stops before the bin is full or runs after the bin is full, ambient temperatures are probably high or GENERAL low and the bin thermostat can be adjusted as follows: Manitowoc ice machines are factory-operated and adjusted before shipment. Normally, new installations do Warning not require any adjustment. -
Page 25: Cube Weight Adjustment
Section 3 Ice Machine Operation CUBE WEIGHT ADJUSTMENT The cube weight can be increased from the factory setting by adjusting the finish time. Additional finishing time check: 1. Press and hold the power button for 5 seconds. 2. Count the flashes on the Automatic Ice Making light. The light will flash once for each additional minute of freeze cycle time. - Page 26 Ice Machine Operation Section 3 THIS PAGE INTENTIONALLY LEFT BLANK Part Number 000001590...
-
Page 27: Maintenance
Section 4 Maintenance Section 4 Maintenance General You are responsible for maintaining the ice machine in accordance with the instructions in this manual. Maintenance procedures are not covered by the warranty. Warning If you do not understand the procedures or the safety precautions that must be followed, call your local Manitowoc service representative to perform the maintenance procedures for you. -
Page 28: Interior Cleaning And Sanitizing
An extremely Step 6 Prepare 1/2 oz (1 tablespoon) of undiluted dirty ice machine must be taken apart for cleaning and Manitowoc Ice Machine Sanitizer (part number 94-0565-3 sanitizing. only) in a container that will fit into the same area. -
Page 29: Cleaning Procedure
Section 4 Maintenance CLEANING PROCEDURE Step 6 Mix 16 oz (2 cups) cleaner with 2 gal of warm water. Ice machine cleaner is used to remove lime scale and other mineral deposits. Ice machine sanitizer disinfects and removes algae and slime. ! Caution Do not mix Cleaner and Sanitizer solutions together. - Page 30 Maintenance Section 4 Step 9 Mix 1 oz (2 tablespoons) sanitizer with 2 gal of warm water. Model Sanitizer Amount Water Amount SM50 1 oz. (30 ml) 2 gal (8L) Step 10 Use 1/2 of the sanitizer/water mixture to sanitize all removed components. Use a cloth or sponge to liberally apply the solution to all surfaces of the removed parts or soak the removed parts in the sanitizer/solution.
-
Page 31: Removal Of Parts For Cleaning/Sanitizing
Section 4 Maintenance REMOVAL OF PARTS FOR CLEANING/SANITIZING 1. Turn off the electrical and water supply to the ice 5. The cleaner will foam; once the foaming stops use a machine. soft-bristle nylon brush, sponge or cloth (NOT a wire brush) to carefully clean the parts. - Page 32 Maintenance Section 4 Top Cover Water Shutters 1. Remove two back screws. The water shutter is designed to keep the spraying water from escaping the evaporator compartment. Warning To remove just the water shutters: Disconnect the electrical power to the ice machine 1.
- Page 33 Section 4 Maintenance Ice Chute Sump Drain Overflow Tube The ice chute is positioned over the spray nozzles and 1. Remove clamp. allows the ice to easily fall into the bin. It must be firmly 2. Pull down to remove overflow tube and tubing as an positioned over the spray bar, with the front edge inside assembly.
- Page 34 Maintenance Section 4 Water Trough Spray Bar, Water Pump and Hose 1. Depress tabs on right and left side of the water Warning trough. Disconnect the electric power to the ice machine at 2. Allow front of water trough to drop as you pull the electric service switch box and turn off the water forward to disengage the rear pins.
- Page 35 Section 4 Maintenance Spray Bar Disassembly Bin Light The spray bar supplies water to the individual ice- If the ice machine is shut down for a long period of time making cups. Water from the water pump sprays through the bin light cover must be cleaned and sanitized. The the nozzles, located on the upper portion of the tubes.
- Page 36 Maintenance Section 4 Front Grill Water Filter To replace the water filter incoming water does not need Warning to be turned off. Disconnect the electric power to the ice machine at 1. Turn the filter 1/4 turn counter clockwise and it will the electric service switch box and turn off the water pop out.
-
Page 37: Exterior Cleaning
Section 4 Maintenance Exterior Cleaning Removal from Service/ Long Term Storage/ Winterization Clean the area around the ice machine as often as necessary to maintain cleanliness and efficient GENERAL operation. Use cleaners designed for use with stainless Special precautions must be taken if the ice machine is steel products. - Page 38 Maintenance Section 4 THIS PAGE INTENTIONALLY LEFT BLANK 4-12 Part Number 000001590...
-
Page 39: Before Calling For Service
Section 5 Before Calling For Service Section 5 Before Calling For Service Checklist If a problem arises during operation of your ice machine, follow the checklist below before calling for service. Routine adjustments and maintenance procedures are not covered by the warranty. Problem Possible Cause To Correct... - Page 40 Before Calling For Service Section 5 THIS PAGE INTENTIONALLY LEFT BLANK Part Number 000001590...
- Page 42 Manitowoc Foodservice Web Site - www.manitowocfsg.com © 2008 Manitowoc Foodservice...
Need help?
Do you have a question about the SM and is the answer not in the manual?
Questions and answers