Table of Contents
Advertisement
Quick Links
XXX XXX/34HF601ARA
USE AND CARE GUIDE
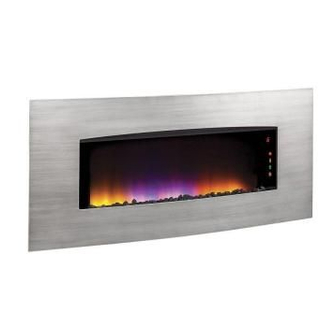
WESTRIDGE WALL HANGING FIREPLACE
Questions, problems, missing parts? Before returning to the store call
Hampton Bay Customer Service
8 a.m. - 6 p.m., EST, Monday-Friday
1-877-527-0313
HAMPTONBAY.COM
THANK YOU
We appreciate the trust and confidence you have placed in Hampton Bay through the purchase of this electric fireplace. We strive to continually
create quality products designed to enhance your home. Visit us online to see our full line of products available for your home imporvement
needs. Thank you for choosing Hampton Bay!
Advertisement
Table of Contents

Subscribe to Our Youtube Channel
Related Manuals for HAMPTON BAY 34HF601ARA


Summary of Contents for HAMPTON BAY 34HF601ARA
- Page 1 THANK YOU We appreciate the trust and confidence you have placed in Hampton Bay through the purchase of this electric fireplace. We strive to continually create quality products designed to enhance your home. Visit us online to see our full line of products available for your home imporvement...
-
Page 2: Table Of Contents
Table of Contents Safety Information ............. 3 Wall Mounting Configuartion ........7 Warranty ..............4 Stand/Base Configuration ......... 9 Pre-Assembly ............. 5 Operation ..............11 Hardware Included ............5 FCC/ICC Information ............14 Product Specifications ............5 Care & Cleaning ............14 Tools Required .............. -
Page 3: Safety Information
Safety Information Please read and understand this entire manual before attempting to assemble, operate or install the product. If you have any question regarding the product, please call customer service at 1-877-527- 0313, 8 a.m.-6 p.m., EST, Monday-Friday. WARNING: This appliance is not a toy. Supervise children playing near it. -
Page 4: Warranty
Warranty 1 Year Limited Warranty: The manufacturer warrants this product to be free from manufacturing and material defects for a period of one year from date of purchase, subject to the following conditions and limitations: Install and operate this Electric Fireplace in accordance with the installation and operating instructions furnished with the product at all times. -
Page 5: Pre-Assembly
Pre-Assembly HARDWARE INCLUDED Part Description Quantity Screw Wall Anchors Screw Screw NOTE: Hardware not shown to actual size. PRODUCT SPECIFICATIONS VOLTAGE 120VAC, 60 Hz AMPS 12.5 Amps WATTS 1500 Watts TOOLS REQUIRED Before beginning assembly of product, make sure all parts are present. Compare parts with package contents list and diagram above. If any part is missing or damaged, do not attempt to assemble, install or operate the product. -
Page 6: Package Contents
Pre-Assembly (continued) PACKAGE CONTENTS Part Description Quantity Mounting Bracket Fireplace Front Glass Base Bracket Base Remote Control Decorative Rocks... -
Page 7: Assembly
Assembly WALL MOUNTING CONFIGURATION Removing the mounthing bracket Choosing the wall location Remove mounting bracket (A) from back of Choose a wall location to attach the mounting Fireplace (B) by removing the two screws at the bracket (A). Position the mounting bracket (A) top back of the unit. - Page 8 Assembly (continued) Attaching the bracket to the wall Hanging the fireplace Attach the mounting bracket (A) to the wall fasten Hang the fireplace (B) on the hooks at bottom of ing the 4 screws (AA) into the wall anchors. mounting bracket (A) and push the fireplace (B) into mounting bracket (A).
-
Page 9: Stand/Base Configuration
Assembly (continued) Installing the rock placement Place the decorative rocks as desired. STAND/BASE CONFIGURATION Assembling the base Installing the stand/base Use 4 screws (CC) to fasten the base bracket (D) to the Mount the fireplace to the base bracket (D) by hooking the clips into position. - Page 10 Assembly (continued) Securing the fireplace to the base Installing the rock placement Fasten the base bracket (D) to the fireplace Place the decorative rocks as desired. with the provided screw (DD). NOTE: Cold climate installation recommendation: When installing this unit against a non-insulated exterior wall or chase the outer walls must be insulated to conform to applicable insulation codes.
-
Page 11: Operation
Operation Display Touch Panel Fireplace Remote Control NOTE: The fireplace can be operated by either the remote control or the control panel. HAMPTONBAY.COM Please contact 1-877-527-0313 for further assistance. - Page 12 Operation (continued) Powering the fireplace Adjusting the flame Push the Power button to supply power to all Press the Flame button to increase and decrease the functions of the fireplace and put the insert in flame intensity. There are 6 brightness levels you can standby mode.
-
Page 13: Replacing The Remote Control Battery
Operation (continued) Replacing the remote control battery Disposing of used batteries When the remote control stops operating or its range The battery may contain hazardous substances that seems reduced, it is time to replace the battery with could endanger the enviroment and human health. new ones. -
Page 14: Fcc/Icc Information
FCC/ICC Information This equipment has been tested and found to comply with the limits for Class B digital device, pursuant to part 15 of the FCC Rules. These limits are designed to provide reasonable protection against harmful interference in a residential installation. This equipment generates, uses, and can radiate radio frequency energy and, if not installed and used in accordance with the instructions, may cause harmful interfer- ence to radio or television reception, which can be determined by turning the equipment off and on. -
Page 15: Troubleshooting
Troubleshooting PROBLEM POSSIBLE CAUSE CORRECTIVE ACTION Check that the unit is plugged into a standard 120V outlet. Press the Power button There is no power. There is no power to the unit. several times, make sure power is set to the “ON”position. -
Page 16: Replacement Parts
Replacement Parts For replacement parts, call our customer service department at 1-877-527-0313, 8 a.m.-6 p.m., EST, Monday-Friday. Part Part Name Part Number Quantity Control Panel 5 Buttons Y12-S84-P32 Right Backlight PCBA Y12-S84-P49R Left Backlight PCBA Y12-S84-P49L Blower/Heater Assembly Y12-S84-P01 Flame PCBA Y12-S84-P40 Remote Control - 5 Buttons Main Circuit Board... - Page 17 HAMPTONBAY.COM Please contact 1-877-527-0313 for further assistance.
- Page 18 Questions, problems, missing parts? Before returning to the store call Hampton Bay Customer Service 8 a.m. - 6 p.m., EST, Monday-Friday 1-877-527-0313 HAMPTONBAY.COM RETAIN THIS MANUAL FOR FUTURE USE.
Need help?
Do you have a question about the 34HF601ARA and is the answer not in the manual?
Questions and answers