
Related Manuals for GE MDS iNET 900


Summary of Contents for GE MDS iNET 900
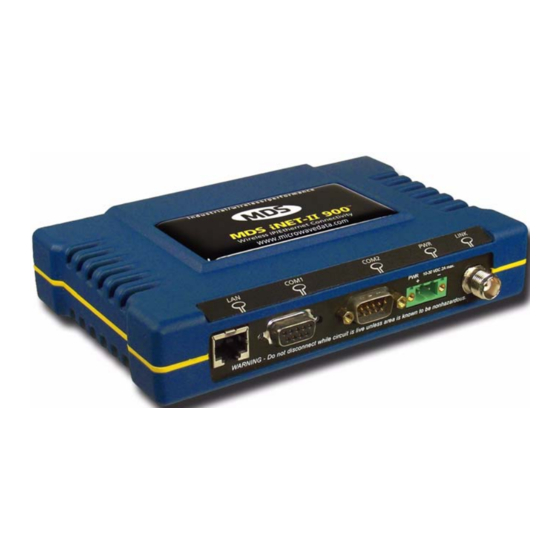
- Page 1 MDS iNET Series MDS iNET-II 900 MDS iNET 900 Wireless IP/Ethernet Transceiver iNET-II 900 Firmware Release 2.3 iNET 900 Firmware Release 6.3 MDS 05-2806A01, Rev. J JUNE 2010...
-
Page 3: Table Of Contents
1.2 PRODUCT DESCRIPTION....................3 1.2.1 Model Offerings .......................... 5 1.2.2 Differences Between iNET and iNET-II Models ................6 1.2.3 GE MDS P21 Protected Network (Redundant) Configuration ............ 6 1.3 APPLICATIONS ........................7 1.3.1 Wireless LAN ..........................7 1.3.2 Point-to-Point LAN Extension ..................... 8 1.3.3 Backhaul for Serial Radio Networks ................... - Page 4 2 EMBEDDED MANAGEMENT SYSTEM ....19 2.1 INTRODUCTION ........................ 23 2.1.1 Differences in the User Interfaces ....................23 2.2 ACCESSING THE MENU SYSTEM ................... 25 2.2.1 Methods of Control ........................26 2.2.2 PC Connection & Log In Procedures ..................26 2.2.3 Navigating the Menus .......................31 Via Terminal Telnet or SSH Sessions Recommended for first-time log-in....................31 Navigating via Web Browser......................31...
- Page 5 TCP vs. UDP..........................61 Serial Encapsulation ........................62 TCP Client vs. TCP Server ......................62 UDP Multicast ..........................62 PPP..............................63 Data Buffering ..........................63 Implementing Configuration Changes....................63 Serial Configuration Wizard ......................63 2.6.2 Serial Data Port Configuration Menu ..................64 2.6.3 Configuring for UDP Mode .......................65 2.6.4 Configuring for TCP Mode ......................68 2.6.5 Configuring for PPP Mode ......................71 2.6.6 IP-to-Serial Application Example ....................72 2.6.7 Point-to-Multipoint IP-to-Serial Application Example ..............73...
- Page 6 2.9 MAINTENANCE........................98 2.9.1 Reprogramming Menu ......................99 Upgrading the Firmware ......................101 Error Messages During File Transfers ..................103 2.9.2 Configuration Scripts Menu ....................104 How Configuration Files Work .....................104 Sample of Configuration Script File .....................105 Editing Configuration Files ......................106 2.9.3 Authorization Keys Menu ......................107 2.9.4 Change the Type of Remote ....................107 2.9.5 Auto-Upgrade/Remote-Reboot Menu ..................107 Firmware Upgrade (with AP Acting as a TFTP Server)..............108...
- Page 7 4.1.1 General Requirements ......................127 DIN Rail Mounting Option ......................129 4.1.2 Site Selection .........................129 4.1.3 Equipment Grounding ......................130 4.1.4 Terrain and Signal Strength ....................130 4.1.5 Antenna & Feedline Selection ....................131 4.1.6 How Much Output Power Can be Used? ................133 4.1.7 Conducting a Site Survey .......................134 4.1.8 A Word About Radio Interference ...................134 4.1.9 Notes on Using 28 VDC Power Supplies ................136 4.2 RADIO (RF) MEASUREMENTS ..................
- Page 8 —Data sheets, frequently asked questions, case studies, applica- Related Materials on the Internet tion notes, firmware upgrades and other updated information is available on the GE MDS Web site at www.gemds.com. iNET Series Reference Manual 05-2806A01, Rev. J...
- Page 9 We also became experts in wireless communication standards and system applications worldwide. The result of our efforts is that today, thousands of utilities around the world rely on GE MDS-based wireless networks to manage their critical assets.
- Page 10 These systems will reuse or recycle most of the materials found in this equipment in a sound way. Please contact GE MDS or your supplier for more information on the proper disposal of this equipment.
-
Page 11: Product Overview And Applications
PRODUCT OVERVIEW AND APPLICATIONS 1 Chapter Counter Reset Paragraph Contents 1.1 ABOUT THIS MANUAL ............3 1.1.1 Related Publication ..............3 1.2 PRODUCT DESCRIPTION ............. 3 1.2.1 Model Offerings ................ 5 1.2.2 Differences Between iNET and iNET-II Models ....... 6 1.2.3 P21 Protected Network (Redundant) Configuration .... - Page 12 iNET Series Reference Manual 05-2806A01, Rev. J...
-
Page 13: About This Manual
1 Mbps (iNET-II) and 512 kbps (iNET). NOTE: For information on the MDS iNET 900 ENI, which provides expanded gateway and protocol conversion capabilities not found in the iNET 900 (DF1 to EIP, and MODBUS to MODBUS TCP conversions), refer to the iNET/ENI Supple- ment (05-4131A01). - Page 14 correctly. See “INSTALLATION PLANNING” on Page 129 for guid- ance on choosing suitable installation sites and antennas. For basic services, simply connect an antenna, connect your Ethernet LAN to the transceiver’s port, apply primary power, set a few oper- ating parameters, and you are done. No license is required for operation in the U.S.A., Canada, and many other countries.
-
Page 15: Model Offerings
The transceiver’s design makes the installation and configuration easy, Transceiver Features while allowing for changes in the future. • Long Range—Up to 25 mile (40 km) range in line-of-sight con- ditions. Repeater stations may be used to extend the operational range. -
Page 16: Differences Between Inet And Inet-Ii Models
1.2.3 MDS P21 Protected Network (Redundant) Configuration For mission-critical applications, GE MDS also offers the Protected Network Station. This radio incorporates two iNET Series transceivers, two power supplies, and a switchover logic board that automatically selects between Transceiver A and Transceiver B as the active radio. -
Page 17: Applications
Invisible place holder Figure 1-2. MDS P21 Protected Network Station (incorporates two Transceivers, with Automatic Switchover) 1.3 APPLICATIONS The following sections provide illustrations of typical transceiver instal- lations. This is meant as an overview only. It is recommended that a net- work manager be involved in all installation planning activities. -
Page 18: Point-To-Point Lan Extension
Invisible place holder Remote Remote Remote Remote Access Point WAN/LAN Figure 1-3. Typical Wireless LAN 1.3.2 Point-to-Point LAN Extension A point-to-point configuration (Figure 1-4) is a simple arrangement consisting of an Access Point and a Remote unit. This provides a com- munications link for the transfer of data between two locations. -
Page 19: Multiple Protocols And/Or Services
Invisible place holder Serial Device Diagnostics MDS 4710 Remote Data Remote Serial Serial MDS 4790 Device NETWORK ROUTER Master MDS 4710 Remote ROUTER Serial Device Diagnostics Access Point MDS 9710 Remote Data Remote Serial MDS 9790 Serial Master Device MDS 9710 Remote NMS Control SCADA Host Point... -
Page 20: Wireless Lan With Mixed Services
antenna, one feedline, one lightning protector and ancillary hardware. Other cost reductions come from the system as a whole, such as reduced management requirements. And above all, the radio offers potential for future applications that run over Ethernet and IP, such as video for remote surveillance. -
Page 21: Replacing Legacy Wireless Products
GE MDS. There are several ways that these systems can benefit from incorporating iNET equipment. The chief advantages are interface flex- ibility (serial and Ethernet in one unit), and higher data throughput. By taking advantage of its built-in serial and Ethernet interfaces, the trans- ceiver is well suited to replace leased lines, dial-up lines, or existing MAS 900 MHz data transceivers. -
Page 22: Network Design Considerations
1.4 NETWORK DESIGN CONSIDERATIONS 1.4.1 Extending Network Coverage with Repeaters What is a Repeater System? A repeater works by re-transmitting data from outlying remote sites to the Access Point and vice-versa. It introduces some additional end-to-end transmission delay but provides longer-range connectivity. In some geographical areas, obstacles can make communications diffi- cult. -
Page 23: Option 2-Using The Ap As A Store-And-Forward Packet Repeater
by the repeater station antennas. A detailed discussion on the effects of terrain is given in Section 4.1.2, Site Selection (beginning on Page 131). The following paragraphs contain specific requirements for repeater systems. Two antennas are required at this type of repeater station—one for each Antennas radio. -
Page 24: Protected Network Operation Using Multiple Access Points
1.4.2 Protected Network Operation using Multiple Access Points Although GE MDS transceivers have a very robust design and have undergone intensive testing before being shipped, it is possible for iso- lated failures to occur. In mission-critical applications, down time can... -
Page 25: Can Radio Frequency Interference (Rfi) Disrupt My Wireless Network
Multiple APs with the same Network Name should be used with care. Using the same Network Name in multiple APs may result in Remotes associating with undesired APs and preventing data exchange from occurring as planned. The use of a different Network Name does not guarantee an interfer- ence-free system. - Page 26 Table 1-3 profiles security risks and how the transceiver pro- vides a solution for minimizing vulnerability. Table 1-3. Security Risk Management Security Vulnerability GE MDS Cyber Security Solution Unauthorized access to the backbone • 802.1x authentication network through a foreign remote radio •...
-
Page 27: Accessories
1.6 ACCESSORIES Table 1-4 lists common accessories and spare items for the transceiver. GE MDS also offers an Accessories Selection Guide listing an array of additional items that may be used with the product. Contact your factory representative or visit to obtain a copy of the guide. - Page 28 “legacy” units. (Consult factory for other lengths and variations.) MDS NETview PC-based network management system for 03-3938A01 MS Software new-generation GE MDS transceivers. Allows radio control and diagnostics in a hierarchal map perspective. Bandpass Filter Antenna system filter that helps eliminate 20-2822A02 interference from nearby paging transmitters.
-
Page 29: Embedded Management System
EMBEDDED MANAGEMENT SYSTEM 2 Chapter Counter Reset Paragraph Contents 2.1 INTRODUCTION ..............23 2.1.1 Differences in the User Interfaces ..........23 2.2 ACCESSING THE MENU SYSTEM ........25 2.2.1 Methods of Control ..............26 2.2.2 PC Connection & Log In Procedures ........26 2.2.3 Navigating the Menus .............. - Page 30 At Every AP Radio ................. 60 2.6 CONFIGURING THE SERIAL PORTS ........61 2.6.1 Overview .................. 61 Com1 Port—Dual Purpose Capability..........61 TCP vs. UDP ................. 61 Serial Encapsulation..............62 TCP Client vs. TCP Server ............62 UDP Multicast ................62 PPP ....................
- Page 31 2.8.5 Remote Listing Menu (Access Points Only) ......95 2.8.6 Endpoint Listing Menu (Access Points Only) ......96 2.8.7 Remote Performance Listing Menu (Access Points Only) ..97 2.8.8 Serial Data Statistics Menu ............98 2.9 MAINTENANCE............... 98 2.9.1 Reprogramming Menu ............. 99 Upgrading the Firmware ..............
- Page 32 iNET Series Reference Manual 05-2806A01, Rev. J...
-
Page 33: Introduction
NETview MS™ software. Refer to publication 05-2973A01 for more information on this tool. For support of other SNMP software, a set of MIB files is available for download from the GE MDS Web site at www.gemds.com. A brief summary of SNMP commands can be found at SNMP Agent Configuration section on Page 48 of this manual. - Page 34 Figure 2-1. Embedded Management System—Top-level Flowchart iNET Series Reference Manual 05-2806A01, Rev. J...
-
Page 35: Accessing The Menu System
Figure 2-2. View of MS with a text-based program— (Terminal Emulator shown—Telnet has similar menu structure) Invisible place holder Figure 2-3. View of the MS with a Browser (Selections at left provide links to the various menus) 2.2 ACCESSING THE MENU SYSTEM The radio has no external controls. -
Page 36: Methods Of Control
2.2.1 Methods of Control The unit’s configuration menus may be accessed in one of several ways: • Local Console—This is the primary method used for the exam- ples in this manual. Connect a PC directly to the port COM 1 using a serial communications cable and launch a terminal com- munications program such as HyperTerminal. - Page 37 Invisible place holder To COM1 or LAN Port (See Text) Serial or Ethernet Crossover Cable (See Text) Configuration PC Figure 2-4. PC Configuration Setup 1. Connect a serial communications cable between the PC and the Starting a Local Console Session unit’s port.
- Page 38 3. Press the key to receive the prompt. ENTER login: 4. Enter the username (default username is , in accor- iNET iNET-II dance with radio model). Press ENTER 5. Enter your password (default password is ). (For security, your admin password keystrokes do not appear on the screen.) Press ENTER NOTE: Passwords are case sensitive.
- Page 39 NOTE: When using Ethernet to access the unit, it may be necessary to change your computer’s IP access to be compatible with the radio IP address. You can identify or verify the unit’s IP address by using a Local Console session to communicate with the radio through its Port and viewing the Starting COM 1...
- Page 40 3. Type in the unit’s IP address and press ENTER 4. A log-in screen is displayed (Figure 2-7) where you enter a user name and password to access the unit’s menu system. Note that the default entries are made in lower case. (Default username is iNET , in accordance with radio model;...
-
Page 41: Navigating The Menus
2.2.3 Navigating the Menus Via Terminal Telnet or SSH Sessions Recommended for first-time log-in Local Console Telnet and SSH sessions use multi-layered text menu systems that are nearly identical. To move further down a menu tree, you type the letter assigned to an item of interest. This takes you to an associated screen where settings may be viewed, or changed. -
Page 42: Basic Device Information
NOTE: In the menu descriptions that follow, parameter options/range, and any default values are displayed at the end of the text between square brackets. Note that the default setting is always shown after a semicolon: [ available settings or range; default setting 2.3 BASIC DEVICE INFORMATION This section contains detailed menu screens and settings that you can... - Page 43 • Alarmed—A alarm event has been logged and not cleared. • Operational—Unit operating normally. At a Remote: • Scanning—The unit is looking for an Access Point beacon signal. • Exp(ecting) Sync(hronization)—The unit has found a valid beacon signal for its network. •...
-
Page 44: Main Menu
2.3.2 Main Menu The next screen, the Main Menu, is the entryway to all user-controllable features. The transceiver’s appears at the top of this and all Device Name other screens as a reminder of the unit that is currently being controlled Figure 2-10. -
Page 45: Configuring Basic Device Parameters
NOTE: Standard MDS iNET (non-iNET-II) transceivers require special firmware to operate in redundant mode. See Upgrading the Firmware on Page 101 for details. 2.3.3 Configuring Basic Device Parameters Device Information Below is the menu/screen that displays basic administrative data on the unit to which you are connected. -
Page 46: Device Names Menu
• —Current time of day. User-setable. Time Setting: HH:MM:SS (Value lost with power failure if SNTP server not accessible.) • —Select presentation format: Date Format • Generic = dd Mmm yyyy • European = dd-mm-yyyy • US = mm-dd-yyyy Device Names Menu Figure 2-12. -
Page 47: Configuring Network Parameters
2.4 CONFIGURING NETWORK PARAMETERS 2.4.1 Network Configuration Menu This Menu contains parameters related to the operation of TCP/IP and Ethernet protocols. There are some differences between AP and Remote type radios regarding these parameters and they are noted where appro- priate. - Page 48 NOTE: A serial Remote can be turned into an Ethernet Bridge and vise-versa. See Change the Type of Remote on Page 107 for details. • —Name of the radio network that this unit belongs Network Name to. Essential for association of Remotes to the Access Point in a network.
-
Page 49: Network Interface Configuration Menu
• —Presents a menu for defining the sta- Ethernet Port Configuration tus of the Ethernet port (enabled or disabled), the Ethernet rate limit, link hardware watch (enabled/disabled), and the Ethernet link poll address. Detailed explanations of this menu are con- tained on Page 45. -
Page 50: Virtual Lan In Inet Series
• —Defines if the radio handles Ethernet frames in VLAN Status “extended” 802.1Q mode or in “normal” mode in the Ethernet port. [ enabled, disabled; disabled • —Allows configuration of IP Addressing Configure Interface parameters. See Configuring the IP Address when VLAN Status is Enabled on Page 41, or Configuring the IP Address When VLAN Status is Disabled on Page 43. -
Page 51: Configuring The Ip Address When Vlan Status Is Enabled
Invisible place holder Figure 2-16. Network Interface Configuration Menu • —Defines whether the radio handles Ethernet VLAN Status frames in “extended” 802.1Q mode or in “normal” mode in the Ethernet port. Ethernet frames intended for the radio, but with a VLAN ID not configured in the radio are discarded. - Page 52 Invisible place holder Figure 2-17. Management VLAN Subnet Configuration Menu • —Defines the source of the IP address of this IP Address Mode device. Only static IP addressing mode is available when VLAN Status is enabled [ Static; Static NOTE: Changes to any of the following parameters while communi- cating over the network (LAN or over-the-air) may cause a loss of communication with the unit being configured.
-
Page 53: Configuring The Ip Address When Vlan Status Is Disabled
Invisible place holder Figure 2-18. Data VLAN Subnet Configuration Menu • —Defines the source of the IP address of this IP Address Mode device. Only static IP addressing mode is available when VLAN Status is enabled [ Static; Static NOTE: Changes to any of the following parameters while communi- cating over the network (LAN or over-the-air) may cause a loss of communication with the unit being configured. - Page 54 Invisible place holder Figure 2-19. IP Address Configuration Menu CAUTION: Changes to any of the following parameters while commu- nicating over the network (LAN or over-the-air) may cause a loss of communication with the unit being configured. Communication will need to be re-established using the new IP address.
-
Page 55: Ethernet Port Configuration Menu
NOTE: Any change made to the above parameters results in the option appearing on screen. This allows all IP Commit Changes settings to be changed at the same time. 2.4.3 Ethernet Port Configuration Menu The transceiver allows for special control of the Ethernet interface, to allow traffic awareness and availability of the backhaul network for redundancy. -
Page 56: Dhcp Server Configuration
• —Detects the lack of an Ether- (AP Only) Ethernet Link (H/W) Watch net connection to the LAN port at the electrical level (link integ- rity). The current AP will broadcast a beacon signal indicating its “NOT AVAILABLE” status so Remotes that hear it do not try to associate to it. - Page 57 Figure 2-22. DHCP Server Configuration Menu NOTE: There should be only one DHCP server active in a network (MDS iNET 900 or other DHCP server). If more than one DHCP server exists, network devices may randomly get their IP address from different servers every time they request one.
-
Page 58: Snmp Agent Configuration
MIB and not affect other existing installations or customers. • —GE MDS sub-tree registrations msdreg.mib • —GE MDS Common MIB definitions for MDS_comm.mib objects and events which are common to the entire product fam- • —GE MDS sub-tree registrations inet_reg.mib •... - Page 59 Invisible place holder Figure 2-23. SNMP Server Configuration Menu From Access Point This menu provides configuration and control of vital SNMP functions. • —SNMP community name with Read Community String SNMPv1/SNMPv2c read access. This string can be up to 30 alpha-numeric characters.
-
Page 60: Prioritized Ap Configuration Submenu
• —This specifies what version of SNMP will be used Trap Version to encode the outgoing traps. The choices are v1_traps, v2_traps, and v3_traps. When v3_traps are selected, v2-style traps are sent, but with a v3 header. [ v1 Traps, v2 Traps, v3 Traps •... -
Page 61: Radio Configuration
• Amount of time that a Remote waits before Connection Time— breaking the connection and looking for an AP. This event hap- pens only when the current AP is not the first entry in the Approved AP List, which means that the remote is not con- nected to the primary AP. -
Page 62: Radio Configuration Menu
2.5.1 Radio Configuration Menu Figure 2-25. Radio Configuration Menu (From Access Point Unit) Figure 2-26. Radio Configuration Menu (From Remote Unit) • —Sets/displays RF power output level. Dis- RF Output Power played in dBm. Setting should reflect local regulatory limita- tions and losses in antenna transmission line. - Page 63 est data rate is possible with strong RF signal levels, typically stronger than –77 dBm RSSI including a 15 dB fade margin. When the data rate is set to , the remote radio is able to AUTO change speeds based on the signal quality criteria set in the Auto Data Rate submenu described later in this section (see Page 55).
- Page 64 • —Before transmitting over the air, if a packet Fragment Threshold exceeds this number of bytes, the transceiver sends the packet in multiple fragments that are reassembled before being delivered over the Ethernet interface at the receiving end. Only even num- bers are acceptable entries for this parameter.
-
Page 65: Channel Config Menu
• : 902–928 MHz band • : 915–928 MHz band • : 902-907.5 and 915-928 MHz bands SPLIT • : 902–928 MHz, individual channels selectable CHANNELS within this range • —This selection (Only applies to iNET. Editable at AP Only.) Skip Zones brings up a submenu discussed in Skip Zones Menu on Page 56. -
Page 66: Skip Zones Menu
• —This allows selection of the channels used Enter Channels for frequency hopping operation. The selection of particular channels will result in an indication of . Be aware that these channels do not become active until the Commit Changes selection is invoked. •... -
Page 67: Auto Data Rate Configuration Menu
With an iNET radio (non-iNET-II), a maximum of three zones may be skipped to be compliant with FCC regulations. 2.5.4 Auto Data Rate Configuration Menu The Auto Data Rate Configuration submenu is typically for use in envi- ronments where signal quality is variable, and you wish to maintain the highest possible over-the-air data rate as conditions change. -
Page 68: Mobility Configuration Menu
Using the example of Figure 2-29, assume the current RSSI is -87 dBm. An RSSI reduction of more than 5 dBm (more negative RSSI number) would cause a data rate change from high speed to standard speed. Once the data speed has changed to standard speed, an RSSI increase to the level of -82 dBm would be required for the radio to switch back to high speed. -
Page 69: Additional Considerations For Mobile Operation
• Use middleware—The use of middleware in the mobile laptops is highly recommended for better operation of a mobile data system. GE MDS provides middleware from one of the vendors in this mar- ket. Contact your factory representative for details. -
Page 70: At Every Mobile (Remote) Radio
• Set the Remote radios to the lower speed (512 kbps for iNET-II, 256 kbps for iNET) to optimize coverage. • Set the RSSI Threshold to -85 dBm—This level is typically used for mobile systems with good performance. Make sure there is overlap- ping coverage of more than one AP to provide a good user experi- ence and continuous coverage. -
Page 71: Configuring The Serial Ports
2.6 CONFIGURING THE SERIAL PORTS 2.6.1 Overview The transceiver includes an embedded serial device server that provides transparent encapsulation over IP. In this capacity, it acts as a gateway between serial and IP remote devices. Two common scenarios are PC applications using IP to talk to remote devices, and serial PC applica- tions talking to remote serial devices over an IP network. -
Page 72: Serial Encapsulation
Serial Encapsulation Transparent encapsulation, or IP tunneling, provides a mechanism to encapsulate serial data into an IP envelope. Basically, all the bytes received through the serial port are put into the data portion of a TCP or UDP packet (TCP or UDP are user configurable options). In the same manner, all data bytes received in a TCP or UDP packet are output through the serial port. -
Page 73: Ppp
As part of the Multicast implementation, the radio sends IGMP mem- bership reports and IGMP queries, and responds to membership queries. It defaults to V2 membership reports, but responds to both V1 and V2 queries. You must configure the multicasted serial port as the target for the mul- ticast data (for example, multipoint-to-multipoint mode, or point-to-multipoint mode where the inbound data is multicast). -
Page 74: Serial Data Port Configuration Menu
The wizard can be bypassed by selecting option B) View Current Settings and adjusting the individual settings of the appropriate parameter 2.6.2 Serial Data Port Configuration Menu The first two menu items present the identical parameter fields for each port with one exception—Flow Control. This is available only on COM2. -
Page 75: Configuring For Udp Mode
2.6.3 Configuring for UDP Mode Invisible place holder Figure 2-32. UDP Point-to-Multipoint Menu Use UDP point-to-multipoint to send a copy of the same packet to mul- tiple destinations, such as in a polling protocol. • —Enable/Disable the serial data port. Status •... - Page 76 • — For proper operation, all radios’ Packet Redundancy Mode Serial Packet Redundancy mode must match (Single Packet mode vs. Packet Repeat mode). This is because a transceiver, when in Packet Repeat mode, sends 12 extra characters (sequence numbers, etc.) to control the delivery of the repeated data.
- Page 77 Invisible place holder Figure 2-33. UDP Point-to-Point Menu Use UDP point-to-point configuration to send information to a single device. • —Enable/Disable the serial data port. Status • —UDP Point-to-Point. This is the type of IP port IP Protocol that will be offered by the transceiver’s serial device server. TCP, UDP, PPP;...
-
Page 78: Configuring For Tcp Mode
• (COM2 only)—RTS/CTS handshaking between Flow Control the transceiver and the connected device. Enable, Disable; Disabled • — When seamless mode is selected, data bytes Serial Mode will be sent over the air as quickly as possible, but the receiver will buffer the data until enough bytes have arrived to cover worst case gaps in transmission. - Page 79 • —The IP address to be used as a destina- Primary Host Address tion for data received through the serial port. Any legal IP address; 0.0.0.0 • —The destination IP port for data packets Primary IP Port received through the serial port on the transceiver. Any valid IP port;...
- Page 80 Invisible place holder Figure 2-35. TCP Server Menu (AP) • —Enable/Disable the serial data port. Status • —TCP Server. This is the type of IP port that will IP Protocol be offered by the transceiver’s serial device server. TCP, UDP, PPP; TCP •...
-
Page 81: Configuring For Ppp Mode
• — Number of characters that repre- Seamless Inter-Frame Delay sent the end of a message (inter-character time-out). MOD- BUS defines a “3.5-character” parameter. [ 1–65,535; 4 • (Custom Packet Mode only)—Maxi- Custom Data Buffer Size mum amount of characters, that the Remote end will buffer locally before starting to transmit data through the serial port. -
Page 82: Ip-To-Serial Application Example
ing may range from 22 to 44 ms, but the radio will not create any gaps in the output data stream. This mode of operation is required for protocols such as MODBUS™ that do not allow gaps in their data transmission. [ Seamless, Custom;... -
Page 83: Point-To-Multipoint Ip-To-Serial Application Example
Invisible place holder 192.168.0.10 192.168.0.1 192.168.0.2 Ethernet Crosssover EIA-232 Remote Access Point Computer or Network Figure 2-37. IP-to-Serial Application Diagram Table 2-1. Serial Port Application Configuration IP-to-Serial Connection Transceiver Menu Item Setting Location Access Point None is required None is required Remote Unit IP Address 192.168.0.2... -
Page 84: Point-To-Point Serial-To-Serial Application Example
Invisible place holder Table 2-2. Serial Port Application Configuration Transceiver Location Menu Item Setting IP Protocol Remote IP Address 224.254.1.1— Multicast Address Local IP Port 30011 None required Access Point (COM2) Enable Enabled Remote Units (COM2) Baud Rate 2,400 (Example) Serial Mode Custom Flow Control... -
Page 85: Combined Serial And Ip Application Example
UDP to the Remote. Upon receiving the packet, the Remote strips the data out of the UDP packet and sends it out its port. Likewise, data presented at the Remote’s port is packetized, sent to the Access Point, stripped, and sent out the Access Point’s port. -
Page 86: Operation And Data Flow
mode while others can be configured (along with the Access Point) for UDP mode. In this configuration, the Host PC can use both data paths to reach the RTUs. This may be helpful when a mixed collection of RTUs is present where some RTUs can operate in a broadcast form while others cannot (see Figure 2-41 on Page 76 and Table 2-4 on Page 76). -
Page 87: Virtual Lan In Inet-Ii And Inet
Table 2-4. Serial Port Application Configuration (Continued) Transceiver Location Menu Item Setting IP Protocol Receive on Port 30011 Remote Units 3 & 4 Status Enabled (COM2) Baud Rate 9,600 Flow Control Disabled IP Protocol Send to Address IP address of the AP Send to Port 30011 Receive on Port... -
Page 88: Device Security
Figure 2-42. Security Configuration Menu (Access Point Version Shown) 2.7.1 Device Security This group of features controls how the radios can be accessed either locally or remotely for configuration and management. Invisible place holder Figure 2-43. Device Security Menu • —... -
Page 89: Wireless Security
TIP: For enhanced security, consider using misspelled words, a combi- nation of letters and numbers, and a combination of upper and lower case letters. Also, the more characters used (up to eight), the more secure the password will be. These strategies help protect against sophisticated hackers who may use a database of common words (for example, dictionary attacks) to determine a password. -
Page 90: Local Authentication Approved Remotes/Access Points List Submenu
Invisible place holder Figure 2-44. Wireless Security Menu • —Controls whether device authentication is Device Auth Method executed locally, via a central server, or not at all. Selecting uses the Approved Remotes List described later in this Local manual. [ None, Local, RADIUS;... -
Page 91: Radius Configuration
This section covers the authentication settings needed for the iNET radios to access the RADIUS server, which is used for Device Level Security and for Wireless Access Security. GE MDS does not provide the RADIUS server software. 05-2806A01, Rev. J... -
Page 92: Operation Of Device Authentication
Operation of Device Authentication Device authentication forces the radio to authenticate before allowing user traffic to traverse the wireless network. When Device Security is configured to use RADIUS as the Authentication Method, Remote radios need three types of certificates: public (client), private, and root (Certificate Authority). -
Page 93: Radius Configuration
2.7.4 RADIUS Configuration Invisible place holder Figure 2-46. RADIUS Configuration Menu • —Used to set/display address of the Server Server IP Address where the RADIUS application resides. • —1812 is the standard port for authentication (RFC Server IP port 2865, June 2000), but this setting may be changed if necessary to any number between 1 and 65535. -
Page 94: Performance Verification
Invisible place holder Figure 2-47. Manage Certificates Menu • —the IP address of the Server where the Server IP Address RADIUS application resides. • should be set appropriately according to the layout TFTP Timeout of the network. Three certificate files (Root, Client, and Private Key) must be present in each of the Remote radios. - Page 95 There are two major areas for possible improvement—the radio and the data network. The following sections will provide you with a variety of items to check and on many occasions, ways to correct or improve their performance. The menu/screen shown in Figure 2-48 is one of two primary sources of information on the radio layer and radio network performance.
-
Page 96: Rssi By Zone Menu (Remotes Only)
• —Multiple radio and network operating statis- Packet Statistics tics. (See “Packet Statistics Menu” on Page 90) • —Current associ- (Displayed only at Remotes) Wireless Network Status ation state and MAC address of the Access Point. (See “Wireless Network Status (Remotes Only)” on Page 93) •... -
Page 97: Event Log Menu
Figure 2-49. RSSI by Zone Menu TIP: Under normal circumstances, the signal levels in each zone should be within a few decibels of each other. If you see one that is signif- icantly lower or higher, it may be a sign of radio frequency inter- ference from another signal source on the 900 MHz band. - Page 98 obtains the time and date from a Time Server. This server can generally be provided by a standard Windows PC server SNTP application. In the absence of the SNTP services, the user must manually enter it at the Access Point. (See “Device Information” on Page 35 for SNTP server identification.) The manually set time and date clock is dependent on the unit’s primary power.
-
Page 99: View Current Alarms
• —Name to be given to the Event (Telnet/Terminal only) Filename Log file sent to the TFTP server for archiving. Any 40-char alphanumeric string; Blank NOTE: You may want to change the filename to reflect the type of log you intend to archive and/or its date. •... -
Page 100: View Event Log
View Event Log See Table 3-4 on Page 121 for event classifications. Figure 2-52. Sample Event Log Screen 2.8.3 Packet Statistics Menu An iNET radio maintains running counters of different categories of events in the Ethernet protocol. The Packet Statistics refer to each Ethernet interface from the perspective of the radio. -
Page 101: Ethernet Packet Statistics
• —Over-the-air data packets sent by this Remote. Packets sent • —Over-the-air data bytes received by this Remote. Bytes received • —Over-the-air data bytes sent by this Remote. Bytes sent • —To-be-transmitted packets dropped as a result Packets dropped of a lack of buffers in the RF outbound queue. •... -
Page 102: Packets Received By Zone
Invisible place holder Figure 2-54. Sample Packet Statistics Menu The VLAN Packet Statistics Menu (Figure 2-55) groups the statistics of both wired and wireless interfaces. The numbers have different meaning depending on whether the Ethernet port is defined as an Access Port or as a Trunk Port. -
Page 103: Wireless Network Status (Remotes Only)
Invisible place holder Figure 2-56. Packets Received By Zone Menu 2.8.4 Wireless Network Status (Remotes Only) The Wireless Network Status screen provides information on a key operating process of the transceiver—the association of the Remote with the Access Point. The following is a description of how this process takes place and as monitored on the Figure 2-57. -
Page 104: The Wireless Network Status Screen (Remotes Only)
The Wireless Network Status Screen (Remotes Only) Figure 2-57. Wireless Network Status Screen • —Current state of the wireless network com- Connection Status munication. • Scanning—The unit is looking for an Access Point beacon signal. • Exp(ecting) Sync(hronization)—The unit has found a valid beacon signal for its network. -
Page 105: Remote Listing Menu (Access Points Only)
2.8.5 Remote Listing Menu (Access Points Only) Figure 2-58. Remote Listing Menu (List of transceivers associated with this AP) • —Hardware address of the Remote transceiver. MAC Address • —IP Address of the Remote transceiver. IP Address • —Current association state of the Remote transceiver. State •... -
Page 106: Endpoint Listing Menu (Access Points Only)
2.8.6 Endpoint Listing Menu (Access Points Only) This list shows all of the non-iNET 900 Ethernet devices that are known to the transceiver and is equivalent to the ARP table of IP devices. Figure 2-59. Endpoint Listing Menu (Lists all equipment attached to REMOTE transceivers in the network) •... -
Page 107: Remote Performance Listing Menu (Access Points Only)
2.8.7 Remote Performance Listing Menu (Access Points Only) Figure 2-60. Remote Performance Listing Menu for iNET AP (iNET-II will show RxRate as 512 kbps or 1024 kbps) This screen provides a unit-by-unit summary of all Remote units cur- rently associated with this Access Point. The parameters are displayed in a column format with each line corresponding to one Remote. -
Page 108: Serial Data Statistics Menu
2.8.8 Serial Data Statistics Menu This screen provides a summary of port activity for both serial data ports. These values will be reset to zero after a reboot cycle. Figure 2-61. Serial Data Statistics Screen (Both COM1 and COM2 will be shown) •... -
Page 109: Reprogramming Menu
From time-to-time GE MDS offers upgrades to the transceiver firm- ware. Loading new firmware into the unit will not alter any privileges provided by Authorization Keys and does not require the transceiver be 05-2806A01, Rev. - Page 110 taken off-line until you want to operate the unit from the newly installed firmware image. Firmware images are available free-of-charge at www.gemds.com NOTE: MDS iNET firmware may not be installed in MDS iNET-II radios, or vice-versa. NOTE: When upgrading to firmware 6.0.0 or later, the unit creates internal files following the first reboot.
-
Page 111: Upgrading The Firmware
(See “Network Configuration Menu” on Configuration Page 37.) A TFTP server is available on the GE MDS Web site at www.gemds.com TIP: If you do not know your computer’s address on a Windows PC, you can use the... - Page 112 Invisible place holder LOCAL WINDOWS PC WITH iNET FILES MDS iNET 900 PORT IP ADDRESS: 172.0.0.B IP ADDRESS: 172.0.0.A INITIATE UPLOAD FROM HERE Figure 2-64. Firmware Upgrade Setup—Option 1 (TFTP Server and Firmware File on Same CPU) Invisible place holder...
-
Page 113: Error Messages During File Transfers
1. Launch a TFTP server on a PC connected either directly or via a LAN to the Ethernet port ( ) of the radio. Point the server towards the directory containing the firmware image file. 2. Connect to the Management System by whichever means is conve- nient: Browser or Telnet via the , or Terminal emulator via the port. -
Page 114: Configuration Scripts Menu
Table 2-6. Common Errors During TFTP Transfer (Continued) Error Message Likely Cause/Corrective Action Bad CRC Cyclic Redundancy Check reporting a corrupted file. Attempt to re-load, or use a different file. Version String Mismatch Invalid file detected. Attempt to re-load, or use a different file. -
Page 115: Sample Of Configuration Script File
Figure 2-66. Configuration Scripts Menu • —IP address of the computer on which the TFTP Host Address TFTP server resides. [ Any valid IP address • —Name of file containing this unit’s configuration pro- Filename file that will be transferred to the TFTP server. The configura- tion information will be in a plain-text ASCII format. -
Page 116: Editing Configuration Files
The configuration files can be modified using a text editor or an automated process. (These applications are not provided by GE MDS). We recommend that you review and update the following parameters for each individual unit. -
Page 117: Authorization Keys Menu
2.9.3 Authorization Keys Menu Figure 2-67. Authorization Key Menu • —Initiate the entering of an Authorization Key Authorization Key into the transceiver’s non-volatile memory. • —List of authorized features available for use Authorized Features enabled disabled MDS iNET-II radios will show an additional selection called under Authorized Features. -
Page 118: Firmware Upgrade (With Ap Acting As A Tftp Server)
Invisible place holder Figure 2-68. Auto-Upgrade / Remote Reboot Menu • —Causes all of the Remotes associated to this AP Auto Upgrade to read the AP’s newest firmware version (active or inactive) and upload it via TFTP to the inactive image, but only if it is newer than the Remote’s current firmware. -
Page 119: Radio Test Menu
NOTE: The filename is case sensitive. 3. Perform the firmware download. 2.9.6 Radio Test Menu Using this menu, you can manually key the radio transmitter to make measurements of antenna performance. (See “Antenna Aiming” on Page 141 for details.) Figure 2-69. Radio Test Menu Shown with Test Mode set to ON Use of the Test Mode will disrupt traffic through the radio. -
Page 120: Ping Utility Menu
• —Incoming received signal strength on frequency RSSI entered in the frequency parameter on this screen (–dBm). This RSSI measurement is updated more frequently than the RSSI by Zone display of the Performance Information menu. Note that for the MDS iNET, the RSSI is an average of the RSSI samples. -
Page 121: Troubleshooting
TROUBLESHOOTING 3 Chapter Counter Reset Paragraph Contents 3.1 INTRODUCTION ..............113 3.1.1 Multiple Communication Layers ..........113 3.1.2 Unit Configuration ..............113 3.1.3 Factory Assistance ..............113 3.2 TROUBLESHOOTING WITH LEDs........113 3.3 TROUBLESHOOTING WITH THE MENU SYSTEM.....114 3.3.1 Starting Information Screen ...........116 3.3.2 Packet Statistics Menu ............117 3.3.3 Serial Port Statistics Menu .............117 3.3.4 Diagnostic Tools ..............118 3.4 Using Logged Operation Events..........118... - Page 122 iNET Series Reference Manual 05-2806A01, Rev. J...
-
Page 123: Introduction
3.1.3 Factory Assistance If problems cannot be resolved using the guidance provided here, review the GE MDS website’s technical support area for recent soft- ware/firmware updates, general troubleshooting help, and service infor- mation. Additional help is available through our Technical Services Department. -
Page 124: Troubleshooting With The Menu System
resolving common system difficulties using the LEDs, and Table 3-2 provides other simple techniques. Table 3-1. Troubleshooting Using LEDs—Symptom-Based Symptom Problem/Recommended System Checks PWR LED does not a. Voltage too low—Check for the proper supply voltage at turn on the power connector. (10–30 Vdc) b. - Page 125 Table 3-2. Basic Troubleshooting Using the Management System Symptom Problem/Recommended System Checks Remote does not a. Verify the AP has sufficiently large number in the “Max associate; stays in Remotes” parameter of the Network Configuration Menu. HOPSYNC b. Verify the correct MAC address is listed in the “Approved Remotes List”...
-
Page 126: Starting Information Screen
The following is a summary of how several screens in the Management System can be used as diagnostic tools. 3.3.1 Starting Information Screen Starting Information Screen on Page 32 (See The Management System’s “homepage” provides some valuable bits of data. One of the most important is the “Device Status” field. This item will tell you if the unit is showing signs of life. -
Page 127: Packet Statistics Menu
3.3.2 Packet Statistics Menu Packet Statistics Menu on Page 90 (See This screen provides detailed information on data exchanges between the unit being viewed and the network through the wireless and the Ethernet (data) layers. These include: Wireless Packet Statistics •... -
Page 128: Diagnostic Tools
• Bytes In On Port xxx • Bytes In On Socket xxx • Bytes Out On Port xxx • Bytes Out On Socket xxx You can use this screen as a indicator of port activity at the data and IP levels. - Page 129 Table 3-5. Alarm Conditions (Alphabetical Order) Alarm Condition Reported Event Log Entry SNMP Trap EVENT_50_LIMIT Crossed 50% of Eth rateLimit50(20) Port Rate Limit EVENT_75_LIMIT Crossed 75% of Eth rateLimit75(21) Port Rate Limit EVENT_100_LIMIT Crossed 100% of Eth rateLimit100(22) Port Rate Limit EVENT_ADC ADC output Railed adcInput(3)
-
Page 130: Correcting Alarm Conditions
Table 3-5. Alarm Conditions (Alphabetical Order) (Continued) Alarm Condition Reported Event Log Entry SNMP Trap EVENT_REMOTE Remote Added/ eventRemote(66) Removed (AP only) EVENT_REPETITIVE The previous event is occurring repetitively EVENT_ROUTE_ADD Manual entry added to routeAdded(68) Routing table EVENT_ROUTE_DEL Manual entry deleted routeDeleted(69) from Routing table RSSI Exceeds... -
Page 131: Logged Events
Table 3-6. Correcting Alarm Conditions—Alphabetical Order Event Log Entry Generating Condition Clearing Condition or Action General System Internal checks suggest unit Reboot the transceiver Error is not functioning properly Initialization Error Unit fails to complete boot Contact factory Technical cycle Services for assistance Invalid IP Address The IP address is either... - Page 132 The following events allow the transceiver to continue operation and do not make the LED blink. Each is reported through an SNMP trap. The left hand column, “Event Log Entry” is what will be shown in the Event Log. Table 3-7. Non-Critical Events—Alphabetical Order Event Log Entry Severity Description...
- Page 133 Table 3-7. Non-Critical Events—Alphabetical Order (Continued) Event Log Entry Severity Description Hop Sync Lost/Established INFORMATIONAL Self explanatory Hop Table INFORMATIONAL Self explanatory Generated/Generation Failed HTTP Access Locked for 5 Min MAJOR Self explanatory HTTP User Logged MAJOR httpLogin(49) Out/Logged In Log Cleared INFORMATIONAL Self explanatory...
- Page 134 iNET Series Reference Manual 05-2806A01, Rev. J...
-
Page 135: Planning A Radio Network
PLANNING A RADIO NETWORK 4 Chapter Counter Reset Paragraph Contents 4.1 INSTALLATION PLANNING ..........127 4.1.1 General Requirements ..............127 DIN Rail Mounting Option ..............129 4.1.2 Site Selection ..................129 4.1.3 Equipment Grounding ............... 130 4.1.4 Terrain and Signal Strength ............... 130 4.1.5 Antenna &... - Page 136 iNET Series Reference Manual 05-2806A01, Rev. J...
-
Page 137: Installation Planning
4.1 INSTALLATION PLANNING This section provides tips for selecting an appropriate site, choosing an antenna system, and reducing the chance of harmful interference. NOTE: To prevent moisture from entering the radio, do not mount the radio with the cable connectors pointing up. Also, dress all cables to prevent moisture from running along the cables and into the radio. - Page 138 Unit Dimensions Figure 4-2 shows the dimensions of the transceiver case and its mounting holes, and Figure 4-3 on Page 131, the dimensions for mounting with factory-supplied brackets. If possible, choose a mounting location that provides easy access to the connectors on the end of the radio and an unobstructed view of the LED status indicators.
-
Page 139: Din Rail Mounting Option
(Attach to DIN Rail. Removal is performed by the end opposite the connectors.) pulling down on the release tab. Figure 4-4. DIN Rail Mounting of GE MDS Equipment 4.1.2 Site Selection Suitable sites should provide: • Protection from direct weather exposure •... -
Page 140: Equipment Grounding
• Suitable entrances for antenna, interface or other required cabling • Antenna location that provides as unobstructed a transmission path as possible in the direction of the associated station These requirements can be quickly determined in most cases. A possible exception is the last item—verifying that an unobstructed transmission path exists. -
Page 141: Antenna & Feedline Selection
Port or with a HTTP browser to the (Ethernet) connector. COM1 (See “Antenna Aiming” on Page 141 for details.) 4.1.5 Antenna & Feedline Selection NOTE: The transceiver is a Professional Installation radio system and must be installed by trained professional installers, or factory trained technicians. - Page 142 1-5/8 inch HELIAX 0.08 dB 0.40 dB 0.80 dB 4.00 dB The tables below outline the minimum lengths of RG-214 coaxial cable that must be used with common GE MDS omnidirectional antennas in iNET Series Reference Manual 05-2806A01, Rev. J...
-
Page 143: How Much Output Power Can Be Used
order to maintain compliance with FCC maximum limit of +36 dBi. If other coaxial cable is used, the appropriate changes in loss figures must be made. NOTE: The authority to operate the transceiver in the USA may be void if antennas other than those approved by the FCC are used. -
Page 144: Conducting A Site Survey
NOTE: In some countries, the maximum allowable RF output may be limited to less than the figures referenced here. Be sure to check for and comply with the requirements for your area. 4.1.7 Conducting a Site Survey If you are in doubt about the suitability of the radio sites in your system, it is best to evaluate them before a permanent installation is underway. - Page 145 ence; those in suburban and urban environments are more likely to be affected by other devices operating in the license-free frequency band and by adjacent licensed services. • Use a directional antenna at remote sites whenever possible. Although these antennas may be more costly than omnidirectional types, they confine the transmission and reception pattern to a com- paratively narrow lobe, that minimizes interference to (and from) stations located outside the pattern.
-
Page 146: Notes On Using 28 Vdc Power Supplies
1. Determine the antenna system gain by subtracting the feedline loss (in dB) from the antenna gain (in dBi). For example, if the antenna gain is 9.5 dBi, and the feedline loss is 1.5 dB, the antenna system gain would be 8 dB. (If the antenna system gain is 6 dB or less, no power adjustment is required.) 2. -
Page 147: Radio (Rf) Measurements
Please direct any questions you may have about interfacing to GE MDS radios to the Technical Services Department, using the information pro- vided at the back of this guide. -
Page 148: Procedure
radio and antenna. The impedance match can be checked indirectly by measuring the SWR (standing-wave ratio) of the antenna system. If the results are normal, record them for comparison for use during future routine preventative maintenance. Abnormal readings indicate a pos- sible trouble with the antenna or the transmission line that will need to be corrected. -
Page 149: Antenna Aiming
5. Measure the forward and reflected power into the antenna system and calculate the SWR and power output level. The output should agree with the programmed value. (Main Menu>>Radio Configuration>>RF Power Output) 6. Turn off Radio Test Mode at the Access Point and Remote. (Main Menu>>Maintenance Menu>>Radio Test>>Test Mode>>Disable) End of procedure 4.2.2 Antenna Aiming... - Page 150 3. Clear the Wireless Packets Statistics history. (Main Menu>>Performance Information>>Packet Statistics>>Wireless Packet Statistics>>Clear Wireless Stats) 4. Read the RSSI level at the Remote. (Main Menu>>Performance Information>>RSSI by Zone) 5. Optimize RSSI (less negative is better) by slowly adjusting the direction of the antenna. Watch the RSSI indication for several seconds after making each adjustment so that the RSSI accurately reflects any change in the link signal strength.
-
Page 151: Dbm-Watts-Volts Conversion Chart
4.3 dBm-WATTS-VOLTS CONVERSION CHART Table 4-4 is provided as a convenience for determining the equivalent voltage or wattage of an RF power expressed in dBm. Table 4-4. dBm-Watts-Volts conversion—for 50 ohm systems dBm V dBm V dBm mV dBm μV 100.0 200W .225 1.0mW... -
Page 152: Performance Notes
4.4 PERFORMANCE NOTES The following is a list of points that are useful for understanding the per- formance of the radio in your installation. 4.4.1 Wireless Bridge The transceiver acts as a bridge. If any radio in your network is con- nected to a large LAN, such as may be found in a large office complex, there may be undesired multicast/broadcast traffic over the air. -
Page 153: Data Latency Tcp Versus Udp Mode
4.4.3 Data Latency—TCP versus UDP Mode The latency of data passing through a network will depend on user data message length, the overall level of traffic on the network, and the quality of the radio path. Under ideal conditions—low traffic and good RF signal path—the latency for units operating in the TCP mode, will typically be around 5 ms in each direction. -
Page 154: Maximizing Throughput
4.4.8 Maximizing Throughput Here are some suggestion on things to try that may maximize throughput: 1. AP Only: Increment the to the maximum of 262.1 ms. Dwell Time This lowers the overhead since it will stay longer on a channel. The down side is that if a particular channel is interfered with it will take longer to hop to another channel. -
Page 155: Placing An Inet Radio Behind A Firewall
4.4.9 Placing an iNET Radio Behind a Firewall iNET-II and iNET radios use the port numbers listed below. If you place the radio behind a firewall, make sure these port numbers are included in the allowed list: • SSH: <- Management •... -
Page 156: Snmpv3 Accounts
SNMPv3 Accounts The following default accounts are available for the SNMP Agent: —Read/write account using Authentication and Encryp- enc_mdsadmin tion —Read/write account using Authentication auth_mdsadmin —Read only account using Authentication and Encryp- enc_mdsviewer tion —Read only account using Authentication auth_mdsviewer —Read only account with no Authentication or Encryp- def_mdsviewer tion... -
Page 157: Password-Mode Management Changes
In either case, the SNMP Manager needs to know the initial passwords that are being used in order to talk to the Agent. If the Agent’s passwords are configured via the Manager, then they can be changed from the Man- ager. - Page 158 Table 4-5. SNMP Traps (Sorted by Code) SNMP Trap Severity Description systemBoot(32) INFORMATIONAL SNR Within threshold/Below threshold systemReboot(33) MAJOR Telnet User Logged Out/Logged In startScan(34) INFORMATIONAL Reprogramming Started rxBeaconErrored(35) INFORMATIONAL Received Beacon - Netname Does Not Match rxBeaconWrongNetworkName (36) INFORMATIONAL Received Beacon - AP is Blacklisted rxBeaconFromBlacklistAP(37) MAJOR...
- Page 159 Table 4-5. SNMP Traps (Sorted by Code) (Continued) SNMP Trap Severity Description routeDeleted(69) INFORMATIONAL Radio attempted but failed to delete a route from its internal routing table sinRemSwitch(70) INFORMATIONAL Remote mode was switched (serial to ethernet, ethernet to serial) ChanCnt(71) INFORMATIONAL Number of channels defined does not match (Channel 130 only)
- Page 160 iNET Series Reference Manual 05-2806A01, Rev. J...
-
Page 161: Technical Reference
TECHNICAL REFERENCE 5 Chapter Counter Reset Paragraph Contents 5.1 DATA INTERFACE CONNECTORS ........153 5.1.1 LAN Port ................153 5.1.2 COM1 Port ................154 5.1.3 COM2 Port ................154 5.2 FUSE REPLACEMENT ............155 5.3 TECHNICAL SPECIFICATIONS........... 156 5.4 CHANNEL HOP TABLE............159 05-2806A01, Rev. - Page 162 iNET Series Reference Manual 05-2806A01, Rev. J...
-
Page 163: Data Interface Connectors
5.1 DATA INTERFACE CONNECTORS Three data interface connectors are provided on the face of the trans- ceiver. The first, the LAN Port, is an RJ-45 connector. The other two use two DB-9 interface connectors that use the RS-232 (EIA-232) signaling standard. -
Page 164: Com1 Port
5.1.2 COM1 Port To connect a PC to the transceiver’s port use a DB-9M to DB-9F COM1 “straight-through” cable. These cables are available commercially, or may be constructed using the pinout information in Figure 5-2 and Table 5-2. Figure 5-2. COM1 Port (DCE) (Viewed from the outside of the unit. -
Page 165: Fuse Replacement
6. Using an Ohmmeter, or other continuity tester, verify the fuse is blown. 7. Install a new fuse by reversing the process. Littelfuse P/N: 0454002; 452 Series, 2 Amp SMF Slo-Blo GE MDS P/N: 29-1784A03 05-2806A01, Rev. J iNET Series Reference Manual... -
Page 166: Technical Specifications
8. Install the covers and check the transceiver for proper operation. Figure 5-4. Internal Fuse Location Invisible place holder 5.3 TECHNICAL SPECIFICATIONS GENERAL Temperature Range: –30° C to +60° C (–22° F to 140° F) Humidity: 95% at +40° C (104° F); non-condensing Primary Power: 10–30 Vdc (13.8 Vdc Nominal) External Power Supply Options:... - Page 167 MANAGEMENT • HTTP, HTTPS (Embedded Web server) • Telnet, SSH, COM1 serial port (Text-based menu) • SNMP v1/v2/v3 • SYSLOG • GE MDS NETview MS™ DATA CHARACTERISTICS PORTS: Ethernet: Interface Connectors: RJ-45 Standard Data Rate:...
- Page 168 CYBER SECURITY • Cyber Security, Level 1 (iNET-II only): • AES-128 encryption (optional) • Cyber Security, Level 2: • RC4-128 encryption (iNET only) •Automatic rotating key algorithm •Authentication: 802.1x, EAP/TLS, PKI, PAP, CHAP •Management: SSL, SSH, HTTPS •Approved AP/Remotes list (local authentication) •Failed login lockdown •900 MHz operation and proprietary data framing RADIO CHARACTERISTICS...
-
Page 169: Channel Hop Table
TRANSMIT/RECEIVE RANGE (Nominal) iNET–256 kbps iNET-II–512 kbps Fixed Range (typical): 15 miles (24 km) 12 miles (19 km) Fixed Range (maximum): 60 miles (97 km) 30 miles (48 km) Mobile Range (parked): 5 miles (8 km) 3 miles (5 km) Mobile Range (moving): 3 miles (5 km) 1 mile (2 km) - Page 170 Table 5-4. Channel Hop Table Zone Channel Frequency 902.5000 (iNET FHSS lowest channel) 902.8165 (iNET-II DTS lowest channel) 903.1330 903.4495 903.7660 904.0825 904.3990 904.7155 905.0320 905.3485 905.6650 905.9815 906.2980 906.6145 906.9310 907.2475 907.5640 907.8805 908.1970 908.5135 908.8300 909.1465 909.4630 909.7795 910.0960 910.4125 910.7290...
- Page 171 Table 5-4. Channel Hop Table (Continued) Zone Channel Frequency 915.1600 915.4765 915.7930 916.1095 916.4260 916.7425 917.0590 917.3755 917.6920 918.0085 918.3250 918.6415 918.9580 919.2745 919.5910 919.9075 920.2240 920.5405 920.8570 921.1735 921.4900 921.8065 922.1230 922.4395 922.7560 923.0725 923.3890 923.7055 924.0220 924.3385 924.6550 924.9715 925.2880 925.6045...
- Page 172 iNET Series Reference Manual 05-2806A01, Rev. J...
-
Page 173: Glossary Of Terms
GLOSSARY OF TERMS AND ABBREVIATIONS 6 Chapter Counter Reset Paragraph If you are new to wireless IP/Ethernet systems, some of the terms used in this guide may be unfamiliar. The following glossary explains many of these terms and will prove helpful in understanding the operation of your radio network. - Page 174 from the number and order of bits in a data string. This value is com- pared with a locally-generated value and a match indicates that the mes- sage is unchanged, and therefore valid. Datagram—A data string consisting of an IP header and the IP message within.
- Page 175 Endpoint—IP address of data equipment connected to the ports of the radio. Equalization—The process of reducing the effects of amplitude, fre- quency or phase distortion with compensating networks. Fade Margin—The greatest tolerable reduction in average received signal strength that will be anticipated under most conditions. Provides an allowance for reduced signal strength due to multipath, slight antenna movement or changing atmospheric losses.
- Page 176 access point, the new access point tells the old access point, using IAPP, that the station has left and is now located on the new access point. ICMP—Internet Control Message Protocol IGMP (Internet Gateway Management Protocol)—Ethernet level protocol used by routers and similar devices to manage the distribution of multicast addresses in a network.
- Page 177 Access Point and all Remotes within a given system should have the same network address. Network-Wide Diagnostics—An advanced method of controlling and interrogating GE MDS radios in a radio network. NTP—Network Time Protocol Packet—The basic unit of data carried on a link layer. On an IP net- work, this refers to an entire IP datagram or a fragment thereof.
- Page 178 assuming the right information is entered, can immediately reconnect to the access point without user intervention. PLC—Programmable Logic Controller. A dedicated microprocessor configured for a specific application with discrete inputs and outputs. It can serve as a host or as an RTU. PuTTY—A free implementation of Telnet and SSH for Win32 and Unix platforms.
- Page 179 SWR—Standing-Wave Ratio. A parameter related to the ratio between forward transmitter power and the reflected power from the antenna system. As a general guideline, reflected power should not exceed 10% of the forward power (≈ 2:1 SWR). TCP—Transmission Control Protocol TFTP—Trivial File Transfer Protocol Trap Manager—Software that collects SNMP traps for display or log- ging of events.
- Page 180 iNET Series Reference Manual 05-2806A01, Rev. J...
- Page 181 INDEX Numerics Network 9 bandpass filter 137 100BaseT 129 Beacon 10BaseT 129 Period 53, 145, 146 802.11b 10 signal 93 Begin Wizard 64 Bit, defined 165 Access Point (AP), defined 165 Bits-per-second (bps), defined 165 accessories 17 BPDU 144 Active Scanning, defined 165, 169 defined 165 Actual Data Rate 85 BPS, defined 165...
- Page 182 167 Verify 101 Listing 86 iNET II, differences of 3, 52, 57, 60, 97, 132, 135, 141 Listing Menu 96 Installation ENI, MDS iNET 900 3 antenna & feedline 133 Equalization, defined 167 feedline selection 134 Ethernet general information 3...
- Page 183 MAC Address 95, 96, 144 defined 169 Management System Ping Utility 110 user interfaces 23 PLC 10 MD5, defined 168 defined 170 MDS iNET 900 ENI 3 Point-Multipoint System, defined 169 MDS Security Suite 15 Point-to-Point measurements LAN Extension 8 radio 139 Link 8...
- Page 184 SNMP 23, 48, 147 RxViaEP 97 defined SNTP 170 Save Changes 81 STP 144 SCADA 9, 10, 62 STP, defined 170 defined 170 TCP 61, 62, 68, 72, 75, 145 Scanning 118 defined Active, defined 169 TFTP 101 Passive, defined 169 defined Seamless Inter-Frame Delay 66, 68, 69, 71, 72 Secondary...
- Page 185 State 95 Configuring IP Address with VLAN enabled 41 Status 32, 65, 67, 68, 70, 71 volts-dBm-watts conversion 143 STP, defined 170 SWR 139, 171 performance optimization 139 watts-dBm-volts conversion 143 Syslog Server 89 WINS system gain, antenna 165 Address 48 system gain, antenna (defined) 165 defined 171 Wireless...
- Page 186 iNET Series Reference Manual 05-2806A01, Rev. J...
- Page 187 IN CASE OF DIFFICULTY... GE MDS products are designed for long life and trouble-free operation. However, this equipment, as with all electronic equipment, may have an occasional component failure. The following infor- mation will assist you in the event that servicing becomes necessary.
- Page 188 GE MDS, LLC 175 Science Parkway Rochester, NY 14620 General Business: +1 585 242-9600 FAX: +1 585 242-9620 Web: www.gemds.com...
Need help?
Do you have a question about the MDS iNET 900 and is the answer not in the manual?
Questions and answers