Table of Contents
Advertisement
Advertisement
Table of Contents

Related Manuals for QUORION CR 2500


Summary of Contents for QUORION CR 2500
- Page 1 User and Programming Manual Electronic Cash Register CR 2500 series...
- Page 2 ...designed to Succeed Dear valued customer! On behalf of our proud company we wish to welcome you to the QUORION family of fine business machines. We sincerely hope you will appreciate the many benefits of being associated with a distinguished product name that represents both quality and commitment to customer satisfaction.
-
Page 3: Table Of Contents
Index Introduction ........................5 1. Before Starting Operations ................... 6 1.1 External View ......................6 1.2 Displays ........................6 1.3 General Precautions ....................7 1.4 Printer Precautions ..................... 7 1.5 Setting up the Cash Register ..................7 2. Installing the Cash Register ..................7 2.1 Installing paper rolls .................... - Page 4 4.1.3 Assigned Clerk Area and Compulsory Invoice ..........36 4.1.4 Opening and Closing a Table ................37 4.1.5 Entry Corrections ....................37 4.1.5.1 Correction of incorrect numbers ..............37 4.1.5.2 Deleting the last Entry (EC/Error Correction) ..........37 4.1.5.3 Voiding earlier Entries ................. 37 4.1.5.4 Refund ......................
-
Page 5: Introduction
Introduction This electronic Cash Register is designed to help you manage your business even more efficiently and effectively. Start-up is quick and easy. Customize the system according to your requirements by taking advantage of the numerous programmable options. Detailed financial and management reports will provide you with the information you need to know to maximize your productivity. -
Page 6: Before Starting Operations
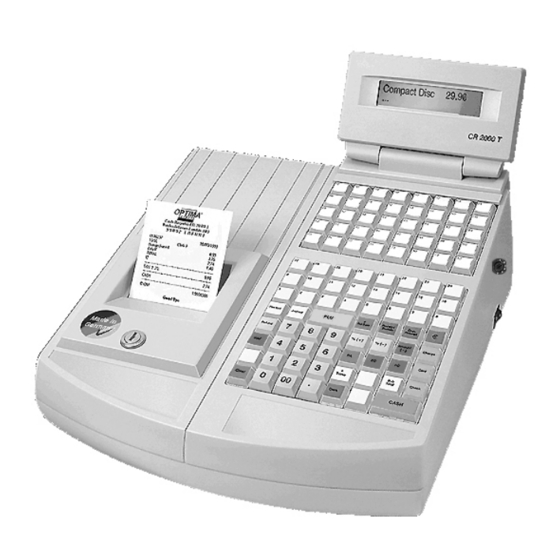
1. Before Starting Operations 1.1 External View Operator Display Customer Display Printer Cover Control Lock Receipt ON/OFF Switch Printer Cover Lock Keyboard Waiter Lock Cash Drawer Drawer Lock 1.2 Displays Customer AMOUNT 1 line 11 characters 7 Segment Display (VFD) 19.00 Operator 2 lines 16 characters Display (LCD) -
Page 7: General Precautions
1.3 General Precautions In case of malfunction do not repair the Cash Register by yourself. Please contact your nearest dealer or sales person. Do not insert any metal objects such as screwdriver, paper clips etc. into your Cash Register. This may damage your Cash Register or subject you to electrical shocks. Clean your Cash Register from time to time with a soft, dry or slightly damp cloth. -
Page 8: Installing Paper Rolls
2.1 Installing paper rolls Cut the edge Do not try to feed 1. Lift up and remove the printer to be fed straight the paper if it is cover. like this like this 2. Load the paper rolls into their respective receptacles. -
Page 9: Thermal Printer
Note: Only remove the paper by pressing the Receipt key ! 2.4 Keyboard The keyboard of the CR 655 Series consists of 64 keys which are freely programmable. The flat keyboard with 128 keys is used in the CR 2500 Series and is freely programmable as well. - Page 10 CHARGE RECEIPT CURSOR CURSOR # NS INVOICE JOURNAL SHIFT GUEST TABLE INVOICE TRANS SHIFT ENTER TIME REFUND VOID CLERK CARD SUB- CHECK I.D. TOTAL TABLE # CASH CLEAR Cover Display Keysheet To change a keysheet, remove the cover no further then 5 cm from the Display. You can place the cover over the display for easier handling.
- Page 11 empty space GUEST PRICE CHARGE INVOICE SHIFT SHIFT SHIFT SEPARATE TIME RECEIPT CURSOR CURSOR RECEIPT REFUND INVOICE CARD 2 ON/OFF VOID CARD 1 ENTER JOURNAL SUB- CLERK TABLE CHECK I.D. TRANS TOTAL CASH CASH CLEAR TABLE # TABLE #...
-
Page 12: Control Lock And Control Lock Keys
2.5 Control Lock and Control Lock Keys The control lock has six different positions for the various operation modes of your Cash Register. Each of the keys provide access to specific modes. Control Lock The following keys are included: - Operator key for modes: L - R - X - Owner key for modes: L - R - X - Z - P... -
Page 13: Key Names And Their Function
2.6 Key Names and their Function Key Label Key Name Function 0…9 Numeric Keys Entering amounts, quantities and programming. Receipt Feed Advances the receipt paper. PAPER Scrolling upwards through the PLU’s of a department or Cursor Key Up through the transactions of an open table. CURSOR Cursor Key Scrolling downwards through the PLU’s of a department... - Page 14 Key Label Key Name Function Must be pressed before finalization of a table. GUEST Guest Invoice Used to print additional text lines at the bottom of a INVOICE receipt. Used for finalization of all registrations and transactions, Cash Key change due is shown in the display and the cash drawer CASH is opened.
- Page 15 2.7 Character Code Chart 0 1 2 3 4 5 6 7 8 9 A B C D E F % & ‘ " Space < > V W X Ä II III ¡ ¢ £ ¤ ¥ ¦ § ¨...
-
Page 16: Programming
3. Programming 3.1 Programming of System Flags 3.1.1 Reset/System CLEAR Control Lock Key Position: P (Initialize your Cash Register by performing a System CLEAR) Description Enter 444. Press “SUBTOTAL“ key. SUBTOTAL Display: CLEAR SUBTOTAL Press “SUBTOTAL“ key to complete the initialization. Note: All programmed parameters and values will revert to the original factory defaults. -
Page 17: Programming Hints
3.1.3 Programming Hints Use these keys to program the cash register. Description The 1st Flag (date) of the system Flags is displayed. SUB TOTAL The ”SUB TOTAL” key confirms the changed Flag and advances to the TOTAL next Flag. CASH The “CASH”... - Page 18 Display Description Digit Entry PRICE inclusive/exclusive of tax / 6 TAX Date format. Entry: 0 1 2 3 y y n n Price exclusive tax. Price inclusive tax. n n y y month/day/year (USA). y n y n day/month/year (Europe). n y n y Entry: 0 1 2 3...
- Page 19 Display Description Digit Entry Compulsory clerk sign-on & 11 11 TAB, WAIT Compulsory table no. Entry: Compulsory entry of table no. Entry: Compulsory clerk sign-on. Enforced server area by table no. / Compulsory guest check printing. 12 DISTR/RCPT Entry: 0 1 2 3 Enforced server area in R mode n y n y Enforced server area in X mode...
- Page 20 Display Description Digit Entry Print price, number, single price of PLU on kitchen printer. 16 KP_PLUstat Entry: Disable price-overwrite for direct PLU's. Entry: 0 1 2 3 4 5 6 7 Print single PLU price. n y n y n y n y Print PLU number.
- Page 21 Display Description Digit Entry Print department report for clerks (X / Z-report). 25 PrtDeptRep Entry: Print department report. Print sales in clerk report (X / Z-rep.). 26 PrtBillRep Entry: Print sales. Print number of “Void” and "EC" 27 NoPrtECVd (X / Z-report). Entry: Print EC Entry:...
- Page 22 Display Description Digit Entry Print kitchen printer receipt number at top or bottom. 31 ReptSet1 Entry: 0 1 2 3 4 5 6 7 n y n y n y n y Print receipt no. on kitchen printer. Print header lines in double height n n y y n n y y Print PLU name in double height n n n n y y y y...
-
Page 23: System Flags Printout
Display Description Digit Entry 35 Bon2cntrl 2. Bon print control Entry: 1 = enable multiple duplicate receipts 4 = reports from PC will not printed 16 = print the Z report with the date of yesterday 32 = print the copy of the orderreceipt as single receipts on kitchenprinter 128 = total X/Z reports disabled for... -
Page 24: Department Programming
3.2 Department Programming Your Cash Register can be programmed with max. 24 departments. Press keys “2“ + “SUB TOTAL“ to start programming. Display Description Prog DEPT 11 Starts department programming. TOTAL Enter number of department to be programmed 0...9 (optional). Prog DEPT 01 11 Confirm department number with SUBTOTAL. -
Page 25: Department Printout
Display Description Press SUB TOTAL to confirm Flag 2. SUB- Prog DEPT 02 11 TOTAL Press “CASH“ key to end programming. CASH 3.2.1 Department printout Description Starts department programming. SUBTOTAL Starting value for department range to be printed (optional). 0...9 SUBTOTAL Press “SUBTOTAL"... -
Page 26: Plu Programming
3.3 PLU Programming A PLU number, name, price, and Flag can be assigned to each sales item. It can then also be linked to a specific department. By pressing the “3” and “Sub Total” keys you may enter PLU programming directly. Display Description Starts PLU programming. -
Page 27: Plu Printout
Display Description 0 = course 1 1 = course 2 0...9 2 = course 3 16 = kitchen printer 1 on 32 = kitchen printer 2 on 128 = local kitchen printer on (thermal printer) Prog PLU No 0001 press “ SUBTOTAL ” to confirm. TOTAL Flag:3 0 = normal... -
Page 28: Menu Programming
Display Description Key program mode SUB- Starts direct key programming. Press key. TOTAL Press key 1…80 Press a key from 1 to 80 (e.g. key 80). <PLU> 0080 Press key Choose a direct key function (PLU, department, menu or 0) with the cursor key. <DEPT>... -
Page 29: Tax Rate Programming
3.5 Tax Rate Programming Display Description Prog Taxrate Starts the tax rate programming. TOTAL 0...9 Enter tax rate to be programmed (optional). TAX RATE 01 11 Start tax rate programming for tax rate 1. TOTAL Default tax rate is 10 %. 100000 TAX RATE 01 11... -
Page 30: Programming Of Restaurant Logo / Commercial Message
Display Description CLERK 01 Press “SUB TOTAL“ to confirm. TOTAL Flag: Drawer open and settings for CLERK 01 (reg. systemflag 29): no drawer opens drawer 1 opens 0...9 drawer 2 opens Priceshift disabled PLU shift only with Code input possible 128= Enable single clerk Z report Confirm “... -
Page 31: Tendering Names Programming
3.8 Tendering names programming Display Description Payments 11 Starts tendering programming. TOTAL 0...9 Enter tender number to be programmed (optional). Payments 1 Confirm tendering programming. TOTAL CASH Payments 1 a...z Enter tender 1 name. ABCDE Press “SUB TOTAL“, to confirm tender 1 name. TOTAL Payments 1 1 = Over payment for this tender is not permitted. - Page 32 Display Description 0...9 Enter new number of digits after decimal point of foreign currency (max. 2). SUB TOTAL FCE 1 Drawer number assigned to foreign currency is displayed. Drawer 0...9 Enter drawer number (1 or 2). SUB TOTAL FCE 1 Number of digits after decimal point for exchange rate is displayed.
-
Page 33: Percentage Rates Programming
Display Description SUB TOTAL Loc. Curr. Confirm FLAG1. CHECK Press “CHECK” to print FCE programming. CASH End FCE programming. 3.10 Percentage Rates Programming Display Description Percent Starts percentage rates programming. TOTAL Enter number of percentage rate to be 0...9 programmed (optional). Percent Confirm percentage rate programming. -
Page 34: Macro Keys
3.11 Macro Keys There is no pre-defined ”Macro” key on the keyboard. So, to operate plural steps at one key, you must program the other keys to be used as the ”Macro” key. Key- Display Description Sequence Prog. Macro 11 Start programming Macro Keys SUB-TOTAL 0...9 Enter number of Macro Key (can be skipped) -
Page 35: Programming Logo For External Display
Display Description Alphan. In. Enter the new name "ABCDEF". a...z ABCDEF SUB- Ext. Logo 2 Press “SUB TOTAL“ key to store 1 line and to advance to 2 line. TOTAL DATA SYS CHECK Press “CHECK“ key to print out the logo lines. Press “CASH“... -
Page 36: Clerk Sign-On
Display Description Electr. Journal Starts electronic journal printout. JOURNAL CODE - - - - Electr. Journal 6688 Enter code 6688. Input No.: Electr. Journal 0…9 Input Enter the number of transactions you wish to print. SUB- Printout of the last transactions. TOTAL 4.1.2 Clerk Sign-On A compulsory clerk sign-on can be programmed. -
Page 37: Opening And Closing A Table
4.1.4 Opening and Closing a Table Display Description 0…9 Enter the table number. Table # TABLE # Press ”TABLE #” key. Registration of departments, PLU’s and menus. DEPT/PLU/ 00004PLU Within a department (e.g. soups) the linked PLU’s Menus may be viewed by using the ”... -
Page 38: Re-Opening A Table
4.1.6 Re-opening a Table Description 0…9 Enter the table number. Press ”TABLE #”. The accumulated total is displayed. Further TABLE # transactions can now be added or previous ones voided. By using the cursor keys you may review all previous transactions. Press ”TABLE #”... -
Page 39: Separation Of A Registered Item
4.1.8.1 Separation of a registered Item Note : The destination table must be opened before using the SEPARATE function. Display Description 0…9 Enter the table number (e.g. 1). Table # TABLE # Press ”TABLE #” key to open the table 1. By using the cursor keys you may review all 00001PLU... -
Page 40: Management Reports
5. Management Reports 5.1 Reports without Reset Control Lock Key Position: X The number of active tables is displayed. Description Daily Report with Departments. 11 + Sub Total 12 + Sub Total Daily Report without Departments. short Daily Report without Departments/clerks with 13 + Sub Total taxes. -
Page 41: Reports With Reset
5.2 Reports with Reset Control Lock Key in Position: Z The number of active tables is displayed. Description Daily Report with Departments. 11 + Sub Total Daily Report without Departments. 12 + Sub Total short Daily Report without Departments/clerks with 13 + Sub Total taxes. -
Page 42: Clearing The Grand Total
5.4 Clearing the Grand Total Control Lock Key in Position : Z Description Clear Grand Total. VOID Press “SUB TOTAL“ key to confirm. TOTAL 6. Accessories and Options 6.1 Ribbon Cassettes Ribbon cassettes are available at your dealer. 6.2 Option PC Interface The Cash Register can be equipped with up to 6 serial interfaces. -
Page 43: Information On The Electromagnetic Compatibility And Safety
8. Information on the Electromagnetic Compatibility and Safety CE Conformance This QUORiON cash register conforms to the European Community’s EMV 2004/108 directive. The cash register fulfills the following technical European requirements: EN 55022 – „Norm values and measuring procedures for radio interference properties –... -
Page 44: Error Messages
9. Error Messages Error Message Reason E00_KEY Incorrect key was pressed. E01_KEY Incorrect key sequence. The number entered manually is incorrect or the digit limit has been E02_KEY exceeded. E03_SUM The sum exceeds the digit capacity. E04_HDLO The limit for HDLO, High-Digit-Lock-Out has been exceeded. E06_CLRK_NR The clerk ID code was not entered. -
Page 45: General Specifications
10. General Specifications Model CR-655 CR-655T CR-2500 CR-2500T CR-2510 CR-2510T Printer Type 1 station 1 station 2 station 2 station 1 station 1 station thermal thermal thermal matrix matrix matrix Paper width 76 mm 80 mm 2 x 38 2 x 38 76 mm 80 mm Characters per line... -
Page 46: Peripheral Devices
11. Peripheral Devices 11.1 Activation of a Serial Interface RS 232 Your Cash Register can be equipped with up to 6 RS 232 C serial interfaces. Location of interfaces with 6 x RS 232 C (rear view): IF 5/6 IF 3/4 IF 2 IF 1 Location of interfaces with 3 x RS 232 C and 1 x RS 485 IRC (rear view):... -
Page 47: Using A Kitchen Printer
- Hand shake signals: DTR / DSR Pin assignment: TM-U210 Cash Register (D-Sub connector, female, 25 pins); (D-Sub connector, male 9 pins) SHIELD DCD 1 RxD 2 DTR 4 GND 5 DSR 6 RTS 7 CTS 8 1.50.417084 BA-englisch GB CR2500 Series QUORION CE (Stand 12.02.09)
Need help?
Do you have a question about the CR 2500 and is the answer not in the manual?
Questions and answers