
Related Manuals for Clarke KING 145


Summary of Contents for Clarke KING 145
- Page 1 HOT WASHER MODEL NO: KING 145 PART NO: 7320165 OPERATION & MAINTENANCE INSTRUCTIONS LS0709...
-
Page 2: Introduction
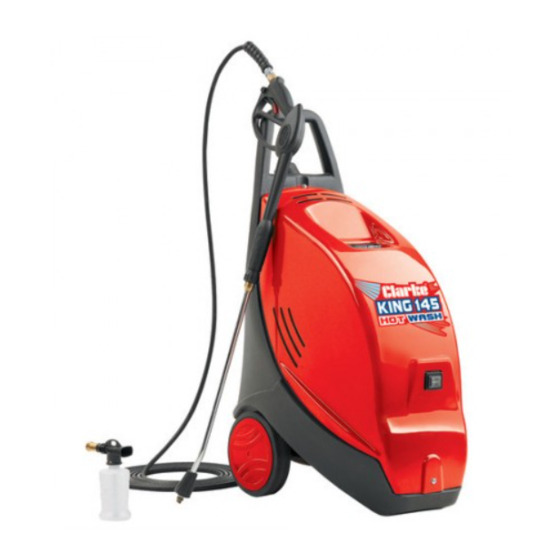
INTRODUCTION Thank you for purchasing this CLARKE Hot Washer. This machine is a portable, high pressure power washer, designed for DIY and light commercial use only. It comprises an electric motor, a pump, a high pressure hose with a trigger and lance, and an adaptor for injecting foam or cleaning agents into the water jet. -
Page 3: Table Of Contents
TABLE OF CONTENTS INTRODUCTION ....... . 2 GUARANTEE ........2 TABLE OF CONTENTS . -
Page 4: General Safety Rules
GENERAL SAFETY RULES WARNING: Water at high pressure can be dangerous and can cause damage to persons or property if the operator is careless. Never allow anyone to operate this equipment unless they are thoroughly reliable, and familiar with the safety precautions. 1. -
Page 5: Safety Symbols
SAFETY SYMBOLS WARNING: Risk of electrocution. NEVER direct spray at persons or animals. NEVER direct spray toward any electrical device or electrical outlet. Guaranteed sound power level . WARNING: Hot surface / Exhaust gasses. -
Page 6: Electrical Connections
ELECTRICAL CONNECTIONS WARNING! Read these electrical safety instructions thoroughly before connecting the product to the mains supply. Before switching the product on, make sure that the voltage of your electricity supply is the same as that indicated on the rating plate. This product is designed to operate on 230VAC 50Hz. -
Page 7: Overview
OVERVIEW Fig. 1 DESCRIPTION NO DESCRIPTION Transformer Electrical system box Boiler Hot / Cold selector switch Fuel delivery pump Cooling fan Electric motor Diesel tank cap Exhaust vent Diesel tank Pressure switch Water inlet High pressure water pump Pressurised water outlet... -
Page 8: Unpacking
UNPACKING Unpack your power washer and check to ensure the following items are present. Contact your Clarke dealer immediately if any parts are missing or damaged. • Hose • Gun/lance • Detergent bottle ASSEMBLY On first use or after a long period out of use, connect only the water intake hose for a few minutes, in order to flush any dirt out of the high pressure hose outlet. - Page 9 WATER SUPPLY CONNECTION 1. Connect the water supply hose (1) to the inlet connection (2). See Fig. 3. NOTE: A reinforced hose with inside diameter of at least 10 mm should always be used. Fig. 3 NOTE: The water supply flow rate must be at least 6.1 l/min.
-
Page 10: Using Your Power Washer
USING YOUR POWER WASHER • Stand on a stable surface and grip gun/spray wand firmly with both hands. • Do not allow vehicles to drive over the hoses. • Never obstruct the exhaust in any way. COLD WATER OPERATION 1. Turn on the water supply tap to supply water to the power washer. WARNING: FAILURE TO TURN ON THE WATER WILL CAUSE DAMAGE TO THE HOT WASHER Set the Hot / Cold selector switch... - Page 11 HOT WATER OPERATION 1. Turn on the water supply tap to supply water to the power washer. WARNING: FAILURE TO TURN ON THE WATER COULD CAUSE DAMAGE TO THE PUMP. Set the Hot / Cold selector switch Fig. 8 (I / 0/II) to (II), to start the power washer operating with hot water.
- Page 12 Take hold of the gun in one hand. Fig. 12 2. Fill the detergent bottle with suitable power washer detergent available from your Clarke dealer. 3. Fit the detergent bottle onto the gun as shown in Fig. 12 4. Tighten the collar to secure.
-
Page 13: Storage
STORAGE 1. Drain all water from the hose and gun by holding the gun/lance vertically with the nozzle pointing down and pulling the trigger. 2. Engage the gun safety catch and coil up the electricity supply cable and the high pressure hose to prevent damage. 3. - Page 14 EVERY 2 WEEKS OR 50 WORKING HOURS WARNING: BEFORE DOING ANY WORK ON THE POWER WASHER, DISCHARGE THE PRESSURE FROM THE HOSE AND DISCONNECT THE ELECTRICITY SUPPLY PLUG, REMOVE THE HOSE FROM THE TAP TO DISCONNECT THE WATER SUPPLY. Check the filter in the water inlet connection (A) fig. 14. CLEANING THE WATER INLET FILTER This screen filter should be checked periodically and cleaned if necessary.
-
Page 15: Parts And Servicing
EVERY 3 MONTHS OR 300 WORKING HOURS: CHANGE THE FUEL FILTER AND FUEL PUMP FILTER. (this operation must be carried out by CLARKE service engineers). PARTS AND SERVICING For Parts & Servicing, please contact your nearest dealer, or CLARKE International, on one of the following numbers. -
Page 16: Troubleshooting
TROUBLESHOOTING If the following does not solve your problem, please contact the CLARKE service department. See page 15 PROBLEM CAUSE SOLUTION The pump turns The pump is sucking in air Check that all pipes and hoses are but does not... - Page 17 PROBLEM CAUSE SOLUTION The boiler is Presence of water in the fuel Empty the fuel tank and refill with producing tank clean fuel. excessive fumes The starter electrodes are Check the distance of the electrodes not positioned correctly The fuel nozzle is dirty Clean the fuel nozzle The fuel nozzle has worn out Replace the fuel nozzle...
-
Page 18: Specifications
SPECIFICATIONS Motor Motor Insulation Class F Motor Protection IPX5 Voltage 230V 50Hz Power 1.8 kW Fuel Capacity (L) 12 Litres Water supply Max. feed temperature Min. feed volume 6.1 l/m Performance Data Working pressure 90 Bar / 9 MPa Max. pump pressure 110 Bar / 11 MPa Max. -
Page 19: Water System Diagram
WATER SYSTEM DIAGRAM... -
Page 20: Kits And Accessories
KITS AND ACCESSORIES... -
Page 21: Parts List
PARTS LIST DESCRIPTION PART NO DESCRIPTION PART NO Boiler AR3162090 Elbow fitting AR3161220 Wheel cover AR3160260 Pressure switch AR3163240 Circlip AR3162010 Gasket AR3162300 Wheel AR3162100 Fitting AR3162310 AR3162110 Ring nut AR3160490 Fitting AR3162120 Pipe AR3162320 Pipe AR3162130 Filter AR3163250 Fitting AR3160430 Pipe AR3162330... -
Page 22: Declaration Of Conformity
DECLARATION OF CONFORMITY... - Page 23 DECLARATION OF CONFORMITY...
Need help?
Do you have a question about the KING 145 and is the answer not in the manual?
Questions and answers