ASCOM i62 Quick Reference Manual
Vowifi handset
Hide thumbs
Also See for i62:
- Configuration manual (80 pages) ,
- Troubleshooting manual (80 pages) ,
- User manual (75 pages)

Subscribe to Our Youtube Channel
Related Manuals for ASCOM i62


Summary of Contents for ASCOM i62
- Page 1 Note: functions and features highlighted in YELLOW not available. [ QUICK REFERENCE GUIDE | EN ] ASCOM i62 VoWiFi HANDSET INCLUDING SAFETY INSTRUCTIONS...
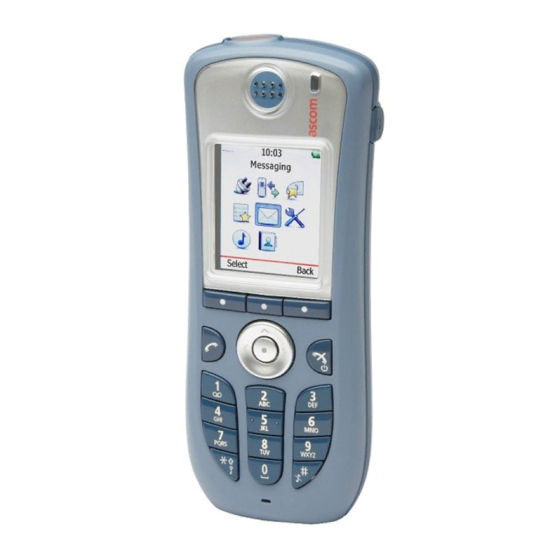
- Page 2 Multifunction/Alarm button Volume buttons Headset connector Display Shows time and icons Shows date and icons Mute/PTT button Shows the soft key Soft keys function Five-way Confirmation key navigation key Call key End key and On/off Voice mail Alphanumeric keys Sound off key Key lock and upper/lower case Microphone...
- Page 3 Display Icons Voice mail Read message Sent message New colored message Read colored message Man-down alarm active No-movement alarm active Profile active Missed call Incoming call Outgoing call Missed call Connected call Call on hold Call diverted To contacts Locked keypad Locked entry (e.g.
- Page 4 Product Presentation The Ascom i62 VoWiFi Handset is a feature-rich handset with color display, telephony and messaging. It supports the WiFi standard a/b/g/n radio. The handset functions are license dependant and are available in three versions: i62 Talker, i62 Messenger, and i62 Protector with alarm. The handset is also upgradeable with additional functions via a license, contact your site administrator for details.
- Page 5 This function is system dependent. b. The handset version must be WH1-AAAA/2A or above (see label under battery cover). These functions require a license. Note: Your unit may have more functions than described here, see User Manual, Ascom i62 VoWiFi Handset, TD92599EN.
-
Page 6: Basic Functions
Basic Functions Switch the handset on/off Press and hold the End key to switch the handset on or off. When switching the handset off, “Switch off?” is displayed, press “Yes”. Make a call Dialling can be made in the following ways: •... - Page 7 A short press on the Sound off key or a press on the Mute button before answering a call, silences the ring signal. Lock/Unlock the keypad manually Press the *-key to lock/unlock and then Soft key “Lock/Yes”. The “Locked keypad” icon indicates a locked keypad.
-
Page 8: Menu Operation
Menu Operation For descriptions of all functions, see User Manual, Ascom i62 VoWiFi Handset, TD92599EN. Messaging 13:00 Calls Short cuts Connections Services Settings Contacts Profiles Back Select Use the Navigation key to move around in the menu structure. The menus for Messenger and Protector are; “Connections”, “Calls”, “Short cuts”, “Services”, “Messaging”, “Settings”,... - Page 9 To add a contact, select “Add contact”, select “New” or “From call list”. Press “Add”, enter the name and press “OK”. Select “Work number”, “Mobile number” or “Other number” enter the number, press “OK” and press “Save”. If desired, choose a specific ring signal for the contact.
- Page 10 automatically displayed (if a voice mail also is received the icon will change to ). The icon will remain in the display until all new messages are opened. If the message is received during a call, a beep notifies the user. It is possible to reply, forward the message, call the sender, and call a number included in a text.
- Page 11 Settings Turn the automatic keypad lock on/off Enter “Settings” , and step to “Locks”. Select “Automatic key lock Off/On”, select “On/Off”, and press “Back”. A locked keypad is indicated by the icon To unlock, press , and then the “Yes” Soft key. Turn the vibrator on/off Press the “Menu”...
-
Page 12: Alarm Operation
Alarm Operation Note: Protector license only. Send Personal Alarm Press twice within 2 seconds until “Personal alarm” is displayed. Send Test Alarm Press and hold until “Test alarm” is displayed. Man-down and No-movement Alarm The Man-down alarm will react if the handset is tilted (default 45°) from the vertical for a predefined period of time (default 7 seconds). - Page 13 • For a predefined period of time (default 10 minutes) if the Mute button is pressed during the alert signal. Activate/Deactivate the Man-down and/or No-movement Alarm Enter “Settings” , and step to “Alarm”. Then select the wanted alarm(s) and press Back repeatedly. The corresponding icon(s) appear on the display.
- Page 14 Safety and Regulatory Instructions For safe and efficient operation of the handset, observe the guidelines given in this manual and all necessary safety precautions when using the handset. Follow the operating instructions and adhere to all warnings and safety precautions located on the product, the Quick Reference Guide and the User Manual.
- Page 15 • Position the electrical cord to the AC power supply where it is least likely to be subjected to damage or stress. • Remove the electrical cord from an outlet by pulling gently on the AC adapter, not by pulling the cord. •...
-
Page 16: Regulatory Compliance Statements
This equipment is in compliance with the essential requirements and other relevant provisions of R&TTE Directive 1999/5/EC and 2009/125/EC (Eco Design). The Declaration of Conformity is available at: https://www.ascom-ws.com/doc/ The handset is marked with the label Restrictions for Wireless LANs (EU/EFTA and USA/Canada) - Page 17 Latvia The outdoor usage of the 2400 MHz Frequency band requires an authorization from the Electronic Communications Office. See also http://www.esd.lv for more details. Regulatory Compliance Statements (USA and Canada only) FCC ID: BXZWH1 IC: 3724B-WH1 US: 9FVIPNANWH1 HAC FCC and IC Compliance Statements This equipment has been tested and found to comply with the limits for a Class B digital device, pursuant to part 15 of the FCC Rules.
- Page 18 SAR value in this configuration is 0.689 W/kg. This device must not be co-located or operating in conjunction with any other antenna or transmitter. Use of non-Ascom approved accessories may violate the FCC and IC guidelines for RF exposure and should be avoided. Information to User This device complies with Part 15 of the FCC rules and with Industry Canada licence-exempt RSS standard(s).
-
Page 19: Environmental Requirements
Environmental Requirements Handset • Only use the handset in temperatures between -5 °C and +45 °C (23 °F and 113 °F). • Avoid exposing the handset for direct sunlight or close to other heat sources. • Do not expose the handset to open flame. •... - Page 20 • Do not leave a battery where it could be subjected to extremely high temperatures, such as inside a car on a hot day. • Use the Desktop Charger or the wall mounted Charging Rack for charging. Charge the battery for at least one hour the first time you use the battery.
- Page 21 Accessories The following accessories are available: Leather casing Belt clip, swivel type incl. belt clip Standard clip Desktop chargers Headset with microphone on boom Also available: • Headset with microphone on cable • Hearing protection 2.5 Peltor • Security cord •...
- Page 22 www.ascom.com...
Need help?
Do you have a question about the i62 and is the answer not in the manual?
Questions and answers