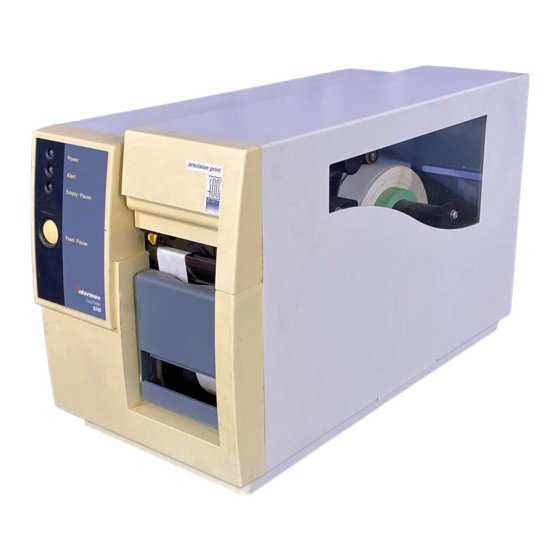
Intermec 3240 User Manual
Bar code label printer
Hide thumbs
Also See for 3240:
- User manual (187 pages) ,
- Developer's manual (116 pages) ,
- Getting started manual (61 pages)
Advertisement
Quick Links
Advertisement

Related Manuals for Intermec 3240


Summary of Contents for Intermec 3240
- Page 1 User’s Manual P/N 063015-003 3240 Bar Code Label Printer Norand Mobile Systems Division...
- Page 2 The information contained herein is proprietary and is provided solely for the purpose of allowing customers to operate and/or service Intermec manufactured equipment and is not to be released, reproduced, or used for any other purpose without written permission of Intermec.
- Page 3 This page records the changes to this manual, which was originally released as version 001. 10/96 These two addenda were added: Self-strip addendum Part No. 064196-001 Top of form addendum Part No. 064522-001 Other minor corrections and changes were made throughout the manual.
- Page 11 To receive a copy of the standard warranty provision for this product, contact your local Intermec sales organization. In the U.S. call 1-800-755-5505, and in Canada call 1-800-688-7043. Otherwise, refer to the Worldwide Sales & Service list that came with this manual for the address and telephone number of your Intermec sales organization.
- Page 12 The warnings and cautions in this manual use the following format. Warning A warning alerts you of an operating procedure, practice, condition, or statement that must be strictly observed to avoid death or serious injury to the persons working on the equipment. Avertissement Un avertissement vous avertit d’une procédure de fonctionnement, d’une méthode, d’un état ou d’un rapport qui doit être strictement respecté...
- Page 13 It also tells you how to control print quality. Advanced procedures Chapter 5, “Performing Advanced Procedures.” Tells you how to perform advanced procedures on the 3240 printer such as decreasing processing time. Printer specifications Appendix A, “Printer Reference.” Contains operating specifications, extended character sets, and reference tables.
- Page 14 The following special terms and conventions occur throughout the manual. Refer to the glossary for a complete list of terms. “Printer” or “3240” refer to the 3240 bar code label printer. “Media” is the label stock on which the printer prints labels.
- Page 15 Data Communications Reference Manual 044737 IPL Programming Reference Manual 066396 The Bar Code Book by Roger C. Palmer 051241 3240 Bar Code Label Printer Getting Started Guide 063257 9154 Multi-Drop Line Controller System Manual 048517 9161B Installation Manual 049572 9180 Network Controller User’s Manual 054292 RF System User’s Manual...
- Page 19 Set the printer on a clean, stable, flat surface and remove the packing material. Save the shipping container and packing materials in case you need to move or ship your printer. I n t e r m e 3240 Printer Media Roll AC power Ribbon core cord...
- Page 20 3240 Label Printer Getting Started Guide Media roll (a 50-foot direct thermal media roll) Intermec thoroughly tests and inspects your 3240 before shipping it from the factory. If you receive any items damaged, please take the following steps to correct the problem.
- Page 21 Printer,” for more information. Precision Print technology that produces high registration labels. See Chapter 4, “Troubleshooting,” for more information. Minimal supervision and maintenance. Use the following figures to familiarize yourself with the 3240 printer. Media window Power on LED...
- Page 22 DIP switches Optional I/O board port Serial communications port ON/OFF switch AC power cord receptacle Fanfold media access slot 3240U.003 Several options are available for use with the 3240 printer. See Appendix A, “Printer Reference,” for complete descriptions of these options.
- Page 23 The back of the 3240 printer contains the AC power cord receptacle, the serial communications port, the (I/O) switch, and two banks of DIP switches. 1. Turn the switch to the off (O) position.
- Page 24 4. Plug the other end of the power cord into a grounded wall outlet or surge protector. 5. Set the ON/OFF switch to the on (|) position. The Power On LED lights, the Empty/Pause LED flashes, and the printer (platen roller) advances. The Empty/Pause LED stays lit because you have not loaded media yet.
- Page 25 As the 3240 prints individual labels, you can remove them from the roll by pulling them down across the tear bar. Use the small roll of media that came with the printer to perform this procedure.
- Page 26 Lateral Upper Media printhead Head lift media guide brake adjust Printhead lever Media support Media Media roll Media Supply roll backing post Supply roll retainer Tear 3240U.006 Lower Label Edge media guide guide sensor 8. Unscrew the edge guide and slide it all the way to the outer edge of the lower media guide.
- Page 27 15. If you are loading continuous media or mark label stock, use PrintSet, your third-party software or the printer command set to tell the printer what kind of media you are using. 16. Press Feed/Pause to advance several inches of media through the printer and out the label opening in the front cover.
- Page 28 Now that you have loaded media in the printer, you are ready to print the hardware configuration test label. Use this label for reference when installing your 3240 printer and for verifying proper printer operation. 1. Turn the ON/OFF switch to the off position.
- Page 29 If you are unable to print a hardware configuration test label, please refer to Chapter 4, “Troubleshooting,” for help. You can connect your 3240 printer to a PC, a local area network, an AS/400 (or other midrange), or a mainframe. This section tells you how to connect your printer to any of these systems.
- Page 30 You can connect the 3240 to either a serial port or parallel port (if you have the option installed) on your PC. You must provide the correct cables for connecting the printer. Refer to the following instructions for cable information.
- Page 31 If you did not have the parallel interface installed at the factory, you can install the field installable option (Intermec Part No. 056830) in the optional I/O board port of your printer. You can purchase a parallel cable from Intermec (Part No. 051211) or from your local computer store.
- Page 32 To connect a 3240 printer directly to an AS/400 or midrange system, you need: a twinax adapter card. a twinaxial cable equivalent to IBM part number 7362267 or 7362062. The maximum cable length for the twinax interface is 5000 feet (1525 meters).
- Page 33 You need to configure the serial port of the 3240 printer to match the configuration of your PC or network controlling device. If the printer’s default settings do not match, use the DIP switch settings table to configure the serial port.
-
Page 34: Dip Switch Settings
None Number of Data Bits 7 Bit 8 Bit Reserved Default settings are noted with an Protocol Selection XON/XOFF Intermec Protocols XON/XOFF Selection No Status Response With Status Response DT/TTR Direct Thermal Thermal Transfer Default settings are noted with an... - Page 35 After connecting the printer to your system, you need to test communications. The easiest way to test communications is to set the printer to Data Line Print mode, which is part of Test and Service mode, and send a character string down from your system.
- Page 39 Optimizes print quality and print speed. Explains different methods for transferring information from the host to the printer and from the printer to the host. On the front panel of the 3240 printer, you will find one button and three light emitting diodes (LEDs). Power...
- Page 40 code39 code39 You use the front panel LEDs to monitor the status of the printer: State Indication Power Power off Power Green LED Power on Orange LED Alert Printing or idle Alert Flashing Over-temperature System fault Yellow LED Empty/Pause Printing or idle Flashing Paused Empty/Pause...
- Page 41 The Feed/Pause button, located on the front panel of the 3240 printer, performs several functions depending on the mode of the printer. Idle Feed out one label or a Press and release the Feed/Pause minimum specified button. amount of media.
- Page 42 You can load media into the 3240 printer in three different ways: Fanfold printing Self-strip printing with roll media Straight-through printing with roll media (see Chapter 1) You can load media with the printer power turned on or off. The following procedures for loading media assume that the ON/OFF switch is turned on.
- Page 43 code39 code39 Media brake Head lift lever Edge Media access guide slot Lateral printhead knob Lower media Guide guide plate Fanfold Supply roll media post Supply roll retainer 3240U.017 10. Slide the supply roll retainer up to the edge of the fanfold media and turn the supply roll retainer clockwise until it locks firmly in place.
- Page 44 code39 code39 Use self-strip printing in applications where you want to apply labels to a surface immediately. After printing a label, the printer prints out the label with the backing removed. The rewinder hub collects the backing after passing over the self-strip assist roller.
- Page 45 code39 code39 Media Brake Lateral printhead Media knob support Head lift lever Supply roll retainer Media roll Supply roll post Upper media Media guide liner Lower media guide Media Rewinder access door Tear Self-strip Rewinder assist roller Printhead clasp 3240U.018 11.
- Page 46 code39 code39 17. Press Feed/Pause to advance a label through the printer. Remove the exposed label from the front of the printer. 18. Unscrew the edge guide and slide it inward until it just touches the edge of the media. Screw it in place. Note: Adjust the label gap sensor if you are using narrow media (less than 1 inch wide).
- Page 47 code39 code39 If you plan to use thermal transfer media, you must install a thermal transfer ribbon (TTR) to print in thermal transfer mode. Note: Save the plastic bag that your ribbon comes in. Attached to the ribbon bag is a small label with a three-digit sensitivity number printed on it.
- Page 48 code39 code39 Empty ribbon core Thermal transfer ribbon (The thermal transfer ribbon is adhered to the empty ribbon hub with an adhesive strip on the leader edge.) Ribbon supply Upper media guide Ribbon rewind Head lift lever TTR assist roller Printhead 3240U.019 8.
- Page 49 Use this three-digit number to optimize print quality and print speed on the 3240 printer. You can only achieve the best print quality on the 3240 printer by using Intermec ribbon and media products. The 3240 default setting for direct thermal media sensitivity is 420. For thermal transfer media, the default setting is 567.
- Page 50 code39 code39 The sensitivity number on each roll of thermal transfer media or ribbon has an asterisk (*) in place of one of the digits. To optimize the sensitivity number for thermal transfer media, you combine the digits as in this example. Thermal Transfer The asterisk reserves the third Media...
- Page 51 If you are not using Intermec media and ribbon, or you misplaced your packaging with the three-digit sensitivity number label on it, you can set the approximate sensitivity rating. The first column of the Direct Thermal and Thermal Transfer Media and ribbon tables list the approximate sensitivity settings.
- Page 52 code39 code39 European Uncoated/Standard 800 Series High Sensitivity (Paper) Duratran TTR Polyimide (Valeron)/Premium 600 Series Medium Sensitivity (Plastic) European Polyethelene/Premium Duratran Kimdura/Premium 500 Series Medium Sensitivity (Paper) Duratran II/Premium Duratran II Tag-5 mil/Premium Duratran II Tag-7 mil/Premium European Board Tag/Premium European Coated/Premium 300 Series Low Sensitivity (Plastic) Super Premium Kimdura/Super Premium 2...
- Page 53 You are now ready to print labels by downloading data from the host to the 3240 printer. Downloading is the universal term used to describe the transfer of information from the host to any connected peripheral device, such as the 3240 printer.
- Page 54 If you select to print a bar code, you can choose a symbology in the Select Symbologies list box. 5. Click on the Print button. Your 3240 printer prints out a test label. For example, if you chose to print a bar code with the Code 39 symbology,...
- Page 55 If you are operating your 3240 printer from a platform not discussed in this manual, it is important to keep several things in mind: The 3240 is an ASCII printer. You must configure the 3240 printer to match the settings of your platform to ensure proper communications.
- Page 57 *1233* *1233* FG 9pt Italic...
- Page 59 *1233* *1233* FG 9pt Italic Inspect the printer and the rest of your data collection system equipment on a regular basis. Your inspection should include the following: Make sure you have properly grounded the printer. Inspect the work environment. Large electric motors, welders, and switching equipment can affect printer performance.
- Page 60 *1233* *1233* FG 9pt Italic Clean your printer regularly to maintain the quality of your labels and extend the life of your printer. This table contains suggestions for cleaning the printer. Use the illustration to locate the parts you need to clean. Printhead Inspect after every roll of media.
- Page 61 *1233* *1233* FG 9pt Italic TTR assist roller Supply roll post Label taken sensor Supply roll retainer Upper media guide Lower media guide Label Pinch Printhead Drive sensor roller roller Self-strip Tear bar assist roller 3240U.030 Warning Switch off the printer power and remove the power cord before cleaning any part of the printer.
- Page 62 *1233* *1233* FG 9pt Italic In order for the printhead to provide good print quality, it must maintain close contact with the media. Therefore, cleaning media debris from the printhead is very important. You should clean the printhead after every roll (or 6,000 inches) of media or more often if necessary.
- Page 63 Printhead 3240U.031 Clean the 3240 printer covers with a general purpose cleaner (soapy water/mild detergent). Do not use abrasive cleansers or solvents. Be sure to clean the transparent panel on the media cover so that the media supply inside...
- Page 64 *1233* *1233* FG 9pt Italic Cleaning the rollers and the tear bar preserves print quality by ensuring close contact between the media and the printhead. 1. Turn the ON/OFF switch to the off position and remove the power cord. 2. Remove the media cover. 3.
- Page 65 *1233* *1233* FG 9pt Italic Supply roll roller TTR assist roller Head lift lever Drive roller Tear 3240U.032...
- Page 66 *1233* *1233* FG 9pt Italic You should clean the media guides and media path regularly to keep debris off the media surface and printhead where irregularities can spoil print quality or damage the printhead. Cleaning the guides also prevents the media from skewing or improperly tracking as it travels through the media path, which can result in smeared images and print off the side of the label.
- Page 67 *1233* *1233* FG 9pt Italic Upper media guide Lower media guide 3240U.033 Media path...
- Page 68 *1233* FG 9pt Italic There are two label sensors on the 3240 printer that require regular cleaning: the label taken sensor and the label gap sensor. 1. Turn the ON/OFF switch to the off position and remove the power cord.
- Page 69 *1233* *1233* FG 9pt Italic Label taken sensor Cotton swab Drive roller Upper media guide Cleaning (underside) brush Label gap sensor Lower media guide 3240U.037...
- Page 70 *1233* *1233* FG 9pt Italic...
- Page 71 *1233* *1233*...
- Page 72 *1233* *1233*...
- Page 73 If you receive an error message, refer to the IPL Programming Reference Manual for a complete list of error messages and their solutions. If the problem persists, contact your Intermec customer service representative. In the U.S. call 1-800-755-5505, and in Canada call 1-800-688-7043. If you are an international customer, contact your local Intermec representative.
- Page 74 *1233* *1233* You have set the printer for Use PrintSet to check the configuration continuous label stock. settings. If the settings are incorrect, use PrintSet to change the settings. Printer slows down. You have set the image bands or Use PrintSet to change the image bands or print speed incorrectly.
- Page 75 Dirty media path or rollers. Clean the media path. For help, see “Cleaning the Media Guides and Media Path,” in Chapter Poor quality label or ribbon Use only Intermec label and ribbon stock to stock. ensure superior print quality and product performance.
- Page 76 Uneven print contrast (density). Adjust the bias adjust screw. See “Correcting Uneven Print Quality” in this chapter. You are using incorrect label or Use only Intermec label and ribbon stock to ribbon stock to print labels. ensure superior print quality and product performance.
- Page 77 *1233* *1233* The printer skips labels The label gap sensor is not in the Properly position the label gap sensor. For randomly or sends an correct position. help, see “Accurately Detecting the Start of intermittent error. a Label” in this chapter. The label format extends beyond Edit the format to ensure that the text fits on the label length.
- Page 78 Several problems can cause data loss or communication problems on the 3240 printer. Data loss can result in printing errors or missing field data. The 3240 printer is a serial ASCII device. It communicates with the host through an ASCII serial communications I/O port. Hardware handshaking involves the use of a hardware wire.
- Page 79 *1233* *1233* Intermec designed and configured the 3240 printer to provide the best possible print quality for both direct thermal and thermal transfer media. However, there are many factors that you need to take into account before you can achieve maximum print quality for your own application. The following sections address these factors: •...
- Page 80 Intermec prints a three-digit sensitivity number on each roll or box to specify a heating schedule optimized for print speed and print history. Each print element on the 3240 printer heats individually and various types of media require different temperatures.
- Page 81 *1233* *1233* Use the darkness adjust control in combination with the Print Darkness adjustment in PrintSet to fine-tune the darkness of print on your labels. The fine adjustments compensate for variations in the media (“lot to lot”), the printhead, or the printer. Set the darkness adjust control after you enter the media sensitivity number.
- Page 82 *1233* *1233* If your 3240 printer is continuing to print labels even when there is a label waiting for removal at the tear bar, you may need to adjust the label taken sensor. The label taken sensor detects whether there is a label present at the tear bar.
- Page 83 *1233* *1233* The 3240 printer uses Precision Print technology to perform high registration printing. High registration printing means that the printer tracks the movement of media and automatically adjusts to ensure accurate horizontal (top of form) placement of an image on the label. Use the Precision Print technology and the adjustable features of the printer to ensure high registration printing by: correcting the lateral position of the label image.
- Page 84 *1233* *1233* Front view Printhead Lateral printhead knob Front view Printhead Lateral printhead knob 3240U.036...
- Page 85 You can adjust the label gap sensor from 0 to 1.0 inch from the inner edge of the printer. Note: Intermec sets the label gap sensor to 0.5 inch from the inner edge of the printer at the factory. You should be able to leave it in this position for most labels wider than 1.0 inch.
- Page 86 *1233* *1233* Label Label gap sensor knob sensor Lower media Label guide radius Position label gap sensor indicator in the middle of Label the label sensor Edge guide Lower media guide Top view 3240U.035 5. Turn the label gap sensor knob clockwise to secure it in the new position. 6.
- Page 87 *1233* *1233* You may experience problems in print quality (ribbon wrinkling or light print on one side of your label) if the printhead is not making even contact with the label stock. This condition can happen with any size label stock, but is most common when using narrow label stock (1 inch or less).
- Page 88 *1233* *1233* 2. To compensate for uneven print quality, turn the bias adjust screw as shown. Adjusting the bias adjust causes the printhead to rest evenly on the drive roller and results in even print quality. If printing is light on the If printing is light on right side of label, turn the the left side of label, turn...
- Page 89 *1233* *1233* If your label format prints too close to the front or back edge of the label, you can fine-tune the position with the top of form (TOF) switch. The TOF switch controls the position of the format forward or backward along the length of the label.
- Page 90 *1233* *1233* Note: You will see the new format position on the second label you print after pressing the TOF switch. You notice that your format is printing toward the from part of the label. Í 3240M.023 1. Remove the media cover. Note: Do not raise the printhead while adjusting the TOF position.
- Page 91 *1233* *1233* You notice that your format is printing toward the back part of the label. Í 3240M.026 1. Remove the media cover. Note: Do not raise the printhead while adjusting the TOF Position. 2. Press on the front part of the TOF switch. Each time you press the TOF switch, you move the label format forward .005 inch (.127 mm).
- Page 92 *1233* *1233*...
- Page 93 QXJJHW code39...
- Page 94 QXJJHW code39...
- Page 95 Be careful of how you use your printer memory. The 3240 printer uses static RAM for storing tables, pages, formats, fonts, and user-defined characters (UDCs). For a printer with 128K of static RAM installed, the default amount allocated for storage RAM is 60K.
- Page 96 Delete any unneeded user-defined fonts, graphics, pages, or formats. For help, see the PrintSet software or the IPL Programming Reference Manual. Purchase additional memory. Please contact your Intermec representative for information on purchasing additional memory for the 3240 printer.
- Page 97 The 3240 printer begins imaging the label when it receives the command to select a format. Since the 3240 printer starts imaging the label so early, the chance that the imaging process will be unable to keep up with the print speed decreases and throughput improves.
- Page 98 *1233* FG 8pt Italic The image bands command controls the amount of memory allotted to the imaging process. When you increase the image band adjustment to a higher number, you add more buffers to the imaging memory. By doing this, the printer images more of the label format before printing begins.
- Page 99 You can now choose to reimage only the fields in a label format that you modify instead of reimaging the entire label format. If you are updating data in only a few simple fields, it may be faster to use the modified field reimaging command.
- Page 100 *1233* FG 8pt Italic Use Test and Service mode on the 3240 printer to print test labels and provide printer hardware diagnostic information to the host. Note: For all Test and Service tests, pressing the Feed/Pause button pauses the current test.
- Page 101 Top Bank Bottom Bank O = OFF 1 = ON TESTS Test Prints Configurations Hardware* Software Test Labels Print Quality Pitch Page Single Page All Pages Format Single Format All Formats Single UDC All UDCs Font Single Font All Fonts Data Line Print Cloning Receiver...
- Page 102 *1233* FG 8pt Italic The 3240 printer can print a variety of test print labels that provide you with information about the printer’s configuration and about the quality of the printing. 1. Turn the ON/OFF switch to the off position.
- Page 103 Selective Transfer command. Use this command to set up different printers to print the same label formats. Using the Selective Transfer command, you can download the following label design attributes from one 3240 printer to another: Any specified page or all pages Any specified format or all formats...
- Page 104 *1233* FG 8pt Italic Use memory reset if you want to return the 3240 printer to its default configuration or if you need to increase the amount of memory available in your printer. You can also use memory reset to clear pages and formats, user- defined characters and fonts, configurations, tables, or all of these parameters.
- Page 105 Test and Service mode also provides you with an alternative way to change configuration commands besides sending configuration commands down from the host. You can change the following configuration commands by setting the Test and Service mode DIP switches: Label rest point Emulation mode X forms adjust Y forms adjust...
- Page 106 *1233* FG 8pt Italic You can move the label rest point and X forms adjust configuration commands forward or backward by setting the printer DIP switches. Use the top bank of DIP switches to determine whether the movement is forward or backward. Use the bottom bank of DIP switches to set the number of dot increments for label rest point, X forms adjust, and Y forms adjust.
- Page 107 1. In the top bank, turn the appropriate switches on or off for forward or backward movement. See the Configuration DIP Switch Settings table on page 5-13 for the appropriate DIP switch settings. 2. Go to the Dot Increments DIP Switch Settings table on page 5-14 and scan down the # of Dot Increments column until you reach the number of dot increments you want to adjust the command forward or backward.
- Page 108 *1233* FG 8pt Italic 1. Turn the printer ON/OFF switch to the off position. 2. Press and hold the Feed/Pause button while turning on the printer. The printer prints out a hardware configuration label and then enters Data Line Print mode. 3.
- Page 109 If you are replacing an Intermec 8636 or 8646 printer with a 3240 printer, you can keep your existing network, hardware, software, and label formats by using Emulation mode. The labels your 3240 printer produces will look just like the ones that your 86XX printer prints.
- Page 110 10 mil (0.01 inch) drag and 15 mil (0.015 inch) picket bar codes. Advanced 5 mil The printer uses the 3240 command set and prints in multiples of 5 mil (0.005 inch) drag and 5 mil (0.005 inch) picket bar codes.
- Page 111 The 3240 printer provides compatibility with the 3400 printer, the 4100 printer, and the earlier 8636 and 8646 bar code printers. The 3240 printer operates in Advanced mode or 86XX Emulation mode. The two modes have three operational subset modes: Print mode (contains configuration commands), Program mode, and Test and Service mode.
- Page 112 *1233* FG 8pt Italic Even though the 3240 printer does not send the BEL status response back to the host, it still generates the internal error code like the 86XX printer. The user can use the same command to ask the printer to transmit its latest error code to the host.
- Page 113 The following table lists the protocol characters that you may redefine and which protocols they affect. SELECT IN POL Mode D, Multi-Drop POLL IN POL Mode D, Multi-Drop RES IN POL Mode D, Multi-Drop REQ IN POL Mode D, Multi-Drop SOM IN STD, POL Mode D,...
- Page 114 180 degrees, in a page. Printhead size command. 8100 protocol and command set. Mandatory data fields. The 3240 printer prints a label even if data is missing from mandatory data fields. Prompting mode.
- Page 115 The 3240 printer does not support baud rates below 1200 baud. It does not allow selection of number of stop bits. It uses one stop bit. The 3240 printer does not support mark and space parity. With the 4100 printer, you enter Test and Service mode by setting the appropriate DIP switch and turning on the printer.
- Page 116 The 3400 printhead has 832 elements (dots) for a total of 4.16 inches. The 3240 printhead has 1024 elements for a total of 2.52 inches. The 3400 printers have printhead elements (dots) that are 0.125 mm in size, for a total of 203 dots per...
- Page 117 The 3240 does not double the dimensions of human-readable characters. The resident fonts are the same size in both the 3240 and the 3400 printers. The only difference is that the characters print much more clearly on the 3240 printer.
- Page 118 *1233* FG 8pt Italic...
- Page 121 Input Voltage 100, 115, or 230 VAC 10% Frequency 47-63 Hz The 3240 printer is capable of direct thermal (DT) printing, or thermal transfer (TTR) printing using a thermal transfer ribbon. Maximum 4 inches per second (101.6 mm per second) Minimum 2 inches per second (50.8 mm per second)
- Page 122 FG 9pt Italic FG 8pt Italic 3240U.083 Label width 0.5 inch (13 mm) 2.7 inches (69 mm) Backing width 0.5 inch (13 mm) 2.8 inches (71 mm) Gap between labels 0.10 inch (2.5 mm) 1.0 inch (25.4 mm) plus label length Label length - stripped media 0.25 inch (6.4 mm) Label length - butt cut media...
- Page 123 10-50 grams There are 21 resident bitmap scalable fonts (including OCR A and B) and three outline fonts available on the 3240 printer. Font ID 3 through 6 and 8 through 19 can be used to download user-defined fonts. 128K (standard) 2.5 inches x 2.5 inches (64 mm x 64 mm)
- Page 124 FG 9pt Italic FG 8pt Italic The following table lists the factory default settings for the 3240 printer. Use PrintSet to set these parameters. The printer’s serial port defaults, which are set using the rear panel DIP switches, are described in Chapter 2, “Operating the Printer.”...
- Page 125 FG 9pt Italic FG 8pt Italic Select in Poll in Reset in Request for Acknowledgement in Start of Message in End of Message in Acknowledgement in Negative Acknowledgement in Data Line Escape in XON in XOFF in Select out Poll out Reset out Request for Acknowledgement out Start of Message out...
- Page 126 FG 9pt Italic FG 8pt Italic Upload configuration parameters to the printer in the form of configuration commands. The commands are concatenated into one command string within a message. Listed below is the order in which the commands are transmitted and the number of bytes in each command.
- Page 127 The following table contains the functional boundaries for 3240 label formats. If you find that you have trouble managing the printer memory, you may want to restructure your formats or purchase additional memory.
- Page 128 Magnification User-Defined Character Size 2.5 inches square User-Defined Character Width Magnification User-Defined Characters User-Defined Font Sets The following table contains the communications boundaries for the 3240 printer. Message Delay 9999 milliseconds Intercharacter Delay 9999 milliseconds Message Block Size 255 (includes STX and ETX characters)
- Page 129 FG 9pt Italic FG 8pt Italic This page contains a list of all the options you can use with the 3240 printer along with a brief description. Consult your Intermec representative to order any option. The memory expansion option replaces the 128K of SRAM with 512K of SRAM to hold more formats, fonts, or bitmap graphics.
- Page 130 FG 9pt Italic FG 8pt Italic Intermec does not provide a cable for use with the parallel interface. You can either buy one from your local computer store or use the following information to make your own interface cable. The parallel interface only allows one-way communications with the printer.
- Page 131 FG 8pt Italic Most of the following information has been taken out of The Bar Code Book by Roger C. Palmer (Intermec Part No. 051241). The 3240 printer can print a bar code on a label in any of the following symbologies: Codabar A bar code symbology that is variable length, discrete, and self-checking.
- Page 132 Interleaved 2 of 5 A bar code developed by Intermec for Computer Identics that encodes the ten digits 0 through 9. The name Interleaved 2 of 5 is derived from the method used to encode two characters. In this symbol, two characters are paired, using bars to represent the first character and the interleaved spaces to represent the second character.
- Page 133 FG 9pt Italic FG 8pt Italic Maxicode Maxicode is a fixed-size symbology where height and width magnification is ignored. This symbology is made up of offset rows of hexagonal elements arranged around a bull’s-eye finder pattern. Each hexagon represents one bit of information and is either black or white depending on the state of the encoded data bit.
- Page 134 FG 9pt Italic FG 8pt Italic The following tables show which hex codes to download for international characters not available in the U.S. character set. To use the tables, find the hex code for the U.S. character that corresponds with the character in your language.
- Page 135 FG 9pt Italic FG 8pt Italic This table shows the hex codes for the character sets that print if your printer is running under 86XX Emulation mode. U.S. ASCII ¦ U.K. ASCII £ ¦ Germany § Ä Ö Ü ä ö...
- Page 136 FG 9pt Italic FG 8pt Italic ¶ § " & < > @ A B C D E F G H I K L M N O P Q R S T U V W X Y d e f l m n o ˜...
- Page 137 FG 9pt Italic FG 8pt Italic Each internal font in the 3240 has a different character set associated with it as shown in the following tables. The hex codes accompany each character. ØØ Ø1 Ø2 Ø3 Ø4 Ø5 Ø6 Ø7 Ø8...
- Page 138 FG 9pt Italic FG 8pt Italic ØØ Ø1 Ø2 Ø3 Ø4 Ø5 Ø6 Ø7 Ø8 Ø9 ØA ØB ØC ØD ØE ØF 1Ø 2Ø 3Ø 4Ø 5Ø 6Ø 7Ø 8Ø 9Ø AØ BØ CØ DØ EØ FØ 3240U.067...
- Page 139 FG 9pt Italic FG 8pt Italic ØØ Ø1 Ø2 Ø3 Ø4 Ø5 Ø6 Ø7 Ø8 Ø9 ØA ØB ØC ØD ØE ØE 1Ø ’ ! " # $ % & 2Ø < > 3Ø A B C D E F M N O 4Ø...
- Page 140 FG 9pt Italic FG 8pt Italic ØØ Ø1 Ø2 Ø3 Ø4 Ø5 Ø6 Ø7 Ø8 Ø9 ØA ØB ØC ØD ØE ØE 1Ø 2Ø 3Ø 4Ø 5Ø 6Ø 7Ø 8Ø 9Ø AØ BØ CØ DØ EØ FØ 3240U.069...
- Page 141 FG 9pt Italic FG 8pt Italic ØØ Ø1 Ø2 Ø3 Ø4 Ø5 Ø6 Ø7 Ø8 Ø9 ØA ØB ØC ØD ØE ØE 1Ø 2Ø 3Ø 4Ø 5Ø 6Ø 7Ø 8Ø 9Ø AØ BØ CØ DØ EØ FØ 3240U.070...
- Page 142 None Number of Data Bits 7 Bit 8 Bit Reserved Default settings are noted with an Protocol Selection XON/XOFF Intermec Protocols XON/XOFF Selection No Status Response With Status Response DT/TTR Direct Thermal Thermal Transfer Default settings are noted with an...
- Page 143 C o d e 39 HelvC FULL ASCII Binary Char Binary Char Control Character Definitions 00000000 01000000 Null, or all zeros 00000001 01000001 Start of Heading 00000010 01000010 Start of Text 00000011 01000011 End of Text 00000100 01000100 End of Transmission 01000101 00000101 Enquiry...
- Page 147 Use the following information on interfaces and protocols to integrate your 3240 printer into a data collection network. The 3240 printer has the following hardware and software requirements: The host computer must use the American Standard Code for Information Exchange (ASCII) for data communications.
- Page 148 Communications protocols are important because they determine the transmission standards for communications between the printer and the host. The 3240 and the host must use the same protocol and parameters to communicate properly. The 3240 printer supports the flow control and block transfer protocols described in the next sections.
- Page 149 <DC2> is substituted for <DC1> and <DC4> is substituted for <DC3>. The 3240 printer does not restrict the message length for XON/XOFF protocol. That is, the printer processes information as it is being downloaded and stops when there is no more information.
- Page 150 3240 to an Intermec port concentrator (RS-232 or RS-422 are acceptable). This protocol is the default setting for the 3240 printer. Return the protocol setting to Polling Mode D by setting the printer DIP switches to the factory default settings (9600, E, 7, 1) or by sending down the Test and Service mode command D.
- Page 151 FG 9pt Italic FG 8pt Italic The following table lists the protocol characters that you can redefine and the protocols they affect: SELECT IN POL Mode D, Multi-Drop POLL IN POL Mode D, Multi-Drop RES IN POL Mode D, Multi-Drop REQ IN POL Mode D, Multi-Drop...
- Page 152 FG 9pt Italic FG 8pt Italic The 3240 printer supports serial communications with the following interfaces: RS-232 RS-422 RS-485 The following sections describe these interfaces. See Data Communications Reference Manual (Intermec Part No. 044737) for more detailed information. Use the RS-232 serial interface in all asynchronous point-to-point full- or half- duplex direct data communications or modem control.
- Page 153 Output: When you use a modem, connect to Ready (DTR) modem DTR pin. When using Intermec Standard protocol, this pin indicates that the printer is switched on. When using XON/XOFF or hardware flow control, this pin indicates the printer mechanical...
- Page 154 FG 9pt Italic FG 8pt Italic The rear panel of the printer contains the serial port connector. It is a 25-pin D-style subminiature receptacle. The port is wired as a data terminal equipment (DTE) device. Refer to the following figure: 3240U.076...
- Page 155 FG 9pt Italic FG 8pt Italic You have many different cabling options with the 3240 printer. Your choice of cabling depends on the network configuration, the hardware interface, the protocol you use, cabling distance, and the electrical and environmental conditions in which you are operating the printer. For typical installations,...
- Page 156 FG 9pt Italic FG 8pt Italic SHIELD 25-PIN (SOCKET) D-SUB 25-PIN (PLUG) D-SUB METAL BACKSHELL METAL BACKSHELL CHASSIS GROUND CHASSIS GROUND TRANSMITTED DATA RECEIVED DATA RECEIVED DATA TRANSMITTED DATA REQUEST TO SEND CLEAR TO SEND CARRIER DETECT DATA SET READY DATA TERMINAL READY GROUND GROUND...
- Page 157 FG 9pt Italic FG 8pt Italic SHIELD NOTE: Connect pin 1 to shield at one end only. Input RxDB Input RxDA Output TxDA Output TxDB PRINTER HOST 3240U.079 SHIELD 25-PIN (PLUG) D-SUB 25-PIN (PLUG) D-SUB METAL BACKSHELL METAL BACKSHELL CHASSIS GROUND CHASSIS GROUND TRANSMITTED DATA TRANSMITTED DATA...
- Page 158 9154 Multi-Drop Line Controller System Manual (Intermec Part No. 048517) 9161B Installation Manual (Intermec Part No. 049572) The items listed below create noisy electrical environments that can disrupt data communications between your host computer and the 3240 printer: Large power transformers Large electrical motors...
- Page 159 FG 9pt Italic FG 8pt Italic The proper way to connect the 3240 printer depends on the way you configure your system. This section contains a procedure for non-switched modem installations and references for network installations. Use a modem to communicate with the host computer from a remote location not accessible with remote cabling.
- Page 160 FG 9pt Italic FG 8pt Italic...
- Page 163 American Standard Code for Information Interchange. A standard seven bit code almost always transmitted with a parity bit for a total of eight bits per character. The American National Standards Institute established ASCII to achieve compatibility between various types of data communication equipment.
- Page 164 An operating mode in which the printer has the operating characteristics of another printer. The 3240 can operate in 8636/46 Emulation, which emulates an Intermec 8636 or 8646 printer. A printer control panel button that advances the media and causes the printer to pause printing.
- Page 165 A character set of a given type size and style. See also character set. See soft font. A collection of printer commands and data that determines the arrangement of fields on a label. A bitmap picture downloaded to the printer by the host before printing. The lever you use to raise the printhead.
- Page 166 To move from the start of the label to the start of print. With continuous media, to advance the media over the “label gap” to the “edge“ of the next label. A text field that describes the data in the associated bar code field. Inches per second.
- Page 167 A protocol capable of controlling communications between a single controller and multiple devices. A software term that refers to grouping bits into sets of four, called nibbles. Usually bits are grouped into sets of eight, which are called bytes. A font that is recognized by optical character recognition. The state in which the printer is not able to carry out two-way communication with the host.
- Page 168 Precision Print is the term Intermec uses to describe the software and adjustable hardware features of the 3240 printer that enable it to print high registration labels. Measured in inches per second (ips), the rate at which media travels past the printhead.
- Page 169 A procedure that copies selected formats, fonts, graphics, or pages stored in the memory of one printer to the memory of another. An optional device for the 3240 printer that presents each label after it prints, with the backing removed so you can apply it immediately.
- Page 170 Static random access memory. SRAM is a high-speed read/write memory that retains data indefinitely while you apply power to the chip. A communications protocol capable of controlling communications between two devices connected by a single data communication line. A scheme for encoding data as bar code. Code 39, Interleaved 2 of 5, and Codabar are examples of different symbologies.
- Page 173 Multi-drop, B-14 RS-232 schematics, B-12 RS-422 schematic, B-13 3400 printer, differences from the 3240, 5-24 RS-485 (Multi-Drop), B-14 4100 printer, differences from the 3240, 5-23 schematics, B-11 86XX printer, differences from the 3240, 5-19 straight through schematics, B-13 86XX Emulation mode, 5-17...
- Page 174 B-9 switches for setting dot increments, 5-14 Interleaved 2 of 5, description of, A-14 Test and Service, 5-9 Intermec Standard protocol, B-4 dot increments, setting the number of, 5-14 international character Sets, A-16 drive roller, cleaning, 3-8...
- Page 175 4-13 LEDs pages, copying to another printer, 5-11 front panel, 2-4 parallel port, using to connect the 3240 to a PC, 1-15 indicators, 2-4 PDF417, description of, A-15 media or system faults, 2-4 plugging in the printer, 1-7...
- Page 176 1-17 options, A-11 description, B-10 memory expansion, A-11 settings, changing, 1-18 batch takeup, A-11 using to connect a PC to the 3240, 1-14 centronics parallel interface, A-12 setting coax interface, A-11 media sensitivity number, 2-13 Kanji/Katakana, A-11 serial port, 1-17...
- Page 177 troubleshooting, 4-3 checklist, 4-3 communication problems, 4-7 print quality problems, 4-5 printer operation problems, 4-3 twinax interface option, A-11 UPC, description of, A-15 user-defined protocol, B-6 x forms adjust, moving forward or backward with DIP switches, 5-14 XON/XOFF protocol, B-5...
Need help?
Do you have a question about the 3240 and is the answer not in the manual?
Questions and answers