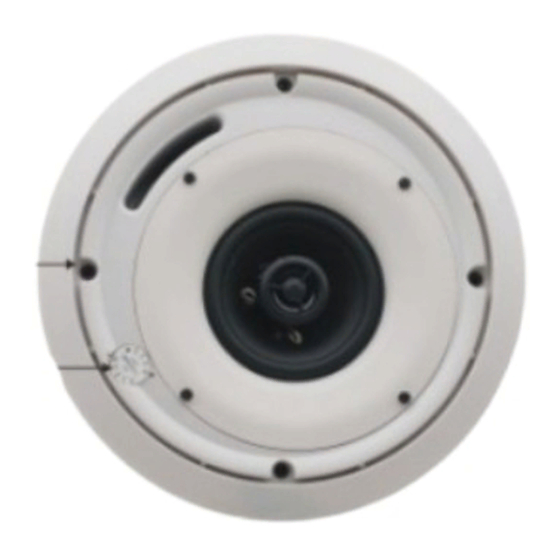
Summary of Contents for Kramer SPK-C411
-
Page 1: User Manual
K R A ME R E LE CT R O N IC S L T D . USER MANUAL MODELS: SPK-C411 Closed-back Ceiling Speakers SPK-C412 Closed-back Ceiling Speakers P/N: 2900-300188 Rev 1... - Page 2 This page is intentionally left blank...
-
Page 3: Table Of Contents
Painting the Speaker Technical Specifications Figures Figure 1: SPK-C411 / SPK-C412 Closed-back Ceiling Speakers in a Boardroom Setup Figure 2: SPK-C411/ SPK-C412 Closed-back Ceiling Speaker Figure 3: Closed-back Ceiling Speaker Schematic Diagram Figure 4: Mounting the SPK-C411 / SPK-C412 Closed-back Ceiling Speakers... - Page 4 This page is intentionally left blank...
-
Page 5: Introduction
Introduction Welcome to Kramer Electronics! Since 1981, Kramer Electronics has been providing a world of unique, creative, and affordable solutions to the vast range of problems that confront video, audio, presentation, and broadcasting professionals on a daily basis. In recent years, we have redesigned and upgraded most of our... -
Page 6: Getting Started
Achieving the Best Performance To achieve the best performance: • Use only good quality connection cables (such as the Kramer BC-2S) to avoid interference, deterioration in signal quality due to poor matching, and elevated noise levels (often associated with low quality cables) •... -
Page 7: Overview
Overview The SPK-C411 / SPK-C412 Closed-back Ceiling speakers consist of a pair of high performance closed back speakers. The pair can be mounted on the ceiling, as well as via a ceiling mounting kit used to safely secure the speakers to the ceiling. -
Page 8: Your Closed-Back Ceiling Speakers
(one shown) This table defines the ceiling mounting kit items: Four Two ceiling Two pairs of support support rings tile rails – ring (C-ring) – one one of a pair screws shown shown SPK-C411 / SPK-C412 - Your Closed-back Ceiling Speakers... -
Page 9: Figure 3: Closed-Back Ceiling Speaker Schematic Diagram
When this is the case, the speakers will need additional support. Figure 3 shows a schematic diagram of the Closed-back Ceiling speaker: Figure 3: Closed-back Ceiling Speaker Schematic Diagram SPK-C411 / SPK-C412 - Your Closed-back Ceiling Speakers... -
Page 10: Installing The Closed-Back Ceiling Speakers
Installing the Closed-back Ceiling Speakers This section explains how to install the SPK-C411 / SPK-C412 closed-back ceiling speakers, that is: • Choosing the best place to locate your speakers (see Section 5.1) • Cutting the ceiling tile (see Section 5.2) •... -
Page 11: Mounting The Spk-C411 / Spk-C412 Speakers
Place it around the hole so that the tabs are located in parallel to the tile edges. T-channel Grid C-ring Support Ring Tile Rails Screws Ceiling Tile Figure 4: Mounting the SPK-C411 / SPK-C412 Closed-back Ceiling Speakers SPK-C411 / SPK-C412 - Installing the Closed-back Ceiling Speakers... -
Page 12: Figure 5: Plugging And Securing The Cable
Figure 5: Plugging and Securing the Cable 7. Push the speaker into the ceiling hole until the front baffle rim is leveled with the ceiling. SPK-C411 / SPK-C412 - Installing the Closed-back Ceiling Speakers... -
Page 13: Figure 6: Tighten The Mounting Tabs
10. Adjust each speaker to the appropriate tap setting before installing the grille (see Figure Figure 7: Adjust Tap Selector (for SPK-C411 and SPK-C412, Respectively) SPK-C411 / SPK-C412 - Installing the Closed-back Ceiling Speakers... -
Page 14: Painting The Speaker
When painting after installation: • Use the circle that you cut out of the template as a paint mask • After you finish painting, remove the paint mask SPK-C411 / SPK-C412 - Installing the Closed-back Ceiling Speakers... -
Page 15: Technical Specifications
DIMENSIONS (OD): 25.1cm (9.88") CUT OUT SIZE (MOUNT 22.3cm (8.78") DIMENSION): MOUNT DEPTH: 11cm (4.33") ACCESSORIES: Ceiling mounting kit Specifications are within a 10% tolerance and are subject to change without notice at http://www.kramerelectronics.com SPK-C411 / SPK-C412 - Technical Specifications... - Page 16 DIMENSIONS (OD): 25.1cm (9.88") CUT OUT SIZE (MOUNT 22.3cm (8.78") DIMENSION): MOUNT DEPTH: 11cm (4.33") ACCESSORIES: Ceiling mounting kit Specifications are within a 10% tolerance and are subject to change without notice at http://www.kramerelectronics.com SPK-C411 / SPK-C412 - Technical Specifications...
- Page 18 This page is intentionally left blank...
- Page 19 This page is intentionally left blank...
- Page 20 For the latest information on our products and a list of Kramer distributors, visit our Web site where updates to this user manual may be found. We welcome your questions, comments, and feedback. Web site: www.kramerelectronics.com E-mail: info@kramerel.com SAFETY WARNING...


Need help?
Do you have a question about the SPK-C411 and is the answer not in the manual?
Questions and answers