
Related Manuals for Kramer SPK-C812


Summary of Contents for Kramer SPK-C812
-
Page 1: User Manual
K R A ME R E LE CT R O N IC S L T D . USER MANUAL MODELS: SPK-C812 SPK-C813 SPK-C814 SPK-C815 SPK-C816 SPK-C817 SPK-C818 SPK-C819 SPK-C820 ESD™ Complete K-overage Ceiling Speaker P/N: 2900-300119 Rev 1... -
Page 2: Table Of Contents
Contents Introduction Getting Started Achieving the Best Performance Overview Defining the ESD Ceiling Speaker Installing the ESD Ceiling Speaker Choosing the Best Location The Input Pinout Determining the Number of Speakers Needed and their Location Preparing the ESD Ceiling Speaker for Operation Installing the Tile Size Speaker Installing the Half-Tile Size Speaker Technical Specifications... -
Page 3: Introduction
Introduction Welcome to Kramer Electronics! Since 1981, Kramer Electronics has been providing a world of unique, creative, and affordable solutions to the vast range of problems that confront the video, audio, presentation, and broadcasting professional on a daily basis. In recent years, we have redesigned and upgraded... -
Page 4: Getting Started
(often associated with low quality cables) • Avoid interference from neighboring electrical appliances that may adversely influence signal quality • Position your Kramer Speakers away from moisture, excessive sunlight and dust ESD Ceiling Speaker - Getting Started... -
Page 5: Overview
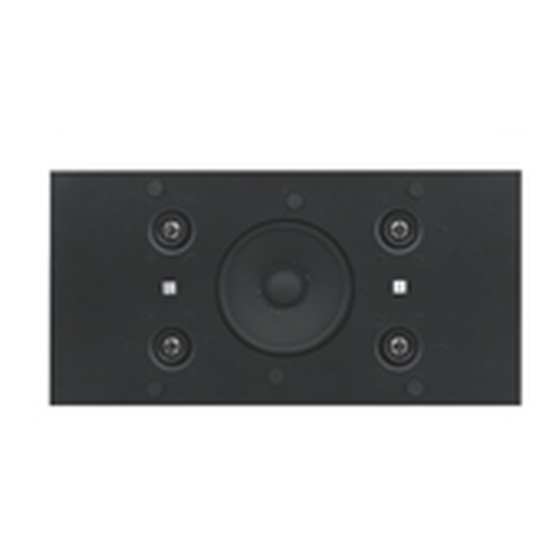
The ESD ceiling speaker is constructed with a central driver and four pivoting tweeters and is housed in an enclosed shallow enclosure. The Kramer complete K-overage ESD provides unmatched sound response in a suspended ceiling device for the professional (PRO) and educational (EDU) markets. -
Page 6: Figure 1: Tile Size Esd Ceiling Speaker (That Fits Into The Ceiling)
Complete K-overage ESD® Ceiling Speakers Available Models Model Name Part Number Description • Polypropylene woofer, surrounded with rubber Professional SPK-C812 • 2 left and 2 right silk dome tweeters tile size stereo • No bass reflex • Polypropylene woofer, surrounded with rubber Professional SPK-C813 •... -
Page 7: Defining The Esd Ceiling Speaker
Defining the ESD Ceiling Speaker Figure 2 defines the ESD Ceiling Speaker: Underside View Top View Figure 2: ESD Ceiling Speaker Flat Ceiling Speaker Features Feature Function Speaker Tile Base Half-tile size or tile size Speaker Steel Enclosure Shallow fireproof enclosure INPUT Terminal Block Connector Connect to the audio source (see Section 4.2... -
Page 8: Installing The Esd Ceiling Speaker
Installing the ESD Ceiling Speaker This section explains how to install the ESD Ceiling Speaker, that is: • Choosing the best place to locate your speaker (see Section 4.1 • Connecting the wires (see Section 4.2 • Determining the number of speakers (see Section 4.3 •... -
Page 9: Determining The Number Of Speakers Needed And Their Location
Determining the Number of Speakers Needed and their Location When installed in a room with a standard ceiling height of 2.7m (8.8 feet), the optimal distance between the speakers is about 10 meters. The speaker should be installed lengthwise relative to the shape of the room. The example in Figure 4 shows the ESD Ceiling Speaker installed in a 10m x 5m room. -
Page 10: Figure 5: Connecting One Stereo Speaker
• If the size of the room requires more than one speaker, use two mono speaker models. Connect the speakers to the left and right connectors of the amplifier, respectively (see Figure Amplifier OUTPUT Speaker Amplifier INPUT OUTPUT 8Ω Speaker Speaker INPUT INPUT... -
Page 11: Preparing The Esd Ceiling Speaker For Operation
Preparing the ESD Ceiling Speaker for Operation Once the location of the speaker is fixed, prepare the speaker for operation as follows: 1. Move each of the pivoting tweeters outward in an angle that is suited to the room shape and size. 2. -
Page 12: Figure 7: Fitting The Tile Size Speaker
Figure 7: Fitting the Tile Size Speaker 2. Secure the speaker by connecting the speaker support ring to an independent secure ceiling anchor point (see Figure 8) as appropriate. The anchor prevents the speaker from falling if the tile itself comes out or falls apart. Figure 8: Securing the Speaker to a Ceiling Anchor Point ESD Ceiling Speaker - Installing the ESD Ceiling Speaker... -
Page 13: Installing The Half-Tile Size Speaker
3. If required, daisy-chain the next speaker (see Section 4.3 Note: Do not over-tighten the screws. It may cause damage to both the speakers and the surface. Installing the Half-Tile Size Speaker When installing the half-tile size model: 1. Remove the ceiling tile. 2. -
Page 14: Figure 10: Fitting The Half-Tile Size Speaker
Figure 10: Fitting the Half-Tile Size Speaker 5. Replace half of the ceiling tile (see Figure 11). Figure 11: Replacing the Ceiling Tile 6. Secure the speaker by connecting the speaker support ring to an independent secure ceiling anchor point (see Figure The anchor prevents the speaker from falling if the tile itself comes out or falls apart. -
Page 15: Figure 12: Esd Ceiling Speaker In A Boardroom Setup
Figure 12 shows an example of how the ESD Ceiling Speaker can be installed in a boardroom setup: Figure 12: ESD Ceiling Speaker in a Boardroom Setup ESD Ceiling Speaker - Installing the ESD Ceiling Speaker... -
Page 16: Technical Specifications
Technical Specifications Technical Specifications of the PRO ESD Ceiling Speakers INPUT POWER: 40W RMS; max. 80 W; continuous load: 40W (24Hr) NOMINAL SENSITIVITY: 87dB SPL @1m CROSSOVER FREQUENCY: 2kHz MEAN SPL: 87dB +/- 1dB @1W-1m FREQUENCY RANGE: Nominal: 80Hz-20kHz; max: 60Hz-20kHz SPEAKER TYPE: Two-way closed ceiling speaker WOOFER:... - Page 17 1. Any product which is not distributed by us or which is not purchased from an authorized Kramer dealer. If you are uncertain as to whether a dealer is authorized, please contact Kramer at one of the agents listed in the Web site www.kramerelectronics.com.
- Page 18 For the latest information on our products and a list of Kramer distributors, visit our Web site where updates to this user manual may be found. We welcome your questions, comments, and feedback. Web site: www.kramerelectronics.com E-mail: info@kramerel.com SAFETY WARNING...
Need help?
Do you have a question about the SPK-C812 and is the answer not in the manual?
Questions and answers