Subscribe to Our Youtube Channel
Summary of Contents for Kramer SPK-C613
-
Page 1: User Manual
K R A ME R E LE CT R O N IC S L T D . USER MANUAL MODEL: SPK-C613 Open-back Ceiling Speakers P/N: 2900-300203 Rev 1... - Page 2 This page is intentionally left blank...
-
Page 3: Table Of Contents
Painting the Speaker Technical Specifications Figures Figure 1: Open-back Ceiling Speakers in a Boardroom Setup Figure 2: SPK-C613 Open-back Ceiling Speakers Figure 3: Position Mounting Tab Figure 4: Adjust Tap Selector Figure 5: Installing the Open-back Ceiling Speakers Figure 6: The Speaker Coverage Area... - Page 4 This page is intentionally left blank...
-
Page 5: Introduction
Introduction Welcome to Kramer Electronics! Since 1981, Kramer Electronics has been providing a world of unique, creative, and affordable solutions to the vast range of problems that confront video, audio, presentation, and broadcasting professionals on a daily basis. In recent years, we have redesigned and upgraded most of our... -
Page 6: Getting Started
Achieving the Best Performance To achieve the best performance: • Use only good quality connection cables (such as the Kramer BC-2S) to avoid interference, deterioration in signal quality due to poor matching, and elevated noise levels (often associated with low quality cables) •... -
Page 7: Overview
The optional Kramer Suspended Ceiling Speaker Mounting Kit (SKIC) can safely secure the speakers to the ceiling as well. The SPK-C613 speakers feature a multi tap power transformer for selecting 8Ω (bypassing the transformer) or 70V/100V power settings suitable for array installation. -
Page 8: Your Spk-C613
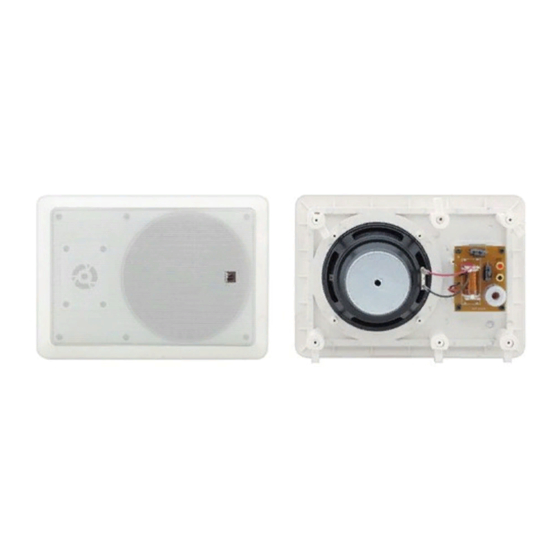
Your SPK-C613 Figure 2 defines the SPK-C613: Figure 2: SPK-C613 Open-back Ceiling Speakers The speaker black and red stereo sockets connect to the black and red sockets of the amplifier (see the wiring example in Figure SPK-C613 - Your SPK-C613... - Page 9 C-ring alone is used to reinforce the ceiling material. Be sure that the tiles can support the speaker. Smaller sized tiles or fiberglass-type tiles cannot support the weight of the speakers. When this is the case, the speakers will need additional support. SPK-C613 - Your SPK-C613...
-
Page 10: Installing The Open-Back Ceiling Speakers
4. Route the wiring from the amplifier to the speakers’ cutout holes, taking care not to place them next to electrical wires or at least at a distance of about two feet from an AC line. SPK-C613 - Installing the Open-back Ceiling Speakers... -
Page 11: Mounting The Open Back Ceiling Speakers
1. Remove the grille over the speakers by inserting a paper clip into one of the grille openings and pulling it upward. 2. Position the mounting tabs (see Figure 3) inward. Figure 3: Position Mounting Tab SPK-C613 - Installing the Open-back Ceiling Speakers... -
Page 12: Figure 4: Adjust Tap Selector
1. Place the C-ring over the hole cut in the ceiling tile (on the “ceiling” side). Place it around the hole so that the tabs are located in parallel to the tile edges (see Figure SPK-C613 - Installing the Open-back Ceiling Speakers... -
Page 13: Array Installation
Repeat this around the perimeter of the grille until it is completely removed Array Installation When installing SPK-C613 in an array installation layout, you have to define the distance between speakers as well as the layout pattern (square or hexagonal). -
Page 14: Figure 6: The Speaker Coverage Area
The speakers are positioned according to their coverage area. Figure 7: Square Layout Figure 8: Hexagonal Layout You can set the power on each speaker to get the desired power level in different installation areas. SPK-C613 - Installing the Open-back Ceiling Speakers... -
Page 15: Figure 9: Square Layout Parallel Wiring
Figure 9 shows an example of parallel wiring in a square array installation: Figure 9: Square Layout Parallel Wiring SPK-C613 - Installing the Open-back Ceiling Speakers... -
Page 16: Painting The Speaker
When painting after installation: • Use the circle that you cut out of the template as a paint mask • After you finish painting, remove the paint mask SPK-C613 - Installing the Open-back Ceiling Speakers... -
Page 17: Technical Specifications
4.3kg (9.48lbs) approx. DIMENSIONS (OD): 23cm (9.06") CUT OUT SIZE (MOUNT 19.5cm (7.68") DIMENSION): MOUNT DEPTH: 7.5cm (2.95") ACCESSORIES: Ceiling mounting kit Specifications are within a 10% tolerance and are subject to change without notice at http://www.kramerelectronics.com SPK-C613 - Technical Specifications... - Page 18 This page is intentionally left blank...
- Page 20 For the latest information on our products and a list of Kramer distributors, visit our Web site where updates to this user manual may be found. We welcome your questions, comments, and feedback. Web site: www.kramerelectronics.com E-mail: info@kramerel.com SAFETY WARNING...


Need help?
Do you have a question about the SPK-C613 and is the answer not in the manual?
Questions and answers