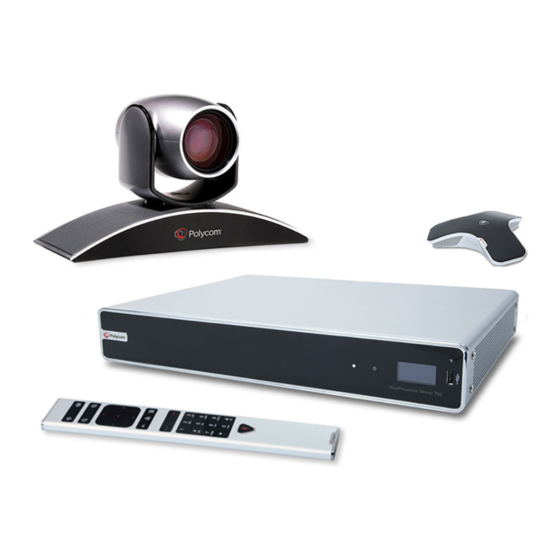
Polycom RealPresence Group 700 system User Manual
Polycom realpresence group series
Hide thumbs
Also See for RealPresence Group 700 system:
- Quick manual (4 pages) ,
- System setup sheet (2 pages) ,
- Installing (2 pages)

Subscribe to Our Youtube Channel
Related Manuals for Polycom RealPresence Group 700 system


Summary of Contents for Polycom RealPresence Group 700 system
- Page 1 [Type the document title] 4.0.0 November 2012 3725-63715-001/A ® ® User’s Guide for the Polycom RealPresence Group Series Polycom Document Title...
- Page 2 Every effort has been made to ensure that the information in this manual is accurate. Polycom, Inc., is not responsible for printing or clerical errors. Information in this document is subject to change without notice.
-
Page 3: Table Of Contents
Including Multiple Sites in Calls ........21 Polycom, Inc. - Page 4 Polycom Solution Support ........39...
- Page 5 • RealPresence Group 700 system Polycom RealPresence Group systems can be configured to show only those options used in your organization. Therefore, this guide may cover options that you cannot access on your system. To find out more about these options, please talk to your administrator.
-
Page 6: Using The Remote Control
User’s Guide for the Polycom RealPresence Group Series Using the Remote Control You use the remote control to place calls, adjust the volume, navigate screens, and select options. Increase the speaker volume Decrease the speaker volume Zoom the camera in... -
Page 7: Recharging The Remote Control Battery
Insert the charged battery into the remote control. The following figure illustrates these steps. If you have a RealPresence Group 700 system, you can also recharge the battery using the USB port on the front of the system. Polycom, Inc. -
Page 8: Powering On And Off
LED indicator light on the front of the device, or in the case of the RealPresence Group 700 system, in the text field display on the front of the system. All test results are logged in the system’s memory. For more information about what the colors of the indicator lights mean, refer to the Administrator’s Guide for Polycom RealPresence Group Series. -
Page 9: Navigating The Local User Interface
User’s Guide for the Polycom RealPresence Group Series If a fatal error occurs during startup, the system will not initialize. Contact Polycom technical support. Navigating the Local User Interface Cycle through the icons at the bottom of the Home screen to access system features. -
Page 10: Calling And Answering
User’s Guide for the Polycom RealPresence Group Series Calling and Answering Placing a Call You can use your system to place a video call in any of the following ways: • Entering a number or name on the > Place a Call > Keypad screen. -
Page 11: Calling From The Recent Calls List
User’s Guide for the Polycom RealPresence Group Series Enter any additional information needed for the call. The available settings depend on the type of call and your system’s configuration. Press on the remote control to place the call or select Place a Call. -
Page 12: Calling A Speed Dial Entry
User’s Guide for the Polycom RealPresence Group Series Calling a Speed Dial Entry If your system administrator configured Speed Dial, you can quickly call a contact in your directory. To place a call to a speed dial entry: Using your remote control, do the following: At the top of the Home screen, select the Speed Dial tab. -
Page 13: Participating In An Encrypted Call
If encryption is required on your system, the far end must support encryption or the call will not be completed. To avoid security risks, Polycom recommends that all participants communicate the state of their padlock icons verbally at the beginning of a call. -
Page 14: Selecting And Adjusting A Camera Or Other Video Source
To return to a previous screen after adjusting your or their camera settings, select To adjust a Polycom EagleEye HD, Polycom EagleEye II, Polycom EagleEye Acoustic, Polycom EagleEye 1080, Polycom EagleEye View, Polycom EagleEye Director or Polycom EagleEye III using the remote control: Select either a near-end or far-end video source to control. - Page 15 User’s Guide for the Polycom RealPresence Group Series To adjust a Polycom EagleEye View camera: Manually swivel the camera right, left, up, or down to frame the view. Turn the focus wheel to adjust the focus. To select the camera, select >...
-
Page 16: Starting And Stopping Camera Tracking With Eagleeye Director
User’s Guide for the Polycom RealPresence Group Series To open or close the privacy shutter on the Polycom EagleEye View camera: >> Move the slider to the right to close the privacy shutter, or to the left to open it. You can still make and receive calls when the shutter is closed, but the people at the far end cannot see you. -
Page 17: Setting And Using Camera Presets
User’s Guide for the Polycom RealPresence Group Series Setting and Using Camera Presets Camera presets are stored camera positions that you can create ahead of time or during a call. The system uses preset 0 as the default camera position for all preset camera positions. -
Page 18: Switching Between Full-Screen Video And The Home Screen
User’s Guide for the Polycom RealPresence Group Series To store a preset: Select > Cameras > Presets. Adjust the camera angle or zoom the camera in or out to the desired position. Press and hold a number to store the preset position. -
Page 19: Muting The Microphone
The microphone may automatically mute when the system is asleep. • The red mute indicator on the front of the Polycom EagleEye View camera is lit when the system is muted or when a Polycom microphone is connected and muted. -
Page 20: Showing Content
You can show the following to the far-end systems: • Any information stored on a computer connected directly to a Polycom RealPresence Group system • A paper document or object placed on a document camera •... -
Page 21: Showing Content From A Computer Connected Directly To
The People+Content IP application must be installed on a computer. To start showing content: On your computer, start the Polycom People+Content IP application. Enter the IP address or host name of the RealPresence Group system and the meeting password, if one is set. - Page 22 User’s Guide for the Polycom RealPresence Group Series Resolution Refresh rates (Hz) 1280 x 768 1280 x 1024 60, 75, 85 1600 x 1200 1680 x 1050 1920 x 1080 1920 x 1200 The way you set the resolution and refresh rate differs, depending on the type of operating system you have.
- Page 23 User’s Guide for the Polycom RealPresence Group Series RealPresence Group 700 System To start showing content from a source connected to a RealPresence Group System: >> Using your remote control, select and then select your content source from the list.
-
Page 24: Working With Directory And Contact Entries
Contacts. Everyone at your site who uses the system can use the contact entries to place calls. Users at other sites cannot access the contacts on your system. Polycom RealPresence Group systems support up to 2,000 contacts. They can also support the following: •... -
Page 25: Including Multiple Sites In Calls
RealPresence Group 500 or 700 system must have an option key installed. You can host multipoint calls using a video conferencing system with multipoint capabilities, or you can use a bridge such as the Polycom RMX 1000 or Polycom RMX 2000. -
Page 26: Hanging Up A Multipoint Call
User’s Guide for the Polycom RealPresence Group Series To place the call, press or the Select button. Depending on how your system is configured, it attempts to call the site using a pre-defined list of call types. Contact your system administrator for more information. -
Page 27: Multipoint Viewing Layouts
User’s Guide for the Polycom RealPresence Group Series To enter a meeting password: • If a prompt appears on the screen, use the remote control or onscreen keypad to enter the password. • If you hear an audio prompt, use the remote control to generate DTMF tones. -
Page 28: Changing The Way Calls Are Answered
User’s Guide for the Polycom RealPresence Group Series Select a layout to use for the current call. The layout is displayed, allowing you to keep the layout or change to another layout. Changing the Way Calls Are Answered Temporarily Refusing Calls If your system administrator has allowed you access, you can automatically refuse incoming calls if you do not wish to be disturbed. -
Page 29: Muting Automatically Answered Video Calls
IP 7000 Conference Phone with a Polycom RealPresence Group System When you connect a Polycom SoundStation® IP 7000 conference phone to a Polycom RealPresence Group system, the conference phone becomes another interface to dial audio or video calls. The conference phone operates as a microphone and as a speaker in audio-only calls. - Page 30 User’s Guide for the Polycom RealPresence Group Series — The IP address (for example, 10*11*12*13) of the site you want to call — The phone number (for example, 19784444321) of the site you want to call — To enter letters, press the ABC soft key. To enter an asterisk, press the...
-
Page 31: Using Microsoft Outlook Calendaring
Content: — RealPresence Group 500 system: You can connect a camera to video input 2. — RealPresence Group 700 system: You can connect a camera to video input 3. Contact your system administrator for more information. -
Page 32: Viewing Scheduled Meetings
User’s Guide for the Polycom RealPresence Group Series Viewing Scheduled Meetings If your RealPresence Group system is configured to connect to the Microsoft Exchange Server, you can view scheduled meetings on the Home screen. If no meetings appear on the Home screen, the system may not be connected to the Microsoft Exchange Server or no meetings are scheduled. -
Page 33: Viewing Microsoft Office Communications Server Or Microsoft Lync Server 2010 Presence States
To manage contacts using Office Communicator or Microsoft Lync: Log in to Office Communicator or Microsoft Lync with the same account information specified in the SIP settings of your Polycom RealPresence Group system. From Office Communicator or Microsoft Lync, you can add and remove contacts. -
Page 34: Multipoint Calls Using Centralized Conferencing Control
To activate call forwarding: Make sure that the Polycom system is not in a call. From the Place a Call screen on the Polycom system, dial the Feature Access Code provided by the Avaya Communication Manager administrator, followed by the E.164 extension of the system to which you want to forward the calls. - Page 35 Wait for confirmation beeps. To transfer a call: While in a call, press the # key on your Polycom system remote control to access the tone pad. Press the Select button to activate flash hook. The first far-end system is placed on hold.
-
Page 36: Customizing Your Workspace
User’s Guide for the Polycom RealPresence Group Series Customizing Your Workspace You can customize what you see on the screen, depending on how your system is configured. Allowing the Far-End System to Control Your Camera If your system administrator has allowed access to user settings, you can allow the far-end system to control your camera. -
Page 37: Allowing Video Display On The Web
If your system administrator has allowed access to user settings, you can choose whether to allow viewing of the room where the system is located or video of calls in which the system participates. You can use the Polycom web interface’s Web Director to view the room or video. -
Page 38: System Information
User’s Guide for the Polycom RealPresence Group Series Available System menus vary based on how your administrator configured the system. Therefore, this section may cover options that you cannot access on your system. To find out more about these options, please talk to your administrator. - Page 39 User’s Guide for the Polycom RealPresence Group Series Status Screen Description Audio Displays the status of microphones, SoundStation IP, SoundStructure, and EagleEye Director Displays whether the IP Network is connected or not connected Servers Always shows: Gatekeeper, SIP Registrar Server; shows the active Global Directory Server, LDAP Server, or Microsoft Lync Server 2010;...
-
Page 40: System Diagnostics
User’s Guide for the Polycom RealPresence Group Series Points to note about system status information: • If the Polycom RealPresence Group system detects an EagleEye Director, a status line for the device is displayed. • When a change occurs in the system status or a potential problem exists, you see an alert next to the System button on the menu. - Page 41 User’s Guide for the Polycom RealPresence Group Series Diagnostic Screen Description Audio Meter Measures the strength of audio signals from the microphone or microphones, far-end audio, VCR audio, and any device connected to the audio line in. • To check the microphone or microphones, speak into the microphone.
-
Page 42: Searching Documentation
Color Bars displays the color bar test screen. Searching Documentation You can find Polycom product documentation at support.polycom.com. The documents are grouped by Polycom video system type and system names. Using the Knowledge Base For more troubleshooting information, search the Knowledge Base at support.polycom.com. -
Page 43: Polycom Solution Support
Polycom solution components only. Additional services for supported third-party Unified Communications (UC) environments integrated with Polycom solutions are available from Polycom Global Services and its certified Partners. These additional services will help customers successfully design, deploy, optimize and manage Polycom visual communications within their UC environments. - Page 44 User’s Guide for the Polycom RealPresence Group Series • Polycom RealPresence Group System 700 (Regulatory Model P002) If you have an EagleEye Acoustic camera, be sure to use it only with UL-approved Information Technology Equipment (ITE) or similarly approved equipment.
Need help?
Do you have a question about the RealPresence Group 700 system and is the answer not in the manual?
Questions and answers