Table of Contents
Advertisement
Advertisement
Table of Contents

Related Manuals for Telstra 13150


Summary of Contents for Telstra 13150
-
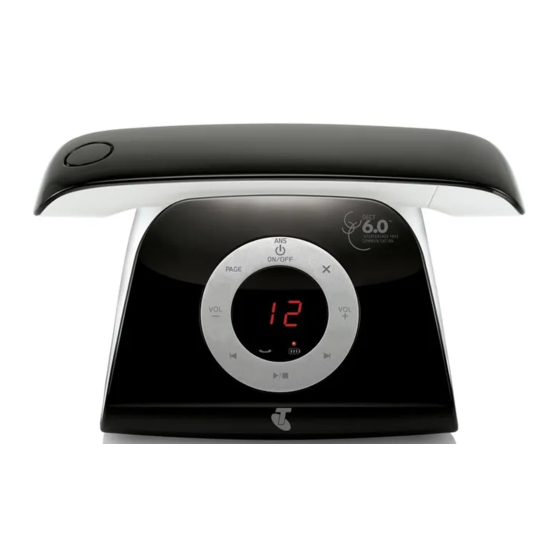
Page 1: Cordless Phone
TELSTRA 13150 DECT6.0 CORDLESS PHONE USER GUIDE This telephone has been designed for ease of use. Please read the instructions and keep it handy for future reference. If you have any problems with your phone, refer to the Help section of this User... - Page 2 Answering machine, with up to 15 minutes digital recording time and helpful voice prompts. * IMPORTANT You need to subscribe to Telstra’s Calling Number Display service to be able to see the caller’s number or name when called, or in the Calls List. See page 38 for more details.
- Page 3 GOT EVERYTHING? The package contains the following items: • Telstra 13150 handset • Telstra 13150 answering machine unit • Telephone power adaptor • Telephone line cord • Battery compartment cover • NiMH rechargeable battery • 1 User guide...
-
Page 4: Table Of Contents
IN THIS GUIDE Important safety instructions Getting started Location Setting up Battery low warning Battery performance Date and time Getting to know your phone Handset buttons Telephone base buttons Navigating the menus Handset menu layout Keystroke table Using the phone Make, answer or end a call Speakerphone Volume control... - Page 5 Set date and time Alarm settings Ringer volume Ringer melody Key tone Low battery tone No coverage tone Auto answer Rename handset Handset display Voicemail access number Base settings Ringer volume Ringer melody Flash time Change system PIN code Telstra Network Services*...
- Page 6 Dial from the call list Save a call list entry to the phonebook Delete an entry in the call list Delete the entire call list Telstra home messages 101 ® or messageBank ® Answering machine Answer on/off Message playback Delete all messages...
- Page 7 General information Replacing the handset batteries Safety Cleaning Environmental How many telephones can you have? Customer service & Product warranty...
-
Page 8: Important Safety Instructions
The use of other battery types or non rechargeable batteries/primary mobile batteries can be dangerous. These may cause interference and/or unit damage. Telstra will not be held liable for damage arising from such noncompliance. Use only the AC power adaptors supplied with this product. Please contact... - Page 9 Please ensure that the batteries are inserted according to the correct polarity as indicated on the re-chargeable batteries and the internal markings inside the handset battery compartment. Do not immerse the batteries in water, and do not place them in a fire. Telephone receivers produce magnetic fields that can attract small metallic objects such as pins or staples.
-
Page 10: Getting Started
GETTING STARTED LOCATION Place your Telstra 13150 within 2 metres of the mains power socket and telephone socket so that the cables will reach. Make sure it is at least 1 metre away from other electrical appliances to avoid interference. Your Telstra 13150 works by sending radio signals between the base and handset. -
Page 11: Setting Up
SETTING UP Telephone base installation Mains power wall socket Telephone base power adapter If you have DSL high- speed Internet service, a DSL filter (not included) is required. Telephone line cord Telephone line jack Power cord jack Plug the mains power adapter cable into the base station, plug the other end of the mains power adapter into a mains power wall socket. - Page 12 Handset batteries installation Slide open the battery compartment cover to fit the NiMH battery into the handset. Plug the battery connector securely into the socket, matching the orientation of the engraved label. Place battery Slide the batte Place the supplied rechargeable battery and the wires inside the battery Insert battery connec in HS compartment c...
- Page 13 Slide the battery compartment cover towards the center of the handset until it clicks into place. Place battery Slide the battery ttery connec in HS compartment cover...
-
Page 14: Battery Low Warning
Check for a dial tone by pressing . If you hear a dial tone, the installation is successful. WARNING Do not place your Telstra 13150 in the bathroom or other humid areas. IMPORTANT The base station must be plugged into the mains power socket at all times. Do not connect the telephone line until the handset is fully charged. -
Page 15: Date And Time
ADSL filter may cause problems with this product and your Broadband service. DATE AND TIME If you have subscribed to Telstra’s Calling Number Display service, the date and time are set automatically with each incoming call. The date and time is recorded with each answering machine message you receive. If you have not subscribed to Telstra’s Calling Number Display Service you can set the... -
Page 16: Getting To Know Your Phone
GETTING TO kNOw YOUR PHONE Front Silkscreen Color : Keypad Silkscreen Color : Silver Pantone Metallic 8401 C Background Color : White(Vtech 2.4 analog) Pantone 347C Pantone 200C Part Description Color Front cabinet ABS/ White(Vtech 2.4 analog) 30-014236-xxx-100 Front cabinet 30-014236-xxx-100 ABS/ White(Vtech 2.4 analog) Rear cabinet... - Page 17 Press and hold ® ® • Press and hold to access Telstra Home Message 101 or MessageBank • Press to toggle between a Name and Number when viewing an entry in the call list when a match to a Phonebook entry has occurred.
- Page 18 Press to switch between the handset speakerphone and the handset earpiece during a call. RECALL • Press to activate Recall for use with Telstra Network Services such as Call Waiting during a call. • Press to review the phonebook when the phone is not in use.
-
Page 19: Telephone Base Buttons
TELEPHONE BASE BUTTONS Pantone C Pantone C Silkscreen Process Front Cabinet Silkscreen X/DELETE 30-014241-xxx-100 ITAD Lens Silkscreen 30-014245-xxx-100 • Press to delete the playing message. Rubber Key Silkscreen 39-008722-xxx-400 • When the phone is not in use, press and hold to delete all previously reviewed messages. - Page 20 VOL- • Press to decrease the volume during message playback. • Press to decrease the telephone base ringer volume during ringing. VOL+ • Press to increase the volume during message playback. • Press to increase the telephone base ringer volume during ringing. •...
-
Page 21: Navigating The Menus
NAVIGATING THE MENUS Your Telstra 13150 has an easy to use menu system. Each menu has a list of options, as outlined on the following page. To enter the main menu of the handset Press MENU when the phone is not in use. -
Page 22: Keystroke Table
REGISTRATION DEFAULT ANS. MACHINE PIN?---- PIN?---- MSG PLAYBACK DELETE ALL MEMO TAM ON/OFF TAM SETTINGS kEYSTROkE TABLE Dialing key Characters by number of key presses SPACE Note: Other characters are available using keys * and #. -
Page 23: Using The Phone
USING THE PHONE MAkE, ANSwER OR END A CALL To make a call: Press on the handset. When you hear a dial tone, dial the number with the dialing keys (0-9). To predial a call: Enter the number with the dialing keys (0-9). Press to dial. -
Page 24: Mute
MUTE The mute function allows you to hear the other party but the other party cannot hear you. During a call, press MUTE. The handset displays MUTED until the mute function • is turned off. Press MUTE again to resume the conversation. •... -
Page 25: Chain Dialing
Press to scroll to the desired entry displays. Press to dial. To save a redial entry to phonebook: Press when the handset is not in use. Press to scroll to the desired entry displays. Press MENU and to scroll to ADD TO PB. Press SELECT to enter the name. -
Page 26: Find Handset
To access a number in the directory: Press MENU while on a call. to scroll to PHONEBOOK. Press Press SELECT and to scroll to desired entry. Press SELECT to dial the displayed number. To access a number in the caller ID log: Press MENU while on a call. -
Page 27: Phonebook
PHONEBOOk The phonebook stores up to 50 entries with up to 24 digits for each phone number and 12 characters for each name. ADD A PHONEBOOk ENTRY Press when the telephone is not in use. -OR- Press MENU when the telephone is not in use, and then press to scroll to PHONEBOOK. -
Page 28: Alphabetical Search
ALPHABETICAL SEARCH Press when idle to show the first entry in the phonebook. Use the dialing keys to enter the letter associated with the name. For example, if you have the entries named Jennifer, Jessie, Kevin and Linda in your phonebook, press 5 (JKL) once to see Jennifer (when Jennifer displays, press to see Jessie), twice to see Kevin, or three times to see Linda. -
Page 29: Delete All Phonebook Entries
DELETE ALL PHONEBOOk ENTRIES Press when the telephone in idle. -OR- Press MENU when the telephone in idle, and then press to scroll to PHONEBOOK. Press SELECT. Press MENU and to scroll to DELETE ALL, and then press SELECT. The screen will display “CONFIRM?”. Press SELECT to confirm. -
Page 30: Handset Settings
HANDSET SETTINGS USING THE MENU You can use the menu of the handset to change the telephone settings. Press MENU when idle. Press until the screen displays the desired feature menu. Press SELECT to enter the menu. To return to the previous menu, press MUTE/DELETE. •... -
Page 31: Alarm Settings
To set the time format: Press MENU when the handset is not in use. Press SELECT and to scroll to HS SETTINGS. Press SELECT and to scroll to DATE & TIME. Press SELECT and to scroll to TIME FORMAT. Press SELECT and to select your desired time format (24 HR or 12 HR). -
Page 32: Ringer Volume
To set the alarm time (if the alarm is set to be ON) Follow Steps 1 to 5 in the section To turn on /off the alarm. Enter the time. Press SELECT to set the snooze function. Press SELECT and to select ON or OFF. -
Page 33: Key Tone
To set the ringer melody for internal call: You can choose from different ringer tones on each handset. Press MENU when the handset is not in use. to scroll to HS SETTINGS. Press Press SELECT and to scroll to RING SETUP. Press SELECT and to scroll to INT. -
Page 34: No Coverage Tone
to scroll to HS SETTINGS. Press Press SELECT and to scroll to TONE SETUP. Press SELECT and to scroll to BATTERY TONE. Press SELECT and to select ON or OFF. Press SELECT to save your selection. You hear a confirmation tone. NO COVERAGE TONE When a handset is out of range of the telephone base, an alert tone will be emitted if no coverage tone is set to ON, You need to move the handset closer to the telephone... -
Page 35: Rename Handset
RENAME HANDSET You can change the name of each device. The new name of each device cannot exceed 12 characters. To reset the auto answer: Press MENU when the handset is not in use. to scroll to HS SETTINGS. Press Press SELECT and to scroll to RENAME HS. -
Page 36: Base Settings
BASE SETTINGS RINGER VOLUME Using the telephone: Press VOL + or VOL - on the telephone base to adjust the message playback volume when the phone is not in use. Press VOL + or VOL - on the telephone base to adjust the base ringer volume during ringing. -
Page 37: Flash Time
fLASH TIME The flash time settings are country dependent. Please contact your local service provider for the correct settings. Press MENU when the handset is not in use. to scroll to BS SETTINGS. Press Press SELECT and to scroll to FLASH TIME. Press SELECT and to select the desired flash time (SHORT, MEDIUM, LONG). -
Page 38: Telstra Network Services
CALLING NUMBER DISPLAY If you have subscribed to Telstra’s Calling Number Display service, you will be able to see your caller’s number on your handset display (provided it is not blocked) prior to answering the call. If your caller’s name is stored in the phonebook and a number match is found, you will see the caller’s name on the display instead. -
Page 39: Memory Match
IMPORTANT To use Telstra’s Calling Number Display you must first subscribe to the service from Telstra. For more information on Telstra Network Services call Telstra on 13 22 00. To ensure the caller’s name is displayed, make sure you have stored the... -
Page 40: Missed Call Indicator
MISSED CALL INDICATOR When there are calls that have not been reviewed in the call list, the screens display XX NEW CALL(S). When you have reviewed all the missed calls, the missed call indicator goes away. Each time you review a call list entry marked on the handset, the number of missed calls decreases by one. -
Page 41: Save A Call List Entry To The Phonebook
SAVE A CALL LIST ENTRY TO THE PHONEBOOk Press when the telephone is not in use. -OR- Press MENU when the telephone is not in use, and then press scroll to CALL LIST. Press SELECT. Press to scroll to the desired call log entry. Press SELECT and to scroll to ADD TO PB. -
Page 42: Telstra Home Messages 101 ® Or Messagebank
TELSTRA HOME MESSAGES 101 OR MESSAGEBANk You can get messages from your Telstra fixed home phone when you are away from the phone, busy on another call or using the Internet. Callers will hear a standard greeting inviting them to leave a message. -
Page 43: Answering Machine
ANSwERING MACHINE Use the answering system menu of a cordless handset to turn on or off the answering system, message alert tone or call screening, set up the announcement message, or change the number of rings, remote access code or message recording time. -
Page 44: Delete All Messages
To play messages at the telephone base: Press when the telephone is not in use. Options during playback: Press VOL + or VOL - to adjust the speaker volume. • • Press to skip to the next message. • Press to repeat the playing message. -
Page 45: Announcement
To delete all messages with the telephone base: Press and hold X when the phone is not in use. To delete all messages with a handset: Press MENU when the phone is not in use. And then press to scroll to ANS. -
Page 46: Record, Play Or Delete Memos
Press SELECT and to scroll to TAM SETTINGS. Press SELECT and to scroll to OGM SETTINGS. Press SELECT and to scroll to ANS & REC or ANSWER ONLY. Press SELECT and to scroll to PLAYBACK. The handset displays PLAYING OGM. RECORD, PLAY OR DELETE MEMOS Memos are your own recorded messages used as reminders for yourself or others using the same answering system. -
Page 47: Number Of Rings
NUMBER Of RINGS You can set the answering system to answer an incoming call after two, four, six or eight rings; or toll saver. With toll saver selected, the answering system answers after two rings when you have new messages, or after four rings when you have no new messages. -
Page 48: Remote Access Code
REMOTE ACCESS CODE A four-digit security code is required to access the answering system remotely from any touch-tone telephone. The preset code is 0000. You can set the code from 0000 to 9999. To turn ON/OFF the remote access: Press MENU when the phone is not in use. And then press to scroll to ANS. -
Page 49: Call Screening
Press SELECT and to choose 60 S, 120 S, 180 S, or UNLIMITED. Press SELECT to confirm your selection. You hear a confirmation tone. CALL SCREENING To screen a call at the telephone base: If the answering system and call screening are on (see Call screening on page 46), the announcement and the incoming message broadcast at the telephone base while the call is answered by the answering system. -
Page 50: Message Window Displays
MESSAGE wINDOw DISPLAYS Window display Description No messages. The total number of old messages and memos recorded. 01-99 The message number currently playing. The total number of new messages recorded, or the current 00-99 message number during new message playback. (flashing) The clock needs to be set. - Page 51 Then you can enter one of the following remote commands. Command Description Delete the message currently being played. Repeat the current message or press twice for the previous message. Play all messages. Skip to the next message. Turn on the answering machine. Stop message playback.
-
Page 52: Help
HELP My telephone doesn’t work at all. • Make sure the power cord is securely plugged in. • Make sure you plug the battery connector securely into the handset. • Make sure you plug the telephone line cord securely and firmly into the telephone base and the telephone wall jack. - Page 53 • Eliminate any background noise. Noise from a television, radio or other appliances might cause the phone to not dial out properly. If you cannot eliminate the background noise, first try muting the handset before dialing, or dial from another room with less background noise. •...
- Page 54 • Other electronic products can cause interference with your phone. Try installing your phone as far away as possible from these types of electronic devices. The handset battery does not accept charge while in the handset charger. • If the handset is in the handset charger and the charge light is not on, refer to The charge light is off on page 56.
- Page 55 • Relocate your phone to a higher location. The phone may have better reception in a high area. • If other phones in your home are having the same problem, contact your telephone service provider (charges may apply). I experience poor sound quality when using the handset speakerphone. •...
- Page 56 • Other electronic products can cause interference with your phone. Try installing your phone as far away as possible from these types of electronic devices. • Remove and install the handset battery again. Place the handset in the handset charger. Wait for the cordless handset to reestablish its connection with the telephone base.
- Page 57 • Make sure that the handset battery is installed properly. My Calling Number Display isn’t working properly. • Calling Number Display is a subscription service. You must subscribe to this service from your telephone service provider for this feature to work on your phone.
- Page 58 The messages are very difficult to hear. /VOL on the telephone base, or VOL + on the cordless handset, or • Press VOL + on the pendant to increase the listening volume. The answering machine does not answer after the correct number of rings. Make sure that the answering machine is on.
- Page 59 The answering machine does not record messages. Make sure that the answering machine is on. ANS ON should show on the • cordless handset and light on the telephone base should be on. • Make sure the memory of the answering machine is not full. •...
- Page 60 Wait for the handset to reestablish its connection with the telephone base. Allow up to one minute for this to take place. TecHelp line 1300 369 193 Call TecHelp: • if you are having difficulties using your Telstra 13350. • if you need replacement batteries or mains power lead.
-
Page 61: General Information
GENERAL INfORMATION REPLACING THE HANDSET BATTERIES After a time, you may find that the handset batteries are running out of charge more quickly. This is a standard sign of wear and the batteries will need replacing. Replacement rechargeable Nickel Metal Hydride (NiMH) batteries can be purchased from TecHelp line on 1300 369 193 your local electrical retailer. -
Page 62: Cleaning
Please note Telstra accepts no responsibility for damage caused to your Telstra 13350 handset by using any other type of batteries. • Never dispose of batteries in a fire. There is a serious risk of explosion and/or the release of highly toxic chemicals. -
Page 63: How Many Telephones Can You Have
Your Telstra 13150 has a REN of 0.1. A total REN of 3 is allowed, if the total REN of 3 is exceeded, the telephone may not ring. With different telephone... -
Page 64: Customer Service & Product Warranty
If you are trying to access a Telstra Network Service and require assistance specifically related to the network service or would like to subscribe to the service, contact Telstra on 13 22 00 for residential or 13 20 00 for business. Voluntary Product Warranty... - Page 65 To make a claim under this Voluntary Product Warranty you must call the TecHelp Information Line on 1300 369 193 or contact VTech by e-mail at: tcpsupport_au@ vtech.com where a Customer Service Representative will inform you of the product return process. You will need to ensure that: You provide proof of purchase;...
- Page 66 This Voluntary Product Warranty is given by: VTech Telecommunications (Australia) Pty Ltd ABN 70 136 672 627 Address: 24 Gilby Road, Mount Waverley 3149 IMPORTANT NOTE: THIS IS NOT A PRODUCT RETURN OR SERVICE ADDRESS – PLEASE CONTACT TECHELP BY PHONE OR EMAIL FOR PRODUCT AND WARRANTY SUPPORT.
- Page 67 FOR MORE INFORMATION CALL: TECHELP ON 1300 369 193 OR Version C EMAIL: TCPSUPPORT_AU@VTECH.COM 91-007320-030-100...
Need help?
Do you have a question about the 13150 and is the answer not in the manual?
Questions and answers