Table of Contents
Advertisement
Quick Links
Advertisement
Table of Contents

Related Manuals for Telstra 13950


Summary of Contents for Telstra 13950
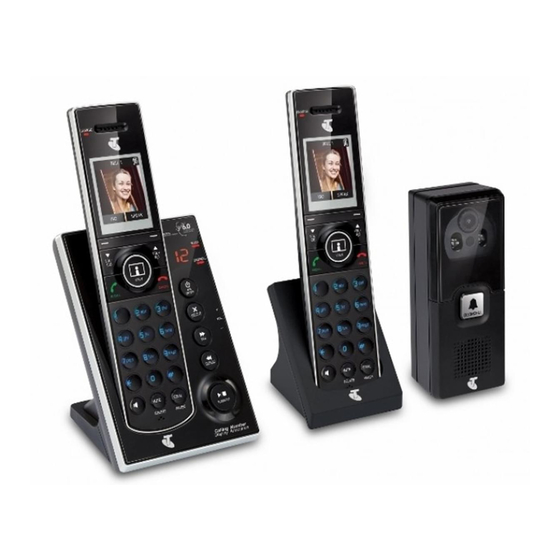
- Page 1 TELSTRA 13950 DECT6.0 CORDLESS PHONE WITH VIDEO DOORBELL USER GUIDE This telephone has been designed for ease of use. Please read the instructions and keep it handy for future reference. If you have any problems with your phone, refer to the Help section of this User...
- Page 2 Answering machine, with up to 15 minutes digital recording time and helpful voice prompts. * IMPORTANT You need to subscribe to Telstra’s Calling Number Display service to be able to see the caller’s number or name when called, or in the Calls List. See page 58 for more details.
- Page 3 • 2 AA Alkaline batteries • Telephone plug • 1 User guide If you have purchased Telstra 13950 Multi-handset pack, you will also have the following for each additional handset: • Telstra 13950 cordless handset • Battery compartment cover •...
-
Page 4: Table Of Contents
IN THIS GUIDE Important safety instructions Getting started Location Setting up Installation options Re-chargeable battery low warning Re-chargeable battery performance Date and time Getting to know your phone Telephone base buttons Handset buttons Doorbell buttons Handset and telephone base display Navigating the menus Handset menu layout Keystroke table... - Page 5 Delete a captured photo Delete all captured photos Night vision Using the phone Make, predial, answer or end a call Handset speakerphone Volume control Mute Temporary ringer silencing Chain dialing PAGE handset Redial Equalizer Transfer a call Join a call in progress Intercom Answer an incoming call during an intercom call Call transfer using intercom...
- Page 6 Set date and time Calling Number Display Voice announce Clear voicemail indicators Rename base/handset Key tone LCD brightness Dim mode Wallpaper Telstra network services* Calling Number Display Memory match Call list display screen message Missed call indicator Review the call list...
- Page 7 Dial a call list entry Save a call list entry to the phonebook Delete call list entries Flashing message indicator (FMI) Telstra home messages 101 or messageBank Call waiting 3-Way chat Answering machine Announcement Record your own announcement Play your announcement...
- Page 8 Remote access Help General information Replacing the handset battery Safety Cleaning Environmental How many telephones can you have? Customer service & Product warranty...
-
Page 9: Important Safety Instructions
The use of other battery types or non rechargeable batteries/primary mobile batteries can be dangerous. These may cause interference and/or unit damage. Telstra will not be held liable for damage arising from such noncompliance. Use only the AC power adaptors supplied with this product. Please contact... - Page 10 Please ensure that the battery is inserted according to the correct polarity as indicated on the re-chargeable battery and the internal markings inside the handset battery compartment. Do not immerse the battery in water, and do not place them in a ire. Telephone receivers produce magnetic ields that can attract small metallic objects such as pins or staples.
-
Page 11: Getting Started
GETTING STARTED LOCATION Place your Telstra 13950 within 2 metres of the mains power socket and telephone socket so that the cables will reach. Make sure it is at least 1 metre away from other electrical appliances to avoid interference. Your Telstra 13950 works by sending radio signals between the base, handset and doorbell. - Page 12 Mains power Telephone wall socket wall jack Telephone base Telephone If you have DSL high-speed power adapter line cord Internet service, a DSL ilter (not included) is required. Power cord jack Telephone line jack Insert one end of the telephone line cord into the base station and the other end of the telephone line cord into a telephone wall jack.
- Page 13 Handset battery installation Insert the battery connector securely Place the battery with the label into the socket, matching the IMPORTANT facing up and orientation of the engraved label. the wires inside the battery compartment. Align the cover lat against the battery compartment, then slide it towards the center of the handset until it clicks into place.
- Page 14 Charger installation Plug the power cable into the charger base. Mains power wall socket Plug the other end into the a mains power wall socket. Place the handset in the handset charger to charge. Note: Ensure power cord is fed through slot on base so unit sits lush with the desk.
- Page 15 Doorbell battery installation Remove the wall mount cover at the back. Install two AA batteries into the battery compartment, matching the polarity markings (+ and -) inside the battery compartment.
- Page 16 Locating the doorbell Before mounting the doorbell on a wall, make sure you test if the location you install the doorbell is in range, and adjust the camera angle to best suit your needs. To test the location for installation: Hold the doorbell in the location where you want to install the doorbell, then follow the steps below to test the reception range and video capture angle.
- Page 17 When inding a desirable location for the doorbell: • Make sure the visitor is standing a reasonable distance away from the doorbell. Avoid mounting it on a location which is subjected to vibration or shock. • • Avoid mounting it on an enclosed area where it may cause echoes. •...
- Page 18 To adjust the shooting area, you may either relocate the doorbell to a different height level, or adjust the camera angle (see below). To adjust the camera angle: Tilt the lever to adjust the angle of the camera lens. The camera lens can be •...
- Page 19 The diagrams below demonstrate an example of doorbell camera position to view a visitor about 50 centimetres from the camera. The camera in this example is set in default angle (0 degree). You may move the lever at the back of the doorbell to adjust the shooting area (the camera lens).
-
Page 20: Doorbell Installation
Side view Shooting area centi- metres degrees centi- metres 110 centi- metres You may install the doorbell on the left or right side. The diagram below demonstrates an example of doorbell camera position to view a visitor about 50 centimetres from the camera. - Page 21 Doorbell installation Make sure to test the reception and the doorbell position before you mount the doorbell on the wall. See Locating the doorbell on pages 16-20 to choose a desirable position for the doorbell. Use a pencil to mark two holes on the desired location. Then remove the wall mount and drill two holes in the wall.
- Page 22 If you drill the holes into a stud, go to step 3. -OR- If you drill the holes into an object other than a stud, insert the wall anchors into the holes and tap gently on the ends with a hammer until the wall anchors are lush with the wall.
- Page 23 4. Push the doorbell gently onto the wall mount until they are sealed tightly. This doorbell meets the IPX4 waterproof standard. Make sure the doorbell is tightly sealed with its wall mount cover in order to maintain its waterproof ability. 5.
- Page 24 Detach doorbell from wall mount cover After an extended exposure to cold, heat or humidity, the doorbell gasket rubber may become sticky. If you need to remove the doorbell from its wall mount cover in case of battery replacement or doorbell relocation, follow the steps below. Insert a lat-bladed screwdriver Remove the screw at the bottom.
-
Page 25: Installation Options
INSTALLATION OPTIONS Your telephone base is ready for tabletop use. If you want to mount your telephone on a wall, follow the steps below to connect the telephone base with a standard dual-stud telephone wall mounting plate. You may need a professional to install the wall mounting plate. - Page 26 Route the telephone line cord through the rectangular hole on the wall mount bracket. Position the lower portion grooves on the telephone base to the lower portion tabs (marked B) on the wall mount bracket. Make sure the upper portion grooves of the telephone base are above the upper portion tabs (marked A) on the wall mount bracket.
- Page 27 Plug the large end of the power adaptor into a mains power wall socket. Bundle the telephone line cord and power adapter cord neatly with twist ties.
- Page 28 Wall mount to tabletop installation To change the telephone base from the wall mount position to tabletop position, follow the steps below. If the telephone line cord and power adapter cord are bundled, untie them irst. Slide the wall mount bracket up and remove it from the wall plate. Unplug the telephone line cord (or DSL ilter) from the wall socket.
-
Page 29: Re-Chargeable Battery Low Warning
Check for a dial tone by pressing . If you hear a dial tone, the installation is successful. WARNING Do not place your Telstra 13950 in the bathroom or other humid areas. IMPORTANT The base station must be plugged into the mains power socket at all times. Do not connect the telephone line until the handset is fully charged. -
Page 30: Date And Time
ADSL ilter may cause problems with this product and your Broadband service. DATE AND TIME If you have subscribed to Telstra’s Calling Number Display service, the date and time are set automatically with each incoming call. The date and time is recorded with each answering machine message you receive. If you have not subscribed to Telstra’s Calling Number Display Service you can set the... -
Page 31: Getting To Know Your Phone
GETTING TO kNOW YOUR PHONE TELEPHONE BASE BUTTONS Calling Number Display Announce MESSAGE WINDOW • Shows the number of messages, and other information of the answering machine or telephone base. /PAGE • Press to page all system handsets. - Page 32 IN USE LIGHT • Flashes quickly when there is an incoming call. • Flashes when another telephone sharing the same line is in use. • On when the telephone line is in use. DOORBELL LIGHT • On when a doorbell is in a video streaming session. •...
-
Page 33: Handset Buttons
HANDSET BUTTONS CHARGE LIGHT • On when the handset is charging in the telephone base or charger. - Page 34 /VOL-/CALLS • Press to scroll down while in a menu, or in the phonebook, call list or redial list. • Press to review the call list when the phone is not in use. • While entering names or numbers, press to move the cursor to the left. •...
- Page 35 Press to enter numbers or characters/*/#. • Press any key to answer an incoming call. ® • key in idle mode: Press and hold to access Telstra Home Message 101 ® MessageBank • Press to switch between upper case and lower case while entering characters.
-
Page 36: Doorbell Buttons
DOORBELL BUTTONS CAMERA LENS INFRARED LEDs • Backup light for night vision. DOORBELL LIGHT • Flashes when /DOORBELL is pressed. /DOORBELL • Press to send a chime to the telephone base and capture a photo. -
Page 37: Handset And Telephone Base Display
HANDSET AND TELEPHONE BASE DISPLAY Display icons Description: Icons can be on (visible), or Flashing or Off (not visible) Battery is low; place handset in charger to recharge. Full battery power level. 2/3 battery power level. 1/3 battery power level. High level of video signal reception strength. -
Page 38: Navigating The Menus
NAVIGATING THE MENUS Your Telstra 13950 has an easy to use menu system. Each menu has a list of options, as outlined on the following page. To enter the main menu of the handset Press MENU in idle mode to enter the main menu. -
Page 39: Handset Menu Layout
HANDSET MENU LAYOUT Play msgs AnsweringSys Phonebook Caller ID log Photo log Announcement Review Review Doorbell Delete all old Add contact Del all calls Delete all Record memo Speed dial Answer ON/OFF Ans sys setup Intercom Ringers Chime Date & Time Setttings HANDSET Ringer... -
Page 40: Keystroke Table
kEYSTROkE TABLE Dialing Characters by number of key presses & Space Note: When entering a name in the phonebook, the irst letter of each word is automatically capitalized. -
Page 41: Using The Doorbell
USING THE DOORBELL MAkE AND ANSWER A CHIME To make a chime at the doorbell: /DOORBELL. Press To answer a chime on a handset: Press SPEAK. START A VIDEO STREAMING SESSION Press /VIEW on a handset when /DOORBELL is pressed and you hear a chime, Options while video streaming: Press the lashing SPEAK to talk to the visitor. -
Page 42: Answer An Incoming Call During Video Streaming
ANSWER AN INCOMING CALL DURING VIDEO STREAMING • Press on the handset to answer the outside call. The video streaming session ends automatically. • Press to end the video streaming session without answering the outside call. The video streaming session ends and the telephone continues to ring. VIEW CAPTURED PHOTOS The telephone stores up to 100 photos captured by the doorbell. -
Page 43: Using The Phone
USING THE PHONE MAkE, PREDIAL, ANSWER OR END A CALL To make a call: Press or . When you hear a dial tone, dial the number. To predial a call: Enter the telephone number. Press to dial. To answer a call: Press or any dialing key. -
Page 44: Temporary Ringer Silencing
TEMPORARY RINGER SILENCING When the telephone is ringing, you can temporarily silence the ringer of the handset or the telephone base without disconnecting the call. The next call rings normally at the preset volume. To silence the ringer temporary on a handset: Press , MUTE or SILENCE on the handset. -
Page 45: Page Handset
PAGE HANDSET This feature helps you ind misplaced handset(s). To start the paging tone: Press /PAGE on the telephone base. All idle handsets ring and their screens display ** Paging ** . To stop the paging tone: Press /PAGE on the telephone base. -OR- Press , or any dialing key on a handset, or return the handset to the... -
Page 46: Transfer A Call
TRANSfER A CALL While on an outside call, you can transfer the call from one system device to another. This feature is only applicable to models with more than one handset. During a call, press OPTION. to scroll to Transfer, then press SELECT. Press •... -
Page 47: Answer An Incoming Call During An Intercom Call
Your handset displays Calling HANDSET X, or Calling all handsets if you choose All handsets. The destination handset displays Other handset is calling or HANDSET X is calling. The destination device rings. To answer the intercom call, press , or any dialing key on the destination handset. - Page 48 From this intercom call, you have the following options: You can let the destination handset join you on the outside call in a three- • way conversation. Press OPTION. Press to scroll to Share call on your handset, then press SELECT. You can transfer the call.
-
Page 49: Phonebook
PHONEBOOk The phonebook stores up to 50 entries with up to 30 digits for each phone number and 15 characters for each name, which are shared by all devices. ADD A PHONEBOOk ENTRY Press MENU when idle. to scroll to Phonebook, then press SELECT. Press Press to scroll to Add contact, then SELECT. -
Page 50: Dial A Phonebook Entry
DIAL A PHONEBOOk ENTRY Search for the desired entry in the phonebook (see Review phonebook entries or Alphabetical search on page 49). To dial the displayed entry on the handset, press or . EDIT A PHONEBOOk ENTRY Search for the desired entry in the phonebook (see Review phonebook entries or Alphabetical search on page 49). -
Page 51: Speed Dial
SPEED DIAL The telephone system has nine speed dial locations (2-9, 0), where you can store the telephone numbers you wish to dial more quickly. You must set the speed dial numbers to the corresponding locations before using them. The speed dial entries are shared by all devices. Changes made to the speed dial entries on one handset apply to all devices. -
Page 52: Delete A Speed Dial Entry
DELETE A SPEED DIAL ENTRY Press MENU when idle. when idle. . to scroll to Phonebook, press SELECT. Press Press to scroll to Speed dial, press SELECT. Press to scroll to the desired speed dial location. the desired speed dial location. Press DELETE, then YES to conirm. -
Page 53: Phone Settings
PHONE SETTINGS USING THE MENU You can use the menu of a handset to change the telephone settings. Press MENU when idle. Press until the screen displays the desired feature menu. Press SELECT to enter that menu. • To return to the previous menu, press •... -
Page 54: Chime Volume
CHIME VOLUME Press MENU when idle. when idle. . to scroll to Chime, press SELECT. Press Press SELECT to select select Chime volume. to select Local handset or Base, then press SELECT. Press Press to sample each volume level, or press , or press OFF to turn off the chime. -
Page 55: Set Date And Time
SET DATE AND TIME The answering machine announces the date and time of each message prior to playing it. Before using the answering machine, set the date and time as follows. If you subscribe to a Calling Number Display service, the day, month and time are set automatically with each incoming call. -
Page 56: Rename Base/Handset
Press MENU when idle. to scroll to Settings, then press SELECT. Press to scroll to Clr voicemail, then press SELECT. Press Press YES to conirm. RENAME BASE/HANDSET You can create a name for each system handset and the telephone base. Press MENU when idle. -
Page 57: Dim Mode
Press to sample each brightness level. Press SET to save. DIM MODE You can set the handset backlight in dim mode or completely off when idle. Press MENU when idle. Press to scroll to Settings, then press SELECT. to scroll to Dim mode, then press SELECT. Press to select On or Off, then press SET to save. -
Page 58: Telstra Network Services
CALLING NUMBER DISPLAY If you have subscribed to Telstra’s Calling Number Display service, you will be able to see your caller’s number on your handset display (provided it is not blocked) prior to answering the call. If your caller’s name is stored in the phonebook and a number match is found, you will see the caller’s name on the display instead. -
Page 59: Memory Match
Missed calls are marked with XX Missed calls. Each time you review a call list entry marked with NEW, the number of missed calls decreases by one. When you have reviewed all the missed calls, the missed calls indicator no longer shows. You can review, redial, and copy an entry into the phonebook. -
Page 60: Missed Call Indicator
IMPORTANT To use Telstra’s Calling Number Display you must irst subscribe to the service from Telstra. For more information on Telstra Network Services call Telstra on 13 22 00. To ensure the caller’s name is displayed, make sure you have stored the telephone number in the phonebook. -
Page 61: Delete Call List Entries
Press YES to conirm. fLASHING MESSAGE INDICATOR (fMI) The Telstra 13950 is designed to provide visual indication when a new message is left in your Telstra Home Messages 101 ® or MessageBank ® service. To arrange connection of the Flashing Message Indicator service, simply call Telstra on 13 22 00. -
Page 62: Telstra Home Messages 101 Or Messagebank
TELSTRA HOME MESSAGES 101 OR MESSAGEBANk You can get messages from your Telstra ixed home phone when you are away from the phone, busy on another call or using the Internet. Callers will hear a standard greeting inviting them to leave a message. -
Page 63: 3-Way Chat
3-WAY CHAT This service is available on most lines ready for you to use. If you are already on a call, you can add another person and then have a 3-Way Chat. To put existing call on hold and make a new call then to 3-Way Chat Press on the handset you are currently using. -
Page 64: Answering Machine
ANSWERING MACHINE The answering machine can record and store up to 99 messages. Each message can be up to 3 minutes in length depending on the message length set (see Message recording time on page 67). The total storage capacity for the outgoing message, messages and memos is 15 minutes. -
Page 65: Play Your Announcement
PLAY YOUR ANNOUNCEMENT Press MENU when idle. to scroll to AnsweringSys, then press SELECT. Press Press SELECT again to select Announcement. Press PLAY to play the current announcement. DELETE YOUR ANNOUNCEMENT Press MENU when idle. to scroll to AnsweringSys, then press SELECT. Press Press SELECT again to select Announcement. -
Page 66: Call Screening
CALL SCREENING Use this feature to choose whether incoming messages can be heard over the handset or the telephone base while they are being recorded. To set call screening on/off: Press MENU when idle. Press to scroll to AnsweringSys, then press SELECT. to scroll to Ans sys setup, then press SELECT. -
Page 67: Message Alert Tone
To set remote access code: Press MENU when idle. to scroll to AnsweringSys, then press SELECT. Press to scroll to Ans sys setup, then press SELECT. Press to scroll to Remote code, then press SELECT. Press Enter a two-digit number, then press SAVE. MESSAGE ALERT TONE When the message alert tone is set to on, and there is at least one new message, the telephone base beeps every 10 seconds. -
Page 68: Answering Machine And Voicemail
ANSWERING MACHINE AND VOICEMAIL Your telephone has separate indicators for two different types of voice messages: those left on its built-in digital answering machine and those left with your telephone service provider’s voicemail (fees may apply). Your telephone’s built-in digital answering machine messages and voicemail messages are separate. Each alerts you to new messages differently. -
Page 69: Message Capacity
Set your answering machine to answer calls at least two rings earlier than your voicemail is set to answer. For example, if your voicemail answers after six rings, set your answering machine to answer after four rings. Some voicemail providers may program the delay before answering calls in seconds instead of rings. -
Page 70: Call Intercept
Press +VOL to temporarily turn on the call screening if it is set to off. • /PLAY/STOP to temporarily turn on or off the call screening. • Press To screen a call at a handset: If the answering machine is on and recording a message, press SCREEN to screen the call on your handset and the screen displays the caller ID information. -
Page 71: Delete All Old Messages
Options during playback: Press +VOL or VOL- to adjust the message playback volume. • /SKIP to skip to the next message. • Press /REPEAT to repeat the message. Press /REPEAT twice to listen to • Press the previous message. Press X/DELETE to delete the playing message. •... -
Page 72: Record, Play And Delete Memos
To delete all old messages with the telephone base: Press X/DELETE twice when idle. To delete all old messages with a handset: Press MENU when idle. to scroll to AnsweringSys, then press SELECT. Press to scroll to Delete all old, then press SELECT. Press Press YES to conirm. - Page 73 Command Function Play all messages. Play new messages. Delete the current message (during playback). Delete all old messages. Repeat the current message (during playback). Stop. Hear a list of remote commands. Skip to the next message (during playback). Record a new announcement. End the call.
-
Page 74: Help
HELP My telephone doesn’t work at all. • Make sure the power cord is securely plugged in. • Make sure you plug the battery connector securely into the cordless handset. Make sure you plug the telephone line cord securely and irmly into the •... - Page 75 I cannot dial out. • Try all the suggestions above. • Make sure you have a dial tone before dialing. The cordless handset may take a second or two to ind the telephone base and produce a dial tone. This is normal.
- Page 76 • Move the cordless handset closer to the telephone base. You may have moved out of range. • Reset the telephone base. Unplug the electrical power. Wait for 15 seconds then plug it back in. Allow up to one minute for the cordless handset and telephone base to reset.
- Page 77 Make sure the chime volume of your handset is not set to off. Refer to Chime • volume on page 54 in this user’s manual. • If there is an incoming call when the doorbell is pressed, the handset will not respond to the chime.
- Page 78 I get noise, static, or weak signals even when I’m near the telephone base. • If you subscribe to high-speed Internet service (DSL - digital subscriber line) through your telephone line, you must install a DSL ilter between the telephone line cord and the telephone wall jack. The ilter prevents noise and Calling Number Display problems as a result of DSL interference.
- Page 79 The telephone does not ring when there is an incoming call. • Make sure that the ringer is not off. • Make sure you plug in the telephone line cord securely into the telephone base and the telephone jack. Make sure you plug in the power cord securely. •...
- Page 80 • Do not install this phone near a microwave oven or on the same electrical outlet. You may experience decreased performance while the microwave oven is operating. • If you plug your phone in with a modem or surge protector, plug the phone (or modem/surge protector) into a different location.
- Page 81 • If you subscribe to high-speed Internet service (DSL - digital subscriber line) through your telephone line, you must install a DSL ilter between the telephone line cord and the telephone wall jack. The ilter prevents noise and Calling Number Display problems resulting from DSL interference. Contact your DSL service provider for more information about DSL ilters.
- Page 82 • In some cases, the answering machine is affected by the ringing system used by your telephone service provider. • If you subscribe to voicemail service, change the number of rings so that your answering machine answers before your voicemail answers. To determine how many rings activate your voicemail, contact your telephone service provider.
- Page 83 The answering machine announces “Time and day not set.” • You need to reset the system clock. The outgoing announcement is not clear. • When you record your announcement, make sure you speak in a normal tone of voice, about 20 centimeters from the handset or telephone base. •...
- Page 84 TecHelp line 1300 369 193 Call TecHelp: if you are having dificulties using your Telstra 13950. • • if you need a replacement battery or mains power lead.
-
Page 85: General Information
GENERAL INfORMATION REPLACING THE HANDSET BATTERY After a time, you may ind that the handset battery is running out of charge more quickly. This is a standard sign of wear and the battery will need replacing. Replacement rechargeable Nickel Metal Hydride (NiMH) batteries can be purchased from TecHelp line on 1300 369 193 your local electrical retailer. -
Page 86: Cleaning
Please note Telstra accepts no responsibility for damage caused to your Telstra 13950 handset by using any other type of battery. Never dispose of batteries in a ire. There is a serious risk of explosion and/or • the release of highly toxic chemicals. -
Page 87: How Many Telephones Can You Have
Your Telstra 13950 has a REN of 1.0. A total REN of 3 is allowed, if the total REN of 3 is exceeded, the telephone may not ring. With different telephone... -
Page 88: Customer Service & Product Warranty
If you are trying to access a Telstra Network Service and require assistance speciically related to the network service or would like to subscribe to the service, contact Telstra on 13 22 00 for residential or 13 20 00 for business. Voluntary Product Warranty... - Page 89 To make a claim under this Voluntary Product Warranty you must call the TecHelp Information Line on 1300 369 193 or contact VTech by e-mail at: tcpsupport_au@vtech.com where a Customer Service Representative will inform you of the product return process. You will need to ensure that: You provide proof of purchase;...
- Page 90 This Voluntary Product Warranty is given by: VTech Telecommunications (Australia) Pty Ltd ABN 70 136 672 627 Address: 24 Gilby Road, Mount Waverley 3149 IMPORTANT NOTE: THIS IS NOT A PRODUCT RETURN OR SERVICE ADDRESS – PLEASE CONTACT TECHELP BY PHONE OR EMAIL FOR PRODUCT AND WARRANTY SUPPORT.
- Page 91 FOR MORE INFORMATION CALL: TECHELP ON 1300 369 193 OR Version A EMAIL: TCPSUPPORT_AU@VTECH.COM 91-007323-010-100...
Need help?
Do you have a question about the 13950 and is the answer not in the manual?
Questions and answers