Table of Contents
Advertisement
Quick Links
Advertisement
Chapters
Table of Contents

Related Manuals for Siemens Gigaset C590 IP


Summary of Contents for Siemens Gigaset C590 IP
-
Page 2: Gigaset C590 Ip - Your Perfect Companion
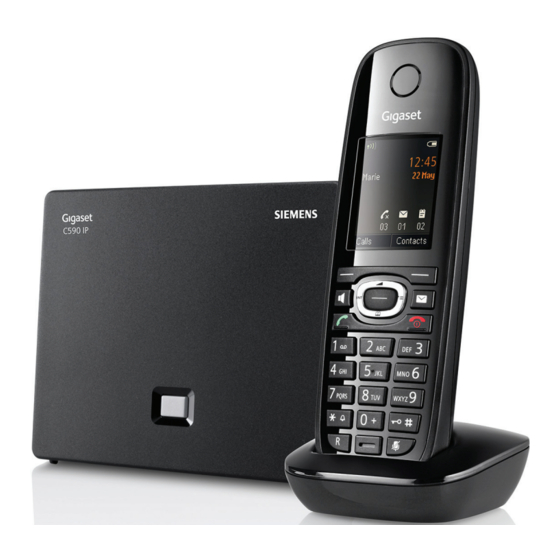
Gigaset C590 IP – your perfect companion Gigaset C590 IP – your perfect companion ... with impressive internal qualities. Go crazy for the vibrant 3.5" TFT display and first-class sound quality. Your Gigaset can do a lot more than just make calls: Ethernet port Connect your Gigaset to the Internet and your PC via Ethernet. - Page 3 Gigaset C590 IP – your perfect companion For more information about your phone, visit www.gigaset.com/gigasetC590ip or www.gigaset.com/gigasetC595ip. After purchasing your Gigaset phone, please register it at www.gigaset.com/service – this will ensure any questions you may have or warranty services you request are dealt with even faster!
-
Page 4: Handset At A Glance
Handset at a glance Handset at a glance ¢ 1 Display in idle status 2 Battery charge status ¢ page 37) ¢ 3 Display keys page 41) 4 Message key page 69) Access to call and message lists; Flashing: new message or new call 5 End call key, On/Off key End a call;... -
Page 5: Display Icons
Display icons Display icons The following icons are displayed dependent on the settings and the operating status of your telephone: ¢ Signal strength i page 121) ¢ or Eco Mode+ icon ¼ page 121) ¢ Ringtone switched off page 142) ¢... -
Page 6: The Base At A Glance
The base at a glance The base at a glance Base key 1 Paging key Lights up: LAN connection active (phone is connected to router) Flashes: Data transfer to LAN connection Press briefly: start paging, display IP address on handset Press and hold: set base to registration mode... -
Page 7: Table Of Contents
Contents Gigaset C590 IP – your perfect companion ......1 Handset at a glance ..........3 Display icons . - Page 8 Contents Using lists ............66 Redial list .
- Page 9 Contents Using a handset as a room monitor ......124 Connecting/using other handsets ....... 127 Registering handsets .
- Page 10 Contents Customer Service & Assistance ........183 Questions and answers .
-
Page 11: Safety Precautions
Safety precautions Safety precautions Warning Read the safety precautions and the user guide before use. Explain their content and the potential hazards associated with using the telephone to your children. Use only the power adapter supplied, as indicated on the underside of the base or charger. - Page 12 Safety precautions ƒ If you give your phone to a third party, make sure you also give them the user guide. Remove faulty bases from use or have them repaired by our Service team, as these could interfere with other wireless services. Please note Please note that only terminals that are operated in-house (inside buildings) may be con- nected to the analogue TAE connection.
-
Page 13: First Steps
First steps First steps Checking the package contents 1 Gigaset C590 IP base 2 One power cable for connecting the base to the mains power supply 3 One phone cable to connect the base to the analogue fixed line (TAE RJ11 6-pole;... - Page 14 First steps Firmware updates This user guide describes the functions of your phone from firmware version 020 onwards. Whenever there are new or improved functions for your Gigaset, firmware ¢ updates are made available for you to download to your base page 152).
-
Page 15: Setting Up The Handset For Use
First steps Setting up the handset for use The display is protected by a plastic film. Please remove the protective film! Inserting the batteries and closing the battery cover Warning ¢ Use only rechargeable batteries page 194) recommended by Gigaset Com- munications GmbH i.e., never use a conventional (non-rechargeable) battery, as this could result in significant health risks and personal injury. -
Page 16: Connecting The Charger
First steps Connecting the charger ¤ Connect the flat plug from the power adapter 1. ¤ Plug the power adapter into the plug socket 2. To disconnect the plug from the charger, press the release button and disconnect the plug 4. Placing the handset in the charger ¤... - Page 17 First steps Initial charging and discharging of the batteries The correct charge level can only be displayed if the batteries are first fully charged and discharged. ¤ Place the handset in the charger for ten hours. ¤ Then remove the handset from the charger and do not replace it until the batteries are fully discharged.
-
Page 18: Installing The Base
First steps Installing the base The base is designed for use in dry rooms in a temperature range of +5°C to +45°C. ¤ Set up the base at a central point in the building. Please note Pay attention to the range of the base. This is up to 300 m in unobstructed outdoor areas and up to 50 m inside buildings. -
Page 19: Connecting The Base
First steps Connecting the base The following diagram is an overview of all connections for your base. The individual connections are described in detail below. In order for you to make calls on your phone via the fixed line and VoIP, you need to connect the base to the fixed line and Internet (see diagram below). - Page 20 First steps 1. Connecting the phone and power cables to the base Back panel of the base 1 Insert the phone cable (TAE connection cable with RJ11 plug) into the lower connection socket at the rear of the base. 2 Insert the power cable of the power adapter into the upper connection socket at the rear of the base.
-
Page 21: Power Supply
First steps 2. Connecting the base to the fixed line and the mains power supply Back panel of the base 1 Insert the phone cable into the fixed line connection socket. 2 Then insert the power adapter into the mains socket. Warning Keep the power cable plugged in at all times for operation, as the phone does not work without a mains connection. - Page 22 First steps 3. Connecting the base with a router (Internet) Data protection notice When the device is connected to the router, it automatically contacts the Gigaset support server to make it easier for you to configure the devices and to enable communication with the Internet services.
- Page 23 First steps Back panel of the base 1 Insert a plug from the Ethernet cable supplied (Cat 5 with 2 RJ45 Western mod- ular plugs) into the LAN connection socket at the side of the base. 2 Then insert the second Ethernet cable plug into a LAN socket on the router. As soon as the cable connecting the phone and router is plugged in and the router is switched on, the key lights up on the front of the base (paging key).
-
Page 24: Setting Up The Phone - Installation Wizard
First steps Setting up the phone – installation wizard Auto configuration: The configuration process for VoIP connections is automated for some VoIP pro- viders. The provider creates a configuration file with all required VoIP access data (the general VoIP provider data and your personal account data). This file is placed on a configuration server on the Internet for downloading to your phone. - Page 25 First steps 1. IP wizard: making VoIP settings You will see the following display: IP Wizard Start IP installation wizard? Before you can use the Internet (VoIP) to phone any other numbers on the Internet, the fixed line or the mobile network, you need the services of a VoIP provider who supports the VoIP SIP standard.
- Page 26 First steps Starting the IP wizard Prerequisite: the phone is connected to the router. Your router is connected to the ¢ Internet page 21). ¤ Press on the centre of the control key w or on the right display key §Yes§...
- Page 27 First steps You will see the following display: IP Wizard Do you have a code for auto configuration? Your VoIP provider has supplied you You have received an auto configura- with an authentication name/pass- tion code (activation code) from your word and, where applicable, a user VoIP provider: ¤...
- Page 28 First steps No Internet connection: The phone requires an Internet connection for you to register your telephone with a VoIP provider. If a connection cannot be made, one of the following mes- sages is displayed: If the phone cannot establish a connection to the router, the message IP address not available is displayed.
- Page 29 First steps Entering the auto configuration code IP Wizard Activation code for ¤ Using the keypad, enter the auto autoconfiguration: configuration code you received from the provider (max. 32 charac- ters). < C ¤ §OK§ Press the key below on the display screen.
- Page 30 First steps Downloading VoIP provider data The connection wizard establishes a connection with the Gigaset configuration server on the Internet. Various profiles with general access data for different VoIP providers can be downloaded here. After a brief period you will see the following display: Select your country A list of countries is loaded.
- Page 31 First steps You have not been able to download your provider's data If your VoIP provider does not appear in the list, i.e., its general data is not pro- vided for download, you must cancel the IP wizard: ¤ Briefly press the end call key repeatedly until End wizard? appears in §Yes§...
- Page 32 First steps Entering user data for your VoIP account You are now prompted to enter your personal access data for your VoIP account. The following are provider-dependent: User ID, Password, User name Please note ..when entering access data, it is case sensitive. To switch between upper and lower case and digits, press the # key (several times if necessary).
- Page 33 First steps IP Wizard ¤ User name: Using the keypad, enter the user name that you received from your VoIP provider. < C ¤ §OK§ Press the key under on the display screen. IP Wizard Û Once you have made all the necessary Registering with entries, the IP wizard will try to register provider...
- Page 34 First steps 2. Connection wizard The connection wizard enables you to assign previously configured connections ¢ (fixed line connection, Gigaset.net and VoIP connections, page 56 ¢ page 24) to internal parties as receive and, if applicable, as send connections. Internal parties are the registered handsets. Receive connections are the phone numbers (connections) on which you can be called.
- Page 35 First steps The list of receive connections cur- rently assigned is displayed. Rec. Connections Press down on the control key s to Ð scroll through the list if necessary. INT1 receives calls for Fixed Line: 4560123 IP1: 12345602 Gigaset.net: 12345#9 ¤...
- Page 36 First steps ¤ Press down on the control key s to switch to the next connection. INT 1 Select either Yes or No as described IP1: above. ¤ Repeat the steps for each connec- tion. Receive calls for Gigaset.net: < Yes >...
- Page 37 First steps If the handset is to make calls via a dif- ferent connection/phone number: INT 1 ¤ Press right on the control key v Connection for repeatedly, until the required con- nection is displayed (in the exam- outgoing calls: ple, IP1).
-
Page 38: Date/Time
First steps Displays Reception between the base and the handset: – Good to poor: Ð i Ñ Ò 07:15 – No reception: ¼ (red) INT 1 14 Oct Green: Eco Mode activated Charge status of the batteries: – y y { { (empty to full) –... -
Page 39: Attaching The Belt Clip (Optional)
First steps Attaching the belt clip (optional) The handset has notches on each side to attach the belt clip. ¤ To attach – press the belt clip onto the back of the handset so that the protrusions on the belt clip engage with the notches. -
Page 40: External Call
First steps Proceeding Now you have successfully set up your phone, you will certainly want to adapt it to your personal requirements. Use the following guide to quickly locate the most important subjects. If you are unfamiliar with menu-driven devices such as other Gigaset telephones, ¢... -
Page 41: Using The Phone
Using the phone Using the phone Control key Below, the side of the control key that you must press in the respective operating situation is marked in black (top, bot- tom, right, left, centre) e.g., v for "press right on the control key"... -
Page 42: Display Keys
Using the phone Display keys The functions of the display keys change depending on the particular operating sit- uation. Example: Current display key functions Back Save Display keys Some important display keys: Options Open a menu for further functions. Confirm selection. Û... -
Page 43: Menu Guidance
Using the phone Menu guidance You can access your telephone's functions by using a menu that has a number of levels. • The menu view can be extended (expert mode ) or restricted (standard mode). Expert mode is the active default setting. •... -
Page 44: Activating/Deactivating The Handset
Using the phone Reverting to idle status You can revert to idle status from anywhere in the menu as follows: ¤ Press and hold the end call key a. ¤ Do not press any key: After 2 minutes the display will automatically revert to idle status. -
Page 45: Understanding The Operating Steps In The User Guide
Using the phone Understanding the operating steps in the user guide The operating steps are shown in abbreviated form. Example: The display: Ï ¢ ¢ ¢ Eco Mode Eco Mode+ (³ = on) means: ¤ Press right on the control key v to open the main menu. - Page 46 Using the phone Eco Mode Press down on the control key s ¤ ³ Eco Mode ´ until the Eco Mode+ menu option Eco Mode+ is highlighted. Back Change ¤ §Change§ Press the display key activate/deactivate the function. Eco Mode The change is effective immediately ³...
-
Page 47: Menu Tree
Menu tree Menu tree Setting standard or expert mode The menu view can be extended (expert mode •) or restricted (standard mode). Menu options that are only available in expert mode are marked with the • icon. To change these settings: Ï... - Page 48 Menu tree Ì Voice Mail ¢ Play Messages Net AM: Fixed Line page 118 Net AM: IP1 Net AM: IP2 Net AM: IP6 ¢ Network Mailboxes Net AM: Fixed Line page 118 Net AM: IP1 Net AM: IP2 Net AM: IP6 ¢...
- Page 49 Menu tree Ï Settings ¢ Date/Time page 144 ¢ Audio Settings Handset Volume page 140 ¢ • Advisory Tones page 143 ¢ Ringtones(Handset) Volume page 141 Melodies Anon. Calls Silent ¢ Music on hold page 145 ¢ Display Screensaver page 137 Info Ticker Large Font Colour Schemes...
- Page 50 Menu tree ¢ • System Reset Handset page 153 ¢ Base Reset page 153 Base Restart ¢ Repeater Mode page 153 ¢ Local Network page 146 ¢ Update Firmware page 152 ¢ System PIN page 144 Menu View Simplified Complete ¢...
-
Page 51: Making Calls
Making calls Making calls ¢ If the display backlight is deactivated page 139), it can be reactivated by press- ing any key. Please note You can make up to two external calls at the same time via your base, depend- ing on the quality of your DSL connection. - Page 52 Making calls Please note If a dialling plan has been defined for the dialled phone number ¢ page 174), then the connection specified in the dialling plan will be used to establish the connection instead of the send connection. If the phone number is blocked by a dialling plan, it will not be dialled. Not possible is displayed.
- Page 53 Making calls Calling an IP address (provider-dependent) You can also dial an IP address instead of a phone number using VoIP. ¤ Press the star key * to separate the sections of the IP address (e.g., 149*246*122*28). ¤ If necessary, press the hash # key to attach the SIP port number of the person you are calling to the IP address (e.g., 149*246*122*28#5060).
-
Page 54: Ending A Call
Making calls Ending a call Press the end call key. Accepting a call An incoming call is indicated in three ways: By ringing, by a display on the screen and by the flashing speaker key d. Please note Only calls to the receive connections assigned to the handset are signalled ¢... -
Page 55: Calling Line Identification
Making calls Calling Line Identification When you receive a call, the caller's number is displayed on the screen if the follow- ing prerequisites are met: Your network provider supports CLIP, CLI. – CLI (Calling Line Identification): the caller's number is transmitted. –... -
Page 56: Notes On Calling Line Display (Clip)
Making calls Notes on calling line display (CLIP) By default, the number of the caller is shown in the display of your Gigaset tele- phone. You do not have to make any other settings on your Gigaset telephone. However, if the caller's number is not displayed, this can be due to the following: You have not requested CLIP from your provider Your telephone is connected via a PABX or a router with an integrated PABX... -
Page 57: Voip Telephony Via Gigaset.net
Making calls VoIP telephony via Gigaset.net You can use Gigaset.net to make free phone calls via the Internet directly to other Gigaset.net users without having to set up an account with a VoIP provider or make any further settings. You simply have to connect your phone to the power supply and the Internet connection and, if necessary, enter yourself in the Gigaset.net ¢... -
Page 58: Gigaset Hdsp - Telephony With Brilliant Sound Quality
Making calls Please note If you do not use your Gigaset.net connection for six months, it is automatically disabled. You cannot be reached for calls from Gigaset.net. The connection is reactivated as soon as you: Start a search in the Gigaset.net directory Make a call via Gigaset.net (dial a number with #9 at the end) Activate the connection via the Web configurator Gigaset HDSP –... -
Page 59: Activating/Deactivating Speaker Mode
Making calls Activating/deactivating speaker mode In speaker mode, instead of holding the handset to your ear you can put it down, for example on the table in front of you. For example, this allows others to partici- pate in the call. Activating speaker mode while dialling Enter the number and press the speaker key. -
Page 60: Making Calls Using Network Services
Making calls using network services Making calls using network services Network services are functions that your network provider makes available to you. Please note: Some settings cannot be made simultaneously on multiple handsets. If this is the case, you will hear a negative acknowledge tone. Some network services may only be used if you have requested them from your fixed line provider (there may be an extra charge). - Page 61 Making calls using network services General call divert (CD) A distinction is made between Diverting calls internally and Diverting calls to an external phone number Call divert to an external connection With call divert the call is diverted to another external connection. Your call divert settings can be specific to a particular connection i.e., for every connection (fixed line number and VoIP connection) that is assigned to the handset as a receive con- nection.
- Page 62 Making calls using network services Diverting calls internally You can divert all external calls intended for a receive connection on the handset to a different handset. ¢ ¢ Ç Select Services Call Divert §OK§ Internal Select and press ¤ You can enter data in the following fields: Activation Activate/deactivate call divert.
- Page 63 Making calls using network services Activating/deactivating call waiting for external calls If the function is activated, during an external call you will hear a call waiting tone to signal that another external caller is trying to get through. If you have CLIP, the number of the waiting caller or the corresponding directory entry is shown in the display.
-
Page 64: Configuring Settings For The Next Call
Making calls using network services Configuring settings for the next call Activating "anonymous calling" for the next call You can withhold your phone number for the next call (CLIR = Calling Line Identifi- cation Restriction). The setting applies to all the phone's connections. In idle status: ¢... - Page 65 Making calls using network services Consultation calls (external) You can call a second external caller. The first call is placed on hold. During an external call: §Ext. Call§ Press the display key. The previous call is placed on hold. The caller hears an announcement or music on hold.
- Page 66 Making calls using network services Conference You can speak to two participants simultaneously. Prerequisite: you are conducting an external call and have called a second partici- pant (consultation call) or have accepted a waiting call. ¤ §Conf.§ Press the display key You and the other two callers (both marked by the æ...
-
Page 67: Using Lists
Using lists Using lists The options are: Redial list Incoming message list E-mail list Call lists Redial list The redial list contains the 20 numbers last dialled (max. 32 digits). If one of the numbers is in the directory, the corresponding name will be displayed. Manual redial Press the key briefly to open the redial list. -
Page 68: Incoming Message List
Using lists Incoming message list ¢ All received SMS messages are saved in the incoming message list page 95). Call lists ¢ Prerequisite: Calling Line Identification Presentation (CLIP, page Your base saves a range of call types: Accepted calls Outgoing calls Missed calls You can view each type of call separately or gain an overview of all calls. - Page 69 Using lists Date and time of call (if set). Type of entry: › – Accepted calls ( ™ – Missed calls ( š – Outgoing calls ( In the missed calls list: The number of missed calls from this number in the form [3] ([1] = "A missed call"...
-
Page 70: Opening Lists With The Message Key
Using lists Opening lists with the message key Use the message key f to open the following lists: Network mailbox, if your network provider supports this function and quick dial ¢ is set for the network mailbox page 119). ¢ Incoming message list page 95) Missed calls list... -
Page 71: Missed Alarms List
Using lists Missed alarms list ¢ Missed anniversaries page 77) are displayed in the Missed Alarms list if: You do not accept an anniversary. The anniversary was signalled during a phone call. The handset is deactivated at the time of the anniversary. ¢... -
Page 72: Using Directories
Using directories Using directories The options are: ¢ (Local) directory page 71) ¢ Public online directory and Yellow Pages page 78) ¢ Gigaset.net directory page 84) Private net directory Local handset directory You can save a total of 150 entries in the directory. You can create a personalised directory for your own individual handset. - Page 73 Using directories Saving number(s) in the directory – new entry ¢ <New Entry> ¤ You can enter data in the following fields: First Name: / Surname: Enter first names and/or surnames. If you do not enter a name in either of the fields, the first phone number saved in the entry is saved and displayed in place of a surname.
-
Page 74: Dialling With The Directory
Using directories Order of directory entries Directory entries are generally sorted alphabetically by surname. Spaces and digits take first priority. If only the first name was entered in the directory, this is incorpo- rated into the sort order instead of the surname. The sort order is as follows: 1 Space 2 Digits (0–9) -
Page 75: Managing Directory Entries
Using directories Managing directory entries Viewing entries ¢ s (Select entry) / w Press the display key or the middle of the control key. The entry will be §View§ displayed. Scroll through the entry if necessary. Using other functions Prerequisite: the directory was opened while the handset was in idle status. §Options§... - Page 76 Using directories Delete List Delete all entries in the directory. Copy All ¢ to Internal: Send the complete list to a handset page 75). Available Memory Display the number of entries that are still available in the directory. Exchanging directory/entries with other handsets You can send entries from the local directory or the complete local directory to handsets as well as receive directory entries from the handsets.
- Page 77 Using directories Adding a displayed number to the directory You can add numbers to the directory: From a list e.g., the call list, incoming SMS message list or the redial list From the text of an SMS From a public online directory or the Yellow Pages From your private net directory When dialling a number A number is displayed:...
- Page 78 Using directories ¤ You can enter data in the following fields: Annivers. (Date) Enter day/month/year in 8-digit format. Anniversary (time) Enter the hour/minute for the reminder call in 4-digit format. Anniversary (tone) Select the reminder type. §Save§ Press the display key. Please note A time must be specified for reminder calls.
-
Page 79: Using Online Directories
Using directories Using online directories You can use public online directories (online directories and classified directories e.g., "Yellow Pages") depending on your provider. You can configure the online directories you wish to use via the Web configurator. Exclusion of liability Gigaset Communications GmbH assumes no guarantee or liability for the availa- bility of this service. - Page 80 Using directories You must make an entry in Surname or Category/Name: and in City or in Number. Searching by number is only possible if supported by the online directory you have selected. For instructions on entering text see page 197. A list of the towns/cities found is displayed if the search returns more than one result: Select the town/city.
- Page 81 Using directories Search result (hit list) The search result is shown as a list on the display. Example: Online Directory 1/50 Sand, Marie Elisabe ... 0049123456789 Parkstraße 11 Berlin 12345 View Options 1. 1/50: Consecutive number/total number of hits (only the consecutive number is dis- played if the total number of hits >99).
- Page 82 Using directories Calling subscribers Prerequisite: a hit list is displayed. ¤ Select the entry and press the talk key c. If the entry only contains one phone number, this is the one that is dialled. A list of numbers appears if there is more than one number. ¤...
-
Page 83: Using The Private Net Directory
Using directories Using the private net directory Some providers offer users the option of creating and managing a private net direc- tory on the Internet. The advantage of an online directory is that you can call up entries from any tele- phone or PC, e.g., from your VoIP phone in the office or your PC at a hotel. - Page 84 Using directories Using other functions §Options§ Press the display key. You can select the following functions with q: Edit nickname §Save§ You can edit or delete the nickname in an entry. Press to save the change. Copy to Directory ¢ Copy an entry to the local directory page 76).
-
Page 85: Using The Gigaset.net Directory
Using directories Using the Gigaset.net directory The handset is in idle status. Press and hold. This opens the list of online directories. Gigaset.net §OK§ Select and press The Gigaset.net directory opens. Please note Calls to the Gigaset.net directory are always free of charge. You can also open the Gigaset.net directory by dialling 1188#9 (phone number of the Gigaset.net directory) and pressing the talk key c. - Page 86 Using directories Data protection notice If you enter a nickname at this point, it is stored on a central Gigaset server. The nickname appears in the Gigaset.net directory, and other subscribers that use the Gigaset.net service can call you using this nickname. By entering your data, you agree to having your data saved.
- Page 87 Using directories ¤ §New§ Press the display key to start a new search. ¤ §Change§ Press the display key to change the search criteria. The name you previ- ously entered in the search field is used as search criterion. You can then expand or edit as required.
- Page 88 Using directories Please note If you select a Gigaset.net number from the local directory, the connection is automatically established via Gigaset.net (Internet). Entering, editing and deleting own entry You have the following options: Edit the name of your entry in the Gigaset.net directory. Delete your entry from the Gigaset.net directory.
- Page 89 Using directories Please note If you delete the name, your entry is deleted from the directory. You are no longer "visible" to other Gigaset.net subscribers. However, you can still be reached via your Gigaset.net number. For instructions on displaying the ¢...
-
Page 90: Making Cost-Effective Calls
Making cost-effective calls Making cost-effective calls Make phone calls through a network provider who offers particularly low-cost call rates (call-by-call; fixed line only). Using the Internet (VoIP) is the preferred cost-effective way of making calls. Defining dialling plans You can also use your phone's cost control function for calls to fixed line or mobile networks. -
Page 91: Displaying The Call Duration
Making cost-effective calls Displaying the call duration The duration of each call appears in the display for all external calls During the conversation Until approximately 3 seconds after replacing the receiver. Please note The actual duration of the call can vary from that shown by a few seconds. -
Page 92: Sending Sms (Text Messages)
Sending SMS (text messages) Sending SMS (text messages) You can use your telephone to send and receive SMS messages via the fixed line and VoIP. You must specify the line via which SMS are sent. You can receive SMS messages (abbreviation: SMS) via all of your phone's connections except for Gigaset.net. - Page 93 Sending SMS (text messages) Sending an SMS §Options§ Press the display key. §OK§ Send Select and press §OK§ Select and press Select number with area code (even if you are in that area) from the directory or enter directly. For sending SMS messages to an SMS mail- box: add the mailbox ID to the end of the number.
- Page 94 Sending SMS (text messages) Draft list You can save an SMS in the draft list and edit and send it later. Saving an SMS in the draft list ¤ ¢ You are writing an SMS page 91). §Options§ Press the display key. §OK§...
- Page 95 Sending SMS (text messages) Deleting the draft list ¤ Open the draft list and then: §Options§ Open menu. Delete List §OK§ §Yes§ Select, press and confirm with . The list is deleted. Sending SMS messages to an e-mail address If your service provider supports the SMS as e-mail feature, you can also send your SMS messages to e-mail addresses.
-
Page 96: Receiving An Sms
Sending SMS (text messages) Receiving an SMS All received SMS messages are saved in the incoming list. Linked SMS messages are displayed as one message. If this is too long or is not transferred completely, it is split into individual messages. Since an SMS remains in the list even after it has been read, regularly delete SMS messages from the list. - Page 97 Sending SMS (text messages) Opening the incoming list via the SMS menu Ë ¢ ¢ ¢ Messaging Incoming Deleting the incoming list All new and old SMS messages in the list are deleted. ¤ Open the incoming list. §Options§ Open menu. Delete List §OK§...
- Page 98 Sending SMS (text messages) Copying the number to the directory Copying the sender's number ¤ ¢ Open the incoming list and select the SMS page 95). ¢ §Options§ Copy to Directory ¤ ¢ Complete the entry page 72). Please note An attached mailbox identifier is added to the directory.
-
Page 99: Sms With Vcard
Sending SMS (text messages) SMS with vCard The vCard is an electronic business card. It is indicated by the Å icon in the body of the SMS. A vCard can include: Name Private number Business number Mobile number Birthday Individual entries in a vCard can be saved to the directory one after the other. Opening the vCard ¤... -
Page 100: Receiving Notifications Via Sms
Sending SMS (text messages) Receiving notifications via SMS You can be notified via SMS about missed calls. Prerequisite: the caller's number (CLI) must have been transmitted in the missed call. Notification is sent to your mobile phone or another phone with SMS functionality. You only need to save the telephone number to which you wish the notification to be sent. -
Page 101: Setting The Sms Service Centre/Defining The Send Line
Sending SMS (text messages) Setting the SMS service centre/defining the send line SMS messages are exchanged between SMS service centres operated by service providers. You must enter the SMS service centre through which you wish to send and receive SMS messages into your phone. You can receive SMS messages from every SMS service centre that is entered, provided you have registered with your service provider. -
Page 102: Activating/Deactivating First Ringtone Muting
Sending SMS (text messages) Sending an SMS via another SMS service centre ¤ Select Service Centr. 2, 3 or 4 and activate it as the send service centre (set Active Send = Yes). Service Centr. 1 is automatically deactivated as the send service centre for the next SMS. -
Page 103: Troubleshooting Sms Problems
Sending SMS (text messages) Troubleshooting SMS problems Error codes when sending E0 Calling Line Identification permanently restricted (CLIR) or Calling Line Identification not activated. FE Error occurred during SMS transfer. FD Connection to SMS service centre failed; see self-help. Self-help with errors The following table lists problem situations and possible causes and provides advice on troubleshooting. -
Page 104: E-Mail Notifications
E-mail notifications E-mail notifications Your phone will notify you when new e-mail messages have been received on your POP3 server. You can set your phone to periodically connect to your POP3 server and check whether you have new messages. Any new e-mail messages that have been received are displayed on the handset: you will hear an advisory tone, the message key f will flash and the Ë... -
Page 105: Opening The Incoming E-Mail List
E-mail notifications Opening the incoming e-mail list Prerequisites: You have set up an e-mail account with an ISP. The incoming e-mail server uses the POP3 protocol. The name of the POP3 server and your personal access data (account name, password) are stored in the phone. ¢... - Page 106 E-mail notifications Please note Many e-mail providers activate spam protection measures by default. E-mail messages classified as spam are stored in a separate folder and are therefore not shown in the incoming mail list. Some e-mail providers allow you to deactivate spam protection or show spam e-mails in the incoming mail list.
-
Page 107: Viewing The Message Header And Text Of An E-Mail
E-mail notifications Viewing the message header and text of an e-mail ¢ Prerequisite: you have opened the incoming mail list page 104). Select an e-mail entry. §Read§ Press the display key. The subject of the e-mail (maximum of 120 characters) and the first few characters of the text are displayed. -
Page 108: Viewing E-Mail Sender's Address
E-mail notifications Viewing e-mail sender's address ¢ Prerequisite: you have opened the e-mail notification to read it page 106). ¢ §Options§ From §OK§ Select and press The sender's e-mail address is displayed, over several lines if necessary (maximum 60 lines). §Back§... -
Page 109: Info Center - Continuous Internet Access From Your Phone
Info Center – continuous Internet access from your phone Info Center – continuous Internet access from your phone Data protection notice The information services enable you to use a Gigaset telephone to call up selected information, such as weather forecasts. The inventory data corresponds to that of the VoIP service. -
Page 110: Customising Info Services
Info Center – continuous Internet access from your phone Customising info services You can change the default setting for the Info Center (standard profile) and add new services. Visit the Gigaset.net page www.gigaset.net on the Internet and com- pile your personal info services. ¤... - Page 111 Info Center – continuous Internet access from your phone Customising info services For some info services you can customise the information that you want from your Gigaset phone yourself. ¤ Click the icon that belongs to an info service (e.g., weather). This will open another Web page where you can customise the RSS feeds.
- Page 112 Info Center – continuous Internet access from your phone Configuring your own applications/info services In addition to the info services provided by Gigaset.net Service, you can also enter up to ten extra info services (applications, apps). You can enter URLs for info serv- ices from different providers or develop your own applications.
-
Page 113: Starting The Info Center, Selecting Info Services
Info Center – continuous Internet access from your phone Starting the Info Center, selecting info services ¢ ¢ É Additional Features Info Center Your Info Center menu i.e., a list of available info services is displayed. You can nav- igate between the info services. §OK§... -
Page 114: Login For Personalised Info Services
Info Center – continuous Internet access from your phone Login for personalised info services If a special login process with user name and password is required to access an info service, the following is displayed after the service has been called up: Authent. -
Page 115: Operating The Info Center
Info Center – continuous Internet access from your phone Operating the Info Center Depending on the type of info service requested, you can perform the following operations: Scrolling within an info service ¤ You can use s to scroll downwards within an info service, and t to scroll up (back). -
Page 116: Entering Text
Info Center – continuous Internet access from your phone §Call§ Depending on the provider, if you press The number is dialled directly The number appears first in the display, in which case you must first confirm the number before it is dialled. ¤... -
Page 117: Accessing Info Services Using Quick Dial
Info Center – continuous Internet access from your phone Accessing info services using quick dial Each info service that is provided via Gigaset.net is assigned a quick dial that you can use to access the service. The table below contains examples. Info service Quick dial News... -
Page 118: Displaying Information From The Internet As A Screensaver
Info Center – continuous Internet access from your phone Displaying information from the Internet as a screensaver You can configure your handset to display one of the info services from the Info Center (e.g., weather reports, newsfeeds) in the device's idle display. ¢... -
Page 119: Using The Network Mailbox
Using the network mailbox Using the network mailbox Some providers offer answering machines on the network – network mailboxes. Each network mailbox accepts incoming calls made via the corresponding line (fixed line or corresponding VoIP phone number). To record all calls, you should therefore set up network mailboxes for both the fixed line and for each of your VoIP connections. -
Page 120: Configuring A Network Mailbox For Quick Dial
Using the network mailbox Configuring a network mailbox for quick dial You can use quick dial to make direct calls to a network mailbox. Assigning key 1, changing assignment Quick dial settings are device-specific. You can assign a different network mailbox to key on each registered handset. - Page 121 Using the network mailbox Displaying new messages in the handset's idle display If a new message is present on one of the network mailboxes that is assigned to the handset via its receive connection, or on the local answering machine, the symbol Ã...
-
Page 122: Eco Dect
ECO DECT ECO DECT You are helping to protect the environment with your Gigaset. Reduced energy consumption Your telephone has a power-saving adapter plug and uses less power. Reducing radiation The radiation from your telephone is reduced automatically: the closer the hand- set is to the base, the lower the radiation. - Page 123 ECO DECT Status displays Display icon Reception strength: Ð i Ñ Ò – Good to poor ¼ – No reception Ð white Eco Mode deactivated Ð green Eco Mode enabled ¼ white Eco Mode+ enabled (displays instead of the reception strength icon when in idle status) ¼...
-
Page 124: Setting The Alarm Clock
Setting the alarm clock Setting the alarm clock Prerequisite: the date and time have already been set. Activating/deactivating the alarm clock and setting the wake-up time É ¢ ¢ Alarm Clock ¤ You can enter data in the following fields: Activation: Select On or Off. -
Page 125: Using A Handset As A Room Monitor
Using a handset as a room monitor Using a handset as a room monitor If the room monitor is activated, the phone number saved in the system is called as soon as a set noise level is reached. You can save an internal or external number in your handset as the destination number. - Page 126 Using a handset as a room monitor Activating the room monitor and entering the destination number É ¢ ¢ Additional Features Room Monitor ¤ You can enter data in the following fields: Activation: Select On to activate. Alarm to: Select Internal or External. ö...
- Page 127 Using a handset as a room monitor Deactivating the room monitor remotely Prerequisites: The telephone must support tone dialling The room monitor call is diverted to an external destination number. If room monitor is activated via a VoIP connection, the DTMF signalling must be ¢...
-
Page 128: Connecting/Using Other Handsets
You can register up to six handsets to your base. A Gigaset C59H handset can be registered on up to four bases. Manually registering Gigaset C59H to Gigaset C590 IP You must register the handset manually on both the handset (1) and the base (2). -
Page 129: De-Registering Handsets
Connecting/using other handsets Please note All base connections are assigned to a handset as receive connections as soon as registration is complete. The fixed line connection is assigned to the handset as a send connection. ¢ You can change the assignment page 150. -
Page 130: Searching For A Handset, Finding The Phone's Ip Address ("Paging")
Connecting/using other handsets Searching for a handset, finding the phone's IP address ("Paging") You can locate your handset using the base. ¤ ¢ Briefly press the register/paging key on the base ( page All handsets will ring at the same time ("paging"), even if the ringtones are switched off. -
Page 131: Changing The Base
Connecting/using other handsets Changing the base If your handset is registered to more than one base, you can set it to a particular base or to the base that has the best reception (Best Base). Ï ¢ ¢ ¢ Registration Select Base §Select§... - Page 132 Connecting/using other handsets Transferring a call to another handset You can transfer (connect) an external call to another handset. You are conducting an external call: Open the list of handsets. ¢ The external party hears music on hold, if activated page 145).
- Page 133 Connecting/using other handsets External call waiting during an internal call If you receive an external call during an internal call, you will hear the call waiting tone (short tone). The caller's number appears in the display if Calling Line Identifi- cation is enabled.
-
Page 134: Changing The Name Of An Internal Party
Connecting/using other handsets Changing the name of an internal party The names "INT 1", "INT 2" etc. are assigned automatically on registration. You can change these names. The name must be no more than 10 characters. The changed name is displayed in every handset's list. Open the list of handsets. -
Page 135: Setting The Handset
Setting the handset Setting the handset Your handset comes with default settings, but you can change the settings to suit your individual requirements. Accessing functions and numbers quickly You can assign one number from the directory to each of the digit keys Q and 2 to O. - Page 136 Setting the handset Changing number key assignments Prerequisite: the digit key already has a number assigned to it. When the handset is in idle status ¤ Briefly press the digit key ¤ §Change§ Press the display key . The directory is opened. Either: ¤...
- Page 137 Setting the handset More Functions... More features are available: Send Connection Assign an alternative send connection to a key. ¤ Select a connection as a (further) send connection for the handset from the §OK§ list of connections and press Press this display key if the alternative send connection should be used (tempo- rarily) for the subsequent call (instead of the send connection for the handset).
-
Page 138: Changing The Display Language
Setting the handset Changing the display language You can view the display texts in different languages. Ï ¢ ¢ Language The current language is indicated by a Ø. §Select§ Select a language and press If you accidentally choose a language you do not understand: Ï... - Page 139 Setting the handset Selection: Select screensaver or §View§ Press the display key. The active screensaver is displayed. §OK§ Select screensaver and press §Save§ Press the display key. The screensaver is activated approx. 10 seconds after the display has changed to idle status.
-
Page 140: Activating/Deactivating Auto Answer
Setting the handset • Setting the display backlight Depending on whether or not the handset is in the charger, you can activate or deactivate the lighting. If it is activated, the display is permanently dimmed. If the display backlight is deactivated, you can reactivate it by pressing any key. The key has no further function in this situation. -
Page 141: Changing The Speaker/Earpiece Volume
Setting the handset Changing the speaker/earpiece volume You can set the volume for speaker mode and earpiece mode to five different levels. In idle status: Open Handset Volume menu. Set the earpiece volume. Scroll to the Speaker: line. Set the speaker volume. §Save§... -
Page 142: Changing Ringtones
Setting the handset Changing ringtones Setting the volume You can choose between five volumes (1–5; e.g., volume 3 = Š) and the "cre- scendo" ringtone (6; volume increases with each ring = ‡). In idle status: Ï ¢ ¢ ¢ ¢... - Page 143 Setting the handset Activating/deactivating the ringtone for anonymous calls You can set your handset not to ring if a caller withholds their number. The call will only be signalled on the display. In idle status: Ï ¢ ¢ ¢ ¢ Audio Settings Ringtones(Handset) Anon.
-
Page 144: Activating/Deactivating Advisory Tones
Setting the handset • Activating/deactivating advisory tones Your handset uses advisory tones to tell you about different activities and statuses. You can activate/deactivate the following advisory tones independently of each other: Key tone: every key press is confirmed. Confirmation tones: –... -
Page 145: Configuring The System Settings
Configuring the system settings Configuring the system settings You can make the following settings via the menu on the relevant handset or on a registered Gigaset SL78H, SL400H, S79H handset or via the Web configurator on the phone. Setting the date and time manually To ensure you have the correct time for incoming calls and to use the alarm clock, the date and time must be set. -
Page 146: Your Own Area Code Setting
Configuring the system settings • Your own area code setting Your area code (international and local area code) must be saved on the phone before you can transfer phone numbers (e.g., in vCards). Some of these numbers are already preset. ¢... -
Page 147: Setting The Base's Ip Address In Lan
Configuring the system settings Setting the base's IP address in LAN ¢ Prerequisite: your base is connected to a router or a PC page 21). An IP address is required in order for the LAN to "recognise" your phone. The IP address can be assigned to the phone automatically (by the router) or man- ually. - Page 148 Configuring the system settings DNS Server Enter the IP address for the preferred DNS server. The DNS server (Domain Name ¢ System, page 199) converts the symbolic name of a server (DNS name) into the public IP address for the server when the connection is made. You can specify your router's IP address here.
-
Page 149: Configuring Voip Connections
Configuring the system settings Configuring VoIP connections Please note If auto configuration is used to download the VoIP data to your phone (pro- ¢ vider-specific, page 23), the VoIP wizard is not available. In this case you can- not change the VoIP settings manually. You can configure up to six VoIP connections on your telephone, i.e., you can assign up to six VoIP phone numbers to your phone. - Page 150 Configuring the system settings Automatic update for the VoIP provider settings After the first download of the VoIP provider settings, your phone will check daily whether a newer version of the file for your VoIP provider is available from the Inter- net on the configuration server.
-
Page 151: Assigning Send And Receive Connections To Internal Parties
Configuring the system settings Assigning send and receive connections to internal parties If you have several connections configured for your telephone system, you can do the following for each internal party: Assign a send connection or allow the internal party to select the line for each external call (select line). - Page 152 Configuring the system settings Assigning receive connections Prerequisite: several connections are configured for your phone. ¢ Ï Settings ¢ ¢ Telephony Rec. Connections A list of internal parties is displayed (handsets). Select the internal parties that should be assigned new receive connec- §OK§...
-
Page 153: Updating The Phone Firmware
Configuring the system settings Updating the phone firmware Prerequisite: the phone is connected to the Internet (i.e., connected to a router, ¢ page 21). If necessary, you can update your phone's firmware. The firmware update is downloaded directly from the Internet by default. The rele- vant Web page is preconfigured in your phone. -
Page 154: Repeater Support
Configuring the system settings • Repeater support You can increase the range and signal strength of your phone using a repeater. To do this you need to activate repeater mode. This will terminate any calls that are in progress at the time. Prerequisite: Eco mode(+) is deactivated. -
Page 155: Restarting The Base
Configuring the system settings The following lists are deleted: SMS lists Call lists ¢ Ï ¢ ¢ System Base Reset §OK§ Enter the system PIN and press §Yes§ Press the display key. After the reset, the base is restarted. The restart takes around ten seconds. ¢... -
Page 156: Connecting The Phone To A Pabx
Connecting the phone to a PABX Connecting the phone to a PABX The following settings are only necessary if your PABX requires them; see the PABX user guide. Please note You cannot send or receive SMS messages on PABXs that do not support Calling Line Identification. -
Page 157: Saving An Access Code (Outside Line Code)
Connecting the phone to a PABX Saving an access code (outside line code) You can save two access codes: one for dialling via the fixed line and one for dialling via VoIP. Prerequisite: you must enter an access code for external calls using your PABX, e.g., "0". -
Page 158: Setting Pauses (Fixed Line)
Connecting the phone to a PABX Setting pauses (fixed line) Changing the pause after line seizure You can change the length of the pause that is inserted between pressing the talk key c and sending the number. Open the main menu. *#Q5# L Press keys in sequence. -
Page 159: Configuring The Phone Via The Web Configurator
Configuring the phone via the Web configurator Configuring the phone via the Web configurator The Web configurator for your Gigaset telephone enables you to make the settings for your phone conveniently on your PC. You can make settings that are also possible using your telephone handset using the web browser on your PC as an alternative, e.g., configure VoIP connec- tions, download firmware updates or start Eco Mode. -
Page 160: Connecting The Pc With The Telephone's Web Configurator
Configuring the phone via the Web configurator Connecting the PC with the telephone's Web configurator Prerequisites: A standard Web browser is installed on the PC e.g., Internet Explorer version 7.0 or higher, Firefox version 3.5 or higher or Apple Safari version 3.x. The phone and PC are directly connected with each other via a router. - Page 161 Configuring the phone via the Web configurator Establishing a connection via Gigaset config Prerequisite: your PC and phone are connected to the Internet. ¤ Launch the web browser on your PC. ¤ Enter the following URL into the Web browser's address field: http://www.gigaset-config.com ¤...
-
Page 162: Logging In To/Off The Web Configurator
Configuring the phone via the Web configurator Logging in to/off the Web configurator Prerequisite: your PC and phone are connected to the Internet. Logging in, setting the interface language Once you have successfully established the connection, the Login Web page is dis- played in the Web browser. -
Page 163: Logging Off
Configuring the phone via the Web configurator Please note If the system PIN is still set as 0000 on the phone (default setting), you will be notified during login that the device is not secure and you should change the PIN. You can deactivate this security notice for subsequent logins by selecting the option “Don’t show this security advice again.”. -
Page 164: Understanding The Structure Of The Web Configurator Pages
Configuring the phone via the Web configurator Understanding the structure of the Web configurator pages The Web configurator pages (Web pages) contain the UI elements shown in Figure 2 (example). Using the Menu bar working area (tabs) Help Navigation area Buttons Figure 2 Example of the structure of a Web configurator page Menu bar... - Page 165 Configuring the phone via the Web configurator Please note ¢ For an overview of the Web configurator menus, page 167. Using the navigation area ¢ The functions of the menu page 163) selected in the menu bar are listed in the navigation area. If you select a function, the associated page containing information and input fields opens in the working area.
- Page 166 Configuring the phone via the Web configurator Entering Cyrillic and Turkish characters In the following section, the specified maximum number of characters permitted in a field refers to Latin characters and digits (1 character = 1 byte), i.e., 1 character means 1 byte.
- Page 167 Configuring the phone via the Web configurator Help You will see a question mark at the top right of most Web pages. Click this question mark to open the Online Help for this Web page in a separate window. The Help pages are downloaded directly from the configuration server. Please note You may need to change your browser settings to display the Help pages cor- rectly.
-
Page 168: Web Configurator Menu
Configuring the phone via the Web configurator Web configurator menu Home ¢ Settings IP Configuration page 168 ¢ Telephony Connections page 169 ¢ Audio page 171 ¢ Number Assignment page 173 ¢ Call Forwarding page 176 ¢ Dialling Plans page 174 ¢... -
Page 169: Functions Of The Web Configurator
Configuring the phone via the Web configurator Functions of the Web configurator Connecting the base to the local network (LAN/router) You can find the functions for connecting to the LAN on the Web page: ¢ Settings IP Configuration In most cases, special settings are not required to connect the phone to the router/ a local network. -
Page 170: Connections
Configuring the phone via the Web configurator Managing base connections; activating/deactivating connections You can manage your base connections using the Web page: ¢ ¢ Settings Telephony Connections This Web page displays a list with all possible connections and your status (e.g., connected,registered): Fixed Line Connection You do not have to configure the fixed line connection. - Page 171 Configuring the phone via the Web configurator Configuring/deleting VoIP connections To configure and delete VoIP connections, open the Web page ¢ ¢ Settings Telephony Connections Click on the [Edit] button next to the list entry for the VoIP connection. This opens a Web page with the following areas: Auto Configuration Profile Download Personal Provider Data...
-
Page 172: Audio
Configuring the phone via the Web configurator Optimising voice quality for VoIP connections Functions to improve the voice quality on VoIP connections are available on the Web page: ¢ ¢ Settings Telephony Audio The voice quality for VoIP connections is mainly determined by the voice codec used for transferring the data and the available bandwidth of your DSL connection. -
Page 173: Security
Configuring the phone via the Web configurator Please note Observe the following for good voice quality: When making calls using VoIP, avoid performing other Internet activities (e.g., surfing the Internet). Please note that voice delays can occur depending on the codec used and the network capacity utilisation. -
Page 174: Number Assignment
Configuring the phone via the Web configurator Assigning send and receive connections For the number assignment, open the Web page: ¢ ¢ Settings Telephony Number Assignment Assign send and receive connections to the registered handsets. Please note: During registration, each handset is automatically assigned the fixed line con- nection as a send connection and all base connections as receive connections. -
Page 175: Dialling Plans
Configuring the phone via the Web configurator User-defined dialling plans – specifying rules for telephony You can define your own dialling plans in the Dialling Plans area on the Web page: ¢ ¢ Settings Telephony Dialling Plans You can specify the following dialling plans: You can define a connection (fixed line or a VoIP connection) for specific phone numbers that are always used to dial these phone numbers and therefore for billing. -
Page 176: Network Mailboxes
Configuring the phone via the Web configurator Emergency numbers If no emergency numbers are set by default, you should define dialling plans for emergency numbers yourself and assign them to a connection that you know sup- ports emergency calls. Local area codes – activating dialling plans for local calls using VoIP If you use VoIP to make a call to the fixed line, you may also have to dial the area code for local calls (depending on the provider). -
Page 177: Call Forwarding
Configuring the phone via the Web configurator Making special settings for VoIP telephony Activating call divert (call forwarding) for VoIP connections The settings for call divert (call forwarding) are on the Web page: ¢ ¢ Settings Telephony Call Forwarding You can divert calls to your VoIP connections and to your Gigaset.net number. You can divert calls to your VoIP connections to any external number (VoIP, fixed line or mobile number). - Page 178 Configuring the phone via the Web configurator Configuring call transfer via VoIP You make the settings for call transfer in the Call Transfer area on the Web page: ¢ ¢ Settings Telephony Advanced VoIP Settings You can connect an external call to one of your VoIP connections with a second external participant (depending on the provider).
-
Page 179: Date & Time
Configuring the phone via the Web configurator If several VoIP phones are operated on the same router with NAT, it makes sense to use randomly selected ports. The phones must then use different ports so that the router's NAT is only able to forward incoming calls and voice data to one (the intended) phone. - Page 180 Configuring the phone via the Web configurator Deleting handset directories and downloading to/from the PC The functions to edit the directories are on the Web page: ¢ Settings Phonebook Transfer The Web configurator has the following options for editing the directories of the registered handsets.
-
Page 181: Save & Restore
Configuring the phone via the Web configurator Understanding directory file content (vcf file) The following data (if available) is written into the vcf file for entry into the directory or transferred from a vcf file into the handset directory. Name First name Number Number (office) -
Page 182: Miscellaneous
Configuring the phone via the Web configurator Changing the base settings, registering handsets You can use the Web configurator to: Switch the base to registration mode to register more handsets to the base. This setting corresponds to pressing and holding the Registration/Paging key on the front of the base. - Page 183 Configuring the phone via the Web configurator Displaying the phone status The Status tab includes the following information about the phone: IP and MAC address for the base Version of the firmware currently loaded The version is shown in the following format: aabbbxxyyyzz. aa denotes the phone's product variant bbb is the version of the firmware and xx the sub-version (yyyzz are only signif- icant for the service).
-
Page 184: Customer Service & Assistance
Customer Service & Assistance Customer Service & Assistance Do you have any questions? As a Gigaset customer, you can find help quickly in this User Manual and in the service section of our Gigaset online portal www.gigaset.com/service. Please register your phone online right after purchase. This enables us to provide you with even better service regarding questions or a warranty claim. -
Page 185: Questions And Answers
Customer Service & Assistance Questions and answers If you have any queries about the use of your telephone, visit our website at www.gigaset.com/service for assistance 24/7. The table below also lists steps for troubleshooting. The display is blank. 1. The phone is not connected to the mains power supply. ¥... - Page 186 Customer Service & Assistance The other party cannot hear you. You have pressed the mute button h. The handset is "muted". ¥ ¢ Unmute the microphone page 58). The number of the caller is not displayed despite CLIP/CLI being activated. ¥...
-
Page 187: Information On Operating Gigaset Voip Telephones With
Customer Service & Assistance Information on operating Gigaset VoIP telephones with Network Address Translation (NAT) routers In general no special telephone or router configuration is required when operating a Gigaset VoIP phone with a NAT router. The configuration settings described in this section are only nec- essary if you encounter one of the following problems. - Page 188 Customer Service & Assistance To define port forwarding on the router, proceed as follows: The terms used in the following can vary from router to router. To forward a port, you must make the following specifications (example): Protocol Public port Local port Local host (IP) 49060...
-
Page 189: Voip Status Codes
Customer Service & Assistance VoIP status codes In the following tables you will find the meaning of the most important VoIP status codes and messages. Status Meaning code 0x31 IP configuration error: IP domain not entered. 0x33 IP configuration error: SIP user name (User ID) not entered. - Page 190 Customer Service & Assistance Status Meaning code 0x414 URI is too long. 0x415 Query format is not supported. 0x416 URI is faulty. 0x420 Incorrect ending 0x421 Incorrect ending 0x423 The requested service is not supported by the VoIP provider. 0x480 The dialled number is temporarily unavailable. 0x481 The recipient is not available.
- Page 191 Customer Service & Assistance Status Meaning code 0x503 The query cannot be processed by the receiving device or the proxy at present because the server is either overloaded or is being serviced. If it is possible for the query to be repeated in the foreseeable future, the server informs the caller or the phone of this.
-
Page 192: Checking Service Information
Customer Service & Assistance Checking service information If you contact Customer Services, you may need the base's service information. Prerequisite: you have assigned an outside line (try to establish an external call, make an exter- nal call). Please note §Options§ You may need to wait a few seconds before appears on the display ¢... -
Page 193: Authorisation
Customer Service & Assistance Authorisation This device is intended for analogue phone lines in your network. Voice over IP telephony is possible with an additional modem via the LAN interface. Country-specific requirements have been taken into consideration. We, Gigaset Communications GmbH, declare that this device meets the essential requirements and other relevant regulations laid down in Directive 1999/5/EC. -
Page 194: Environment
Environment Environment Our environmental mission statement We, Gigaset Communications GmbH, bear social responsibility and are actively committed to a better world. Our ideas, technologies and actions serve people, society and the environment. The aim of our global activity is to secure sustainable life resources for humanity. We are com- mitted to a responsibility for our products that comprises their entire life cycle. -
Page 195: Appendix
Appendix Appendix Care ¤ Wipe the base, charger and handset with a damp cloth (do not use solvents) or an antistatic cloth. ¤ Impairments in the high-gloss finish can be carefully removed using display polishes for mobile phones. Never use a dry cloth, this can cause static. Contact with liquid If the handset has come into contact with liquid: 1 Deactivate the handset and remove the battery immediately. - Page 196 Appendix Handset operating times/charging times The operating time of your Gigaset depends on the capacity and age of the batteries and the way it is used. (All times are maximum possible times). Capacity (mAh) approx. 1000 Standby time (hours)* 160/48 185/56 210/64 260/79...
- Page 197 Appendix General specifications Interfaces Analogue fixed line, Ethernet DECT standard Supported GAP standard Supported No. of channels 60 duplex channels Radio frequency range 1880–1900 MHz Duplex method Time multiplex, 10 ms frame length Repeat frequency of the transmission 100 Hz pulse Length of the transmission pulse 370 μs...
-
Page 198: Writing And Editing Text
Appendix Writing and editing text The following rules apply when writing text: Each key between Q and O is assigned several letters and characters. Control the cursor with u v t s. Press and hold u or v to move the cursor word by word. -
Page 199: Glossary
Glossary Glossary Call swapping Call swapping allows you to switch between two callers or between a conference and an individual caller without allowing the wait- ADSL ing caller to listen to the call. Asymmetric Digital Subscriber Line Call waiting Special form of DSL. Network provider feature. - Page 200 Glossary COLP / COLR DMZ (Demilitarised Zone) Connected Line Identification Presentation/ DMZ describes a part of a network that is Restriction outside the firewall. Feature provided by a VoIP/ISDN connection A DMZ is set up, as it were, between a net- for outgoing calls.
- Page 201 Glossary DTMF Dual Tone Multi-Frequency Firewall Another description for dual tone multi- You can use a firewall to protect your net- frequency dialling (DTMF). work against unauthorised external access. Dynamic IP address This involves combining various measures and technologies (hardware and/or soft- A dynamic IP address is assigned to a net- ware) to control the flow of data between a work component automatically via DHCP.
- Page 202 Glossary Gateway Connects two different Networks, e.g., a G.711 a law, G.711 μ law router as an Internet gateway. Standard for a Codec. For phone calls from VoIP to the telephone G.711 delivers a very good voice quality that network, a gateway has to be connected to corresponds to that in the ISDN network.
- Page 203 Glossary IP address A unique address for a network component IEEE within a network based on the TCP/IP proto- Institute of Electrical and Electronics Engineers cols (e.g., LAN, Internet). On the Internet, International body that defines standards in domain names are usually assigned instead electronics and electrical engineering, con- of IP addresses.
- Page 204 Glossary MAC address Media Access Control address Network Address Translation Hardware address by means of which Method for converting (private) each network device (e.g., network card, addresses to one or more (public) IP switch, phone) can be uniquely identified addresses. NAT enables the IP addresses of worldwide.
- Page 205 Glossary Proxy / Proxy server Computer program that controls the Paging (handset search) exchange of data between Client Base function for locating the registered Server in computer networks. If the phone handsets. The base establishes a connection sends a query to the VoIP server, the proxy to every registered handset.
- Page 206 Glossary Router Routes data packets within a network and between different networks via the quickest Random Access Memory route. Can connect Ethernet networks and Memory in which you have reading and stor- WLAN. Can be a Gateway to the Internet. age rights.
- Page 207 Glossary Subnet mask addresses consist of a fixed line number Server and a variable subscriber number. The net- Provides a service to other Network sub- work number is identical for all Network scribers (Clients). The term can indicate a subscribers. The size of the network number computer/PC or an application.
- Page 208 Glossary Voice codec User Datagram Protocol See Codec. Transport protocol. Unlike TCP, is a VoIP non session-based protocol. UDP does not Voice over Internet Protocol establish a fixed connection. The data pack- Telephone calls are no longer placed and ets ("datagrams") are sent as a broadcast. transmitted over the telephone network but The recipient is solely responsible for mak- over the...
-
Page 209: Accessories
Accessories Accessories Gigaset handsets Upgrade your Gigaset to a cordless PABX: Gigaset SL400 handset Genuine metal frame and keypad High-quality keypad illumination 1.8" TFT colour display Bluetooth® and mini USB Directory for up to 500 vCards Talk/standby time of up to 14 h/230 h Large font for call lists and directory Brilliant sound quality in speaker mode: 4 speaker settings... - Page 210 Accessories Gigaset C59H handset Social life management with room monitor and birthday reminders Individual programming of ringtones with 6 VIP groups High-quality keypad with illumination 1.8" TFT colour display Directory for up to 150 vCards Talk/standby time of up to 12 h/180 h, standard batteries Large font for call lists and directory Brilliant sound quality in speaker mode...
- Page 211 Accessories Gigaset E49H handset Resistant to shocks, dust and water splashes Hardy illuminated keypad Colour display Directory for 150 entries Talk/standby time of up to 12 h/250 h, standard batteries Brilliant sound quality in speaker mode Screensaver ECO DECT Alarm clock Room monitor SMS with up to 640 characters www.gigaset.com/gigasete49h...
-
Page 212: Mounting The Base On The Wall
Mounting the base on the wall Mounting the base on the wall Mounting the charger on the wall 21 mm Approx. 2.5 mm... -
Page 213: Battery Charging
Index Index restoring to default settings ......setting up ......system PIN . - Page 214 Index Changing destination number ..Data packets, fragmentation ....(room monitor) Deactivating ..... . dialling mode .
- Page 215 Index Directory file ..........
- Page 216 Index registering to different base ....restoring to default settings ......G.711 μ...
- Page 217 Index Internal ......conference ........
- Page 218 Index Menu view Number ......expert mode as destination for room monitor .
- Page 219 Index Preferred DNS server ........Private IP address .
- Page 220 Index SMS service centre Troubleshooting ..........changing number e-mail .
- Page 221 Index ....... . Warning tone, see Advisory tones Weather forecasts .
Need help?
Do you have a question about the Gigaset C590 IP and is the answer not in the manual?
Questions and answers