Table of Contents
Advertisement
Advertisement
Table of Contents

Related Manuals for Yamaha MT4X


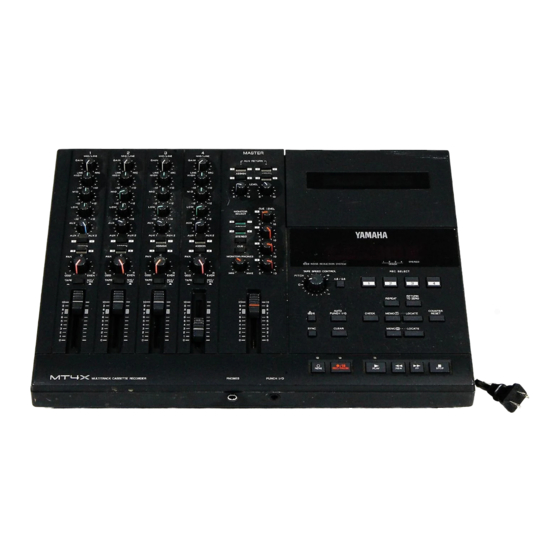
Summary of Contents for Yamaha MT4X
- Page 1 YAMAHA Multitrack Cassette Recorder User's Guide...
-
Page 2: Table Of Contents
1 Avoid excessive heat, humidity, dust, and vibration. To ensure consistent high performance and sound quality from Keep the MT4X away from locations where it is likely to be the MT4X, it is important to clean the heads and tape path exposed to high temperatures or humidity, such as direct regularly —... -
Page 3: Introduction
In order to make use of the many features of the MT4X and to obtain the best performance, please read this manual thoroughly — and keep it in a safe place for future reference. -
Page 4: Structure Of The Mt4X
Introduction Structure of the MT4X User's Guide... -
Page 5: Structure Of The Mt4X
Introduction Structure of the MT4X The MT4X can be divided into three basic sections - the mixer, the recorder, and the bus lines which connect them: Mixer The mixer has four input channels. It adjusts the input signals at each respective channel and sends them to the bus lines. -
Page 6: Controls And Connections
Controls and Connections 1 Controls and Connections Power Connections Rear Panel Connections Channel Modules Master Module Recorder Controls Front Panel Transport Controls Connections User's Guide... -
Page 7: Channel Modules
Controls and Connections Channel Modules GAIN control This rotary control adjusts the level of the signal from a microphone or instrument plugged into the MIC/LINE INPUT connector Equalizer controls These rotary controls are used to adjust the high, middle and low band frequency levels. To help you select the "flat"... - Page 8 PHONES connector on the front of the MT4X. GROUP: These keys select groups 1 and 3 and groups 2 and 4 respectively. If you select both keys, groups 1 and 3 will be sent to the left channel and groups 2 and 4 will be sent to the right channel.
-
Page 9: Recorder Controls
Multi- function display This FLD (Fluorescent Light Display) shows the operating modes and signal levels of the MT4X. See "Multi- function Display" on page 11. TAPE SPEED CONTROL These controls consist of a rotary PITCH control and a tape speed (4.8/9.5) select... - Page 10 REPEAT key This key is used to start and cancel the repeat function. When the repeat function is active, the MT4X will repeatedly playback a selection between two memory points set with the MEMO keys . See "Repeat Function" on page 42.
-
Page 11: Transport Controls
These keys locate to the stored memory points. When you press one of these keys, the MT4X will fast forward or rewind to the corresponding memory point. Note: The locate interval must be more than three counts on the tape counter... -
Page 12: Multi-Function Display
Tape speed indicator These indicators show the current tape speed selection, either 9.5 cm/sec or 4.8 cm/ sec. When the MT4X is first powered on, it defaults to 9.5 cm/sec. dbx indicator This indicator illuminates when the dbx™ noise reduction system is turned on. -
Page 13: Front Panel Connections
Controls and Connections REPEAT indicator This indicator illuminates while the repeat function is active. REC SELECT - TRACK indicators These indicators flash when you arm the corresponding trade by pressing one of the REC SELECT keys The armed indicators switch from flashing to illuminated when you press the REC/PAUSE key Front Panel Connections PHONES connector... -
Page 14: Power Connections
Note: Always make sure the Master fader is set to "0" and the MONITOR/ PHONES level control is set to "MIN" when turning the MT4X on or off. CAUTION (FOR CANADIAN MODEL) TO PREVENT ELECTRIC SHOCK/ MATCH WIDE BLADE OF PLUG TO WIDE SLOT, FULLY INSERT. -
Page 15: Example System
Example System Example System User's Guide... -
Page 16: Recording Functions
Mixdown master tape. Monitoring The MT4X offers you a great deal of flexibility in monitoring the status of your recordings. You can monitor the individual channel groups, the stereo bus, the cue bus, or any combination. You control monitoring with the MONITOR SELECT keys The GROUP keys allow you to monitor the group bus signals. -
Page 17: Initial Recording
The first step in multitrack recording is to record the initial tracks. Usually these are your rhythm tracks: bassguitar, rhythm guitar, and drums. Note: Before you record anything, you must connect the MT4X to both an input source and a monitoring system. See "Example System" on page 14. - Page 18 Recording Functions Using the ASSIGN keys and the PAN control select the group bus you want the input signal to go to. Press the and rotate the The input signal is sent to the first ASSIGN key: PAN control: (odd) group. and rotate the Press the The input signal is sent to the second...
- Page 19 Record the track Press the PLAY key The indicator above the key lights and the MT4X starts the tape. Start playing. Tip: If your song starts with drums, bassguitar, and guitars all on the first bar, you will need to record a count-in.
-
Page 20: Overdubbing
Note: Connecting an instrument with a high output impedance such as an electric guitar or bassguitar to the MT4X may increase noise and distortion. If this happens, connect a direct box or effect unit between the instrument and the MT4X to reduce the impedance. - Page 21 Press the PLAY key. The indicator above the key lights and the MT4X starts the tape. Play the part again Note: To prevent wow and flutter effects, do not accidentally adjust the PITCH control while you are recording.
-
Page 22: Punch-In/Out Recording
You play your part while punching in and out to start and stop the recorder. For the greatest precision, you should use the advanced automatic punch-in/out features of the MT4X. However, it is reasonably easy to punch-in manually. If you have a footswitch, you can also punch in and out using your foot. - Page 23 Recording Functions The REC SELECT - TRACK indicator on the display will flash. Note: You can skip step 2 at this point. However, you must select a track before you perform the actual recording. Set the working points: Post-roll is 10 counts on the tape counter at 9.5 cm/sec (5 counts at 4.8 cm/sec).
- Page 24 Recording Functions The AUTO PUNCH and START indicators on the display and the indicator above the REHE key will begin flashing. Note: The AUTO PUNCH indicator will either be flashing or illuminated while the automatic punch-in/out function is active. Press the PLAY key (or step on the footswitch) to play the tape. The START indicator will light and the IN indicator will begin flashing.
- Page 25 Recording Functions Rehearsal The MT4X automatically enters rehearsal mode after you have assigned the punch-in and punch-out points. This mode allows you to practice the punch-in/out operation before you actually commit anything to tape. Note: In this mode, you can press the REPEAT key to start Repeat Rehearsal.
- Page 26 Check the recording 11) Press the PLAY key again to play back the tape. The MT4X will automatically play from the pre-roll point to the post-roll point. If the resulting recording is good, press the AUTO PUNCH I/O key to cancel the automatic punch-in/out function.
- Page 27 Recording Functions Status indicators During the operation of the automatic punch-in/out function, you can determine the status by checking the indicators shown in the following table: Function LEDs Display Indicators Mark the pre-roll point (see step 3). Start the tape playing (see step 4).
- Page 28 The REC SELECT - TRACK indicator on the display will flash. Press the PLAY key. The indicator above the key lights and the MT4X starts the tape. Get ready to play the punch-in part. At the punch-in location, press the REC/PAUSE key.
- Page 29 Step on the footswitch. The indicator above the PLAY key lights, the indicator above the REC/PAUSE key will flash rapidly, and the MT4X starts the tape. Get ready to play the punch-in part. At the punch-in location, step on the footswitch again.
-
Page 30: Ping-Pong Recording
The indicator over the key lights and the flashing REC SELECT - TRACK indicators will be illuminated. Press the PLAY key to start the rehearsal. The indicator above the key lights and the MT4X starts the tape. Adjust the channel fader, PAN controls, and equalizer controls for each source channel. - Page 31 The indicator over the key lights and the REC SELECT - TRACK indicators will be illuminated. Press the PLAY key to start recording. The indicator above the key lights and the MT4X starts the tape. When the recording is finished, press the RETURN TO ZERO key to stop and rewind the tape.
- Page 32 Recording Functions This technique is a combination of overdubbing (see "Overdub recording" on page 15) and ping-pong recording. Connect the input source for the overdubbing channel to its corresponding MIC/ LINE INPUT connector. Set the input select key to the MIC/LINE position. Rotate the GAIN control to adjust the level of the input signal.
-
Page 33: Mixdown
Plug the output from the effect unit into the AUX RETURN connectors Note: If the effect unit has stereo outputs, connect it to the MT4X in stereo. Otherwise, plug it into the L/MONO connector. - Page 34 MIC/LINE position until the count is completed and then switch it to the TAPE. Another method is to set the MT4X to start playback after the count-in. Use the method that you find most comfortable.
-
Page 35: Synchronization
MIDI sequencer or rhythm machine to set the tempo. Some MIDI sequencers and rhythm machines are already equipped with a SYNC OUT connector. You can plug this type of machine directly into the MT4X to record FSK onto one of the tracks. -
Page 36: Fsk Recording
FSK signals. This sometimes results in an unusable sync track. Therefore, the MT4X is also equipped with a SYNC key. When you press the SYNC key, the dbx™ system is defeated on track 4, allowing you to have noise reduction on your audio tracks and a usable sync track. -
Page 37: Synchronized Playback
MT4X and your MIDI instrument. Some MIDI sequencers and rhythm machines can read FSK signals. You can plug this type of machine directly to the MT4X to synchronize to the recorded FSK signal. Connections and setup... - Page 38 Set the connected MIDI instrument to FSK sync mode, to receive the FSK signals from the MT4X. Set any other connected MIDI instruments to MIDI clock mode to slave to the MIDI device receiving the FSK signals. Perform any other required setup on your MIDI instruments to ensure they perform correctly once the MT4X starts playing the FSK signals.
- Page 39 Synchronization Play the overdub part along with the MIDI instrument(s) and the previously recorded tracks. Adjust the recording and monitoring levels while watching the level meters. When you are satisfied with the levels, press the RETURN TO ZERO key to stop the rehearsal and rewind the tape.
-
Page 40: Synchronized Mixdown
To take full advantage of this technique, you may have to use an external mixer. Tip: A special feature of the MT4X is its TAPE OUT connectors. These allow you to send the track signals directly from the recorder to your external mixer. - Page 41 Recording Insert a tape into the master recorder. 12) Start recording on the master recorder. Press the PLAY key on the MT4X to start playback. The synchronized mixdown will be carried out automatically. Check the recording When the recording is finished, rewind the master recorder and play back the tape.
-
Page 42: Memory Functions
Locate to a stored location Press the appropriate LOCATE key The MT4X will fast-wind or rewind the tape to the stored location. While the tape is in motion, the number portion of the MEMO indicator will flash. The following display shows the results of pressing the LOCATE-2 key. -
Page 43: Repeat Function
The REPEAT indicator is illuminated. Repeat notes • If only one memory location is stored, the MT4X will repeat from the tape counter location "0000" to the stored point. • Playback is repeated 16 times continuously, then the tape is rewound back to the first memory location and stopped. - Page 44 Note: If the maximum level is reached a several locations, only the first location is displayed. If you reset the tape counter after the recording, the location displayed will be incorrect. Unlike the memo function, the MT4X does not re-calculate the maximum level memory locations. Clear the maximum level data...
-
Page 45: Appendix
Appendix Troubleshooting If you experience difficulty operating the MT4X, or it does not seem to be working as it should, look up the problem in the following table. You may find it is just a simple error, easy to correct. -
Page 46: Maintenance
Appendix Maintenance The MT4X requires regular maintenance to remain in top operating condition. If you observe the following problems, you should clean and possibly demagnetize the unit: • A drop in level at high frequencies. • An increase in wow and flutter. -
Page 47: Specifications
Appendix Specifications Model 4-track/4-channel one direction recording and playback cassette recorder with mixer Tape Transport Tape Type C-46 ~ 90 cassette tapes CrO - TypeII (Bias: HIGH; EQ 70 µs) Track Configuration 4-track/4-channel one direction recording and playback Heads 4-track Hard Permalloy record/play head x 1 4-track ferrite erase head x 1 Motor DC servo motor x 1... - Page 48 Appendix Specifications (continued) Signal-to-Noise ratio (at nominal input and output) 68 dB / IHF-A MIC IN - STEREO OUT (GAIN control MAX) 75 dB/IHF-A LINE IN - STEREO OUT (GAIN control MDM) Distortion (1 kHz at nominal input and output) 0.1%/30kHz LPF MIC IN - STEREO OUT (GAIN control MAX)
-
Page 49: Block Diagram
Appendix Block Diagram Dimensions User's Guide... -
Page 50: Tracking Sheet
Appendix Tracking Sheet There is a tracking sheet template on the back cover of this manual. You should make a number of photocopies and use them to keep a log of your recording sessions. Initial tracks Recording the bassguitar and drum machine: Overdubbing Recording the synthesizer and MIDI tone generator: User's Guide... -
Page 51: Glossary
SEND output connector. Auxiliary Return — The AUX RETURN controls determine the destination and amount of signal that is fed back into the MT4X via the AUX RETURN input connectors. You can return an effect in stereo, to further enhance your recording. - Page 52 FSK (Frequency Shift Keying) A method of recording MIDI clock data onto one of the tracks of the MT4X. A device translates the data into two distinct frequencies that represent the two binary states: "on" and "off". Some MIDI instruments can directly output FSK sync signals.
- Page 53 MONITOR OUT jacks or to the stereo PHONES (headphone) jack. Multitrack A tape recorder with more than two tracks. The MT4X is a four-track machine. Each track can be independently recorded at an optimum level, and then mixed, equalized, processed, and panned into a final mixdown.
- Page 54 The technique of coordinating external MIDI instruments and the playback of the MT4X via a timecode. See Overdub recording. Track A physical band on a recording tape created by a recording head. The MT4X creates four tracks on one side of a standard audio cassette. Tracking sheet A chart that lists what was recorded on each track, the settings used, and in what order.
- Page 55 YAMAHA CORPORATION...
- Page 56 MT4X OM 5/20/99 19E0112...
Need help?
Do you have a question about the MT4X and is the answer not in the manual?
Questions and answers