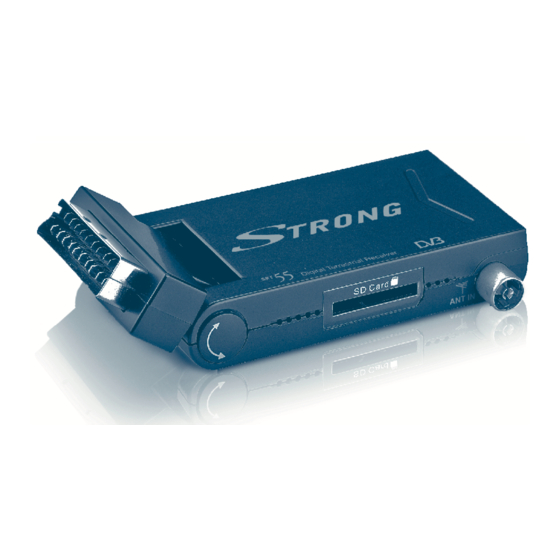
Summary of Contents for Strong SRT 55
- Page 1 ����������������������������� ������ ����������� ������������������� �������������������� �������������� ������������������ ���������������...
-
Page 4: Table Of Contents
PART 1 • English TABLE OF CONTENTS 1.0 INSTRUCTION 1.1 Safety Instructions 1.2 Storage 1.3 Equipment Set-up 1.4 Features & Accessories 2.0 CONNECTION 3.0 YOUR RECEIVER 3.1 Remote Control 4.0 FIRST TIME INSTALLATION 5.0 MAIN MENU 5.1 Channel 5.2 Installation 5.3 Setup 5.4 Tools 5.5 Media+... -
Page 5: Instruction
Attachments - For your safety, and to avoid damaging the product, use only accessories recommended by STRONG. Water and Moisture - Never use this product around water (near a bathtub, kitchen sink, laundry tub, wet basement. swimming pool or in the rain) -
Page 6: Storage
PART 1 • English GENERAL PRECAUTIONS - SAFETY PRECAUTIONS Lightning - If a lightning storm occurs while using a specified AC adapter, remove it from the wall outlet immediately. To avoid damage from unexpected power surges, always unplug the AC adapter from the power outlet and disconnect it from the receiver when the receiver is not in use. -
Page 7: Features & Accessories
PART 1 • English of the antenna are in a good condition and the SCART connections are well shielded This manual provides complete instructions for installing and using this receiver. The following symbols will serve as follow. WARNING Indicates warning information. Tips Indicates any other additional important or helpful information. -
Page 8: Connection
Support of active antenna by 5 V output * Depending on local signal conditions ** Availability depending on broadcaster *** STRONG cannot guarantee the playback of external video files, which have not been recorded by this device Accessories: 1 User Manual... -
Page 9: Remote Control
The sensor may not able to receive the remote signal when it is exposed to direct sunlight or a strong artificial light (fluorescent or strobe light). In this case, change the direction of the light or reposition the unit to avoid direct lighting. -
Page 10: Channel
PART 1 • English 5.1 Channel 1. Use the pq buttons to select Channel and press OK to enter. 2. Use the pq buttons to highlight the desired item and press OK to select. 3. Press EXIT to exit. Note: You can also press OK in TV mode to enter channel list. 5.1.1 TV Channel list 1. -
Page 11: Installation
PART 1 • English Name (A-Z): Sorting in Alphabetical Order. Name (Z-A): Sorting in Alphabetical Order. FTA: First in the list will be Free-To-Air channels. Lock: First will be listed all unlocked and then the locked channels. 5.1.1.4 Move Press the [4] button to activate the Move function. The selected channel will be marked symbol, use the pq buttons to move the selected channel to the desired in a position. -
Page 12: Setup
PART 1 • English 2. With the pq buttons to select Channel Scan and press OK to enter the menu. 3. Use the tu buttons to select one of two Scan Modes – By Channel and By Frequency. 4. When By Channel is selected use the cursor buttons to select Scan Band and Channel No. - Page 13 PART 1 • English 5.3.3 Region and Time Here you can set your region and time zone. Region: This menu is used for changing the region setting. GMT Usage: This menu is used for usage of GMT. The options are: Off / User Define / By Region GMT Offset: This menu is valid only when selected “User Define”...
-
Page 14: Tools
2. Press EXIT button to exit. 5.4.1 Receiver Information This menu displays some Receiver information like Hardware, Software, Build Date and our Web site www.strong.tv. 1. In Tools menu, select “Receiver Information” and press OK button to open receiver information window. -
Page 15: Media
Note: This receiver has foreseen an over the air update function, which might not be available at your local broadcast conditions. For further details visit our website www.strong.tv or contact your local Serviceline. 5.5 Media+ The "Media+" menu consists of following submenus: Media Player, Record Manager, Removable Disk Information, Record Settings, Safely remove storage device and Disk Format. -
Page 16: Time Shift And Recording Functions
PART 1 • English During the playback, it is possible to perform the following actions: Press YELLOW (II) button to pause the playback. Press the buttons for fast forward or fast rewind during playback Press GREEN (Iu) button once to perform slow motion, every further press will change the slow motion speed (1/2, 1/4, 1/8). -
Page 17: Operation
PART 1 • English Instant record In viewing mode press the ● button to instantly start a record on the current channel. Press the RED (■) button to stop recording. If you press the ● button again you can adjust the duration for this record. Insert the time with the Numeric buttons and press OK to confirm then press EXIT to remove the message. -
Page 18: Accessing The Electronic Program Guide (Epg)
PART 1 • English 2. Selected by number Enter the channel number directly by pressing numeric buttons, and press the OK button to select desired channel. 3. Selected by on-screen channels list You can also select the required channel directly from on-screen channel list. -
Page 19: Specifications
10 ~ 85%, RH, Non-condensing Size (W x D x H) in mm: 69 x 137,5 x 20,5 Weight: 102 g STRONG declares that this item complies with the basic requirements and other relevant regulations of directives CE 2004/108/EEC and 73/23EEC RoHS 2002/95EEC Subject to alterations.


Need help?
Do you have a question about the SRT 55 and is the answer not in the manual?
Questions and answers