Table of Contents
Advertisement
Quick Links
Advertisement
Table of Contents

Related Manuals for Strong SRT 5510 MHP


Summary of Contents for Strong SRT 5510 MHP
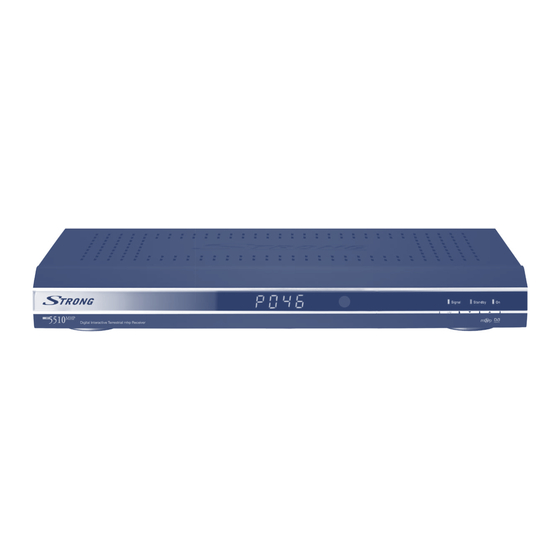
- Page 1 Digital Interactive Terrestrial mhp Receiver SRT 5510 MHP User Manual...
-
Page 2: Table Of Contents
PART 2 • English TABLE OF CONTENTS 1.0 INTRODUCTION 1.1 Safety Instructions 1.2 Storage 1.3 Equipment Set-up 1.4 Features & Accessories 2.0 CONNECTIONS 2.1 Connection to Terrestrial Antenna 2.2 Connecting to TV & VCR 2.3 Connecting to a Digital Audio Amplifier 2.4 Connecting to PC 3.0 YOUR RECEIVER 3.1 Front Panel... -
Page 3: Introduction
PART 2 • English INTRODUCTION Safety Instructions DO NOT INSTALL YOUR RECEIVER: In a closed or poorly ventilated cabinet; directly on top of or under any another equipment; on a surface which might obstruct the ventilation slots. DO NOT EXPOSE THE RECEIVER OR ITS ACCESSORIES: To direct sunlight or near any other equipment that generates heat;... -
Page 4: Equipment Set-Up
PART 2 • English Equipment Set-up We recommend you consult a professional installer to set up your equipment. Otherwise, please follow the instructions below: Refer to the user manual of your TV and your antenna. Make sure that the SCART cable and outdoor components are in a good condition and the SCART connections are well shielded This manual provides complete instructions for installing and using this receiver. -
Page 5: Connections
PART 2 • English CONNECTIONS Connection to Terrestrial Antenna To receive the broadcast signal, the terrestrial antenna cable should be connected to the ANT IN connector at the back of the receiver. Connecting to TV & VCR The TV set should be connected with the receiver through a SCART cable. This terrestrial receiver may also be operated together with a VCR using the loop through function. -
Page 6: Rear Panel
PART 2 • English Rear Panel 1. ANT IN To connect a digital aerial antenna for receiving broadcasting signal. 2. TO TV To connect a TV set to receive analogue channels or to connect an extra receiver. 3. TV SCART To connect your receiver with your TV set using a SCART cable. -
Page 7: Remote Control
PART 2 • English Remote Control Turns the receiver On/Off. Mutes audio output of the receiver. TV/RAD Toggle between TV or RADIO mode Shows the EPG (Electronic Program Guide) during No-menu state only V+ / V- Use to increase or decrease the receiver volume level. PROG+ / PROG- Page up and down in menu list. -
Page 8: Starting Up
Ensure that your receiver is correctly connected to your television and DVB-T antenna, and that your terrestrial signal is of good quality. (If you are not sure about this then ask your local STRONG dealer to check your installation or terrestrial signal). -
Page 9: Usage
PART 2 • English USAGE In the main menu you’ll find all important settings and functions. You get there by pressing the MENU button on your remote control. By pressing BACK you’ll always get back to the previous menu. Your Guide TV Channels Radio Channels Application Channels... -
Page 10: Your Guide
PART 2 • English Channel Search Install Update Add One Channel Time Setup Factory Settings Internet Setup Decoder Status Signal Level System Info Decoder Upgrade Loader Status Help Using Your Box Using Your PIN Software Update Your Guide 5.1.1 TV Channels Select “TV channels”... -
Page 11: Your Preferences
PART 2 • English YOUR PREFERENCES This menu contains the personal settings. Display options, Language options, Sort channels. Display options In this menu you can modify the layout of the on-screen information banner and the settings of the applications MHP. Select “Display options” in “Your Preferences” and press OK. The following parameters can be set: Time and Date: date and time to be visible or non-visible... -
Page 12: Installation
PART 2 • English INSTALLATION The change of some menu settings can jeopardize the correct operation of the receiver. We recommend therefore, to read this section of the manual carefully before proceeding. For this section you’ll need the safety code (PIN). The factory setting is “1 2 3 4”. System Setup 7.1.1 TV Aspect Ratio... -
Page 13: Channel Search
PART 2 • English Channel Search This function allows you search for channels. Several ways are possible: Install, Update, Add one channel. 7.3.1 Install First Time Search allows the receiver to search for all DVB-T available TV and Radio channels. Select in “Channel Search”... -
Page 14: Decoder Status
PART 2 • English DECODER STATUS Signal level This menu shows the intensity and quality signal of the selected channel. The taller the bar level, the better is the level and quality of the signal Select a channel or frequency in “Signal Level” and press OK. System Info This menu shows the information of the MHP software version. -
Page 15: Technical Specifications
PART 2 • English TECHNICAL SPECIFICATIONS Demodulation Demodulation: COFDM/16 QAM, 64 QAM Transmission spectrum: 2 K, 8 K Tuner Frequency range: 177.5 ~ 466.0 MHz; 474.0 ~ 858.0 MHz Bandwidth 8 / 7 MHz Video Decoder MPEG-2 MP@ML Data rate: up to 15 Mbits/s Video format: 4:3, 16:9... -
Page 16: Troubleshooting
No sound or picture connections between receiver on the backside of the TV and and TV receiver. Replace the SCART cable Antenna is not strong enough Check the signal strength with a No picture spectrum analyzer and adjust your antenna correctly... - Page 17 PART 2 • English...
Need help?
Do you have a question about the SRT 5510 MHP and is the answer not in the manual?
Questions and answers