Table of Contents
Advertisement
Advertisement
Table of Contents

Subscribe to Our Youtube Channel
Related Manuals for Strong SRT 6155


Summary of Contents for Strong SRT 6155
- Page 3 PART 1 • English Thank you for choosing this Strong satellite receiver. This receiver is of our latest development and it is designed to be capable of safely install your receiver and to achieve its optimum performance. 1.0 Usage This user manual is applicable for Strong SRT 6155 Digital Satellite Receiver and its related accessories. It is advised that first-time and experienced users read this manual in order to safely install the receiver.
-
Page 4: Table Of Contents
PART 1 • English Safety Instructions Features & Accessories Safety Precautions Storage Equipment Set-up Your Receiver Front Panel Rear Panel Connections Connecting to your TV & VCR 3.1.1 Basic connection with a coaxial cable 3.1.2 Basic connection with a Scart cable 3.1.3 Advanced connection 3.1.4... -
Page 5: Safety Instructions
Italic Characters: Represents a menu item within the On Screen Display (OSD) Menu 1.2 Features & Accessories SRT 6155 Digital Satellite Receiver: Easy to use Graphic MENU Interface; Multi-lingual support on screen Menu: English, German, French, Italian, Spanish, Dutch, Russian, Turkish, Swedish, Slavic, Slovak, Hungarian, Czech, Bulgarian, Romanian, Lithuanian, Latvian, Polish;... -
Page 6: Safety Precautions
PART 1 • English Channel Memory: about 2900 Digital TV Channels, about 1400 Radio Channels; Supports software downloading via satellite (O.T.A.); S/PDIF output for connection with a digital audio amplifier. Accessories User's Manual; Remote contol unit; 2x Batteries (AAA type); Warranty Card;... -
Page 7: Your Receiver
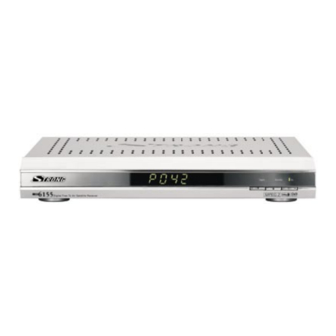
PART 1 • English 2.0 Your Receiver 2.1 Front Panel (Please see inside cover Figure 1) 1. Power Button Turns the receiver ON/OFF. 2. Stand-BY/ ON/ SIGNAL (3 LEDs) The red LED is the “stand-by” indicator. The green LED is the “Power On” indicator. The orange LED lights up once you correctly receive a satellite signal (signal locked). -
Page 8: Connections
Warning: If you are not sure how to connect your receiver, do not take the risk of doing it yourself. Ask your Strong dealer to do it for you. They are specially trained by our technicians and can get the best performance out of your receiver. Although there are entechnologies, and requires specialised equipment. -
Page 9: Connecting A Remote Eye
Another possibility of watching programs from multiple satellites is by mounting a dish to a motorized DiSEqc 1.2 positioner. Have your Strong dealer mount the dish to the positioner with the correct azimuth angle of elevation and let him set the centre point for your positioner. -
Page 10: Dish Aimed At Other Satellites
PART 1 • English 4.2 Dish aimed at other satellites IT download the channels, please refer to “Channel Set-up”. (Described in section 5.1.4.3) 5.0 Basic settings Note: Every time the receiver asks you to put your PIN code, enter '0000' on your remote control using [0-9] numeric keypads. Remember: To switch between the TV/Radio channels list, you will have to press the TV/RAD buttons on your remote accordingly. - Page 11 PART 1 • English 5. Using UP/DOWN or P+/P- keys, select the channel and press the coloured button on your remote corresponding to the classification of the channel. For example, if you press the Red (movie) button the channel is designated as "Movie"...
-
Page 12: Favourite Organizer Menu
PART 1 • English 4. Using UP/DOWN or P+/P- keys on your remote, select the channel. 5. Press the Red button to delete the selected channel. 6. Press the Green button to delete all channels from the list. 7. Press the Yellow Button to exit the delete menu 5.1.2 Favourite Organizer Menu This menu enables you to organize your Favourite channels list. -
Page 13: System Set-Up Menu
PART 1 • English 5.1.4.1 System Set-up Menu (Please see inside cover Screen 11) To install your receiver to your personal preferences, go to “System Set-up” menu. Then please apply the following steps: 1. Press the Menu button. 2. Using UP/DOWN keys, select "Installation" and press OK. 3. -
Page 14: Lnb Set-Up
PART 1 • English Select GMT usage: Press OK or the Right button and use the UP/DOWN buttons to set the GMT usage to “off”. Press OK to save your setting. The time setting menu will now activate the bottom two fields of the menu. Select Set Local Time: Press OK or the Right button. -
Page 15: Channel Set-Up
PART 1 • English LNB Dish: Using the Left/Right buttons, select “Fixed” or “ Moved” Dish. If you use a motorised dish, read the “Positioner Set-up” (Described in section 5.1.4.3.1). DiSEqC switch: The default is Off. To use the DiSEqC switch, set up the DiSEqC version you have (V1.0 or V1.1). DiSEqC Input: Select position 1~4 if DiSEqC switch is DiSEqC V1.0. -
Page 16: Positioner Set-Up
PART 1 • English AutoScan (Red Button): This function searches all the transponders of a satellite. Net. Scan (Green Button): “Network Search” Performs network search for a transponder. TP Scan (Yellow Button): Search channels from current specific transponder. PID (Blue Button): You can search a specific channel by entering the PID value of a channel. If you press the Blue (PID) button, the PID screen is displayed. -
Page 17: Parental Lock - Changing Pin Code
PART 1 • English 5.1.4.4 Parental Lock - Changing PIN Code (Please see inside cover Screen 25) This function changes the Personal Identification Number (PIN) that is used to control access to the menu and individual channels. In this function, you can lock/unlock channels and you can change your PIN code by applying the following steps: To lock/unlock the menu, please apply the following steps: 1. - Page 18 PART 1 • English 6.0 Basic functions - Remote control All features of the set-top box can be controlled with the remote control. Inserting batteries to the Remote Control Unit: 1. Open the battery cover on the rear of the remote control Unit. 2.
- Page 19 PART 1 • English 15. EPG Display the EPG (Electronic Program Guide). EPG shows the event information on the current TP channel by time zone. EPG is divided into Weekly mode, Daily mode and Extend mode. It provides timer based recording and automatic power ON/Off.
-
Page 20: A.1 Trouble Shooting
PART 1 • English A.1 Trouble Shooting Occasionally receivers can hang-up (just like with a PC) so you are recommended to reset the receiver by disconnecting it from mains power. Wait 30 seconds and connect to mains power again and now check if the unit is working as expected. If the receiver does not work properly after checking the trouble shooting section, please contact the dealer. -
Page 21: A.2 Glossary Of Terms
PART 1 • English A.2 Glossary of terms C band 3.7 ~ 4.2GHz Frequency. DiSEqC Digital Satellite Equipment Control. Electronic program guides that are transmitted by a broadcaster from a particular satellite to display information guide about a program content. Fixed Dish A dish antenna that is aimed at one particular satellite. -
Page 22: Technical Specifications
• Technical Specifications Technical Specifications Demodulator Modulation: QPSK Input Symbol Rate: 2 ~ 45 Ms/s SCPC & MCPC signals from C & KU band satellites Video Decoder MPEG 2 Main profile @ Main level Input Rate: Max. 60 Mbit/s Video Resolution: 720 x 576 (PAL), 720 x 480 (NTSC) Aspect Ratio: 4:3, 16:9, Pan&Scan, Letter box Audio Decoder MPEG/MusiCam Layer I &...
Need help?
Do you have a question about the SRT 6155 and is the answer not in the manual?
Questions and answers
Can in open pay channel for free