
Subscribe to Our Youtube Channel
Related Manuals for Strong SRT 6780


Summary of Contents for Strong SRT 6780
- Page 1 Digital Satellite Receiver SRT 6780 User manual Bruksanvisning Bruksanvisning Betjeningsvejledning Käyttöohje www.strong.tv.com...
- Page 2 7 c m DIG ITA 1 0 c m 1 0 c m...
-
Page 3: Table Of Contents
General information Summary Precautions............................2 Welcome to digital satellite TV! ...................3 Your remote control ........................4 Inserting the batteries...........................4 Remote control buttons: quick reference....................5 Your set-up box ..........................6 Front panel ..............................6 Rear panel connectors overview .......................6 Installation ............................7 Before you begin ............................7 What else do I need?............................8 Connecting to other equipment ........................9 Connection method 1: ToTV and VCR .....................9... -
Page 4: Precautions
General information Precautions Never open your set yourself. It could be dangerous and you risk electric shock or damaging the set. The opening of the box is protected by a warranty sticker on the rear panel. Any noticed dammage will invalidate the warranty conditions of your equipment. Installation - Ensure that the voltage from the mains in your room complies with that indicated on the back of your set (identification label, screen marking, etc.). -
Page 5: Welcome To Digital Satellite Tv
General information Welcome to digital satellite TV! Thank you for choosing the STRONG set-top box. Please follow the instructions in this User Guide carefully to enjoy all the advantages of digital satelliteTV. We advise following the user instructions and recommendations supplied with your set-top box, especially for first-time use. -
Page 6: Your Remote Control
Your remote control Your remote control Inserting the batteries Before you can use your remote control, you must insert the two supplied AAA batteries as follows: 1. Remove the cover. 2. Insert the batteries according to this drawing. Observe the polarity (+/-). 3. -
Page 7: Remote Control Buttons: Quick Reference
Your remote control Remote control buttons: quick reference SAT/DVD/TV To put your set-top box Select the device you want into or out of standby. to control. PR +/- To change channel up or down. To turn the sound on or off. BACK a +/- To go back to the previous... -
Page 8: Your Set-Up Box
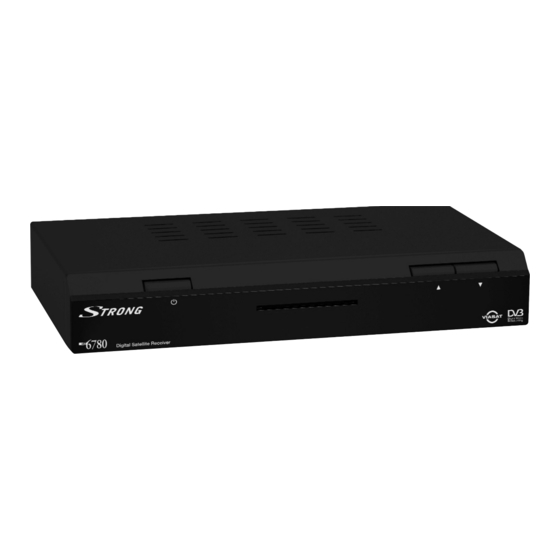
Your set-up box Your set-up box Front panel B button V, W To switch your set-top To change channel box on or on standby. up or down. Yellow light Green light Smart card slot Lights up when your set-top Lights up when To insert your smart card box is on standby. -
Page 9: Installation
Installation Installation To install your set-top box, follow the instructions from this page up to page 17. Before you begin The supplied equipment If you have not already done so, remove all the packaging. You should have the following items: •... -
Page 10: What Else Do I Need
Installation What else do I need? Smart card If you wish to view premium services, you will need a smart card. This is available from your service provider, Viasat. Satellite dish You will also need a correctly-installed satellite dish, pointing at the correct satellite(s). •... -
Page 11: Connecting To Other Equipment
Installation Connecting to other equipment Before you start, make sure that your TV, VCR and set-top box will be placed in a location that is conveniently located: • near an easily-accessible mains wall socket; • within reach of your TV-antenna and satellite-dish leads, •... -
Page 12: Connection Method 2: To Tv Only
Installation Connection method 2: To TV only If you wish to connect your set-top box to a TV only, connect up as described below. 1. Use the supplied SCART lead to connect your set-top box to your TV. 2. Connect the lead from your satelitte dish to the satellite input connector on your set-top box. -
Page 13: Inserting Your Smart Card
Installation Inserting your smart card 1. Take your smart card from its packaging (if you have not already done so) and hold it so that the picture is facing upwards, with the arrow pointing towards your set- top box, and the 'smart' patch is facing downwards and at the end away from you. 2. -
Page 14: Switching On For The First Time
Installation Switching on for the first time When you connect your set-top box to the mains, all the lights on the front panel will light up. After around 5 seconds, only the standby light remains light. Press SAT key (decoder key) on your remote control to control your set-top box, then press B key to switch it on. -
Page 15: Checking The Installation Screens
Installation Checking the installation screens For most intallations, this is easy to do, if you follow these instructions. However, for some installations you may need to make additionnal settings - see the “Other settings” section starting on page 24. Note: At any time during the first time installation process, you can return to previous screen by pressing BACK button. -
Page 16: Antenna Configuration Menu
Installation Antenna configuration menu The Antenna configuration menu is displayed and Antenna Configuration field is selected. Depending on your antenna configuration, select: - One LNB: if you have only one antenna. - DiSEqC: if you have 2, 3 or 4 antennas connected to the set-top box through a DiSEqC switch. -
Page 17: Checking The Signal
Installation Low and High frequencies (These fields are only displayed if you have selected Customized at the LNB type field). With digit keys, enter Low and Hight bands oscillator frequencies. Satellite (This field is not displayed if you have selected SMATV at the Antenna Configuration field or None at the LNB type field). -
Page 18: Channels Search Menu
Installation Once you have confirmed the satellite signal strength, the Channels Search menu is displayed. Channels Search menu The default parameters allow you to install all the Viasat Channels. If you want to do a specific installation, use a specialized satellite magazine to get the correct figures for following settings. -
Page 19: Searching For Channels
Installation According to the selected transponder, select correct FEC. Bouquet number (This field is only available if you have selected Bouquet at Installation Type field). With digit buttons, enter the number of the desired bouquet. If you have selected Manual scanning at Installation Type field, a new menu is displayed on which you can search for at least 6 Symbol rate on a satellite. -
Page 20: Day To Day Use
Day to day use Day to day use Decoder switch ON / Standby Press B button on the remote control unit or on the front panel to switch ON / Standby your decoder. Volume setting Volume: You can set the volume level with a +/- buttons. Sound mute: Press button to mute the sound. -
Page 21: Tv Banner / Extended Information
Day to day use Zapping Banner / Extended Information banner You can get two levels of information related to the current played event. • TV banner basic channel information, • Extended event description. The Basic channel information is displayed through a Zapping Banner that is either shortly displayed after each Zapping or by pressing the INFO key. - Page 22 Day to day use Access option: Following icons may be displayed at the bottom line of the information banner. Availability of another audio language. Availability of another Subtitle language. Name of the current channels list. If one of these icons is displayed, a option icon at the bottom of the information banner inform you that you can access the option screen.
-
Page 23: Tv Miniguide
Day to day use TV Miniguide The TV Miniguide allows you to display at the same time: - the TV channel list, - the corresponding TV channel information (if available), - the corresponding live video in a small window. Direct access from any TV channel: Press GUIDE key more than 2 seconds. -
Page 24: Tv Channel List
Day to day use TV Channel list Direct access from any TV channel: Press the GUIDE key once to display the TV Channel list. !Pressing the GUIDE key for more than 2 seconds gives access to the TV Miniguide. Press V/W keys to select the previous / next TV channel in the list. The C and B buttons allow you to navigate through previous / next pages. -
Page 25: Extra Information
Extra information Extra information Recording a digital satellite program If you have aVCR you can use it to record satellite programs from your set-top box. To record a satellite program: 1. Make sure your set-top box is switched on and tuned to the channel you wish to record. -
Page 26: Other Settings
Other settings Other settings Displaying the Main Menu You need to display the Main Menu in order to perform other settings.You can also use the Main Menu to display the TV and Radio channel lists (see page 18). To display the Main Menu: 1. -
Page 27: Conditional Access
Other settings Conditional Access Select Conditional Access field in the Main menu and press OK. Conditional Access menu is displayed and Viasat is highlighted. If the line Viasat is not selected, select it with V / W keys and press OK. You can now navigate the menu which is provided by the embedded Viasat CAS module. -
Page 28: Preferences
Other settings Preferences Select Preferences field and press OK. Preferences menu is displayed and Languages field is highlighted. Languages While Languages field is highlighted press OK, Languages menu is displayed. This screen allows you to select the desired language for menus as well as for audio and subtitles if available. - Page 29 Other settings Favorite Lists Select Favorite Lists field in the Preferences menu and press OK. Favorite Lists menu is displayed. (This menu allows you to create a favorite list or to modify an existing one). New list: With V / W keys select the list you want to define and press OK. List Definition screen is displayed.
- Page 30 Other settings Once the fourth digit is entered, Parental Control menu is displayed and Decoder Lock field is selected. Tick the box with OK key if you want to lock the decoder. To unlock the decoder, untick the box. This function enables you to watch all the channels even if they had been locked previously as long as the decoder is awake, it will be automatically relock at standby.
-
Page 31: Configuration
Other settings Configuration This menu allows you to perform subsequent Channels Installation, to set TV /VCR settings to your personal preferences, to set your Local time zone, and to set your Modem configuration. Select Configuration in the Main menu and press OK. Configuration menu is displayed and Channels Installation field is highlighted. - Page 32 Other settings Antenna Configuration menu is displayed. Refer to chapter First installation, page 14, for more information on this menu. Channels search: select Channels Search field and press OK. Channels Search menu is displayed. Refer to chapter First installation, page 16, for more information on this menu. Channels erase: select Channels erase field and press OK.
-
Page 33: Tv/Vcr Configuration
Other settings TV/VCR Configuration This menu allows you to set TV /VCR settings to your personal preferences. Select TV/VCR Configuration field in the Configuration menu and press OK, TV/VCR Configuration menu is displayed and TV Format field is selected. - TV Format: With C / B button set your TV format to 4/3 Letterbox, 16:9 or 4/3 Pan and Scan. - Page 34 Other settings Modem Configuration This menu allows you to define the modem prefix (numbers to be automatically dialed before a phone number to access the public phone network). Select Modem Configuration field in the Configuration menu and press OK, Modem Configuration screen is displayed. External line prefix: Select from 1 digit to 10 digits if a dialing prefix is needed, select Not required otherwise.
-
Page 35: Information
Other settings Default Configuration Restoration This menu allows you to return to factory preset parameters. To access this menu, Receiver PIN code is requested. Select Default Configuration Restoration field in the Configuration menu and press OK, Default Configuration Restoration screen is displayed. !Be cautious, if you press OK, ALL YOUR SETTINGS will be erased. -
Page 36: Solving Problems
Solving problems Solving problems * Before you check connections between your equipment, make sure you disconnect all your equipment from the mains supply. When you have finished checking and making connections, safely reconnect all the equipment to the mains supply (see page 11). Problem Possible cause Suggested solution... -
Page 37: Specification
Specification Problem Possible cause Suggested solution You've forgotten Call customer support for advice. your PIN. The menus and The menu language You can change the menu language as follows: banners are in has been changed to 1. From a digital satellite channel, press MENU. 2. - Page 40 TCM: 36573620...
Need help?
Do you have a question about the SRT 6780 and is the answer not in the manual?
Questions and answers