Table of Contents
Advertisement
Quick Links
Advertisement
Table of Contents

Related Manuals for Strong SRT 8910


Summary of Contents for Strong SRT 8910
- Page 1 Digital Terrestrial Receiver with Embedded Conax SRT 8910 User Manual...
-
Page 2: Table Of Contents
PART 2 • English TABLE OF CONTENTS 1.0 INTRODUCTION 1.1 Safety Instructions 2. INTRODUCTION 2.1 Front Panel 2.2 Rear Panel 2.3 Remote control 3.0 CONNECTION 3.1 Connecting to Terrestrial Antenna 3.2 Connection to TV with HDMI cable 3.3 Connecting to TV with SCART cable 3.4 Connecting a Hi-Fi system 4.0 GETTING STARTED 4.1 Switching On... -
Page 3: Introduction
PART 2 • English 1.0 INTRODUCTION 1.1 Safety Instructions TO REDUCE THE RISK OF FIRE AND ELECTRIC SHOCK, DO NOT EXPOSE THIS UNIT TO RAIN OR MOISTURE. CAUTION: To reduce the risk of fire and electric shock, do not remove the cover (or back) of the unit. - Page 4 PART 2 • English outlet. To prevent electric shock, do not use this polarized plug with an extension cord, receptacle, or other outlet unless the blades can be fully inserted without blade exposure. If you need an extension cord, use a polarized cord. 5.
- Page 5 PART 2 • English against voltage surges and built-up static charges. Section 810 of the National Electrical Code, ANSI/NFPA No.70-1984 (Section 54 of Canadian Electrical Code, Part1) provides information with respect to proper grounding of the mast and supporting structure, grounding of the lead-in wire to an antenna-discharge unit, connection to grounding electrodes, and requirements for the grounding electrode.
- Page 6 PART 2 • English 22. Heat - The product should be situated away from heat sources such as radiators, heat registers, stoves, or other products (including amplifiers) that products heat. Safety Warnings 1. The normal operating temperature of the digital receiver is between 0° C and 40° C 2.
-
Page 7: Introduction
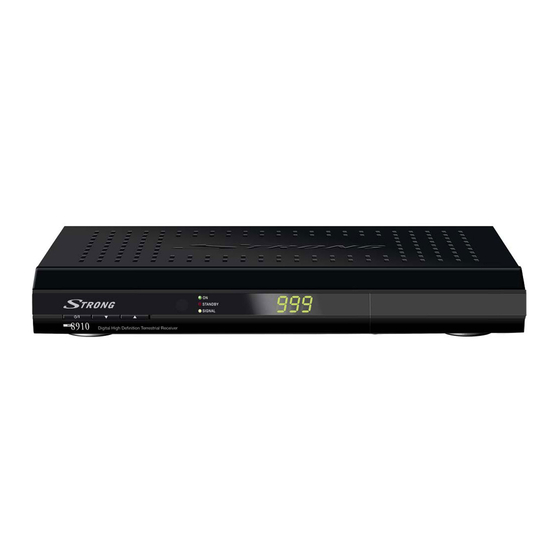
PART 2 • English 2.0 INTRODUCTION 2.1 Front Panel 1. Power ON/STAND BY 2. pq Chanel up/down 3. Display I In ON mode channel number is shown 2.2 Rear Panel 1. ANT IN To connect your terrestrial antenna 2. TO TV If you want your antenna signals from “ANT IN”... - Page 8 The sensor may not able to receive the remote signal when it is exposed to direct sunlight or a strong artificial light (fluorescent or strobe light). In this case, change the direction of the light or reposition the unit to avoid direct lighting.
-
Page 9: Connection
PART 2 • English 3.0 CONNECTION 3.1 Connecting to Terrestrial Antenna You can connect the receiver to the following types: 1. Standard Antenna 2. Active Antenna with built-in amplifier. Note: This receiver uses active antenna as standard. 3.2 Connection to TV with HDMI cable Connect the antenna to ANT IN on the receiver Connect the TV HDMI plug on the receiver to the HDMI plug on your TV using a HDMI cable Turn on your TV, connect and turn on your receiver... -
Page 10: Getting Started
PART 2 • English 4.0 GETTING STARTED 4.1 Switching On Turn on your TV set. Turn on the main power supply to the receiver and press Power On/Standby. If TV set does not turn automatically to the SCART input, please select this input with the AV key, or similar on your TV remote control. -
Page 11: Main Menu
PART 2 • English 5.0 MAIN MENU In the Main Menu you find Channel manager, Installation, Timer and Information. 5.1 Channel manager 1. Press MENU button to go to the Main Menu 2. Manage Channels Press OK to choose sub menus and pq to choose between the submenus. OK to confirm. a. - Page 12 PART 2 • English Choose with tupq and OK Standard for: HDMI output, TV Format, Picture Format and HDCP Always Enabled. Time settings Choose with tupq and OK set-up for: Country, Timezone Selection, Preferred Timezone and Daylight Savings Time. Favorite network Choose with tupq and OK favorite network.
-
Page 13: Functions
PART 2 • English 5. Information Press OK to choose submenu and pq to choose sub item, activate with OK. a. System information In this menu you will find information about your receiver product ID, Software version and Serial no. etc. b. -
Page 14: Changing Channels
PART 2 • English 6.3 Changing Channels 1. Stepping through the channel list: To move through the channel list, press the P+ or P- key on the remote control. 2. Selection by on-screen channels list: You can also select the required channel directly from on-screen channel list. This is displayed using the remotes OK button. -
Page 15: Switching Between Dtv And Radio Mode
PART 2 • English 6.10 Switching between DTV and Radio mode You can switch between Digital TV mode and Radio mode by pressing “TV/RAD” button on your remote. 7.0 SPECIFICATION Demodulator Modulation: DVB-T COFDM Frequency range : 174 – 234 MHz (VHF III) 470 –... - Page 16 Subject to alterations. In consequence of continuous research and development technical specifications, design and appearance of products may change. RiksTV is a registered trademark, all other product names are trademarks or registered trademarks of their respective owners. © STRONG 2009. All rights reserved. 01/2009 NOTE: Design and Specifications may be changed without warning.
-
Page 17: Troubleshooting
PART 2 • English A.1 TROUBLESHOOTING In some regions, the digital terrestrial signal may be weak. In this case we recommend using an antenna with built in amplifier. Problem Possible cause What do I do Standby light not lit Mains lead unplugged Check mains lead Mains fuse blown Check fuse... -
Page 18: Environmental Issues
Environmental Issues ENVIRONMENTAL ISSUES STRONG is committed to reducing the impact of its products on the environment. To maximise the benefits of our design enhancements, your co-operation is required. Electronic product recycling Packaging Do not dispose of this product with your When disposing of this domestic rubbish. - Page 19 Environmental Issues...
Need help?
Do you have a question about the SRT 8910 and is the answer not in the manual?
Questions and answers