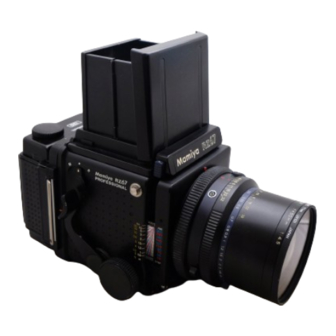
Mamiya RZ67 Professional Instructions Manual
Hide thumbs
Also See for RZ67 Professional:
- User manual ,
- Instructions manual (70 pages) ,
- Instruction manual (52 pages)
Table of Contents
Advertisement
Advertisement
Table of Contents

Related Manuals for Mamiya RZ67 Professional


Summary of Contents for Mamiya RZ67 Professional
- Page 2 The result is a camera with incredible versatility and handling ease. ideally suited for commercial, industrial, scientific, news, portrait, scenic, and fashion photography. In fact, the Mamiya RZ67 knows no bounds in photographic application?.. However, in order to fully take advantage...
-
Page 3: Table Of Contents
Contents Special Features of the Mamiya RZ67 ........... Outline of Names and Functions of Parts s ..........Inserting a Battery ................Attaching/Removing Lenses ..............Focusing Hood Operation ................. Releasing the Shutter ..................17 Shutter Speed and Aperture .............. -
Page 4: Special Features Of The Mamiya Rz67
The mirror-up mechanism is now automatically engaged as soon as a RB67 have been further refined in the Mamiya RZ67, resulting in un- cable release is attached to the Mirror-up Socket. precedented quality and performance. - Page 5 For occasions when the camera is mounted on a tripod, both the RB Holders which solve the problem of film curl by retaining the film perfectly flat across the entire film plane. Thus, the full potential of Mamiya-Sekor and RZ67 allow the photographer to raise the mirror well before releasing ultra performance lenses and the large negative size are realized.
-
Page 6: Outline Of Names And Functions Of Parts S
Outline of Names and Functions of Parts (Detailed instructions follow.) R-M Lever For double exposure prevention and normal operation. keep R-M Lever aligned with central index mark. Carrying Strap Lug R: The lever is set to this position before revolving the back. M: Set the lever to this position when desiring to take multiple exposures. - Page 7 Magnifier Release To raise the magnifier. push the Mag- nifier Release to the left. Magnifier Interchangeable with other magnifiers in various diopter strengths. Prism Finder, for the finder Focusing Hood Catch switches will not Operate without the cover in place. Focusing Screen The visible field of the focusing screen automatically changes from vertical to...
- Page 8 Film Advance Coupler The central pin transmits a signal to the film holder which disengages the film advance-stop and activates the multi- ple exposure prevention mechanism. The small circle appearing on the Re- volving Ring should be aligned with either the uppermost (“12 o’ clock”) or right-hand side (“3 o’...
- Page 9 Bayonet Ring The Bayonet Ring is a breech mount which se- cures the lens onto the camera body. As a safety Flash Sync Terminal X-sync feature, the lens can not be removed from the camera body unless the mirror is set (lowered), thereby assisting the Light Baffle in shielding the film from light.
-
Page 10: Exposure Counter
Roll Film Holder When the Film Holder is removed from the camera back, the Dark Slide is automatically locked in the holder, preventing accidental removal. Placing the Film Holder onto the camera back automatically unlocks the Dark Slide, so that it can easily be removed (I-SO) Film Speed Dial... -
Page 12: Inserting A Battery
2. Insert the battery into the chamber, taking Because the Mamiya RZ67 does not func- purchase and is stored after purchase, temperature at care to match the f poles of the battery with... -
Page 13: Attaching/Removing Lenses
Attaching/Removing Lenses Lenses Attaching Before attaching a lens to the camera body, (B) Cocking the Lens Shutter (C) Attaching the Lens the mirror of the body must be set and the shut- 1. Remove the Rear Lens Cap. 1. With the front of the lens facing you, rotate ter of the lens cocked. -
Page 14: Focusing Hood Operation
Focusing Hood Operation Raising the Focusing Hood Removing Lenses 1. Push the Cocking Lever of the camera body Merely lift the back of the hood until it opens completely down, setting the mirror and cock- completely. ing the lens shutter. 2. - Page 15 Raising the Magnifier Lowering the Magnifier Folding the Focusing Hood Slide the Magnifier Release slightly to the left Gently push the base plate of the Magnifier Afler lowering the Magnifier, gently squeeze and the Magnifier will pop up into position. all the way down until it locks in place.
-
Page 16: Releasing The Shutter
Releasing the Shutter It is best to become acquainted with the method of releasing the shutter before using film in the camera. Rotate the Release Button Col- lar until the white dot on it is aligned with the one mediately below (on the Collar Stop Lever). - Page 17 Using the Release Button Collar I For normal operation, align the white dot on The Normal Position the Release Button Collar (A) with the white dot For normal operation of the camera, the R-M on the lever below (B). When this is done, the Lever should be kept in the center position, Shutter Release functions electromagnetically aligned with the index mark.
-
Page 18: Battery Check
Lever / [ Operating Cocking Under the following circumstances an orange, red, or green lamp will il- luminate in the viewfinder when the Shutter Release Button is depressed. 1. Cocking Lever Not Set (Orange warning lamp) If the Cocking Lever has not been depressed or has been only partially depressed, an orange warning lamp will illuminate in the viewfinder when the Shutter Release Button is pressed, warning the user that the film has not been advanced, the mirror not been set, and the shutter not been... -
Page 19: Shutter Speed And Aperture
Shutter Speed and Aperture The Shutter Speed Dial The Aperture Ring When the Shutter Speed Dial is set to “B” (bulb). the shutter will remain open as long as pressure is applied to the Shutter Release But- ton and will close as soon as pressure is re- leased. -
Page 20: Focusing And Locking The Focusing Knob
Focusing and Locking the Focusing Knob Locking the Focusing Knob Focusing Depressing the Cocking Lever sets the mir- After adjusting the focus, focusing deviation can be prevented by locking the Focusing Knob ror. projecting a bright image on the focusing screen. -
Page 21: The Revolving Back
The Revolving Back The Vertical and Horizontal Formats Change in Viewfinder Format Before attempting to revolve the back, set the R-M Lever to “R” To change from horizon- tal to vertical format, rotate the Film Holder clockwise as far as it will go. Rotating it counter- clockwise, changes the format from vertical back to horizontal. -
Page 22: The Roll Film Holder
The Roll Film Holder Attaching the Holder 3. Lock the holder on the camera body by 1. Slide the Holder Lock Lever of the Film Hol- Remove the rear body cap by sliding it up- moving the Slide Lock as far as it will go in the der completely toward the Lock Release Lever wards. -
Page 23: Loading The Film Holder
Loading the Film Holder Removing the Holder 4. Insert Dark Slide into the Roll Film Hol- 1. Pull out the upper and lower Back Cover 2. While holding down the left-hand Spool Re- der. For instant recognition, the Dark Slide Slot Latches and the back cover will open. - Page 24 Loading the Film Holder 3. After feeding the tip of the backing paper 4. Gently wind the Film Advance Knob until the 5. Set the correct film speed value on the Film into the slot of the Take-up Spool. arrow of the backing paper aligns with the insert Speed Dial of the Roll Film Holder.
- Page 25 Advancing the Film Before attempting to advance the film to the Place the Film Insert into the outer cassette, 7. After correctly placing the insert into the cas- first frame, make sure the R-M Lever is set to its sette, close the back cover, and while gently making sure the film advance coupler of the in- normal (center) position.
-
Page 26: Taking Photographs
Taking Photographs When the film is advanced to the next frame, the numeral in the Exposure Counter will au- tomatically change and the red mark will disap- pear. Operate the Cocking Lever gently. If if is pressed very rapidly, the spacing between frames may not be uniform. -
Page 27: Unloading The Film
Unloading the Film When desiring to turn in for processing a roll of film that has been only partially exposed, first remove the holder after inserting the Dark Slide. Next, while holding in the pin in thecenter of the coupler(A), completely wind the film onto the Take-up Spool with the Film Advance Knob. -
Page 28: Distance Scale/Depth-Of-Field
Distance Scale Depth-of-Field Depth-of-Field Preview Using the Depth-of-Field Scale The Distance Scale is used to determine the 1. Set the Aperture Ring to the desired f-stop 1. Check the camera-to-subject distance on film-plane-to-subject distance. The scale itself and focus the lens. the Distance Scale. -
Page 29: Close-Up Photography
Close-up Photography Exposure Compensation for Close-up Photography Area Covered with Bellows fully Extended When working very close to the subject, the + 1 (a full stop increase in exposure is neces- compensation of + 1, set the lens to either f/16 exposure must be increased. -
Page 30: Using A Tripod/Long Exposures
Using a Tripod Long Exposures Bulb (B) Exposures For optimum quality, use of a large, sturdy When the Shutter Speed Dial is set to B, the When using bulb, if pressure is released from the Shutter Release Button too quickly (before the mirror tripod is recommended. -
Page 31: Mirror-Up Operation
Mirror-up Operation Time Exposures 1. To make a time exposure, first slide the T With the RZ 67, it is possible to lock the mirror Lever of the lens until the letter "T" is exposed. in the up position beforehand, and at the de- After doing so, the shutter will remain open sired instant release the shutter without the upon depressing the Shutter Release Button. -
Page 32: Multiple Exposures
Multiple Exposures . If you release the shutter with the cable release after If you complete step 3 above, but remove the cable re- the buzzer stops, the shutter speed will be 1/400 sec. lease without making an exposure (step 4), the shutter If you wish to use a shutter speed other than 1/400 will be released as soon as the cable release is re- sec. -
Page 33: Flash Photography
G.N. (48) = Correct aperture charged and ready to fire. When using Mamiya setting (8) Subject Distance (6) flash units, two units can be fired simultane- ously by connecting one unit to the Hot-Shoe Flash Synchronization Table and the other to the Sync Terminal. -
Page 34: Close-Up Photography With Auto Extension Tubes
Close-up Photography with Auto Extension Tubes After attaching an auto extension tube to a lens, treat the extension tube/lens combination as a single unit, attaching and removing them from the camera as any other lens. Moreover, when using the auto extension tubes, dia- phragm automation of the lens is fully main- tained sot hat close-up photography is as con- venient as standard operating procedure. -
Page 35: How To Use Fhe Carrying Strap
How to Use the Carrying Strap Attaching the Strap Three Carrying Positions Hold the metal clamp of the strap Depending upon the way the so that the key-hole shaped open- strap is attached to the camera. ing faces the Carrying Strap Lug on there are three ways of carrying the the camera body. -
Page 36: Interchanging Magnifier/Focusing Hood/Focusing Screen
Interchanging Magnifier/ Focusing Hood/Focusing Screen Focusing Screens Focusing Hood Magnifier Removing the Focusing Hood There are seven instantly interchangeable The Magnifier of the Focusing Hood is inter- focusing screens to choose from, each de- (- 1.3 changeable. In addition to the standard To remove the Focusing Hood, merely signed for specific applications. -
Page 37: Attaching A Lens With Shutter Released Or Mirror Raised
Attaching a Lens with Shutter Released or Mirror Raised When a lens is removed from the camera If the mirror is raised (regardless of whether body, the mirror is set (lowered) and the lens the lens shutter is cocked or released), simply shutter cocked. - Page 38 Overriding the Dark Slide Safety Overriding the Shutter Lock Pin If a lens. is not to be used over a prolonged When a Film Holder is removed from the camera body, the Dark Slide automatically period, it is desirable to store it with the shutter released.
-
Page 39: Camera Back Lock System
(and G-lock system holders) Polaroid Land pack film holder RZ The unique camera back lock system of the Mamiya RZ67 is designed to allow it to accept a G adapter RZ large variety of Film Holders. All RZ series Film Holders mount and lock directly on the back of the RZ67. -
Page 40: Rb Series Lenses And Accessories
RB Series Lenses and Accessories Film Holders Lenses Focusing Follow the procedure outlined below in order to use RB series (G-Lock RB67 lenses mount directly onto the RZ67; however, the bellows must System) holders on the RZ67. be extended 7mm in order to focus the lens at infinity (m). Therefore, 1. -
Page 41: Troubleshooting
Mamiya- than a camera malfunction. Should something appear to go Sekor Z 110mm f/2.8 lens, follow the procedure indicated below. -
Page 42: Care Of The Camera
Also check any ac- cessories you plan to use. For a general overhaul, cleaning, or minor repair, take the camera to your nearest authorized Mamiya Service Center or see your camera shop for advice. -
Page 43: Mamiya Rz67 Specifications
Uses 120 (10 exposure) or 220 (20 exposure) roll film. Actual negative size of 56 x 69.5mm. Standard Lenses: Mamiya-Sekor Z 90 mm f/3.5 (6 elements in 6 groups). Mamiya-Sekor Z 110mm f/2.8 (6 elements in 5 groups). Mamiya-Sekor Z 127mm f/3.8 (5 elements in 3 groups).
Need help?
Do you have a question about the RZ67 Professional and is the answer not in the manual?
Questions and answers