Table of Contents
Advertisement
Even more info on the adaptor -
One way to use the Mamiya ZE "P" adapter with the Mamiya ZE-X without damaging the ZE-X is to first attach an Osawa
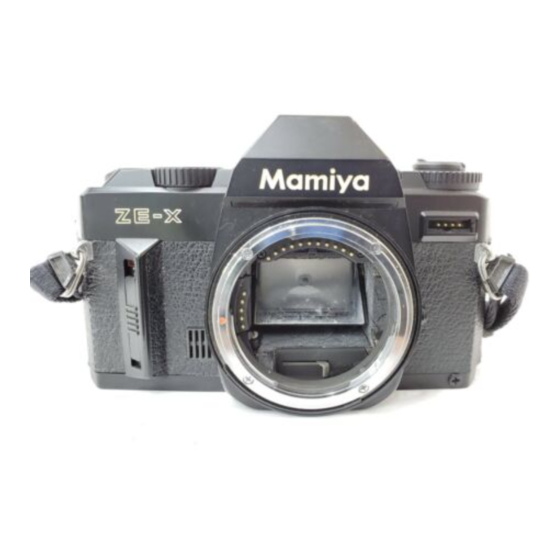
Mamiya ZE-X
Mamiya ZE-X
MC-4 ZE 2x teleconverter to the ZE-X camera body. Then you can attach the ZE "P" adapter to the teleconverter in order
to use lenses from the DSX, MSX, DTL and TL series of cameras. Of course you will have then doubled your focal length
by two but at least you have the ability to use those M42 lenses with the ZE-X.
Welcome to the Wonderful World of Mamiya Crossover Photography
Congratulation on your choice of a Mamiya ZE-X Crossover single lens reflex camera. This highly versatile
multimode automatic exposure (AK) camera not only offers you shutter speed priority AK, aperture priority
AK, programmed AK, and electronic flash AE (with Mamiyalite MZ flash units), but is also equipped for
crossover between all four modes. A full manual override is provided for advanced amateur and professional
photographers.
The Mamiya ZE-X is simplicity itself to use. Whichever AE mode, shutter speed, or aperture you select, the
Crossover capability guarantees perfectly exposed, camera shake free pictures under all but the very darkest
conditions. And even with, extremely dark subjects, if you attach a Mamiya dedicated flash to your camera, you
can be sure of beautifully exposed pictures every time.
This manual is designed to help you get the best out of your Mamiya ZE-X. Please read it carefully and
completely familiarize yourself with the remarkable features of this super camera. And, to make photography
with your ZE-X even more" convenient, please note that a full range of systems accessories is available,
including an automatic film winder, a complete range of interchangeable lenses, electronic" flash units, close-up
accessories and many, many others. Build up your systems as your skills and requirements grow!
Features of the Crossover System and the
AE Modes 3
Basic Operation Steps
Description of Parts
Standard Camera Operation
Loading the Batteries
Lens Mounting/Removal
Loading the Film
Setting the ASA Film Speed
Selecting the AE Mode
(A) Shutter Speed Priority Crossover AE
(B) Aperture Priority Crossover AE
Flash Photography
(A) Flash AE Crossover with EF
Lenses
(B) Flash AE Crossover with E
Lenses
(C) Flash Photography with
Mamiyalite ZE
Additional Features :
Exposure Compensation
(A) Exposure Variation Dial
(B) Exposure Memory Button
Manual Exposures
B (Bulb) for Long Exposures
4www.butkus.org
Advertisement
Table of Contents

Related Manuals for Mamiya ZE-X


Summary of Contents for Mamiya ZE-X
- Page 1 Even more info on the adaptor - One way to use the Mamiya ZE "P" adapter with the Mamiya ZE-X without damaging the ZE-X is to first attach an Osawa Mamiya ZE-X Mamiya ZE-X MC-4 ZE 2x teleconverter to the ZE-X camera body. Then you can attach the ZE "P" adapter to the teleconverter in order to use lenses from the DSX, MSX, DTL and TL series of cameras.
- Page 2 Features of the Crossover System and the AE (Auto Exposure) Mode The Crossover System The ZE-X Crossover System enables the camera to cross over automatically between the various AE modes in the following circumstances: 1) Used with the shutter speed priority AE or aperture priority AE modes, it allows the camera to automatically correct exposure settings in unforeseen situations when conditions are such that your pre-selected shutter speed or aperture will not give you a correct exposure.
- Page 3 Priority AE modes as needed. Electronic Flash AE When used in combination with the dedicated Mamiyalite MZ flash units, the ZE-X will automatically set the aperture and synchronize for flash on charging, thereby making auto flash exposures as easy as normal auto exposures.
- Page 4 3. Set the ASA film speed. Make sure the crossover switch (A) is at its normal position (flush with the camera body). 4. Select the AE mode. (See previous pane for general description). A) Shutter Speed Priority AE. B) Aperture Priority AE.
- Page 5 C) Programmed AE. ·Before settee the dial away from the "A" setting, press the lock-release button (B) and turn simultaneously. 4www.butkus.org ·To lock and unlock aperture ring, press the white button and simultaneously rotate. 5. Viewfinder Check. Press shutter button partway. Depending upon AE mode in use, shutter speed and aperture or "P" will appear in the viewfinder.
- Page 6 Description of Parts...
-
Page 7: Loading The Batteries
(+) (-) polarity markings match those on the chamber cover. Your ZE-X will not function if batteries are improperly inserted or batteries are not loaded. Battery Check/Low Battery Warning After loading the batteries, press the shutter button partway to see if the data display inside the viewfinder lights. -
Page 8: Lens Mounting/Removal
Lens Mounting/Removal Match the red dots on the lens and Press the lens release button and turn camera body, seat the lens in the mount lens counterclockwise until it stops. and turn clockwise until lens locks in Unseat lens from mount. place with a click. -
Page 9: Setting The Asa Film Speed
· To avoid unnecessary delays when loading the film, set the shutter speed dial to one of the faster manual settings, e.g., 1/1000 sec. If you load the film with the dial set at "A", remove the lens cap and point the camera toward a bright light source to prevent long exposures. - Page 10 Selecting the AE Mode Shutter Speed Priority Crossover AE - With this exposure mode, you set the shutter speed and the camera selects the correct aperture for you. 1. Set the crossover switch (A) at its normal position (flush against the camera body). 2.
- Page 11 proper, the minimum aperture of the lens in use will flash to indicate overexposure; the maximum aperture will flash for underexposure. When proper exposure is desired, turn the shutter speed dial until the flashing ceases. Selecting the AE Mode Aperture Priority Crossover AE - With this exposure mode, you set the shutter speed and the camera selects the correct aperture for you.
- Page 12 ·For lenses with a maximum aperture of F1.7, the viewfinder displays either "1.4" or "2.0" as the maximum aperture setting; for those with a maximum aperture of f/3.5, the maximum aperture setting in the viewfinder is either "2.8" or "4.0". ·Always use a tripod for slow shutter speed to prevent picture blur.
- Page 13 * Slow Shutter Speed Warning Often when you are shooting in poor lighting conditions and selected shutter speed is too slow for hand-held shooting, the speed indication will appear alongside the "P" to warn you. When slow shutter speed warning is given, mount the camera on a tripod or hold the camera steady on a firm support.
-
Page 14: Holding The Camera
Holding the camera Press the elbow firmly against the side of your body for a steadier hold, whether using the camera horizontally or vertically. It is also recommended that you press the camera against your forehead for extra steadiness. Most blurred photographs are due to camera shake caused by not holding the camera steady. Improve the sharpness of your pictures by holding your camera steady. - Page 15 Electronic Mechanism ZE-X * Viewfinder Display Your ZE-X features a bright, full-frame viewfinder which gives all the necessary exposure information for the exposure mode in use via an easy to-read LED digital display system. The brightness of the LED read-out is automatically regulated to match the brightness of the subject.
- Page 16 Below this speed, "camera shake" is likely to occur blurring the photograph. The ZE-X is designed to operate within the following "camera shake"...
- Page 17 In the programmed AE mode, "60" will appear in the viewfinder as the "camera shake" warning for 1/80 sec., while "250" warns you that the speed has actually dropped below 1/200 second. (A) Shutter Speed Priority Crossover AE Variation This chart shows the pattern used by the camera's microprocessor to maintain the selected shutter speed for as long as possible in relation to the lens aperture and the lighting...
- Page 18 (B) Aperture Priority Crossover AE Variation This chart shows the pattern used by the camera's microprocessor to maintain the selected aperture for as long as possible in relation to the shutter speed, the lighting conditions and the "camera shake" limit of the lens in use.
-
Page 19: Flash Photography
Flash units are indispensable system accessories. When using the Mamiyalight MZ auto electronic flash with the ZE-X, the camera automatically controls the aperture according to the ASA film speed which you set when loading the film in the cameral and synchronizes the shutter at 1/60 sec. - Page 20 Crossover Performance When the Crossover System is on, the flash will not discharge unless it is necessary and the regular crossover AE mode takes priority. The flash will operate only when the shutter speed in any AE mode drops below the "camera shake"...
- Page 21 4. Set the focusing distance priority switch at the base of the EF lens to ON by clicking it as far as it will go in the direction of the arrow. 5. Turn the flash unit power switch on and set the selector at MZ-A. Press the shutter button partway and the indication EF appears in the viewfinder, take your picture.
- Page 22 Automatic Aperture Variation in relation to flash distance with EF lenses ·In the aperture priority AE/manual operation modes (At ASA 100, with 50mm f/1.4 EF lens and Mamiyalite MZ 36R): (A) For auto flash photography up to 9m, f/4 is the ideal aperture since the intencity of the flash is controlled according to the focused distance and surplus energy is saved for the next shot.
- Page 23 In the programmed AE or shutter speed priority AE modes, the aperture changes automatically in relation to the focusing distance. Up to 12.5 meters, flash energy remains at one half of full (GN 18); beyond 12.5 meters, flash intensity automatically increases to full (GN 36). "Out of Auto Flash Range"...
- Page 24 OFF. Precautions when using other flash units Mamiya Camera will not be responsible for any damage caused to the camera by flash units other than Mamiya products. The electrical contacts and input/output of non-Mamiya dedicated flash units, including high voltage...
-
Page 25: Additional Features
Additional Features Exposure compensation The center-weighted exposure metering system of the ZE-X will give you the best possible exposures with each of the camera's AE modes in most of all shooting situations. However, when the subject is situated against a bright light source such as snow,... - Page 26 4www.butkus.org Manual Exposures The manual exposure mode of the ZE-X permits free selection of both aperture and shutter speed to give you full command of the camera when required for special effects and creative photography. Manual exposures with the ZE-X are non-metered. Set both the aperture ring and shutter speed dial to the desired aperture and shutter speed settings.
- Page 27 B (Bulb) for Long Exposures · The use of an optional cable release adapter, lockable cable release and sturdy tripod are recommended to prevent camera shake. · Also, since long exposures present a real drain on the batteries, we recommend to use fairly new batteries. ·...
-
Page 28: Multiple Exposures
Slide the lever all the way to the right until the blind completely covers the eyepiece. Multiple Exposures Multiple exposures are easily made with the ZE-X because the handy multiple exposure lever automatically disengages the film advance system and also the exposure counter to keep accurate exposure count. -
Page 29: Depth-Of-Field Control
3. Release the shutter for your second exposure on the same frame. For additional exposures on the same frame, repeat steps two and three above. Exposure Tips: With multiple exposures best results are obtained. if you photograph a dark subject first and superimpose lighter ones over it. -
Page 30: Infrared Photography
The depth-of-field range can be determined using the depth-of-field scale for the lens in use. First, select the desired aperture, then look at the corresponding figures on the depth-of-field scale on both sides of the central index dot. This is the extent of the depth-of-field that will be obtained with the aperture you are using. For example, if the camera is focused at 15ft (5m) at an aperture of f/11, the range of sharp focus will be approximately from 10ft (3m) to Soft (10m). - Page 31 <<<< Additional information not in the manual: I just wanted to point out that not all Mamiya M42 lenses are safe to use with the P adapter for the Auto-XTL. If you attempt to use the SX type lenses with the Auto-XTL P adapter, the aperture sensing pin will dig into the P adapter face since it is not perfectly flush with the outer surface edge of the SX lense.
- Page 32 GN 12 with the wide-angle diffuser attached. It features two auto flash ranges plus manual flash override. When using with the ZE-X, set the film speed on the flash unit and select either of the two usable apertures, it will automatically control flash intensity for proper exposure within the flash operating range.
- Page 33 In continuous shooting with the winder, the ZE-X is preferably set at either shutter speed priority mode or aperture priority mode with crossover AE mode, so that the camera can provides you the best possible exposure settings throughout changing lighting situation and shows the exposure data in the viewfinder.
- Page 34 1. Rubber Eye-cup ZE with Adapter This adapter is required for attaching the diopter correction lenses to the camera. The rubber eye-cup helps to prevent stray light entering the viewfinder while taking photographs. To attach the diopter correction lens, first remove the mounting ring located inside the eye-cup by turning it counter-clockwise;...
- Page 35 Precautions on Batteries The Mamiya ZE-X has a built-in circuit that automatically gives a warning when battery power is running low. In this case, the data display in the viewfinder flashes at the rate of 8 times per second when the shutter release button is lightly pressed.
-
Page 36: Handling Cautions
Test shots should also be taken if possible to discover any irregularities that may exist. (Incidental damage which results in this camera malfunctioning will not be compensated.) Do not try to repair or lubricate the camera if some irregularity is discovered. Leave this to your Mamiya dealer. -
Page 37: Specifications
Electronic flash AE with automatic crossover among these modes), plus full manual override. Picture format: 24mm x 36mm Usable lenses: Mamiya-Sekor EF and E series lenses with Mamiya ZE bayonet mount. Standard lenses: Mamiya-Sekor EF/E 50mm f/1.4, MamiyaSekor EF/E 50mm f/1.7 and Mamiya-Sekor E 50mm f/2.0. - Page 38 Self-timer: Electronically operated with 2, 6 and 10 sec. interval settings, features LED and PCV sound warnings. Flash synch: X hotshoe synch at 1/60 sec.; auto synch on charging with Mamiya dedicated flash units. Dedicated flash features: Full automatic flash photography possible using with Mamiyalite MZ; shutter speed and aperture automatically set when flash has charged.
Need help?
Do you have a question about the ZE-X and is the answer not in the manual?
Questions and answers